

This post contains affiliate links. If you purchase through my links, I may earn a small commission at no extra cost to you. Thank you for supporting Room Revival Studio!
Glass mosaic tile is one of those craft materials that looks complicated but is actually completely forgiving. The pieces are small, which means mistakes disappear into the grout. The colors are endless. And the finished result looks like something that took real skill, whether you have any or not. The beginner tax is basically zero on this one.
These 15 glass mosaic tile craft ideas are built for people who have never picked up a tile nipper before. Each one starts simple, builds confidence, and ends with a piece that belongs on your shelf, in your garden, or on your wall. Grab a tile cutter, some grout, and a sheet of glass mosaic tiles. Start with number one and go from there.
1. Mosaic Picture Frame

A plain wood picture frame becomes a completely different object once you cover it in mosaic tile. Apply mosaic adhesive to the frame surface, press your glass tiles down in whatever pattern you want, let it cure overnight, and grout the gaps the next morning. The result is a frame that looks intentional and expensive even when the materials cost under twenty dollars.
Hot tip: Start with a flat, wide frame rather than a narrow or ornate one. Wide flat frames give you more surface to work with, and the tiles sit evenly without curling at the edges. A 4×6 or 5×7 frame is the perfect first project because it is small enough to finish in a single afternoon. (Everyone who sees it will assume you bought it somewhere special.)
Honest caveat: Leave the glass opening area clear when you tile so the frame still fits your photo properly. Mark the inner border with painter’s tape before you start laying tiles, and peel it away before grouting. A frame this beautiful deserves to actually hold the photo it was made for.
Shop the Look
2. Mosaic Coaster Set
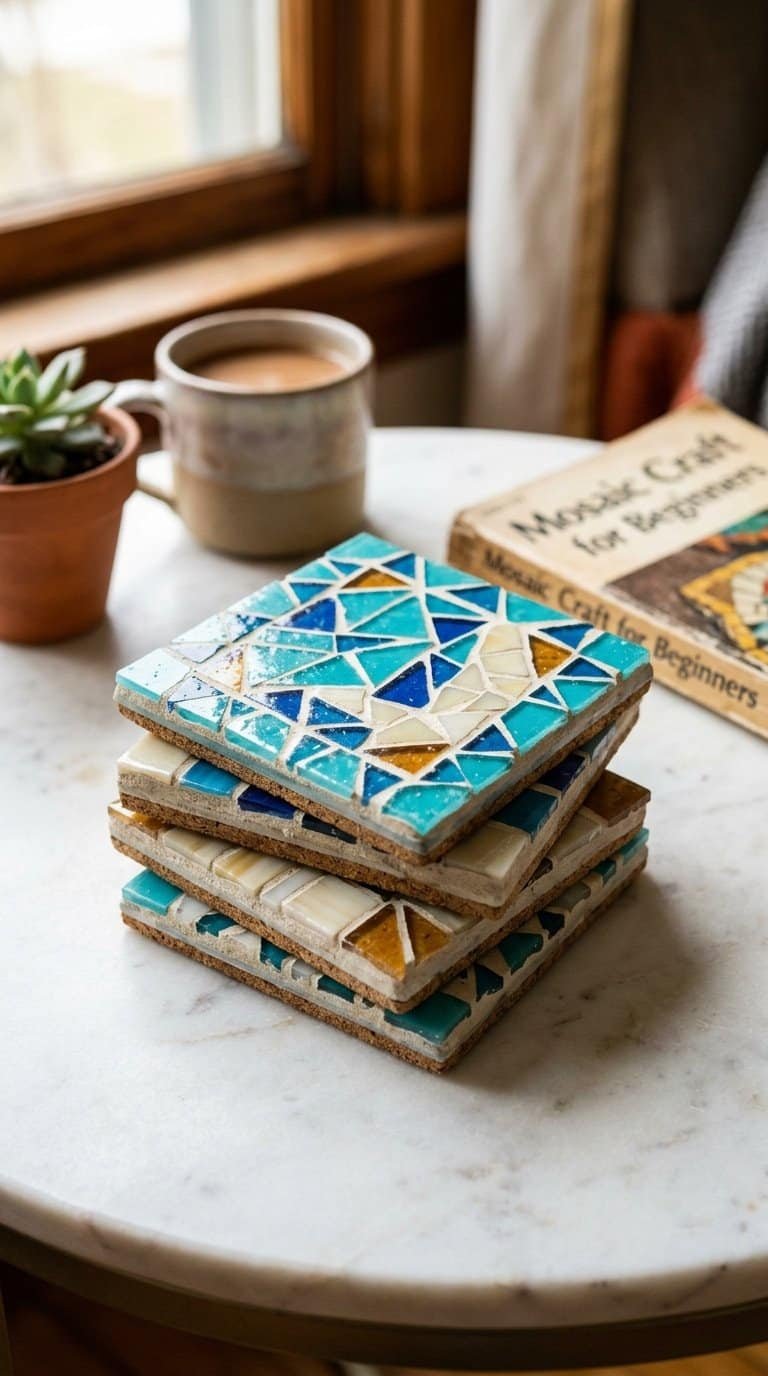
Mosaic coasters are the perfect beginner project because each one is small, fast, and gives you a chance to practice your tile placement before committing to anything larger. Start with square cork or wood coaster blanks, apply your tiles in a simple geometric pattern or random fill, grout, and seal. A set of four is completely doable in a weekend.
Hot tip: Use a 1cm or smaller glass tile for coasters to keep the surface relatively flat and functional. Large tiles on a small coaster can tip your cup or leave sharp edges after grouting. Smaller tiles also let you fit more design into a limited space, which makes the finished set look more detailed and polished. (These are the best hostess gifts on the planet.)
Honest caveat: Seal your coasters with a waterproof grout sealer once they are fully cured. Unprotected grout absorbs moisture from condensation and stains quickly with coffee or wine. One coat of sealer takes five minutes and keeps the set looking new for years. The finished coasters on the coffee table are the first thing guests notice.
Shop the Look
- Cork Coaster Blanks for Crafts
- 1cm Glass Mosaic Tiles
- Waterproof Grout Sealer
- Mosaic Tile Spreader Tool
3. Mosaic Candle Holders
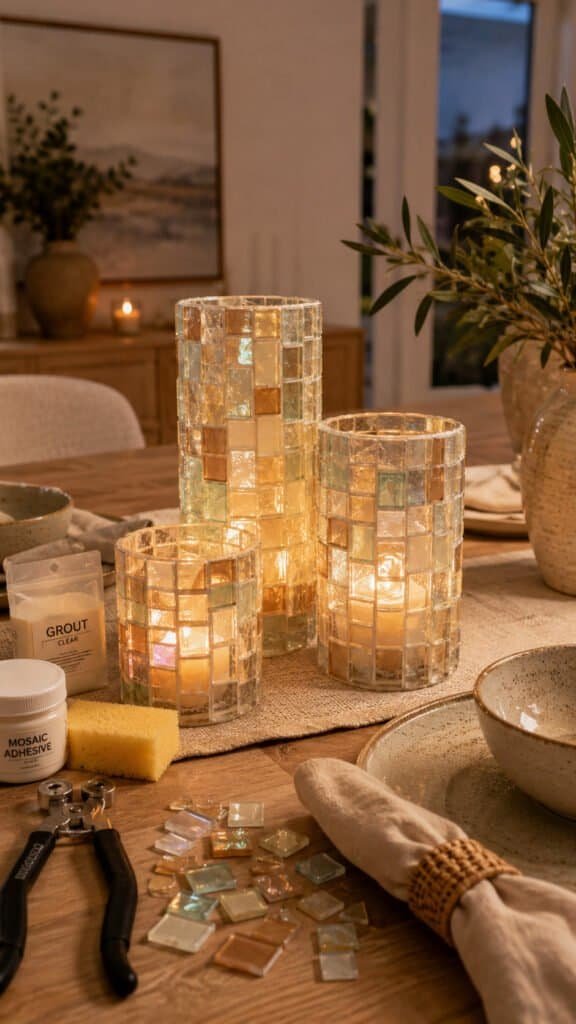
Glass mosaic tile on a glass candle holder is a magical combination. When the candle is lit, light passes through the tiles and throws colored reflections across the table. Apply tiles to the exterior of a plain glass votive or hurricane candle holder, leaving small gaps for the grout, and finish with clear grout for maximum light transmission. The result is something that looks more like a lamp than a craft.
Here is what nobody tells you: clear or white grout lets the most light through and gives the piece a jeweled stained-glass effect. Dark grout creates more contrast and looks richer in daylight but blocks some of the candlelight. Pick based on your room and whether you want the dramatic glow effect or the bold daytime pattern. Both are beautiful. (The glow effect will make you want to make twelve of these.)
Honest caveat: Only use these with candles safely contained in a votive cup or use LED candles instead. Bare flame directly inside a glass mosaic holder can overheat the tile adhesive over time. The safest setup is a glass votive inside the mosaic holder, with the candle burning inside that inner glass layer. The table at dinner looks like it was decorated by someone who really knows what they are doing.
Shop the Look
4. Mosaic Flower Pots

A plain terracotta pot is one of the best surfaces for glass mosaic work. The slightly rough texture gives the adhesive something to grip, and the cylindrical shape lets you work in sections without the tiles sliding off. Cover the exterior in tiles from rim to base, grout with an exterior-safe grout, and plant whatever you like inside. The pot becomes the decoration as much as the plant.
Hot tip: Work in small sections, letting each section fully cure before rotating to the next side. Trying to tile the entire pot at once leads to tiles sliding on the curved surface before the adhesive sets. Section-by-section tiling takes longer but gives you a much cleaner, tighter result. (The finished pot on the front step makes the whole entryway look styled.)
Honest caveat: Use exterior-rated tile adhesive and grout if the pot is going outside. Standard craft mosaic adhesive is not weatherproof and will loosen with rain and freezing temperatures. The extra cost of exterior-grade materials is worth it for anything staying outdoors year round. A properly sealed mosaic pot weathers beautifully and gets better looking over time.
Shop the Look
- Plain Terracotta Flower Pots
- Blue and Green Glass Mosaic Tiles
- Exterior Tile Adhesive
- Exterior Sanded Grout
5. Mosaic Garden Stepping Stones
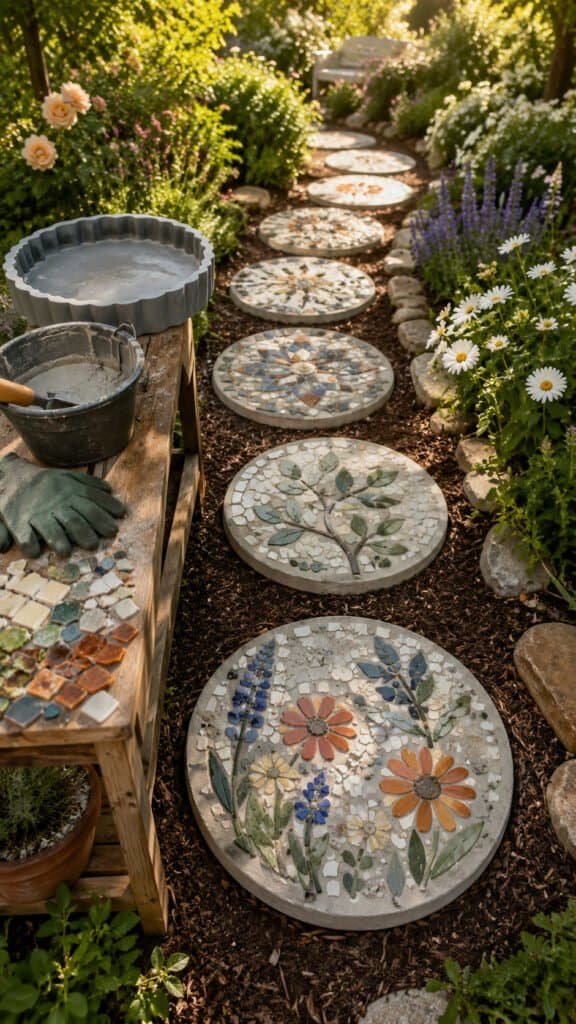
Mosaic stepping stones are one of the most satisfying outdoor projects you can make. Pour a concrete stepping stone base, press glass tiles into the surface while the concrete is still workable, and let it cure for several days. The tiles become permanently embedded in the concrete, which means this is actually the most durable mosaic technique on the list. No adhesive required.
Here is what nobody tells you: pressing tiles face-down into wet concrete and then lifting the concrete mold away once cured gives the smoothest, flattest result. It is called the direct-embed method and it produces a surface that is walkable without any tiles sticking up unevenly. Look for stepping stone concrete molds to use as your form and press tiles in before the concrete sets. (The garden path becomes a piece of art.)
Honest caveat: Let concrete stepping stones cure for a full 72 hours before placing them in the garden and at least a week before walking on them regularly. Rushing the cure time cracks the concrete around the tiles. Patience here is the only skill the project actually requires. The path through the garden looks like something from a magazine spread.
Shop the Look
- Concrete Stepping Stone Mold
- Concrete Mix for Stepping Stones
- Bulk Multicolor Glass Mosaic Tiles
- Rubber Mixing Trowel
6. Mosaic Serving Tray
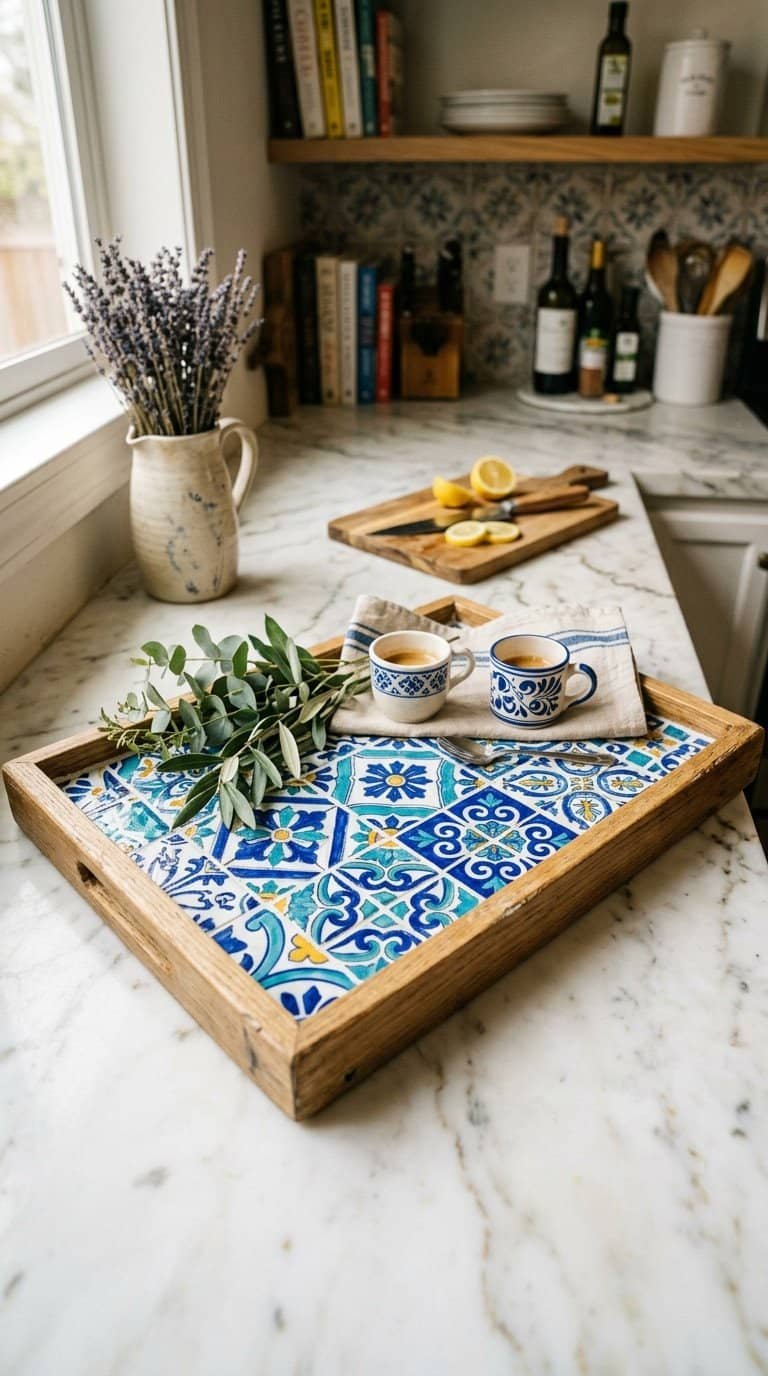
A wood or MDF serving tray with a recessed center panel is perfect for mosaic work. Tile the flat center section in whatever pattern you like, grout between the tiles, seal the whole surface, and add handles if the tray did not come with them. The result is a tray that looks like it came from a boutique shop in a coastal town and cost three times what it did.
Hot tip: Blue and white tile combinations in geometric patterns are the highest-performing look for mosaic trays. The Mediterranean or Moroccan vibe is immediately recognizable and feels elevated without being complicated to execute. Use white grout with blue tiles for a clean contrast, or navy grout for a moodier result. (The tray on the coffee table makes the whole room look more designed.)
Honest caveat: A mosaic tray should be used for display or for serving dry items. Grout, even sealed grout, is not designed for prolonged moisture exposure. Use it for a cheese board, for decor, or for serving things in bowls and plates. Avoid using it as a wet bar tray or leaving damp items directly on the tile surface. The tray looks like a designer piece sitting on the counter between uses.
Shop the Look
- Unfinished Wood Serving Tray
- Blue and White Glass Mosaic Tiles
- White Unsanded Grout
- Decorative Tray Handles
7. Mosaic Mirror Frame

A mosaic mirror is one of the biggest visual payoffs in the craft world. The reflective surface of the mirror bounces light onto the tiles, and the tiles bounce it back, creating a layered sparkle that plain art never achieves. Start with a plain round or rectangular mirror, tile the frame only, and leave the mirror surface completely clear. Hang it on a wall that gets natural light and the effect is immediate.
Hot tip: Jewel-toned tiles in sapphire, emerald, and amethyst look spectacular on a mirror frame. The combination of the tile color with the reflected light creates a stained-glass window effect on the wall around the mirror throughout the day. Even a small 12-inch round mirror becomes a statement piece with a well-executed tile frame. (This is the piece that stops people in the hallway every single time.)
Honest caveat: Protect the mirror glass itself from adhesive drips and grout haze while you work. Cover the mirror surface with painter’s tape or plastic wrap before you start tiling the frame, and peel it away carefully once the grout is fully cured. Grout haze on a mirror is difficult to remove without scratching the surface. The finished mirror on the wall is worth every careful step.
Shop the Look
8. Mosaic Wall Art Panel
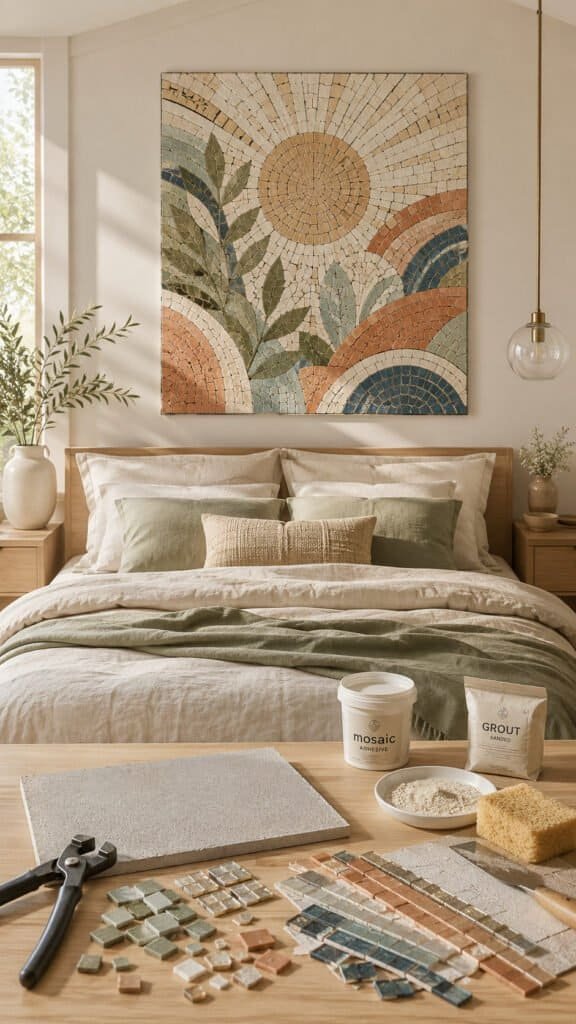
A mosaic wall art panel is a flat piece of MDF, wood, or cement board covered in glass tiles and displayed as wall art. You design the composition, tile it out, grout it, seal it, and hang it. There is no function beyond beauty and that makes it the most creatively free project on this list. Abstract patterns, simple geometric designs, and even representational images like waves, leaves, or sunbursts all work beautifully at this scale.
Here is what nobody tells you: cement backer board is a better base than wood for mosaic wall art because it does not flex or warp with humidity the way wood can. Flexing causes tiles to crack and pop over time, especially in humid rooms like bathrooms. Cement board stays flat, and the adhesive bonds to it beautifully. A 12×12 or 16×16 inch panel is a manageable first size. (The finished piece above the bed makes the whole room feel gallery-level.)
Honest caveat: Mosaic panels are heavy once fully tiled and grouted. Use proper wall anchors rated for the weight when hanging. A large panel landing on the floor is a disaster for the piece and anything it hits. Check the wall before you hang it and use two anchor points for anything over 12 inches wide. The art on the wall looks like it belongs in a boutique hotel room.
Shop the Look
- Cement Backer Board for Crafts
- Ocean Blue Glass Mosaic Tiles
- Mastic Tile Adhesive
- Heavy Duty Wall Anchors
9. Mosaic Trinket Dish

A shallow ceramic or wooden dish becomes a gorgeous little catchall once covered in glass mosaic tiles. Tile the interior bottom of the dish for a jewelry-box effect, tile the exterior for full coverage, or do both for a completely transformed piece. These are fast to make, use very little tile, and are genuinely one of the most giftable things in this entire list.
Hot tip: Rose gold, pink, and champagne glass tiles in a trinket dish create an instantly luxe accessory tray for a bedroom dresser or bathroom counter. Use clear or white grout to keep the color palette soft. The dish goes from craft project to something that looks expensive the second you drop a ring or earring into it. (You will make one for yourself and immediately want to make five more as gifts.)
Honest caveat: Grout the inside of the dish with care and make sure there are no sharp tile edges left exposed after grouting. A dish that lives on a dresser gets handled regularly, and rough grout or jagged tile edges will scratch jewelry. Sand any rough spots lightly with fine sandpaper once the grout cures. The finished trinket dish on the dresser looks like something from a boutique gift shop.
Shop the Look
- Shallow Ceramic Craft Dish
- Rose Gold and Pink Glass Mosaic Tiles
- Mosaic Craft Adhesive
- Fine Grit Sandpaper Assortment
10. Mosaic Side Table Top

An old side table or wooden plant stand becomes a completely new piece when you tile the top surface. Sand the existing surface lightly, apply tile adhesive, set your tiles in the design you want, grout, and seal. The base stays whatever finish it already has or you paint it a color that coordinates with your tile palette. The top does all the visual work and the result looks like a custom furniture piece.
Here is what nobody tells you: terracotta, cream, and sage tiles on a side table top create a Moroccan or Mediterranean look that pairs beautifully with boho, coastal, and organic modern interiors. It is one of the highest-impact tile color palettes for small furniture because it reads warm and earthy rather than cold or clinical. The scale of the project is still completely manageable for a beginner. (The table in the corner becomes the thing people photograph at your next gathering.)
Honest caveat: Always use coasters or a felt pad between items placed on a mosaic table top. The grout lines create an uneven surface that can scratch the bottom of ceramics, vases, and books over time. A small felt pad under anything decorative resting on the surface protects both the tile and the item. The finished table looks like a designer piece that belongs exactly where you put it.
Shop the Look
- Small Wood Side Table or Plant Stand
- Terracotta and Cream Mosaic Tiles
- Small Notched Tile Trowel
- Self-Adhesive Felt Furniture Pads
11. Mosaic Address Plaque
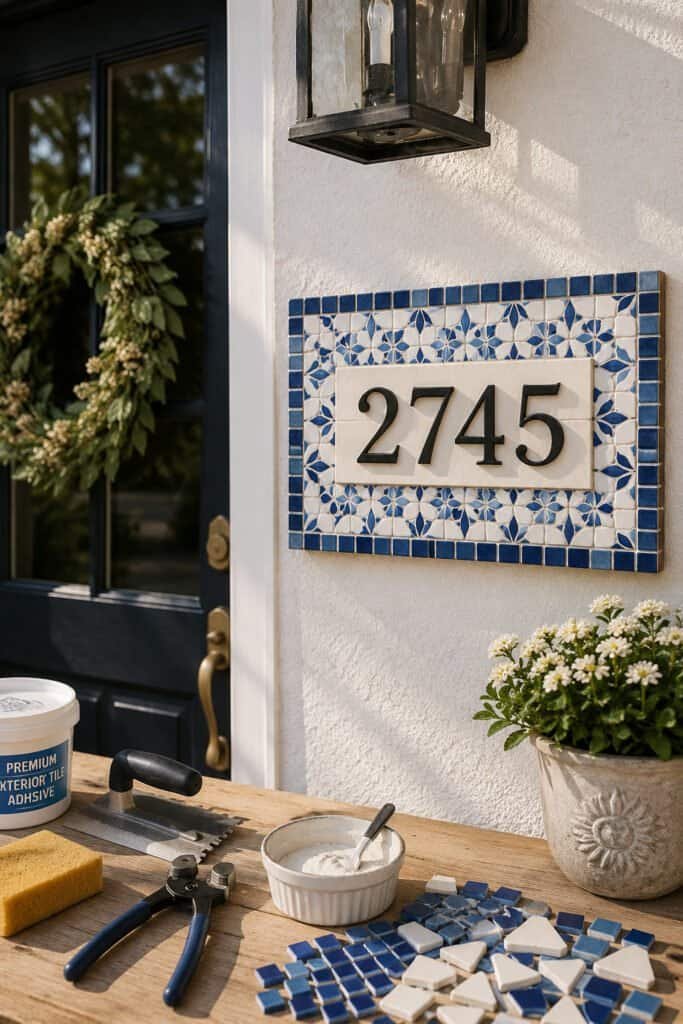
A mosaic house number plaque is a genuinely useful craft project that also completely upgrades your curb appeal. Use a flat piece of cement board or a pre-cut wood plaque as your base, create a background tile pattern in the color of your choice, and either leave space for metal house numbers or create the numbers themselves from contrasting tile pieces. The result is a front door accessory that looks completely custom.
Hot tip: Blue and white is the most classic color combination for outdoor mosaic plaques and also the most legible from a distance. High contrast between number and background makes the address readable at night and from a car. You do not need to cut tiles into letter shapes. A contrasting colored background rectangle for metal stick-on numbers looks equally polished and is far easier to execute. (The front door has never looked more welcoming.)
Honest caveat: Use exterior-rated materials throughout for any plaque going outside. Standard craft glue and interior grout will fail after a winter of freeze-thaw cycles. Seal the finished plaque with exterior masonry sealer before mounting it on the house. A plaque sealed and installed correctly weathers beautifully for years and requires almost no maintenance. The address plaque beside the door looks like a commissioned piece.
Shop the Look
- Blank Outdoor Wood Plaque
- Stick-On Metal House Numbers
- Exterior Masonry Sealer
- Blue and White Glass Craft Tiles
12. Mosaic Vase
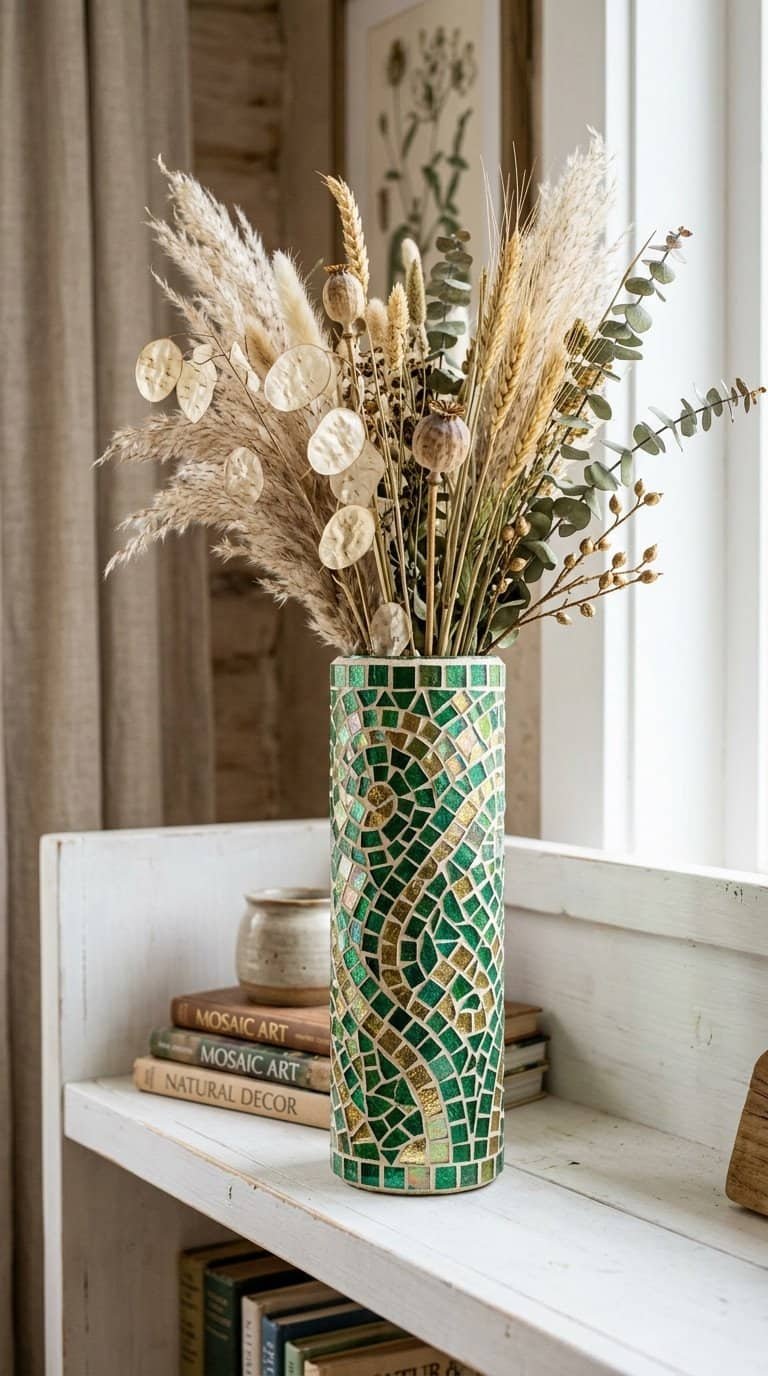
A plain glass or ceramic vase becomes a statement piece when covered in mosaic tile. The trick is to work in small horizontal sections, letting each section cure before moving to the next, so the tiles stay in place on the curved surface. Grout the completed exterior once all tiles are set and sealed. The finished vase can hold dried botanicals, branches, or nothing at all and still look like a decorative sculpture worth keeping on the shelf.
Hot tip: Emerald green and gold glass tile combinations on a tall vase give the piece a maximalist, jeweled effect that photographs beautifully and looks stunning in natural light. Pair it with warm neutrals around it for a balanced look, or stack two or three mosaic vases of different heights as a grouping. The vase display reads as intentional decor rather than a scattered collection. (The arrangement on the shelf belongs in an interior design magazine.)
Honest caveat: Mosaic vases are best used for dried or faux botanicals rather than fresh flowers and water. The adhesive holding the tiles can weaken over extended periods of water exposure, particularly if any water seeps between the tiles. For fresh florals, use a waterproof glass insert inside the mosaic vase so the water never contacts the tile or adhesive layer. The vase on display looks expensive every single day.
Shop the Look
- Tall Plain Ceramic Vase
- Emerald Green Glass Mosaic Tiles
- Gold Glass Mosaic Tiles
- Dried Botanical Stems for Decor
13. Mosaic Garden Birdbath Bowl
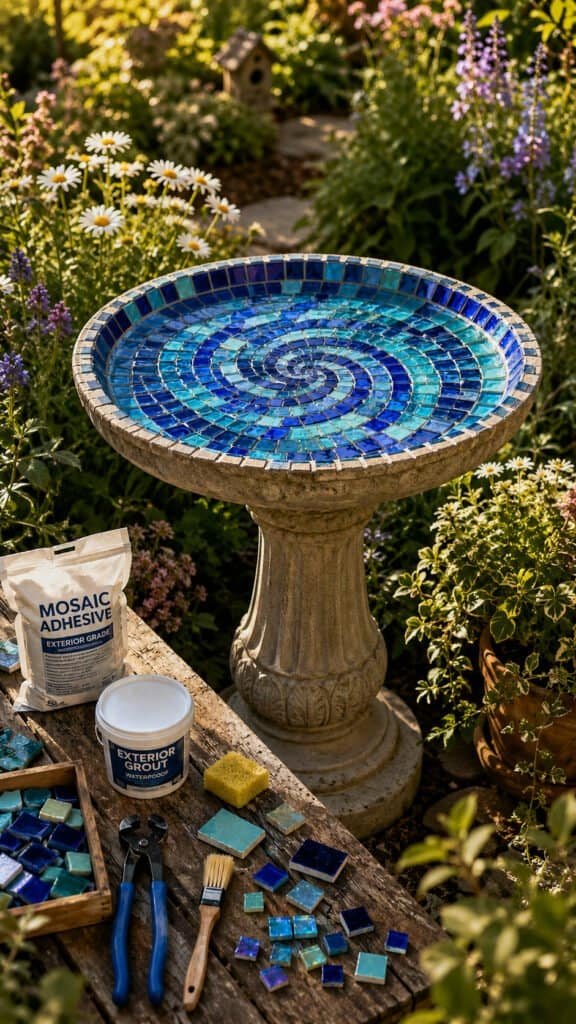
A concrete or ceramic birdbath bowl is the perfect outdoor mosaic project because it is round, relatively shallow, and gives you a visible flat surface to work on. Tile the interior bowl surface in a sunburst, spiral, or simple fill pattern, use exterior-grade grout, seal it completely, and set it on its pedestal in the garden. Birds do not care about your technique, but the neighbors will absolutely notice the result.
Hot tip: Cobalt blue and teal tiles in a birdbath create the visual illusion of water even when the bowl is empty, which means it looks good in every season including winter when the actual water is gone. The color reads beautifully against green garden foliage and holds up visually from a distance. A simple fill pattern with no particular design still looks spectacular because the color combination does all the work. (The garden now has a focal point worth photographing.)
Honest caveat: Birdbath bowls need to be sealed specifically with a food-safe or wildlife-safe sealer since birds will drink from the water. Many standard masonry sealers off-gas chemicals that are safe for humans but not ideal for birds. Look for a non-toxic masonry sealer or let the standard sealer fully cure and air out for several weeks before filling with water. The birdbath in the garden draws wildlife and looks stunning doing it.
Shop the Look
- Concrete Birdbath Bowl
- Cobalt Blue and Teal Mosaic Tiles
- Non-Toxic Masonry Sealer
- Garden Birdbath Pedestal
14. Mosaic Lamp Base
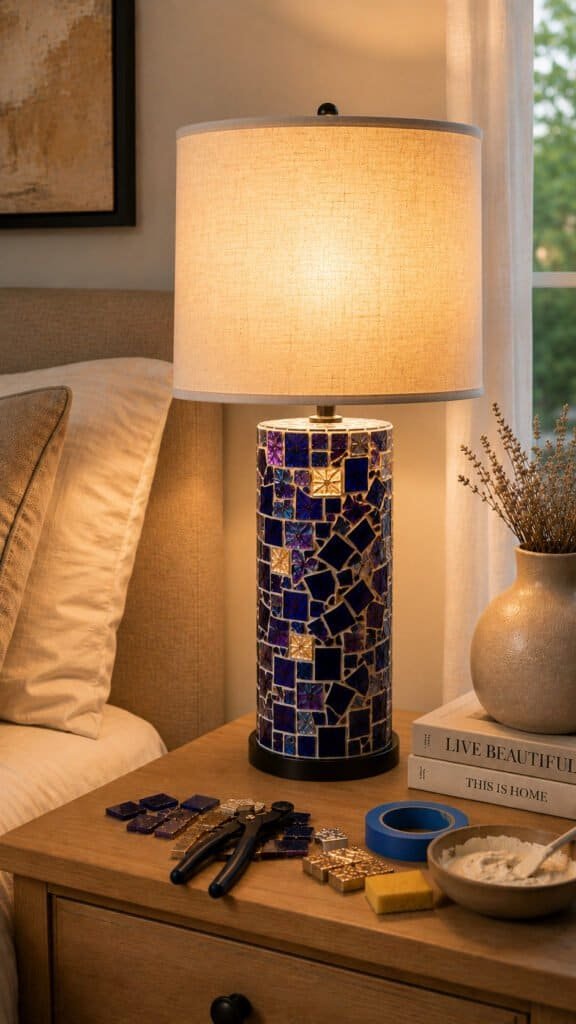
A ceramic lamp base is one of the most satisfying surfaces for mosaic tile work. The cylindrical shape is easy to tile in sections, the curved surface rewards patience with a polished result, and the finished piece is something you actually use every day. Remove the electrical hardware before starting, tile the ceramic exterior completely, grout and seal, reassemble the hardware, and add a shade. The lamp becomes a centerpiece.
Here is what nobody tells you: purple and blue tiles on a lamp base create a moody, dramatic nightstand lamp that looks incredible in the evening when the light is on. The tiles pick up the warmth of the bulb and glow in a way that feels more like a piece of art than a light fixture. A white or off-white shade lets the lamp speak without competing. (The room feels completely different with this lamp on at night.)
Honest caveat: Only tile the ceramic base portion of the lamp, never the area where the electrical cord exits or near any hardware fittings. Adhesive and grout near electrical components creates a fire hazard. Mark off a clean exclusion zone around all hardware before you start, and leave it completely clear. The finished lamp on the nightstand makes the whole room look more thoughtfully decorated.
Shop the Look
- Plain Ceramic Table Lamp Base
- Purple and Blue Glass Mosaic Tiles
- White Drum Lampshade
- Beginner Mosaic Tile Nippers
15. Mosaic Windowsill Planter Box
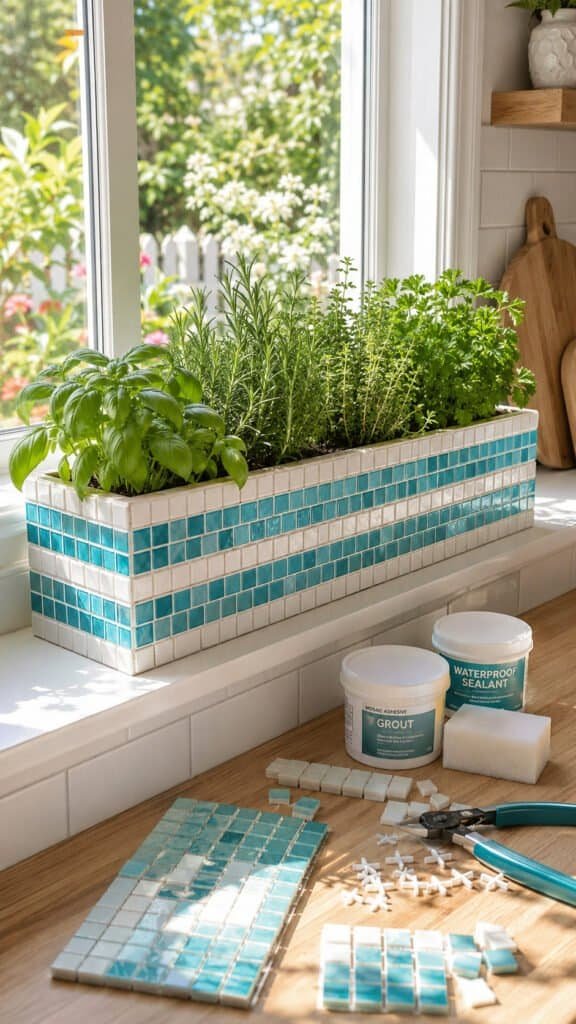
A long narrow wood or ceramic window box is the most ambitious project on this list and also one of the most rewarding. Tile the four exterior sides in a pattern that coordinates with your kitchen or bedroom decor, grout, seal, and fill with herbs or small plants. It sits on the windowsill and makes every single morning slightly better than it would have been otherwise.
Hot tip: White and turquoise tiles on a windowsill planter give it a fresh, coastal cottage energy that works in kitchens, bedrooms, and sunrooms. Simple horizontal stripe patterns are the easiest to execute on a long narrow surface and look intentional without requiring intricate cutting. Keep the grout lines even for the cleanest look, which is easier than it sounds if you use small tile spacers. (Fresh herbs in this planter make the kitchen smell like a restaurant and look like a magazine.)
Honest caveat: Seal the inside of the box with waterproof sealant before adding soil or water. Tile adhesive and wood are not waterproof and will deteriorate with repeated watering if not properly sealed inside. A brush-on waterproof paint or pond liner material works well for the interior. The outside stays looking beautiful and the inside holds up through years of plant watering. The windowsill planter is the last thing you expected to feel proud of and the first thing you show off.
Shop the Look
- Wood Window Box Planter
- White and Turquoise Mosaic Tiles
- Waterproof Interior Box Sealant
- Small Tile Spacers for Crafts
Pick One and Start This Weekend
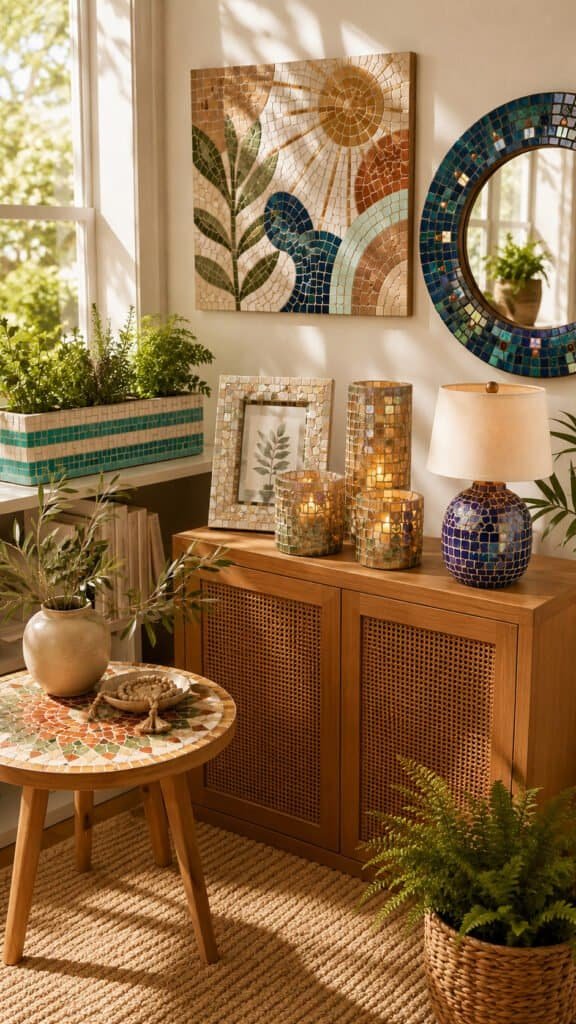
Glass mosaic tile crafts reward patience and punish rushing, but they almost never punish beginners. The grout covers the gaps, the tiles forgive uneven spacing, and the glass itself does most of the visual work. Start with the coasters if you want the fastest win, the picture frame if you want a practical piece, or the garden steppingstone if you spend more time outside than in. Any one of these projects gives you a finished piece worth keeping and a skill worth building on. If you are looking for more beginner-friendly craft ideas that make your home feel styled on a budget, check out 18 Air Dry Clay Projects You Can Make and Sell This Summer for another approachable craft medium with a completely different look.

