This post contains affiliate links. If you purchase through my links, I may earn a small commission at no extra cost to you. Thank you for supporting Room Revival Studio!
The basket in the corner is full again. You have strips from the curtain project, squares from a pillow you restyled last spring, and an entire yard of fabric you bought on impulse because the print was too good to leave behind. Every time you walk past it, the guilt grows a little louder. Here is the truth: that pile is not a problem. It is a project list waiting to happen.
These 12 fabric craft projects are built for the scraps you already own. From no-sew options for the non-sewer to framed wall pieces that look like something from a boutique, every idea on this list makes your leftover fabric look intentional. Pull out the basket, pick one, and start there.
1. Cover a Bulletin Board in a Pattern You Love
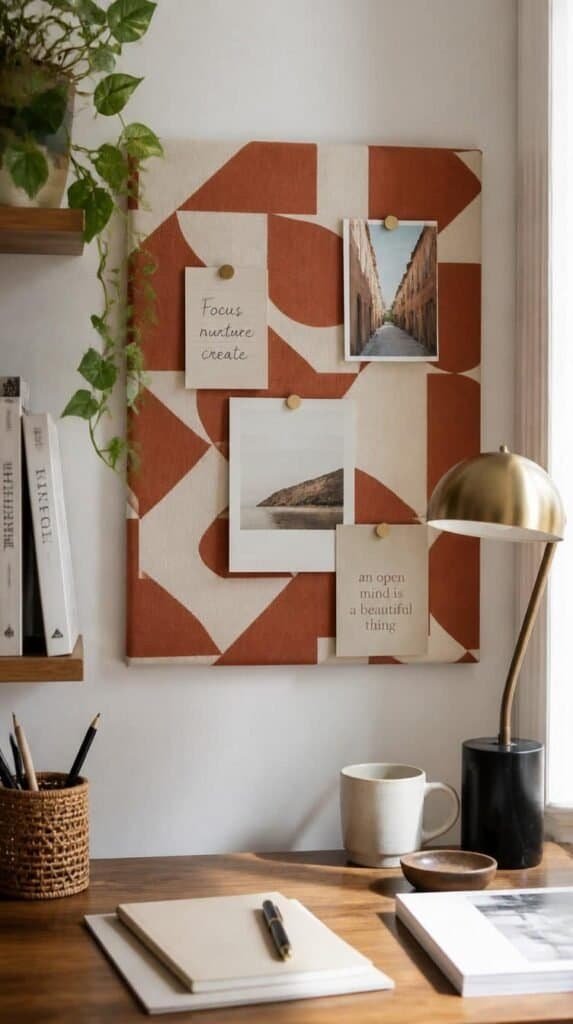
A plain cork board is one of the easiest things to transform with a fabric scrap. Cut your piece a few inches larger than the board, pull it tight over the front, and staple it to the back like wrapping a present. The result looks custom and deliberate, even if the fabric came from the floor pile ten minutes ago.
Hot tip: Use a bold print for a statement piece or a neutral linen for something that disappears into the wall in the best way. Either direction works. The cork still does its job. (It is basically the most useful wall piece you will ever hang.)
Honest caveat: If your fabric is very thin or loosely woven, it tends to pull away from the staples over time. Double up the fabric or choose a heavier piece for anything getting daily use. A clean, tailored finish is worth the extra layer. The board finally looks like it belongs in the room.
Shop the Look
2. Make a No-Sew Throw Pillow in Under 20 Minutes

Two fabric squares, some fabric glue, and a pillow insert are all you need to make a throw pillow worth keeping. Cut your fabric into two equal squares, apply fabric glue along three edges, press together, slip in the insert, and glue the last edge shut. No machine required. No needle threading involved.
The trick here: press the seams flat with a heavy book while the glue sets. It dries cleaner and the edges stay crisp instead of puckering at the corners. Give it a full hour before you fluff it. (You will want to make four immediately. Completely normal.)
Honest caveat: Fabric glue pillows are not washing machine safe. Spot clean only, or use a removable cover if your household goes hard on throw pillows. A beautifully glued seam and a toddler are rarely a great combination. The pillow still looks perfect on the bed.
Shop the Look
3. Wrap a Vase or Glass Bottle for a Boutique-Looking Centerpiece
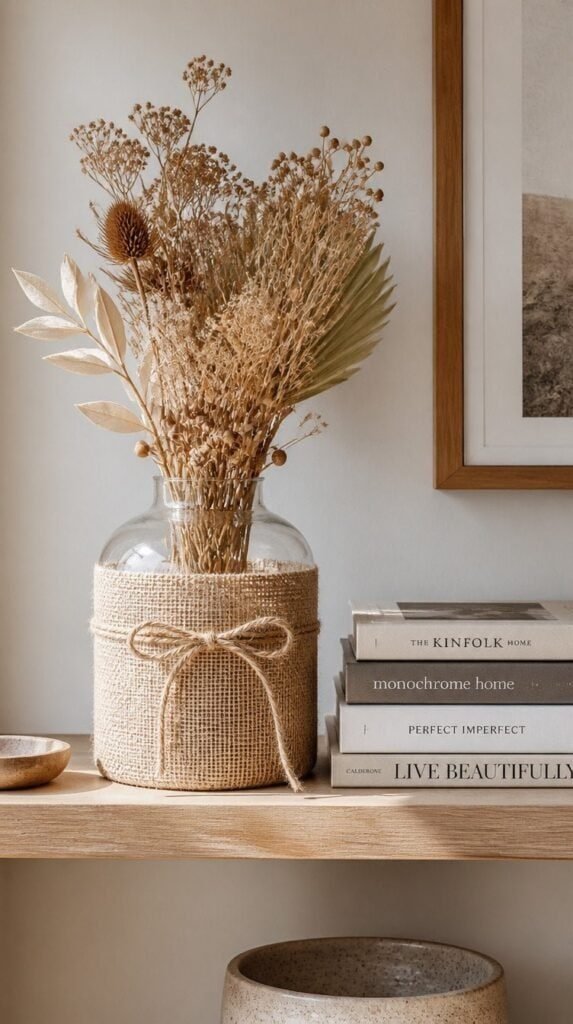
A plain glass vase or empty wine bottle becomes a styled home accessory with a strip of fabric and a few dots of hot glue. Wrap the fabric around the vessel in overlapping strips or one clean piece, secure as you go, and tuck the edge under at the top for a finished look. It takes ten minutes and turns something headed for the recycling bin into a decor piece.
Hot tip: Layer a thinner fabric on top of a burlap base for a textured, dimensional finish worth more than either fabric alone. A piece of twine knotted at the neck pulls the whole thing together. (The bottle you nearly threw away is now the centerpiece.)
Honest caveat: This works best with fabric with some body to it. Very lightweight or slippery fabric will shift and slide no matter how much glue you apply. Stick to cotton, linen, or medium-weight canvas for the cleanest results. The vase on the shelf looks like it came from a market stall in the best possible way.
Shop the Look
4. Build Patchwork Wall Art From the Scraps You Almost Tossed
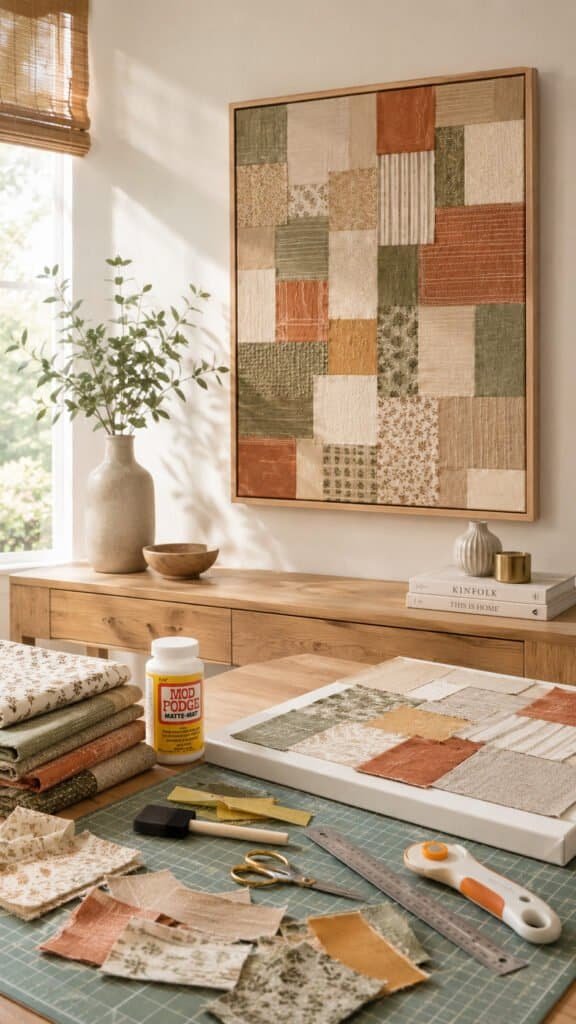
Gather scraps in coordinating colors or patterns, cut them into squares or strips, and arrange them onto a stretched canvas or cardboard wrapped in white fabric. Glue each piece down, overlap the edges slightly, and seal the whole thing with a layer of Mod Podge for a flat, polished finish. Framed, it reads like something from an actual gallery wall.
Here is what nobody tells you: the arrangement matters more than the individual fabrics. Even a mix of completely unrelated scraps looks cohesive when you pull from two or three colors. Grab everything sharing a tone and let that be your palette. (The ugly floral from 2019 suddenly has a purpose in the world.)
Honest caveat: Mod Podge takes longer to dry than expected, and too much at once causes the fabric to wrinkle or bubble. Thin coats, each fully dried between layers, are the move here. The finished piece belongs on the wall and it knows it.
Shop the Look
5. Sew or Glue a Fabric Table Runner in an Afternoon

A table runner is one of the highest-impact, lowest-effort fabric projects you will ever make. Cut a long rectangle of fabric, fold the edges under, press them flat with an iron, then sew or glue the hem down. The result makes your dining table look styled every single day, not just when company comes over.
Hot tip: Cut the runner about 12 to 14 inches wide and long enough to drape 6 to 8 inches over each end of your table. That overhang is what makes it look intentional instead of like a stretched-out placemat. A raw linen edge left unfringed works beautifully for an organic, relaxed look. (Decor this easy should not look this good.)
Honest caveat: A solid color or very subtle pattern tends to read better on a table than something bold. A loud print visually competes with whatever you set on top of it, including your food. When in doubt, go quieter than you think you should. The table looks finished, calm, and pulled together.
Shop the Look
6. Cover Storage Boxes With Scrap Fabric for a Coordinated Shelf

Cardboard boxes, shoeboxes, or even old tissue boxes become shelf-worthy storage when covered in fabric. Apply Mod Podge to the box surface, lay your fabric on top, smooth out the air bubbles, and seal with another coat. It dries flat, holds firm, and turns something headed for the trash into a piece worth displaying.
The trick here: do the inside edges of the box lid separately with their own dry time. Rushing two wet, fabric-covered surfaces together is a guaranteed wrinkle situation. Patience on each panel makes the whole box look seamless. (A row of these on a shelf makes the whole room feel organized, even when it is not.)
Honest caveat: This method works beautifully for display storage but not for anything opened and closed constantly. The fabric edges lift over time with heavy daily use. Use these for things you access occasionally, like seasonal items or extra accessories. The shelf looks purposeful and pulled together from across the room.
Shop the Look
- Cardboard Storage Box Set
- Mod Podge Fabric Formula
- Sponge Applicator Brush Set
- Cotton Print Fabric for Crafts
7. Make Fabric Bookmarks That Double as Thoughtful Small Gifts
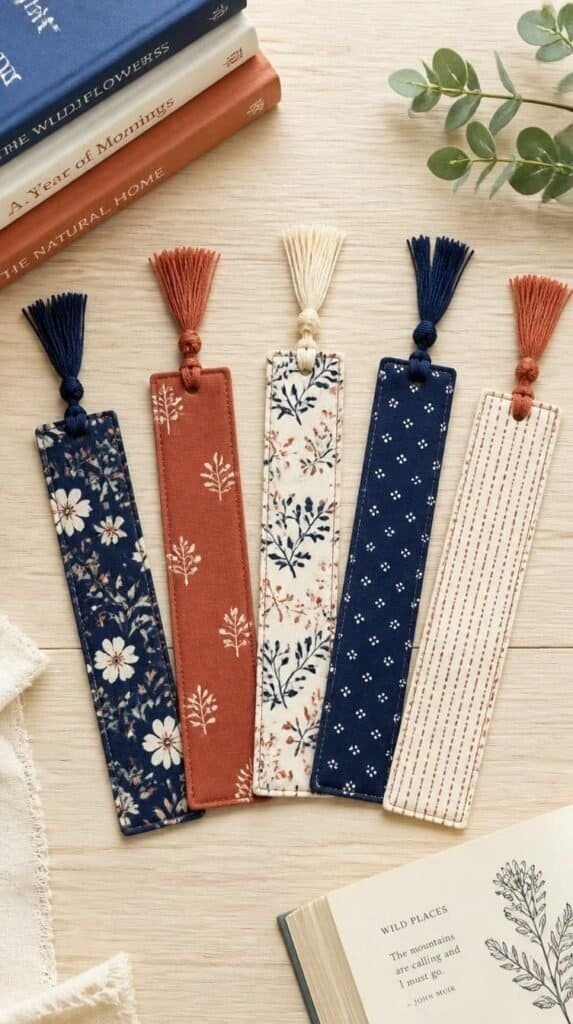
Cut two narrow strips of fabric, place them back-to-back, and sew or glue around the edges. Add a tassel to the top from leftover thread or yarn, and you have a bookmark that is infinitely better than a folded receipt. These use almost no fabric at all, which makes them the perfect scrap fabric project for using up the tiniest pieces in your stash.
Hot tip: Interface the fabric first with a light iron-on interfacing so the bookmark holds its shape and does not curl at the edges after a few uses. It adds about five minutes to the process and makes the difference between a floppy strip and a finished item. (These are the best last-minute teacher gifts and people will ask where you bought them.)
Honest caveat: Very thin or stretchy fabric does not hold up well to the repeated flexing of bookmark use. Woven cotton or a firm linen is your best material choice here. Skip anything with a lot of elasticity unless you interface it heavily. The finished stack looks like a shop display.
Shop the Look
- Iron-On Interfacing for Fabric
- Tassel Trim for Crafts
- Hand Sewing Needle and Thread Kit
- Small Fabric Snips
8. Hot Glue a Fabric Flower Wreath for Your Door or Gallery Wall
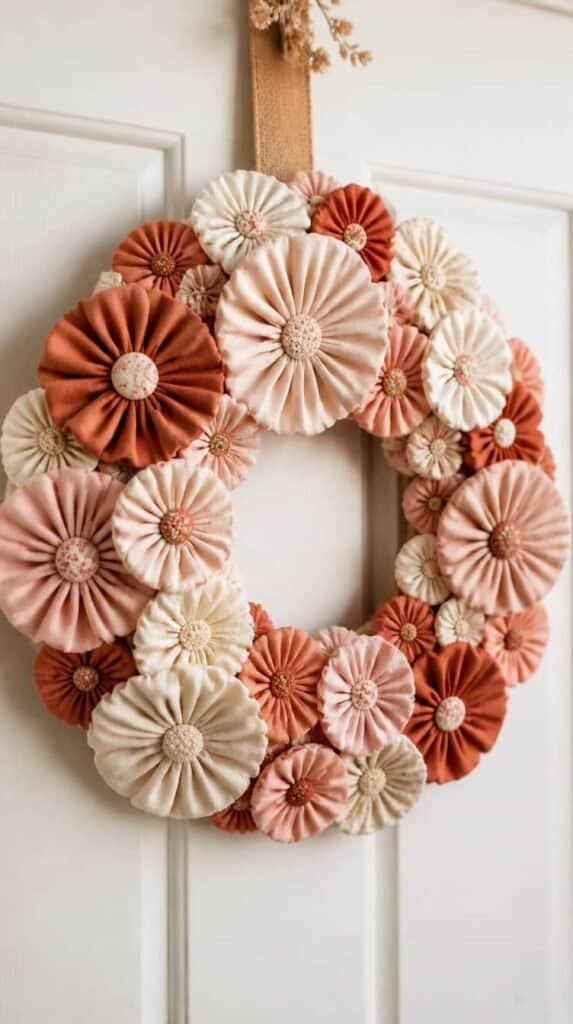
Cut circles of fabric in varying sizes, fold them into quarters or into petal shapes, and hot glue them to a foam or grapevine wreath base to build a full, textured cluster. Layer colors and textures as you go. Use scraps in a single colorway for something cohesive, or go completely mixed for an eclectic, maximalist feel.
Here is what nobody tells you: the smaller the circles, the more dimensional and lifelike the flowers look. Large circles tend to fall flat and floppy if not shaped carefully. Start with a 2-inch circle and fold it tightly before gluing the base. The wreath fills up faster than expected and looks absolutely full. (You will need a second glue gun stick. Always a second glue gun stick.)
Honest caveat: This wreath is not built for very rainy climates if hung outdoors. Moisture softens the glue and the flowers lose their shape. Use it on an interior door or gallery wall for something holding up long term. The front door finally gets the moment it deserved.
Shop the Look
9. Sew or Glue DIY Fabric Coasters in a Matching Set

Cut squares or circles of fabric, back them with a layer of felt or thick batting, and stitch or glue around the perimeter. These protect your surfaces, absorb condensation, and look like something from a boutique home shop. A matching set of four in coordinating prints is one of the most satisfying things you will make from a scrap pile.
Hot tip: Use a thick cotton batting layer in the middle to add real absorbency. Two fabric layers with no batting look great but do not protect surfaces well during a sweaty summer drink situation. The triple-layer coaster is always the one worth making. (House guests will ask where you got them.)
Honest caveat: Fabric coasters need regular washing, especially near coffee and wine. Staining catches fast. Use a fabric holding up through a standard washing machine cycle without shrinking or fading dramatically. The little stack next to the coffee maker looks like it belongs there permanently.
Shop the Look
- Thick Felt Sheets for Crafts
- Cotton Quilt Batting
- Beginner Sewing Machine
- Circle Template Ruler for Crafts
10. Give a Plain Picture Frame a Fabric Refresh
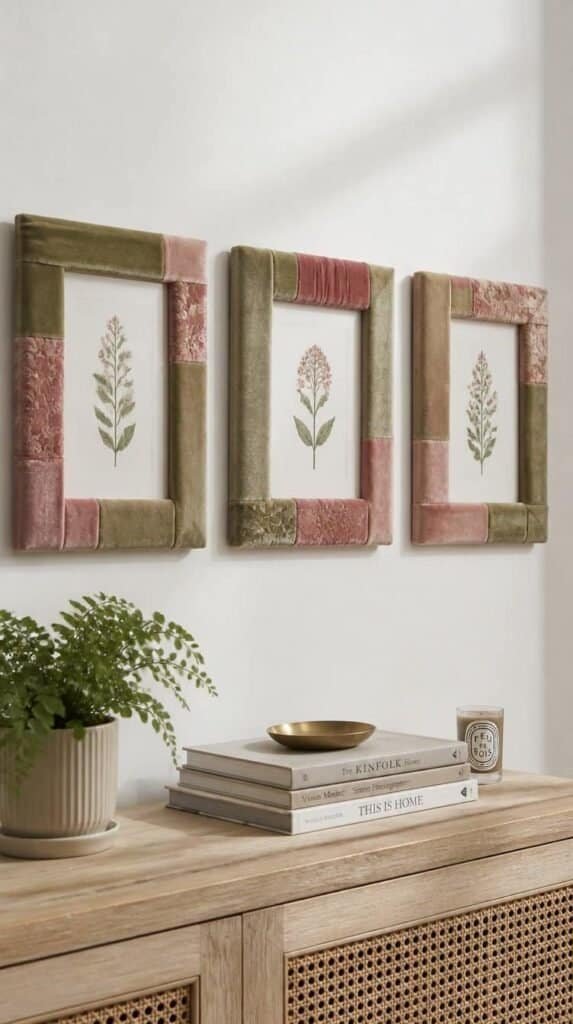
Wrap a wood or cardboard picture frame in fabric the same way you would cover a book. Cut your fabric slightly larger than the frame, apply hot glue or Mod Podge to the frame surface, press the fabric down, fold the edges over the back, and miter the corners neatly. Swap out the glass and photo, and you have a completely refreshed frame fitting your current decor.
The trick here: cut V-shapes at the inner corners of the frame opening before folding the fabric inward. It lets the fabric lie flat without bunching where the frame curves inward. That single cut is the difference between a messy project and a finished piece. (A set of three matching frames on a shelf looks like a deliberate design decision.)
Honest caveat: Very thick or textured fabric adds enough bulk to keep the glass from sitting flat in the frame opening. Test your fabric against the frame before committing to the glue. A medium-weight cotton or thin velvet works best for a smooth, gallery-ready result. The wall looks like you planned it from the beginning.
Shop the Look
11. String a Fabric Scrap Garland for Instant Boho Warmth

Cut your scrap fabric into strips about one inch wide and six to eight inches long. Tie them onto a length of twine, jute rope, or even a stick you pulled from the yard. Keep tying until the garland is as full as you want it. The more strips you add, the more layered and textured the finished piece becomes. This is genuinely the most forgiving project on the list.
Hot tip: Mix fabric weights, textures, and pattern scales for the best result. A thin cotton next to a chunky linen next to a silky remnant gives the garland depth no single fabric could. Use pinking shears on the cut edges for a clean fringe effect that will not fray further. (You will absolutely make three of these and hang them everywhere.)
Honest caveat: A fabric garland picks up dust faster than you would like if hung in a kitchen or living area with a lot of air movement. Shake it out every few weeks or take it down for a quick gentle wash cycle. The garland on the mantel makes the whole room feel warm and layered and lived-in.
Shop the Look
- Jute Rope for Crafts and Decor
- Pinking Shears for Fabric
- Wooden Dowel Rod for Crafts
- Mixed Fabric Remnant Lot
12. Make a No-Sew Tote Bag From Two Large Fabric Rectangles

Cut two matching rectangles of fabric, roughly 14 by 16 inches. Glue or iron-on hem tape along the sides and bottom, leaving the top open. Fold over the top edge and secure with hem tape for a clean finish. Cut two long strips for handles, fold them in thirds lengthwise, seal with glue, and attach to the top edge on each side. You now have a tote bag made entirely from your scrap pile.
Hot tip: Use a medium-to-heavy canvas or denim for the best structural result. Lightweight cotton bags look beautiful but tend to slouch and stretch under any real weight. A stiffer fabric holds its shape and looks more intentional at the market or the farmer’s stand. (The tote you made in an afternoon replaces every plastic bag in your car.)
Honest caveat: No-sew tote bags are best for light loads like produce or a library book. They are not built to carry a full grocery haul. If you want a bag handling real weight, reinforce the handle attachment points with a few hand stitches even if everything else is glued. The tote on the counter is ready for tomorrow’s errands and it looks like you bought it.
Shop the Look
Your Scrap Pile Has Been Waiting for This Moment
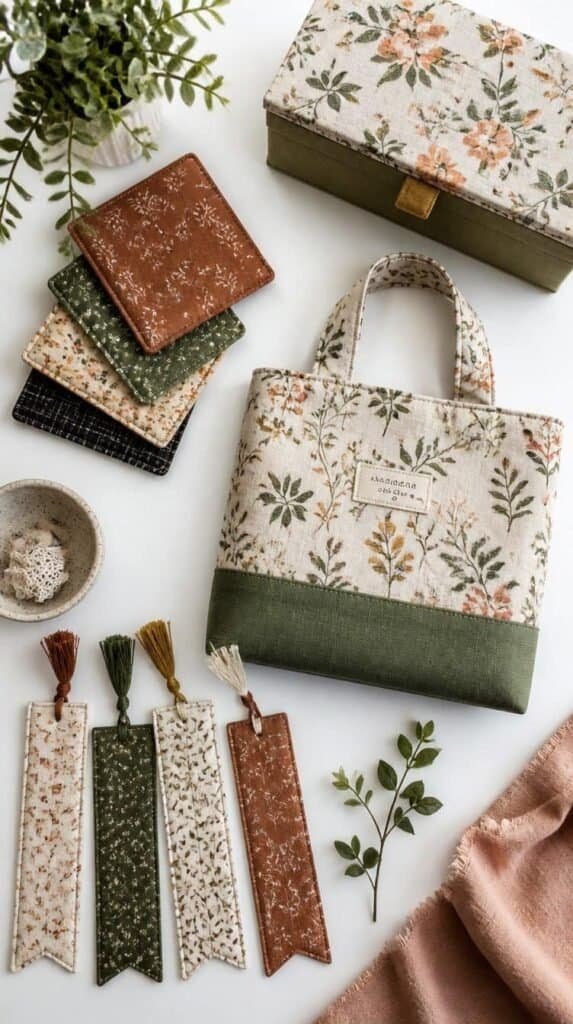
Summer is the perfect season to finally clear the craft corner and turn those fabric scraps into something worth keeping. From no-sew pillows and tote bags to patchwork wall art and fabric flower wreaths, this list covers beginner-friendly projects and slightly more ambitious ones still completely doable in an afternoon. Start with the no-sew tote or the bulletin board, pull three coordinating fabrics from your stash, and build from there one project at a time until the basket is actually empty for once. If you are ready for even more DIY projects that make your home feel styled on a budget, be sure to check out 16 DIY Summer Crafts That Double as Decorations for even more ways to make your space feel like yours.