This post contains affiliate links. If you purchase through my links, I may earn a small commission at no extra cost to you. Thank you for supporting Room Revival Studio!
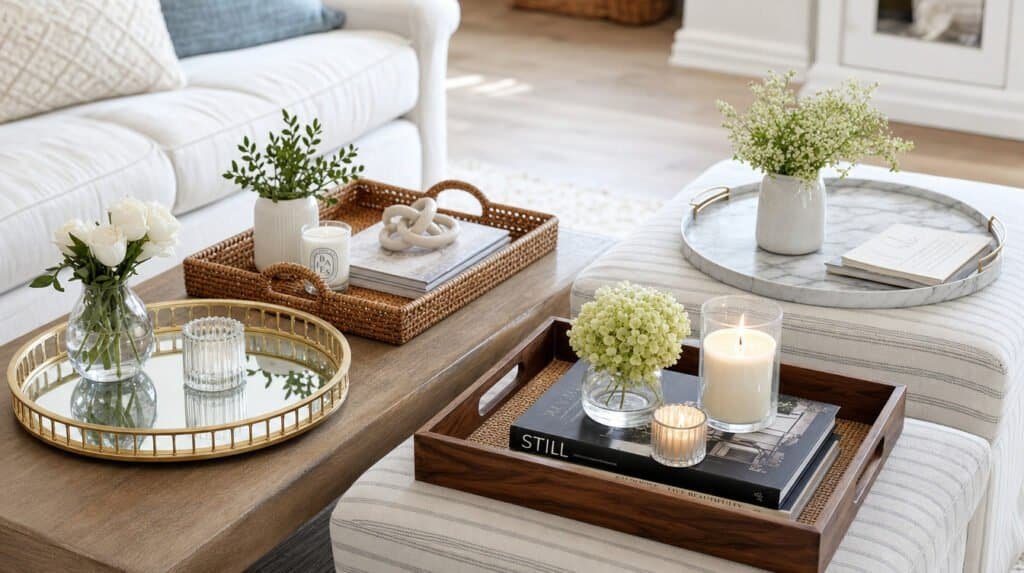
Your coffee table holds a candle, a remote, a coaster, and a stray hair tie. Everything is a little scattered. A tray gathers the small stuff into one tidy group and makes the whole table look styled. It is the cheapest trick in decorating.
These 15 DIY decorative trays use thrifted finds, craft supplies, and basic paint to make pieces that look store bought. Most need an hour and a few dollars. Pick one, make it this weekend, and give your clutter a home.
Gold Mirror Tray

Glue a mirror tile into a picture frame and paint the frame gold. Add two small handles to the short sides. Set it on a dresser with perfume and a candle.
Honest caveat: mirror shows fingerprints, so keep a cloth nearby. Hot tip: cut the tile to fit for a snug look. The tray adds sparkle to any surface.
Shop the Look
Rope Wrapped Round Tray

Glue thick rope around the rim of a round wood board, coiling it up the edge. Trim and tuck the end. Add a small candle and a plant.
Honest note: use a low temp glue gun, since hot glue burns fingers fast. Hot tip: choose natural jute for a coastal look. The tray looks like a boutique find.
Shop the Look
Faux Marble Tray

Cover a wood tray with marble contact paper. Smooth out bubbles with a card and trim the edges. Add gold handles.
Hot tip: warm the paper with a hair dryer at the corners. Honest caveat: wipe with a soft cloth, not a scrub brush. The tray looks like stone and weighs far less.
Shop the Look
Painted Crate Tray

Turn a small wooden crate into a tray. Sand it, then paint it white with chalk paint. Set it on an ottoman with a candle and a magazine.
Honest note: sand rough edges to protect hands. Hot tip: line the bottom with felt to protect furniture. The crate feels farmhouse and fresh.
Shop the Look
Pallet Wood Serving Tray

Cut pallet boards to size and attach them to two cross strips. Sand until smooth and add black metal handles. Stain in a warm tone.
Honest caveat: choose pallets stamped HT, which means heat treated and safe to use indoors. Hot tip: wear gloves while sanding. The tray looks rustic and sturdy.
Shop the Look
Terrazzo Clay Trinket Tray
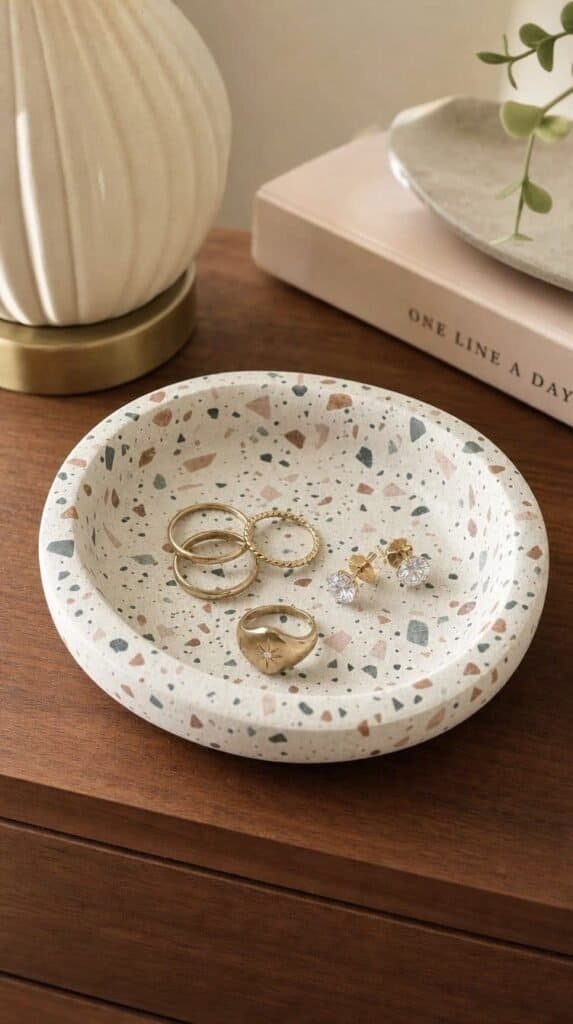
Roll air dry clay flat and press small colored clay chips into the surface. Roll smooth and cut a round shape. Lift the edges to make a rim.
Hot tip: use dyed clay scraps for the chips. Honest note: seal with a water based sealer so rings do not scratch it. The tray holds jewelry and keys with style.
Shop the Look
Ocean Resin Art Tray

Pour blue and white resin over a wood base. Swirl gently with a stir stick and add a gold edge. Let it cure for 24 hours.
Honest caveat: resin needs gloves and good ventilation. Hot tip: pass a small torch lightly over the top to pop bubbles. The tray looks like a frozen wave.
Shop the Look
Fabric Lined Wood Tray

Glue a piece of linen or patterned fabric inside a wood tray. Smooth it flat and trim around the edge. Seal with clear decoupage glue.
Hot tip: pick fabric to match your pillows. Honest note: sealed fabric wipes clean, but keep wet items off it. The tray feels soft and custom.
Shop the Look
Handmade Concrete Tray

Pour mix into a silicone mold and press a smaller mold into the center. Let it cure, then remove both. Seal with a matte sealer.
Honest caveat: concrete is heavy, so keep it for low shelves and counters. Hot tip: sand rough edges after curing. The tray looks modern and calm.
Shop the Look
Wood Slice Tray

Use a large wood slice as a base. Sand and seal it, keeping the bark edge. Set candles and pinecones on top.
Hot tip: add felt feet to protect tables. Honest note: buy kiln dried slices, since fresh ones crack. The slice brings forest warmth indoors.
Shop the Look
Picture Frame Serving Tray

Take a large picture frame and glue decorative paper or fabric behind the glass. Add handles on each side. Use it for coffee cups and snacks.
Honest caveat: use strong adhesive for the handles, since trays get lifted often. Hot tip: choose a frame with a wide edge. The tray carries coffee with ease.
Shop the Look
Ceramic Tile Tray

Glue a large ceramic tile to a wood frame with handles. Pick a pattern like blue and white. Seal the edges for a clean finish.
Hot tip: use tile adhesive, not craft glue. Honest note: tile is heavy, so choose a sturdy frame. The tray looks Mediterranean and bright.
Shop the Look
Lazy Susan Kitchen Tray

Paint a wood lazy susan and add a thin trim to the rim. Use it on a counter to hold oils and spices. Spin to reach what you need.
Honest caveat: keep it on a flat surface so bottles do not slide. Hot tip: add a felt pad under the base. The turntable keeps cooking items tidy.
Shop the Look
Faux Leather Wrapped Tray

Wrap a wood tray in faux leather using strong glue. Fold the corners neatly like a gift and trim the edges. Set it on a living room table with a remote and candle.
Honest note: test the glue on a scrap, since some leathers melt under hot glue. Hot tip: clamp the edges while the glue dries. The tray looks like luxury desk decor.
Shop the Look
Repainted Thrifted Metal Tray

Find a metal tray at a thrift store and sand it lightly. Paint it matte sage and brush gold along the rim. Seal with clear spray.
Honest caveat: use metal primer so the paint holds. Hot tip: tape the edge for a crisp gold line. The tray looks like a designer piece.
Shop the Look
Make One. Style Everything.
Winter is the perfect season to gather small things into pretty groups, and trays do that job in every room. From mirror and marble looks to wood, clay, and concrete, every tray here fits a budget and a skill level. Start with the mirror tray or the marble paper tray, then try something bolder next weekend. If you are ready for even more handmade decor, be sure to check out 12 Clay Tray Ideas That Feel Modern and Aesthetic for even more tray inspiration.