This post contains affiliate links. If you purchase through my links, I earn a small commission at no extra cost to you. Thank you for supporting Room Revival Studio!
The classroom walls are bare. It is September, the bulletin board is a crime scene of old staples and faded paper, and the teacher has three prep minutes left in the week. Bulletin boards go from “I will deal with it later” to “I need this done tonight” almost overnight. Here is the fix: the best fall boards are not teacher-made masterpieces finished at midnight. They are kid-made, done in a single art period, with supplies already in the cabinet.
These 14 fall bulletin board ideas are built for real classrooms with real timelines. From kindergartners who love smearing paint to fifth graders who want something with a bit more edge, each project is a finished display in itself. Pick the one fitting your schedule, hand over the supplies, and step back.
1. Leaf Rubbing Art Panels

Leaf rubbing looks more impressive than it sounds, and kids figure this out fast. Collect leaves from outside, press them under heavy books overnight to flatten them, then lay them face-down under white cardstock. The side of a crayon does the rest. Vein details come through sharp and clean every time.
Layer the finished panels side by side across the board in rows, mixing leaf shapes and crayon colors. Hot tip: warm earth tones like burnt orange, gold, and deep red make the display feel cohesive even when kids work with different leaf shapes. (It is forgiving in all the right ways.)
The result looks like a nature art installation. The kids made it before lunch.
Shop the Look
- Earth Tone Crayon Set
- White Cardstock Paper Bulk Pack
- Faux Fall Leaf Set
- Fall Bulletin Board Border Strips
2. Handprint Turkey Flock Border

Handprint turkeys are a classroom staple for a reason: every child ends up with something completely their own. Trace each kid’s hand in brown paint, let the palm dry as the turkey body, then add a paper wattle, beak, and googly eyes. Tail feather strips in harvest colors complete the bird.
Line the turkeys along the bulletin board border, alternating tail feather colors for a cohesive but lively look. Here is what nobody tells you: the wobblier the turkey, the more personality it has. Embrace the chaos. Parents stop in the hallway to find their kid’s bird every single time.
The border makes the whole board feel warm and personal.
Shop the Look
- Washable Finger Paint Set for Kids
- Googly Eyes Bulk Pack
- Fall Color Construction Paper Pack
- School Glue Sticks Bulk Pack
3. Sunflower Paper Plate Collage

Paper plate sunflowers look far more impressive than the effort required to make them. Paint the center of a paper plate in brown or dark orange, then glue yellow tissue paper petals around the rim. Kids love this one because the tissue paper technique requires zero precision. Scrunch, glue, done.
Display the finished sunflowers clustered against a blue or cream background on the board, with paper stems and leaves cut from green construction paper. The trick here: mix dessert plates and dinner plates in the display for natural depth. (One size makes a pattern. Two sizes make a garden.)
A full sunflower field on a bulletin board stops everyone cold in the best way.
Shop the Look
- Yellow Tissue Paper Pack
- White Paper Plates Bulk School Pack
- Green Construction Paper Pack
- Tacky Craft Glue
4. Acorn Stamping Pattern Border

Acorn stamps are a low-mess, high-impact option for younger kids. Sponge daubers loaded with fall-colored paint work better than carved stamps and require zero prep. Kids press a repeating acorn pattern across long strips of white paper. The rhythm of it is genuinely satisfying for kids who need to move.
Use the finished strips as a border around the main display or as filler between other pieces. Hot tip: let the first color dry before adding a second for layered acorn prints with real depth. One honest caveat: this is best done with paint shirts on. Brown paint travels to places you will not find for days.
The stamped border ties the whole board together without costing more than a few minutes of setup.
Shop the Look
- Sponge Daubers for Craft Painting
- Fall Color Tempera Paint Set
- Kids Art Smocks Classroom Pack
- White Kraft Paper Roll
5. Apple Tissue Paper Mosaic
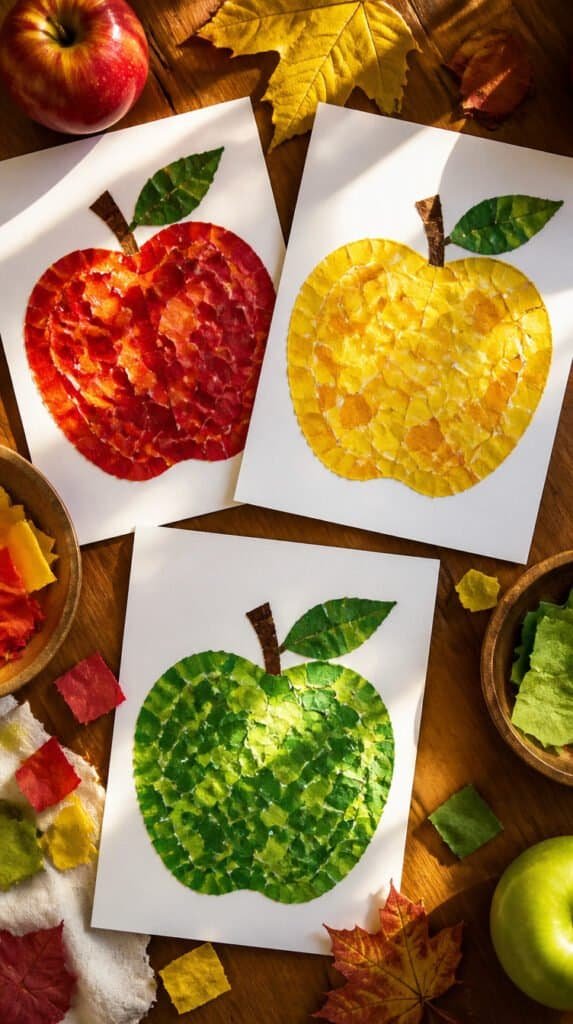
Draw a large apple outline on white cardstock, then fill it in entirely with small torn squares of red, yellow, and green tissue paper. The layered tissue creates a stained-glass effect once the glue dries. It looks like it took hours. It takes about 30 minutes per kid.
Display the apples side by side on the board for a vibrant harvest display. Each one ends up different based on how kids layer the tissue, which makes the whole group feel intentional and curated. (Nobody planned for them to look this good, but here we are.)
A row of these apples is one of those bulletin boards you photograph before taking it down.
Shop the Look
- Assorted Tissue Paper Craft Pack
- Mod Podge Glossy for Crafts
- Foam Paint Brush Set
- Heavy White Cardstock Paper
6. Scarecrow Self-Portrait Gallery
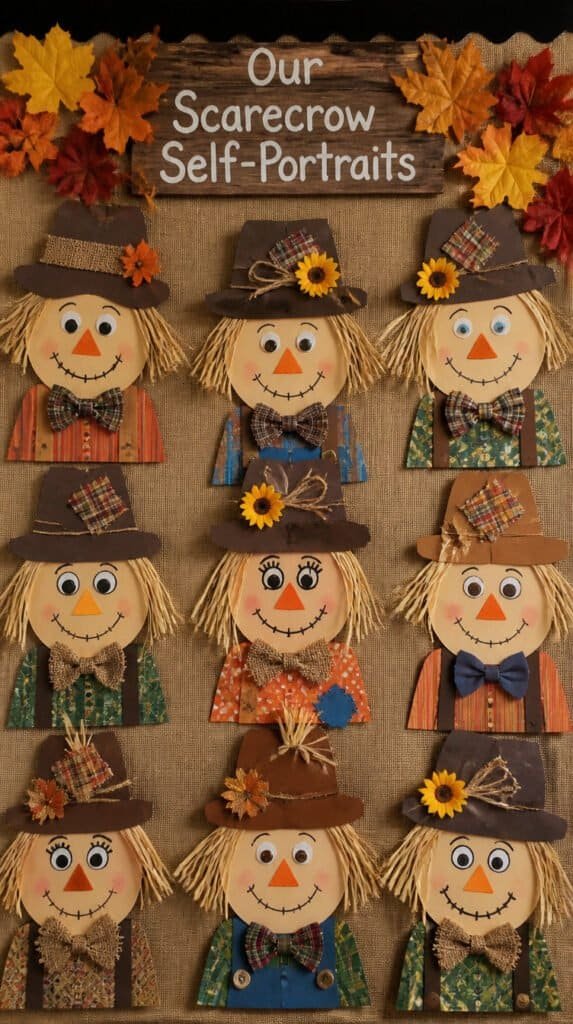
Scarecrow self-portraits hit different when kids realize they get to design their own face and outfit. Give each child a pre-cut paper scarecrow body and hat, then let them draw their own face with markers and decorate with raffia, yarn, and fabric scraps for straw. The personalization is the whole point.
Arrange the finished portraits across the board with name tags below each one. The variety of expressions and outfits makes the display feel like a real gallery. Hot tip: use brown paper bag strips for the straw poking out of sleeves and hat brims. It is cheap, reads as actual straw from a distance, and kids love the texture of it.
This is the bulletin board kids beg to take home at the end of the season.
Shop the Look
- Natural Raffia for Crafts
- Assorted Yarn Craft Pack
- Assorted Fabric Scraps
- Washable Markers Kids School Pack
7. Pumpkin Patch Paper Painting

A pumpkin patch mural works beautifully as a whole-class collaborative piece. Assign each kid one or two pumpkins to paint on large paper in orange, yellow, or white. When dry, cut the pumpkins out and arrange them across a green paper field on the bulletin board, adding paper vines to connect everything.
The patchwork of different painting styles and sizes gives the display real depth. The trick here: have kids blend orange and yellow within each pumpkin rather than painting flat. Blended pumpkins have dimension. A perfectly flat orange pumpkin from a child is slightly unsettling, if we are being honest.
The finished patch makes the whole hallway feel like autumn arrived for real.
Shop the Look
- Liquid Watercolor Paint Set
- Large Art Paper for Kids
- Green Bulletin Board Paper Roll
- Kids Paint Brush Set Classroom
8. Fingerprint Fall Tree

A fingerprint fall tree is one of the most striking bulletin board displays there is, and it works at every grade level. Draw or trace bare tree branches on a large sheet of paper, then have kids press fingerprints across the branches in red, orange, yellow, and gold to build the leaf canopy. The density of fingerprints is up to each child.
The tree ends up looking hand-painted in the best possible way. One honest thing to know: the paper needs a full class period to dry before mounting when kids go heavy on ink coverage. The wait is worth it. (Ask anyone who has tried to mount a wet fingerprint tree. It is not pretty.)
Frame it with kraft paper and it looks like something from an art museum. A children’s art museum, specifically, but still.
Shop the Look
- Washable Stamp Pads Fall Colors
- Brown Kraft Paper Roll
- Black Paint Pens for Outlines
- Hand Wipes Classroom Bulk Pack
9. Tissue Paper Stained-Glass Leaves

Cut leaf shapes from black construction paper, then cut out the interior of each leaf, leaving a thick black frame. Press small squares of yellow, red, and orange tissue paper onto clear contact paper, then place the black leaf frame on top. Trim the edges and hold it to the light. It glows.
Hang the finished leaves along the top edge of the bulletin board with string so they hang down and catch the hallway light. Hot tip: buy contact paper in bulk because you will use far more than expected. A caveat worth knowing: teacher prep time is needed to cut the frames in advance, but the kids assemble everything themselves after.
These leaves make every hallway feel like fall walked in and decided to stay.
Shop the Look
- Clear Contact Paper Roll
- Black Construction Paper Bulk Pack
- Orange Red Yellow Tissue Paper Mix
- Natural Twine Craft String
10. Owl Paper Bag Puppet Parade

Brown paper lunch bags become owls with a little folding, paint, and paper. Fold the bottom flap of the bag forward to create a beak shape, paint the bag in brown or gray, then add large paper circle eyes with colored pupils. Wing shapes cut from brown construction paper glue to the sides.
Mount the finished owls in a row along a paper tree branch running the width of the board. Each owl ends up with a different expression depending on how kids place the pupils, giving the display so much personality. (Some of these owls look deeply concerned about the upcoming spelling test. Entirely relatable.)
A full owl parade is the bulletin board the whole school slows down to look at.
Shop the Look
- Brown Paper Lunch Bags Bulk Pack
- White Circle Stickers for Eyes
- Brown and Gray Tempera Paint
- Safety Scissors for Kids Crafts
11. Harvest Moon Watercolor Scene
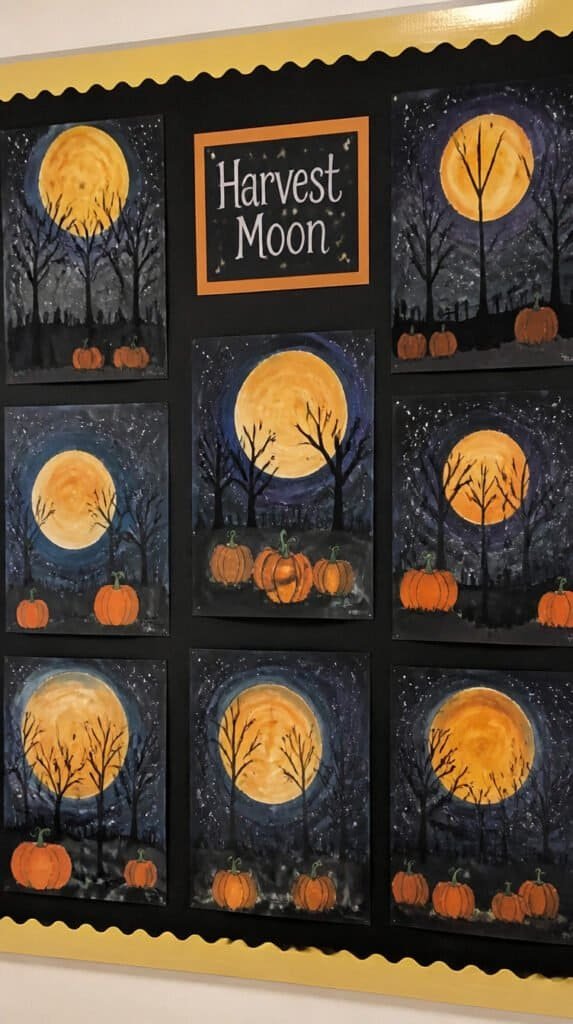
A harvest moon scene works as an individual piece or a full-class mural. Paint a large gold circle on dark blue or black paper for the moon, then build a silhouette landscape below it with dark brown watercolor. Bare trees, wooden fences, or pumpkins against the glowing moon always look incredible.
Display the individual scenes as a gallery across the board, or combine them into one long panoramic mural. Watercolor moves in ways kids do not expect, making each piece genuinely different. The trick here: wet the paper slightly before adding the sky color for a soft, blended background. Dry paper gives streaks. Wet paper gives atmosphere.
The finished display looks like something a professional made. The kids will never stop being proud of it.
Shop the Look
- Watercolor Paint Set for Kids
- Black Watercolor Paper 9×12
- Round Watercolor Brush Set
- No-Spill Water Cups Classroom Set
12. Fall Vocabulary Word Collage

Combine literacy and art in one bulletin board: each child picks a fall vocabulary word like “harvest,” “crisp,” “cider,” or “golden” and illustrates it with markers, watercolors, or collage materials. The word goes large and bold at the top. The art fills the rest of the card.
Arrange the finished cards in a grid on the board, mixing sizes and illustration styles. Hot tip: laminate the cards before mounting if you want them to last all season without curling at the corners. This one takes a full art period but produces something with real academic value and genuine visual interest.
The word collage board works harder than any store-bought kit, and the kids made it themselves.
Shop the Look
- Thick Black Markers for Lettering
- Mixed Media Art Paper Pack
- 48-Color Pencil Set for Kids
- Laminator Machine with Sheets
13. Harvest Vegetable Still Life

Give each child a fall object to observe and draw from life: an ear of dried corn, a small squash, an apple, or a gourd. Older kids draw in pencil and paint over it. Younger kids go straight to paint or oil pastels. The goal is observation, not perfection.
Display the finished still lifes salon-style on the board with small name labels below each one. This is the art project quietly teaching kids to slow down and look. An honest caveat: bring extra apples because at least two will get eaten before the painting starts. (This is a tradition at this point. Plan accordingly.)
The board ends up looking like a real art show. It is one.
Shop the Look
- Oil Pastels Kids Art Set
- Drawing Pencils Set School
- Decorative Mini Gourds Fall Set
- Decorative Dried Corn for Fall
14. Thankful Tree with Leaf Notes

Draw or paint a large bare tree trunk and branches on brown paper and mount it as the centerpiece of the board. Cut leaf shapes in orange, red, and yellow paper and give each child one to write something they are grateful for. Mount the leaves across the branches.
Add new leaves throughout November as kids think of more things to add. By Thanksgiving, the tree is overflowing. The trick here: use three or four different leaf template sizes so the tree looks organic rather than uniform. Uniform is boring. Organic is interesting. (The kid who writes “pizza” deserves a leaf, too. No judgment.)
The thankful tree is the one bulletin board kids stop to read. It is how you know it worked.
Shop the Look
- Fall Leaf Paper Cutouts Bulk Pack
- Fine Tip Markers for Kids Writing
- Large Brown Kraft Paper Roll
- Heavy Duty Bulletin Board Stapler
Pick One. Put It Up. Let the Kids Make It.
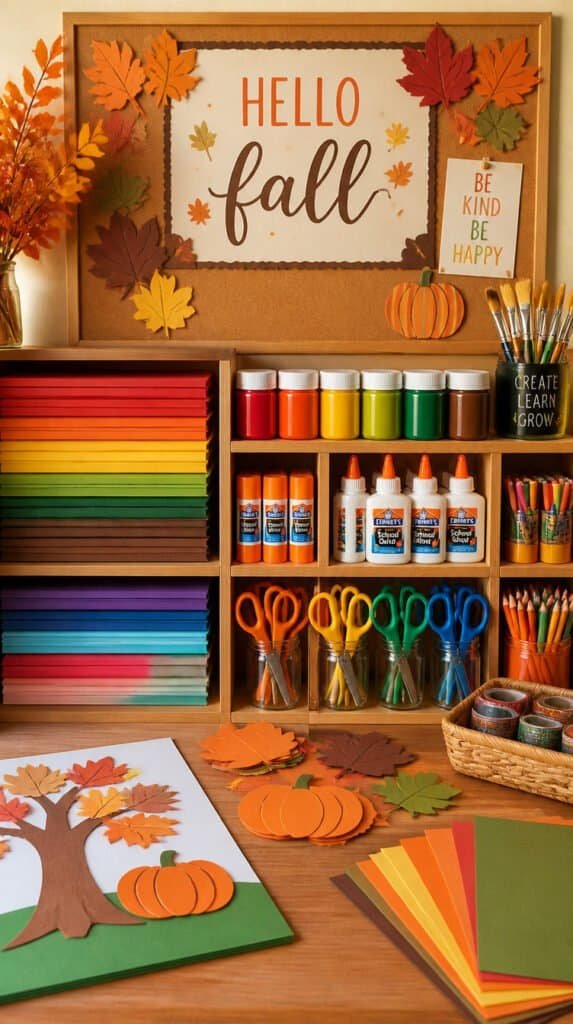
Fourteen fall bulletin board crafts, and the best one is the one fitting your week. Leaf rubbings need nothing more than leaves from outside and crayons from the bin. The fingerprint tree scales for any class size in any grade. The thankful tree builds itself over the course of a month. Start with the supplies already on hand, pick the project matching your timeline, and hand the materials to your students. Step back. You will be surprised by what they make.