
Affiliate Disclosure – This post may contain affiliate links, which means I may earn a small commission at no extra cost to you.
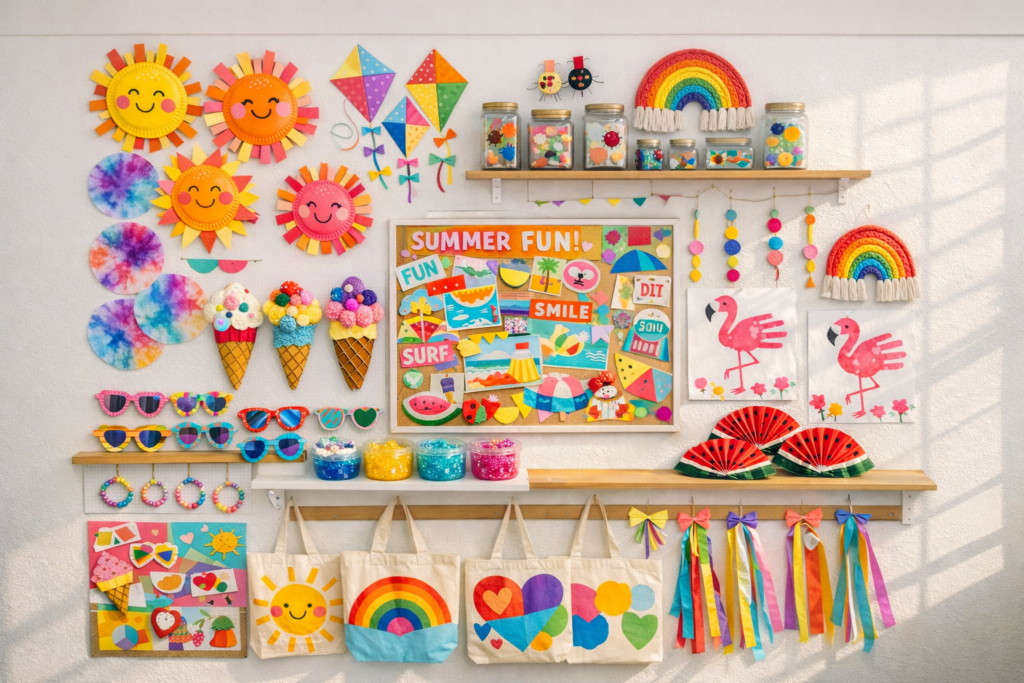
If your classroom starts feeling chaotic the second summer hits, you’re not alone. Kids have energy, short attention spans, and zero interest in anything that feels like “work.” That’s where the right crafts come in.
The key is choosing projects that are bright, engaging, and actually hold their attention longer than five minutes. Not complicated. Not stressful. Just fun, hands-on activities that feel like play but keep things structured.
These summer classroom crafts are exactly that. Easy to set up, visually exciting, and designed to keep kids focused, creative, and busy.
1. Painted Paper Plate Suns
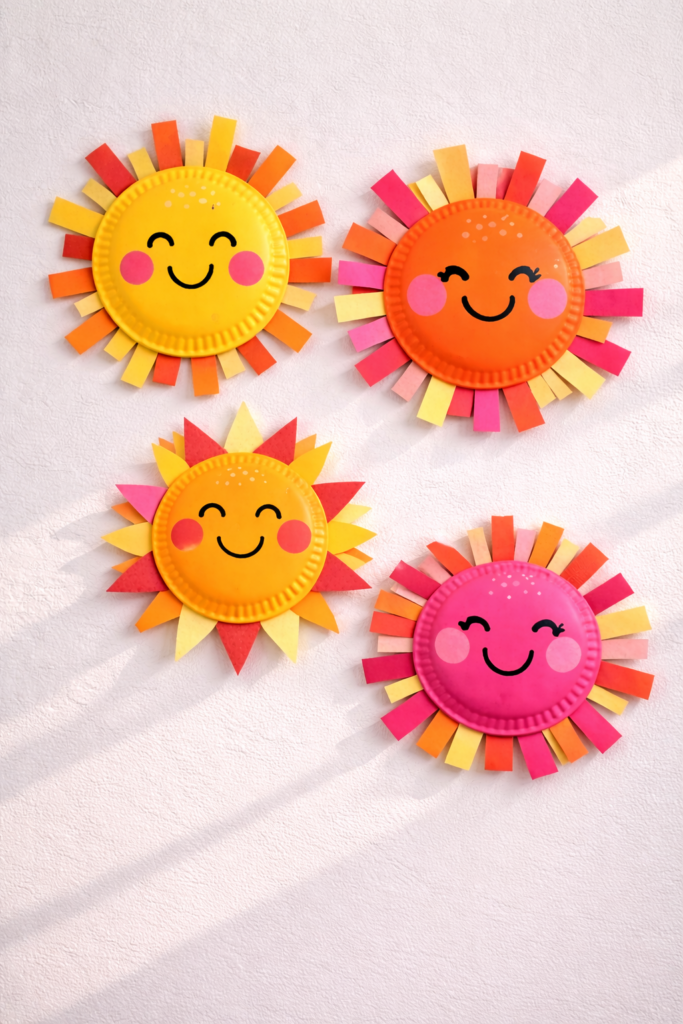
This is one of those classroom crafts that almost always works because it is simple, bright, and fun from the start. Kids get to paint, cut, glue, and decorate, which helps hold their attention longer than a basic coloring activity. It also gives them enough freedom to be creative without making the project feel too messy or hard to manage.
Instead of sticking with plain yellow suns, let kids play with bold summer colors like orange, red, hot pink, and even a little glitter if you want the finished project to pop. They can add silly faces, bold patterns, or different ray shapes to make each one look unique. Once these are hung up on a bulletin board or classroom wall, they instantly make the room feel brighter and more cheerful.
Step-by-Step Instructions
- Give each child one paper plate to use as the base of the sun.
- Let them paint the plate in bright summer colors like yellow, orange, or a mix of both.
- While the paint dries, cut sun rays from colored construction paper.
- Glue the paper rays around the back edge of the plate.
- Add details to the front like a smiling face, rosy cheeks, swirls, dots, or glitter accents.
- Let everything dry fully before displaying the finished suns around the classroom.
Shop the Look
2. DIY Ice Cream Cone Crafts
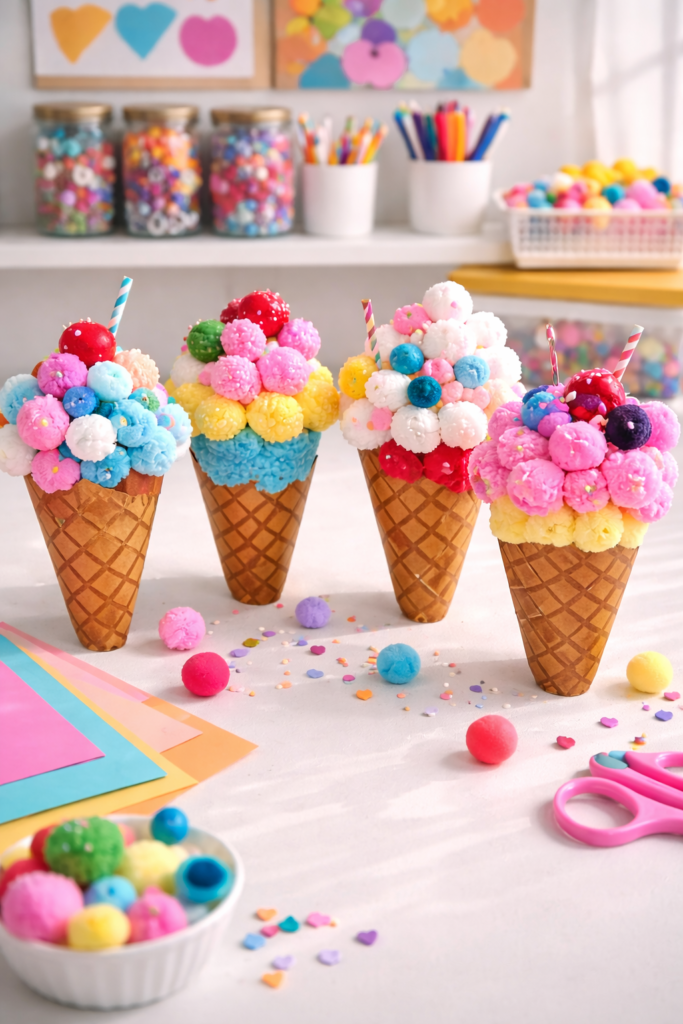
This is one of those summer crafts kids instantly get excited about because it feels playful and familiar. It combines texture, color, and a little bit of imagination, which is exactly what keeps them engaged longer. You can easily turn this into a mini creative challenge by letting kids design their own “flavors” using different colors and materials.
To make it more visually exciting, encourage layering with bright pom-poms, cotton balls, or even tissue paper in bold colors like teal, pink, purple, and neon yellow. The finished cones look fun, dimensional, and perfect for a summer-themed classroom display. It is simple to prep but still feels like a standout activity.
Step-by-Step Instructions
- Cut triangle shapes from brown construction paper to create the cone base.
- Glue the cone onto a sheet of colored paper as the background.
- Add “scoops” using cotton balls, pom-poms, or crumpled tissue paper.
- Let kids stack multiple scoops for a tall, colorful ice cream effect.
- Decorate with markers, glitter, or paint to create sprinkles and patterns.
- Allow everything to dry before displaying the finished designs.
Shop the Look
3. Tie-Dye Coffee Filter Art
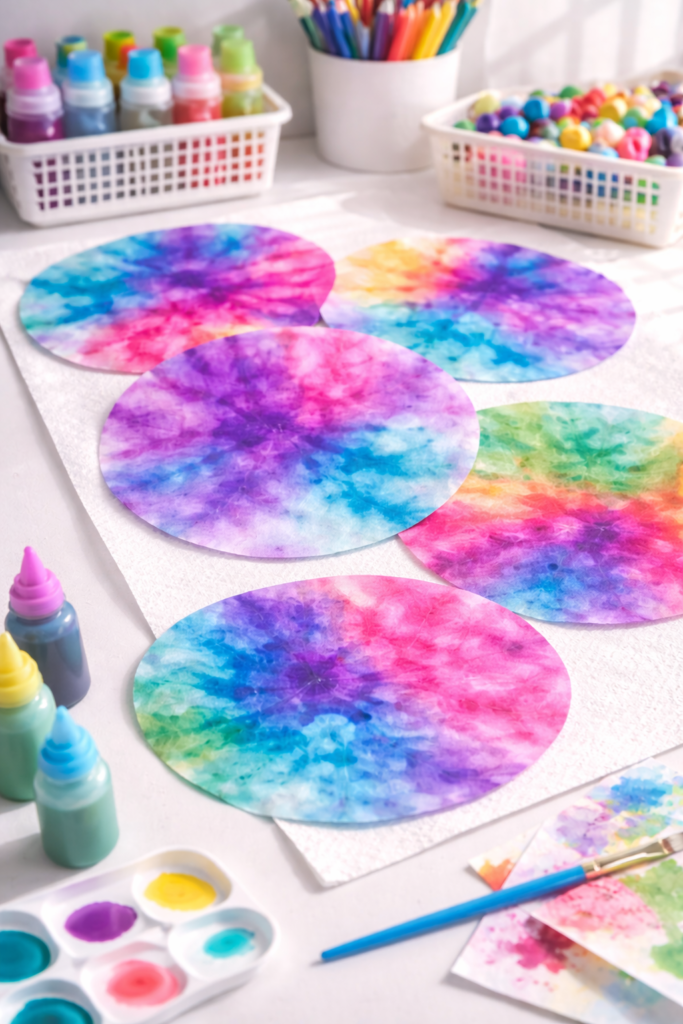
This craft is a classroom favorite because it delivers that wow moment without a complicated setup. Kids love watching the colors blend and spread, and it feels a little like magic every time. It is hands-on, slightly messy in a controlled way, and visually satisfying from start to finish.
The key here is going bold with color. Bright pinks, blues, purples, and greens create that true tie-dye effect that stands out once dry. You can hang these up as window decor or layer them into a larger classroom display for a colorful summer vibe that feels energetic and fun.
Step-by-Step Instructions
- Give each child a flat coffee filter and washable markers.
- Let them color the filter using bold, bright patterns or random color blocks.
- Lightly spray the coffee filter with water using a spray bottle.
- Watch as the colors blend and spread across the filter.
- Carefully set the filters aside to dry on paper towels or trays.
- Once dry, display them on windows or bulletin boards for a bright effect.
Shop the Look
4. Popsicle Stick Sunglasses
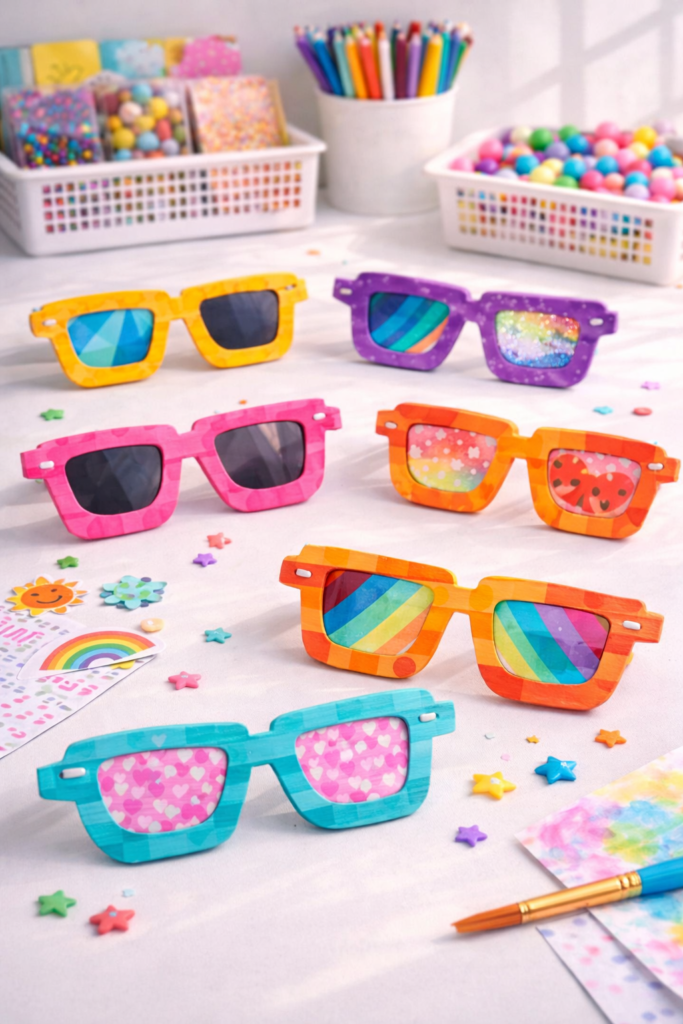
This craft is a hit because kids get to make something they can actually “wear,” which instantly makes it more exciting. It combines building, decorating, and a little imagination, so it keeps their attention longer than a flat paper project. It also works really well for group energy since everyone wants to show off their final look.
To keep it visually bold, encourage bright colors, fun patterns, and oversized “lenses” in neon shades or layered paper. You can even let kids theme their sunglasses with hearts, stars, or stripes. Once finished, it turns into a fun mini moment where everyone tries them on and shows their style.
Step-by-Step Instructions
- Give each child 6 to 8 popsicle sticks and glue.
- Help them glue the sticks together to form two square or round frames connected in the middle.
- Let the frame dry slightly so it holds its shape.
- Cut out “lenses” from bright colored paper and glue them behind each frame opening.
- Decorate the frames with paint, markers, or stickers in bold patterns.
- Allow everything to dry before letting kids hold or wear their sunglasses.
Shop the Look
5. Ocean Slime Sensory Craft
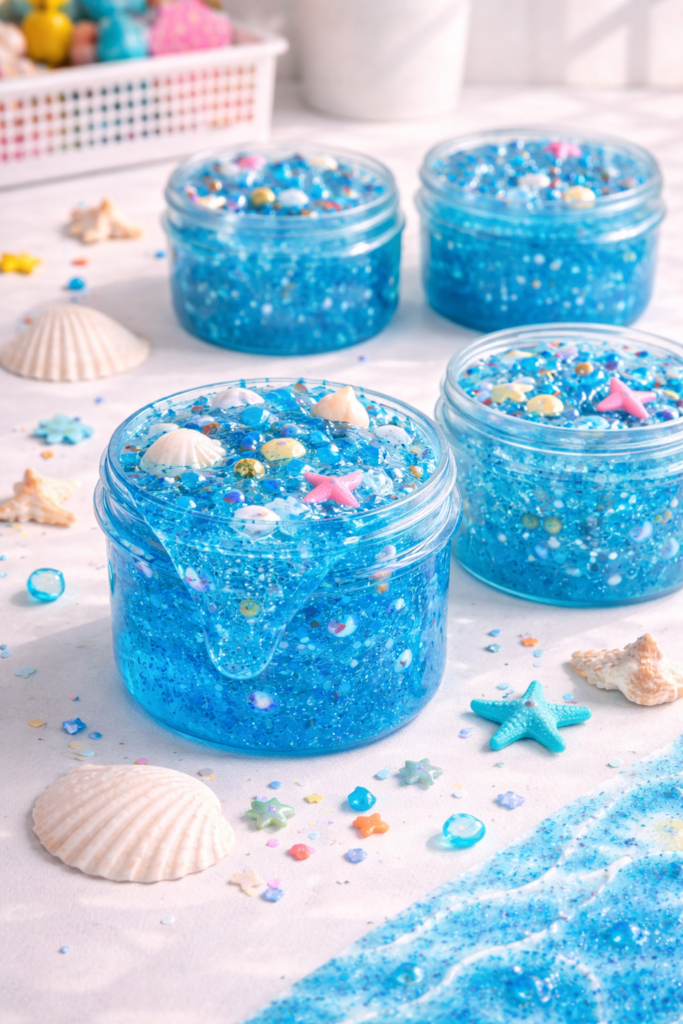
If you need something that actually holds attention for more than a few minutes, this is it. Slime is one of those activities kids do not get bored of, and when you give it a bright ocean theme, it becomes even more engaging. It is hands-on, calming for some kids, and perfect for mixing creativity with sensory play.
To make it feel more like a summer activity, go with bold ocean-inspired colors like bright blue, teal, and a hint of purple. Add in glitter, beads, or small ocean-themed pieces to create that under-the-sea look. This turns a simple slime activity into something that feels exciting and a little different.
Step-by-Step Instructions
- Pour clear glue into a bowl as your base.
- Add a few drops of blue or teal food coloring and mix well.
- Stir in glitter, beads, or small craft add-ins for texture.
- Slowly add slime activator while mixing until it begins to form.
- Knead the slime with hands until it reaches a smooth, stretchy consistency.
- Store in small containers so kids can keep or reuse their slime.
Shop the Look
6. Painted Rock Fruit Set
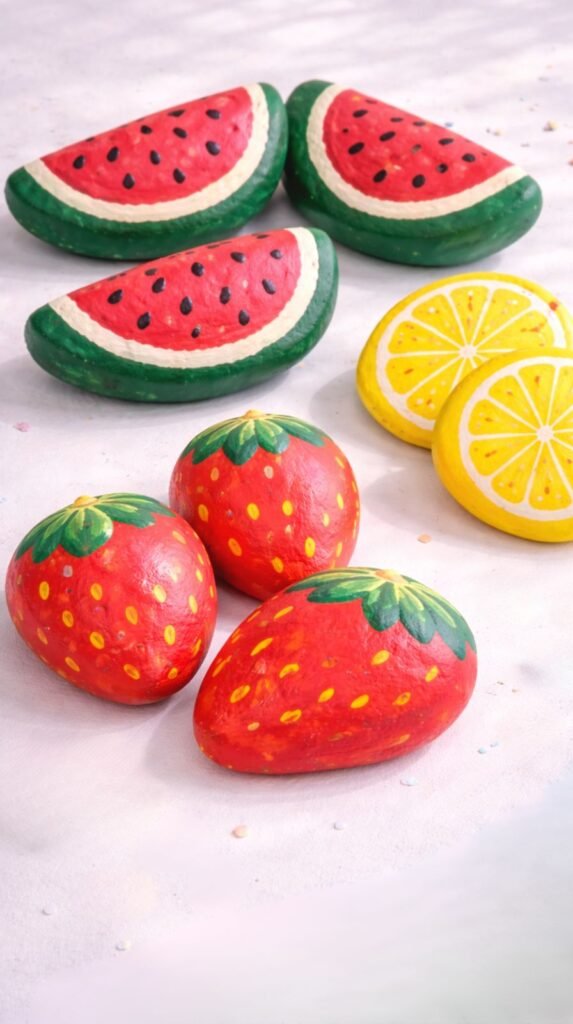
This craft is simple but surprisingly fun because kids get to turn something ordinary into something bright and playful. It also works great as a low-mess option compared to full paint projects, which makes it easier to manage in a classroom setting. The best part is that the finished pieces feel more like little keepsakes than just another craft.
Instead of basic designs, push bold fruit colors like watermelon red, lemon yellow, lime green, and bright orange. Kids can mix patterns, add seeds, or create faces to give each “fruit” personality. Once finished, these look great displayed in groups or even used as small decorative pieces around the classroom.
Step-by-Step Instructions
- Start with clean, dry smooth rocks.
- Paint each rock a bold base color depending on the fruit you want to create.
- Let the base coat dry completely before adding details.
- Use smaller brushes to paint fruit details like seeds, stripes, or slices.
- Add outlines or accents using markers or darker paint for definition.
- Allow everything to dry fully before displaying or using the rocks.
Shop the Look
7. DIY Wind Catchers
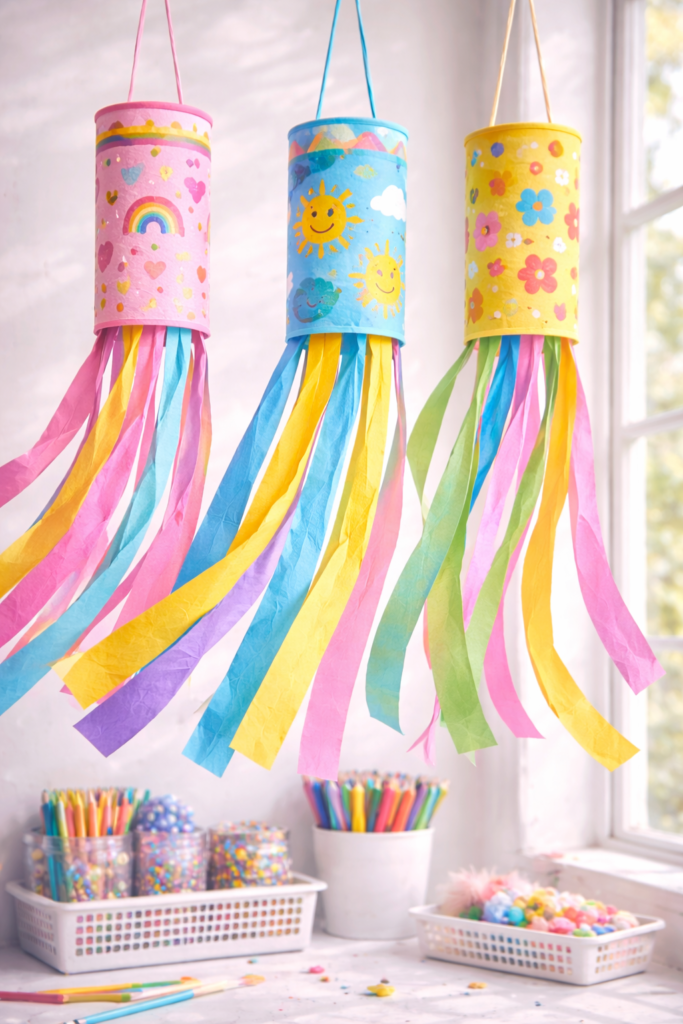
This is one of those crafts that feels interactive even after it is finished. Kids love seeing their work move and react, which makes this more exciting than something that just sits on a desk. It also adds instant color and energy to the classroom once everything is hanging up.
Go bold with bright streamers, layered paper, and high-contrast colors like pink, blue, yellow, and green. The movement combined with strong color makes these stand out in windows or near fans. It is simple to assemble but creates a big visual impact across the room.
Step-by-Step Instructions
- Cut a base shape from cardstock such as a circle, heart, or square.
- Punch holes along the bottom edge of the shape.
- Cut strips of tissue paper or ribbon in bright colors.
- Attach the strips through the holes using tape or glue.
- Add a string or loop at the top for hanging.
- Hang near a window or airflow so the streamers can move.
Shop the Look
8. Watermelon Paper Fans
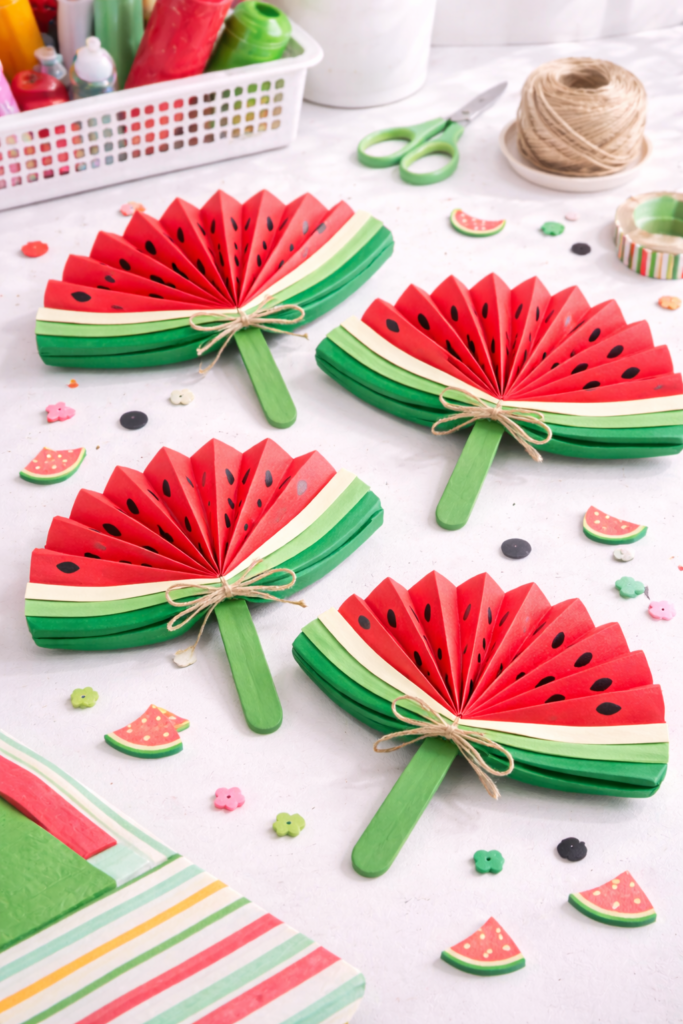
This craft works because it is both fun and functional. Kids are not just making something cute, they are creating something they can actually use. That instantly makes them more invested in the process and keeps their attention longer.
The bold watermelon color combo of red, green, and black creates a bright summer look that stands out right away. You can encourage kids to exaggerate the colors or even mix in fun variations like pink centers or patterned “rinds.” Once finished, they get a handheld fan that feels playful and useful at the same time.
Step-by-Step Instructions
- Give each child a sheet of paper and have them paint or color it red in the center.
- Add a green strip along one edge to create the watermelon rind.
- Draw small black seeds across the red section using a marker.
- Fold the paper back and forth in an accordion style from top to bottom.
- Pinch the bottom of the folded paper and secure it with glue or tape.
- Attach a popsicle stick to the base to create a handle.
Shop the Look
9. DIY Bug Jars (Paper Craft)
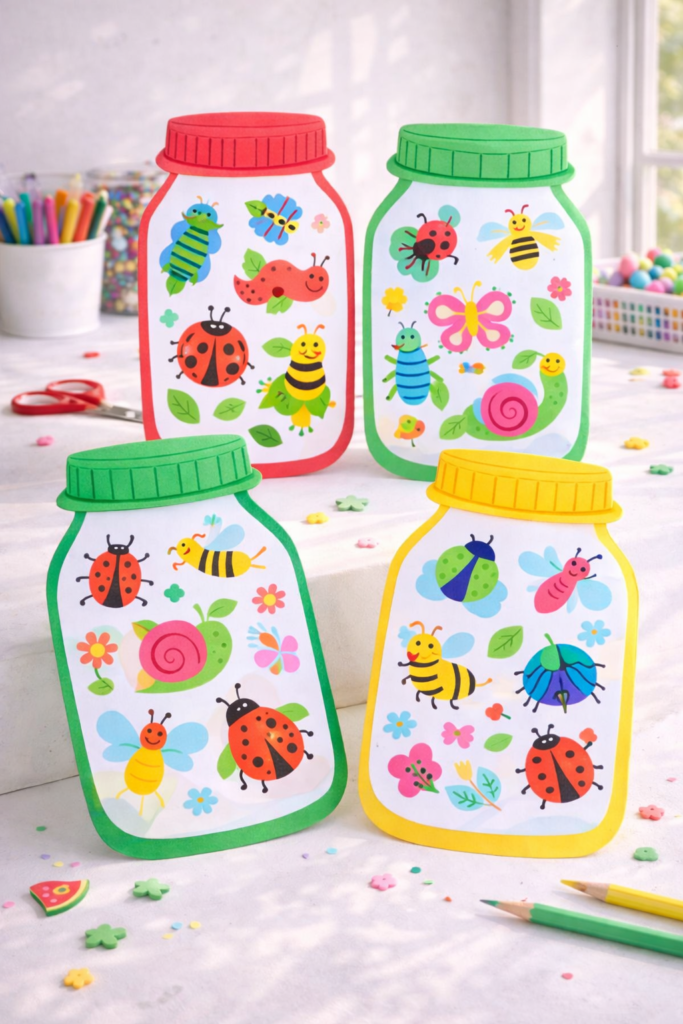
This craft taps into imagination, which is exactly what keeps kids engaged longer. Instead of just making something flat, they are creating their own little “world” inside a jar. It gives them freedom to design, choose colors, and come up with fun bug ideas without needing anything complicated.
To keep it bright and playful, use bold backgrounds and colorful bugs in neon greens, reds, blues, and yellows. You can let kids create real-looking bugs or completely made-up ones with wings, patterns, and fun shapes. When displayed together, it creates a vibrant, slightly whimsical classroom wall.
Step-by-Step Instructions
- Draw or print a large jar shape onto a sheet of paper.
- Cut out the jar shape or leave it as part of the background page.
- Have kids draw, color, or cut out bug shapes from colored paper.
- Glue the bugs inside the jar area to create a “filled jar” effect.
- Add details like grass, labels, or names for each bug.
- Optional: Cover the jar area with clear plastic for a shiny, realistic look.
Shop the Look
10. Rainbow Yarn Wall Hangings
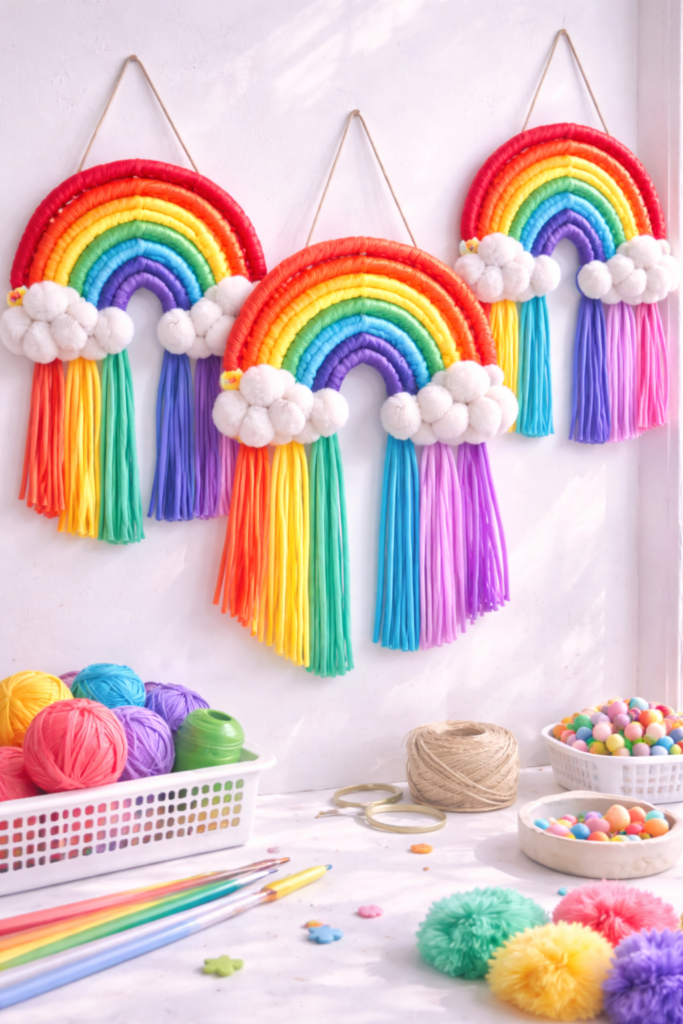
This craft brings in texture, which instantly makes it feel different from the usual paper projects. It is calming, repetitive, and great for keeping kids focused while still letting them be creative with color choices. It also doubles as decor, which means your classroom ends up looking styled and intentional.
Go bold with bright rainbow colors like red, orange, yellow, green, blue, and purple, or let kids create their own color combinations. The layered yarn creates a soft, dimensional look that stands out on bulletin boards or walls. It feels simple to make but looks much more elevated when finished.
Step-by-Step Instructions
- Cut a piece of cardboard into a simple shape like an arch or rectangle.
- Choose bright yarn colors and start wrapping them around the cardboard.
- Layer different colors to create a striped or rainbow effect.
- Continue wrapping until the cardboard is mostly covered.
- Tie off the yarn securely at the back.
- Attach a string or loop at the top for hanging.
Shop the Look
11. DIY Kite Paper Craft
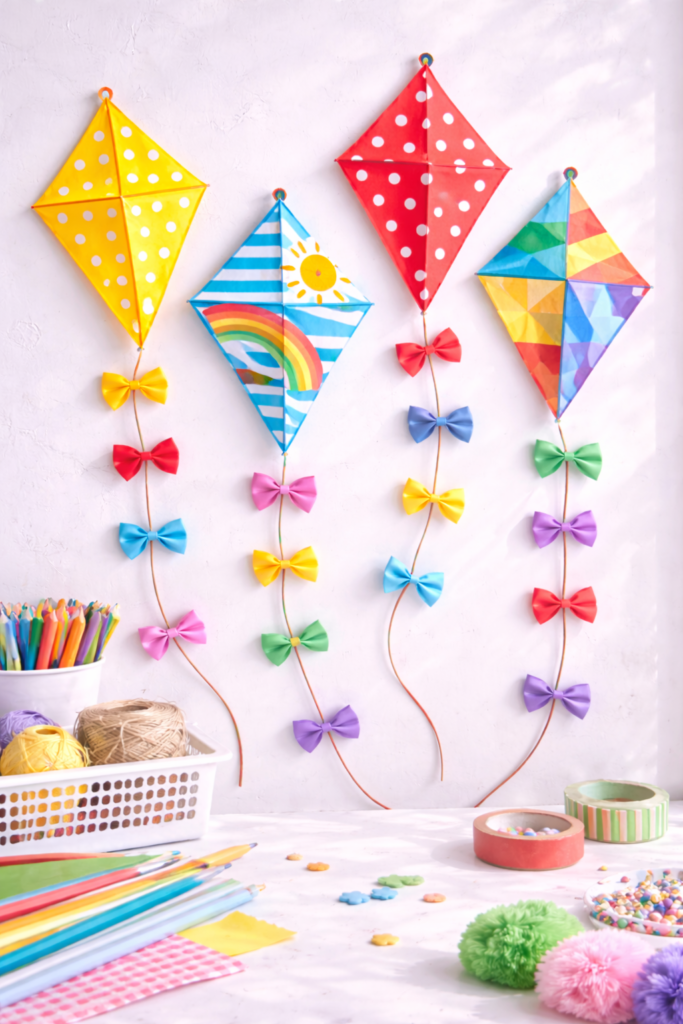
This is a classic summer craft that still works every time because it is simple, colorful, and easy to personalize. Kids love the idea of making something that represents flying and outdoor fun, even when they are inside. It also gives them space to get creative with patterns, shapes, and bold color combinations.
Encourage bright, high-contrast designs using stripes, polka dots, or color blocking in bold shades like blue, red, yellow, and green. The long string tail with added bows makes the craft feel more dynamic and visually interesting once it is complete. When displayed together, it creates a full summer theme across the classroom.
Step-by-Step Instructions
- Cut a diamond shape from colored paper to form the kite.
- Let kids decorate the kite using markers, stickers, or paint.
- Cut a long piece of string and attach it to the bottom corner of the kite.
- Add small bows or strips of paper along the string to create a tail.
- Optional: Attach a small loop at the top if you want to hang the kite.
- Display on walls or hang from the ceiling for a floating effect.
Shop the Look
12. Handprint Flamingo Art
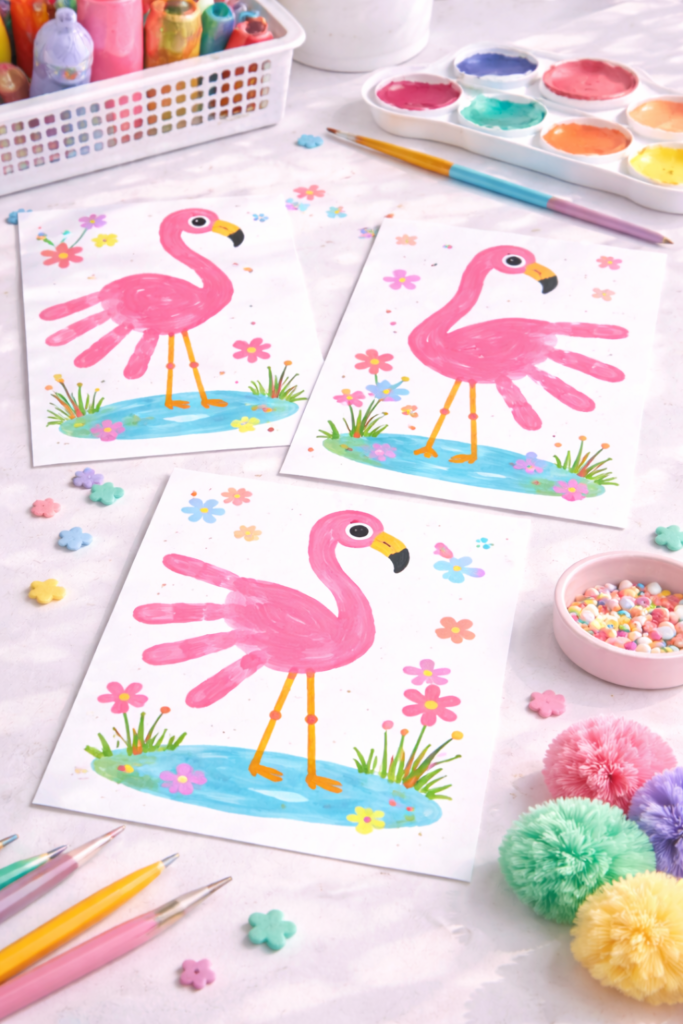
This craft is always a favorite because it feels personal and a little special. Kids love using their own handprints to create something recognizable, and it adds a keepsake element that makes the project more meaningful. It is simple to set up but still feels creative and fun.
The bright pink flamingo theme keeps it bold and very on-brand for summer. You can let kids go all in with vibrant pinks, coral tones, and even add fun backgrounds like blue water or tropical patterns. When displayed together, it creates a colorful and cohesive summer wall.
Step-by-Step Instructions
- Have kids paint their hand with bright pink washable paint.
- Press their hand onto paper at a slight angle to form the flamingo body.
- Let the handprint dry completely before adding details.
- Draw or paint the flamingo’s neck, head, and beak extending from the handprint.
- Add legs using markers or paint in thin lines.
- Optional: Decorate the background with water, grass, or tropical elements.
Shop the Look
13. DIY Beaded Bracelets
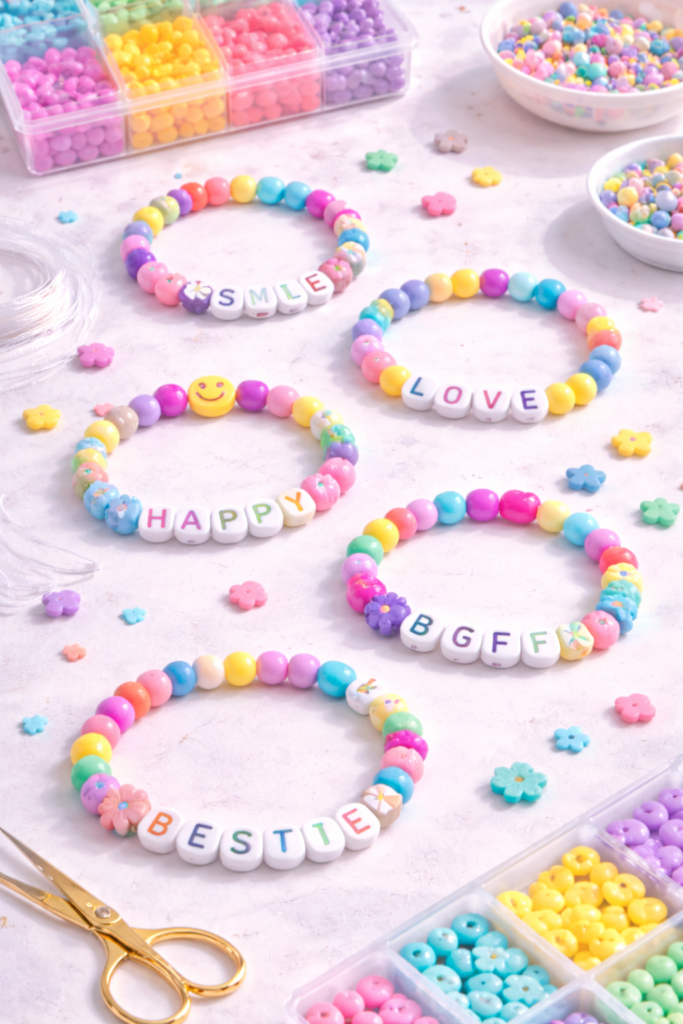
This craft is perfect when you need something that keeps kids focused and busy for a longer stretch of time. It is simple to set up, but the process of choosing colors, threading beads, and creating patterns naturally slows things down in a good way. It also helps build fine motor skills without feeling like work.
To keep it bright and fun, go for bold bead colors like neon pink, turquoise, yellow, and purple. Kids can create patterns, spell out names, or just mix colors freely. The best part is they get to wear their finished piece, which makes the activity feel more exciting and personal.
Step-by-Step Instructions
- Cut a piece of elastic string to fit comfortably around the child’s wrist.
- Tie a knot at one end or tape it down to prevent beads from slipping off.
- Let kids choose beads in bright colors and begin threading them onto the string.
- Encourage patterns or name designs if letter beads are available.
- Once finished, tie the ends of the string together securely.
- Trim any excess string and let kids wear or share their bracelets.
Shop the Look
14. Painted Canvas Tote Bags
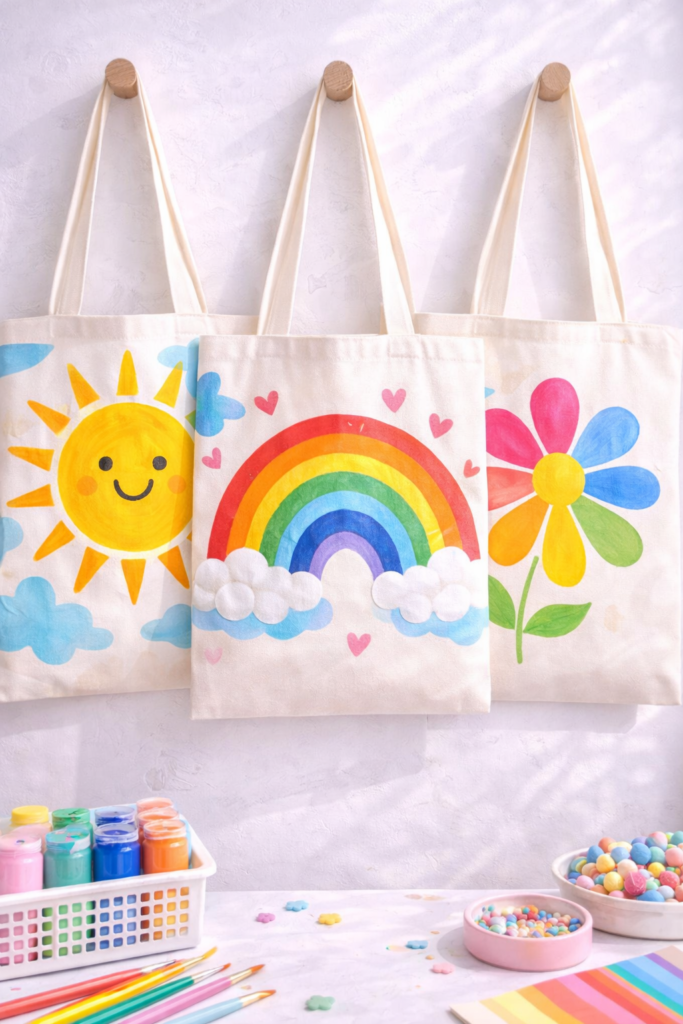
This craft feels a little more elevated because kids are creating something they can actually use outside of the classroom. That instantly makes it more exciting and gives the activity a purpose beyond just passing time. It is also great for slightly older kids who want something that feels less “basic.”
Encourage bold, graphic designs using bright colors like neon pink, blue, yellow, and green. Think simple shapes, names, patterns, or fun summer icons like suns and waves. The finished tote bags look fun, personalized, and something kids will actually want to carry around.
Step-by-Step Instructions
- Place a piece of cardboard inside each tote bag to prevent paint from bleeding through.
- Lay the tote bag flat on a protected surface.
- Let kids sketch or go straight into painting their designs using bold colors.
- Use brushes or sponges to create shapes, patterns, or lettering.
- Allow the paint to dry completely before moving the bag.
- Optional: Heat set the design if using fabric paint for longer-lasting results.
Shop the Look
15. Summer Collage Boards
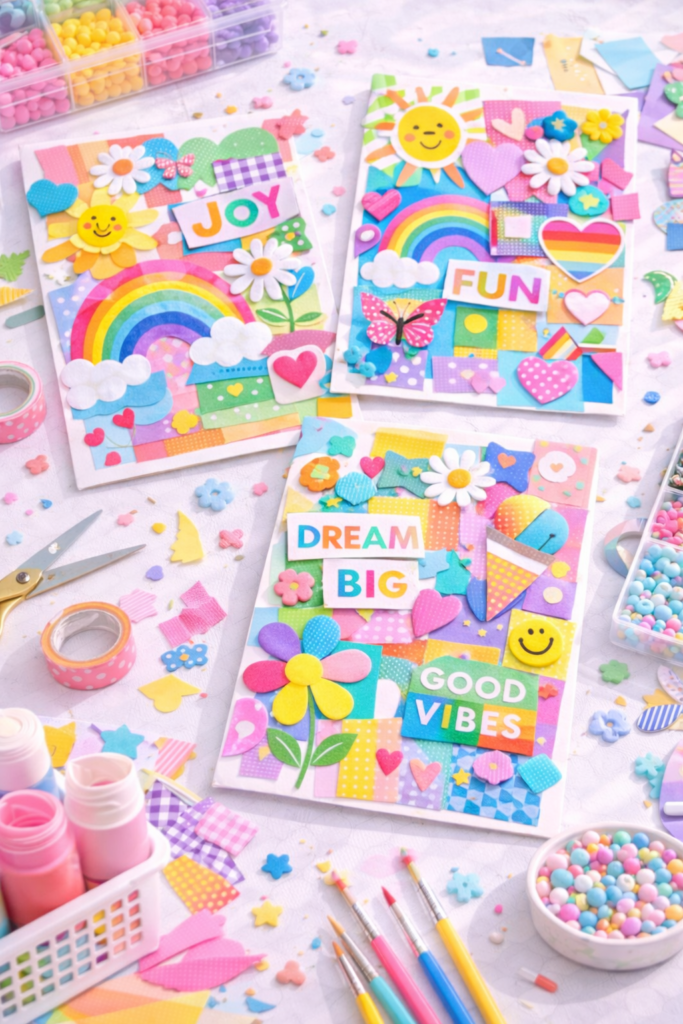
This is one of the easiest crafts to set up, but it gives kids the most creative freedom. There are no strict rules, which means every student can approach it differently and stay engaged longer. It is perfect for those moments when you want something flexible that still keeps the classroom focused.
To keep the energy high, provide bold, colorful materials like magazines, bright paper, stickers, and textured pieces. Kids can create summer scenes, abstract designs, or themed boards with suns, beaches, and fun patterns. The variety makes this one of the most visually interesting displays when everything is finished.
Step-by-Step Instructions
- Give each child a base sheet of paper or cardstock.
- Provide a mix of materials like magazines, colored paper, and stickers.
- Have kids cut out shapes, images, or patterns they like.
- Arrange the pieces on the paper before gluing to plan the layout.
- Glue everything down once they are happy with the design.
- Add final details with markers or paint if desired.
Shop the Look
Summer in the classroom does not have to feel chaotic or unstructured. The right crafts give kids something fun to focus on while still keeping your space organized and calm. When you lean into bright colors, simple setups, and hands-on activities, everything just flows better.
These classroom craft ideas are designed to keep kids engaged, creative, and actually excited to participate. Save this list so you always have go-to ideas ready when you need them.
If you want more group-friendly ideas that are just as fun and easy to set up, check out 12 Ladies Craft Night Themes That Make Hosting Easy. It is packed with creative ideas you can easily adapt for classroom use.

