

Affiliate Disclosure: This post contains affiliate links. If you make a purchase through these links, I may earn a small commission at no extra cost to you.
If you’ve ever walked past an outdated dresser at a thrift store and thought, “That could be cute if it weren’t so ugly,” you’re not alone. Learning how to paint old furniture without sanding is one of the easiest ways to give forgotten pieces a second life without spending a fortune on new décor. Thanks to modern furniture paint and chalk paint, you can skip much of the tedious prep work and still get beautiful results. Whether you’re tackling your first thrift flip or refreshing a hand-me-down, this beginner guide will show you exactly how to paint old wood furniture and create a modern vintage look you’ll actually want to display.
Master Supplies List
Before you start, gather your supplies. Having everything ready makes the project smoother and helps you avoid common beginner frustrations.
- Chalk Paint
- Furniture Paint
- Paint Brushes for Furniture
- High-Density Foam Rollers
- Degreasing Cleaner
- Microfiber Cleaning Cloths
- Painter’s Tape
- Stain-Blocking Primer
- Furniture Wax
- Water-Based Furniture Topcoat
- Canvas Drop Cloth
- Paint Stir Sticks
- Disposable Nitrile Gloves
- Detail Paint Brush Set
- Furniture Hardware Screwdriver Set
- Cabinet Knobs and Drawer Pulls
Choose the Right Piece of Furniture

The easiest furniture makeovers start with the right piece. When learning how to paint old furniture without sanding, look for furniture that’s sturdy, functional, and free from major damage. Don’t worry about outdated colors or finishes because paint can completely change the look.
Thrift stores, flea markets, garage sales, and Facebook Marketplace are great places to find budget-friendly furniture with potential. Focus on solid construction and classic shapes that can be updated with a fresh coat of chalk paint or furniture paint.
Great beginner projects include:
- Nightstands
- Side tables
- Small dressers
- Bookshelves
- Entryway tables
Step-by-Step Instructions
- Check for Stability – Make sure the furniture doesn’t wobble and feels solid when moved.
- Test Drawers and Doors – Open and close everything to ensure it works properly.
- Inspect for Damage – Minor scratches and dents are fine, but avoid pieces with severe water damage, broken sections, or large cracks.
- Identify the Surface – Solid wood is ideal, but many laminate and veneer pieces can also be painted successfully.
Picture the Finished Look – Look beyond the current finish and imagine how the piece could look in a modern vintage color like soft white, sage green, dusty blue, or charcoal black.
Best Furniture Types for Beginners
| Furniture Type | Difficulty |
|---|---|
| Nightstand | Easy |
| Side Table | Easy |
| Small Dresser | Easy |
| Bookshelf | Easy |
| Dining Table | Medium |
| Large Armoire | Advanced |
A simple thrifted piece with good bones is often the easiest way to build confidence and achieve a successful furniture makeover on your first try.
Why Chalk Paint Is the Easiest Option

If you’re wondering how to paint old furniture without sanding, chalk paint is usually the easiest place to start. It adheres well to many surfaces, offers excellent coverage, and creates a soft matte finish that works beautifully with modern vintage décor.
Chalk paint furniture projects have become popular because they require less prep work than traditional painting methods. While some pieces may still benefit from primer, many thrifted tables, dressers, and cabinets can be painted after a thorough cleaning.
Popular chalk paint colors include:
- Soft white
- Sage green
- Dusty blue
- Warm greige
- Matte black
These shades instantly make old furniture feel updated while preserving its character.
Step-by-Step Instructions
- Choose Your Paint Color – Select a color that complements your home’s style and existing décor.
- Stir the Paint Thoroughly – Chalk paint can settle during storage, so mix it well before use.
- Test a Small Area – Apply paint to an inconspicuous spot to check coverage and adhesion.
- Gather Your Application Tools – A quality brush works well for detailed furniture, while foam rollers can help create a smoother finish on larger surfaces.
- Plan Your Finish – Decide whether you want a clean modern look or a lightly distressed vintage appearance before you begin painting.
Chalk Paint vs. Traditional Furniture Paint
| Feature | Chalk Paint | Traditional Furniture Paint |
|---|---|---|
| Prep Work | Minimal | Moderate |
| Sanding Required | Often No | Often Yes |
| Coverage | Excellent | Good |
| Finish | Matte | Varies |
| Beginner Friendly | Yes | Moderate |
For most first-time furniture painters, chalk paint offers the fastest path to a successful makeover with fewer tools, less prep work, and beautiful results.
Clean the Furniture Thoroughly
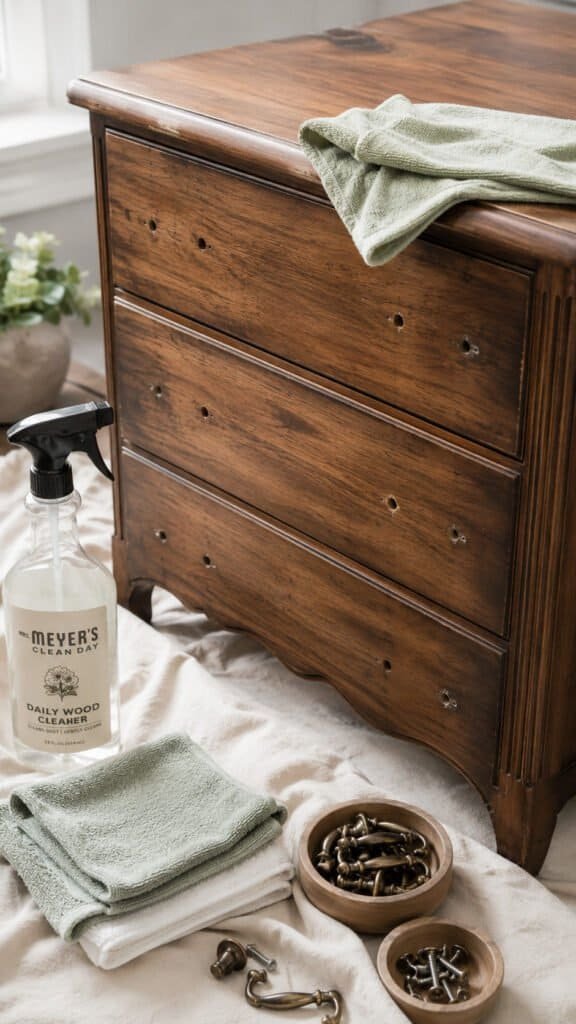
Want to know the secret behind most successful furniture makeovers? It’s not the paint. It’s the cleaning. Years of dust, furniture polish, grease, and grime can prevent paint from sticking properly, even when using chalk paint.
This is especially important when painting thrifted furniture. What looks clean on the surface often has invisible residue that can ruin your finish. Taking a few extra minutes to clean properly helps your paint adhere better and last longer.
Step-by-Step Instructions
- Remove Hardware – Take off knobs, pulls, hinges, and any removable pieces before cleaning.
- Dust the Entire Piece – Use a microfiber cloth or vacuum attachment to remove loose dirt from corners, drawers, and trim.
- Wash With a Degreasing Cleaner – Wipe down every surface, paying special attention to drawer fronts, tabletops, and handles where oils tend to accumulate.
- Rinse Away Residue – Use a damp cloth to remove any remaining cleaner from the furniture.
- Let It Dry Completely – Allow the piece to dry thoroughly before moving on to primer or paint.
Areas Most Often Missed
- Drawer edges
- Cabinet doors
- Decorative trim
- Table legs
- Around hardware holes
A clean surface gives your paint the best chance to bond properly, resulting in a smoother finish and a more durable furniture makeover.
Decide If You Need a Primer
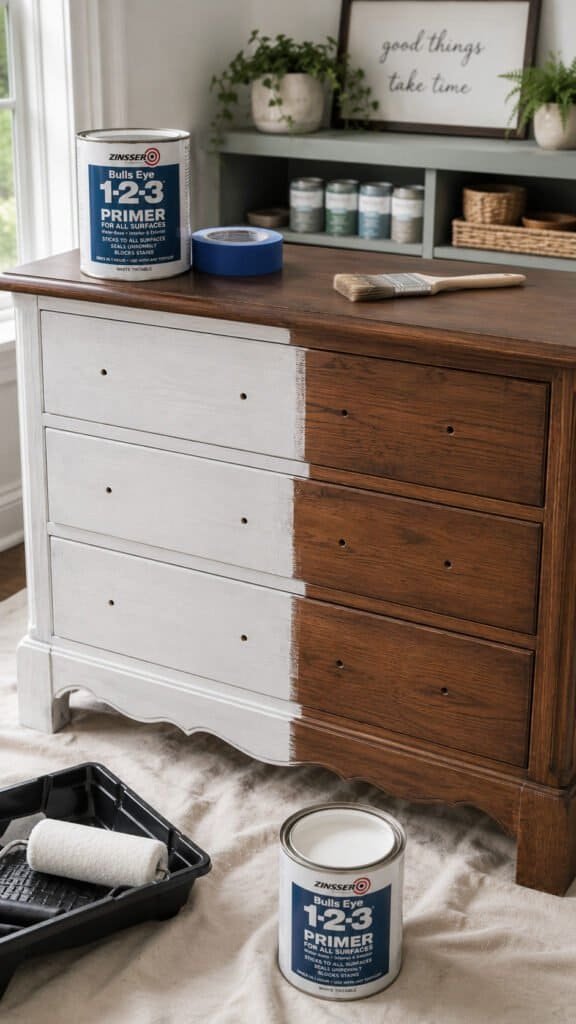
One of the biggest benefits of learning how to paint old furniture without sanding is avoiding unnecessary work. In many cases, chalk paint can be applied directly to the furniture after cleaning. However, some pieces benefit from a primer first.
Dark wood finishes, glossy surfaces, and furniture with stains can sometimes bleed through paint over time. A primer creates a barrier that helps your finish stay clean and even.
You may want to use primer if you’re painting:
- Dark mahogany or cherry furniture
- High-gloss finishes
- Water-stained furniture
- Knotty wood
- Laminate surfaces
Step-by-Step Instructions
- Inspect the Surface – Look for glossy finishes, dark stains, or areas that may cause discoloration.
- Choose the Right Primer – A stain-blocking primer works best for most furniture makeover projects.
- Apply a Thin Coat – Use a brush or foam roller to apply an even layer across the furniture.
- Allow It to Dry – Follow the manufacturer’s recommended drying time before painting.
- Check for Bleed-Through – If stains or wood tannins are still visible, apply a second coat before moving on to paint.
Common Situations That Need Primer
| Furniture Type | Primer Recommended? |
|---|---|
| Light-colored wood | Usually No |
| Dark stained wood | Yes |
| Glossy furniture | Yes |
| Laminate furniture | Often Yes |
| Previously painted furniture | Sometimes |
| Raw unfinished wood | Optional |
While primer isn’t required for every project, using it when needed can help you achieve a smoother finish with fewer coats of paint.
Apply the First Coat of Paint
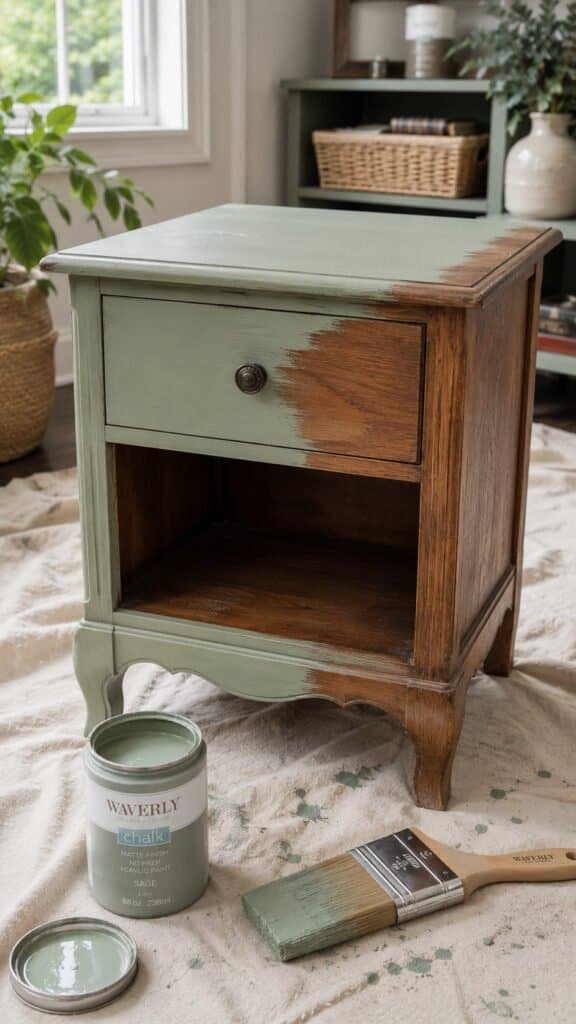
This is where your furniture transformation finally starts to come to life. Don’t worry if the first coat looks streaky or uneven. Most furniture paint and chalk paint projects need multiple coats to achieve full coverage. The biggest mistake beginners make is applying too much paint at once. Thin coats dry faster, create a smoother finish, and reduce brush marks.
Step-by-Step Instructions
- Load Your Brush Lightly – Dip only the tip of the brush into the paint and remove excess product.
- Paint in Small Sections – Work one area at a time rather than trying to cover the entire piece at once.
- Follow the Wood Grain – Use long, even strokes whenever possible for a cleaner finish.
- Watch for Drips – Check corners, edges, and decorative details where paint tends to collect.
- Let the First Coat Dry – Resist the urge to touch up wet paint. Allow the entire piece to dry before evaluating coverage.
What Your First Coat Should Look Like
- Some wood may still show through
- Brush strokes may be visible
- Color may appear uneven
- Coverage may look patchy
That’s completely normal. The goal of the first coat is to create a foundation for the additional layers that follow. Most painted furniture doesn’t start looking polished until the second coat goes on.
Build Coverage with Additional Coats
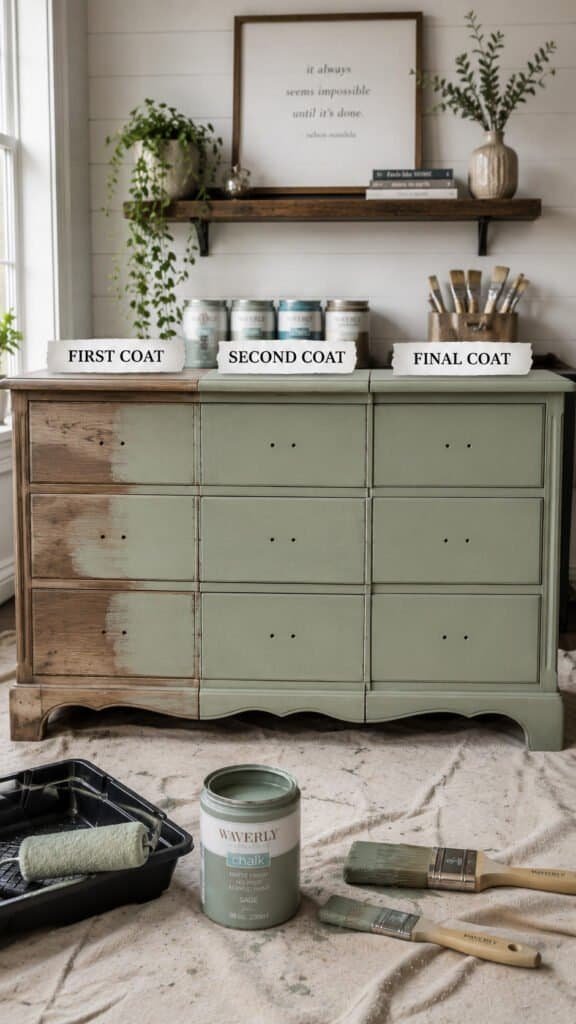
Once the first coat is dry, you’ll start seeing the makeover come together. This is where the color becomes richer, coverage improves, and the furniture begins to look professionally painted. Most chalk paint furniture projects require two coats, while lighter colors painted over dark wood may need three. Taking your time between coats will give you a smoother, more durable finish.
Step-by-Step Instructions
- Check the First Coat – Look for thin spots, streaks, or areas where the original finish is still visible.
- Apply the Second Coat – Use the same thin, even application method you used for the first coat.
- Allow Proper Drying Time – Let each coat dry fully before adding another layer.
- Inspect in Natural Light – Move the piece near a window or use bright lighting to spot missed areas.
- Add a Third Coat if Needed – Light paint colors, bold color changes, and heavily stained furniture sometimes need an extra coat for full coverage.
Signs You’re Ready to Move On
- Color looks consistent across the entire piece
- Original finish is no longer visible
- Brush strokes are minimal
- No patchy areas remain
- Paint feels dry to the touch
At this stage, your old furniture should already look dramatically different. The next steps are what turn a simple paint job into a polished modern vintage piece that looks intentional rather than DIY.
Create a Modern Vintage Finish
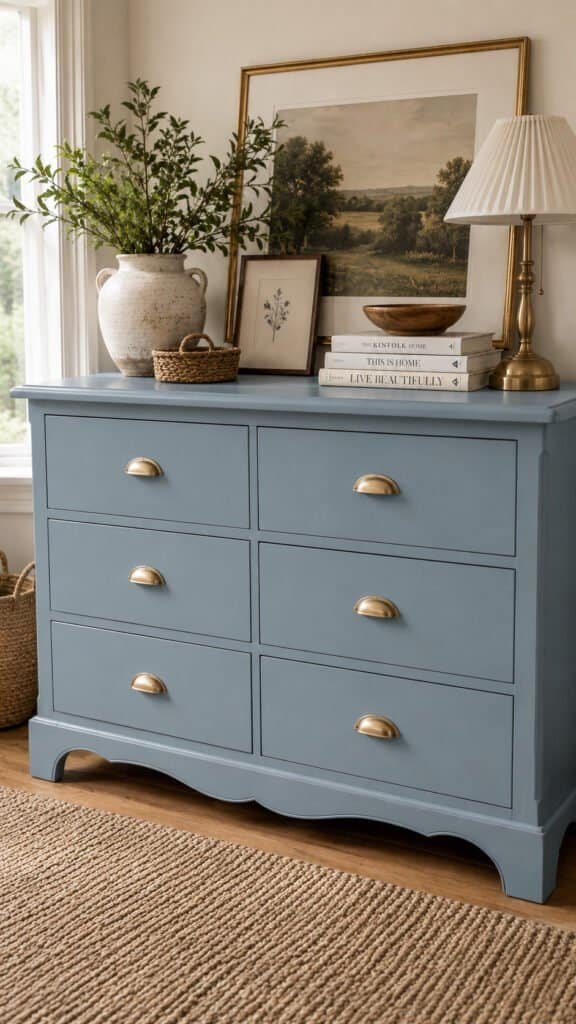
The paint color is important, but the finishing details are what make a piece feel custom. Modern vintage style combines the charm of older furniture with fresh, updated colors and hardware. The goal is to make the piece feel collected and timeless rather than outdated.
Soft whites, sage greens, dusty blues, warm greiges, and matte blacks are all popular choices for furniture makeovers. Pairing these colors with updated hardware can instantly elevate a thrifted find.
Step-by-Step Instructions
- Choose Your Style Direction – Decide whether you want a farmhouse, cottage, French country, or modern vintage look.
- Consider Light Distressing – If desired, gently distress corners and edges to reveal a hint of the original finish underneath.
- Upgrade the Hardware – Swap outdated knobs and pulls for more modern options in brass, matte black, or antique bronze.
- Touch Up Small Imperfections – Use a detail brush to correct any missed spots before sealing.
- Step Back and Evaluate – View the piece from different angles to make sure the finish looks balanced and intentional.
Popular Modern Vintage Color Combinations
| Paint Color | Hardware Finish |
|---|---|
| Soft White | Aged Brass |
| Sage Green | Matte Black |
| Dusty Blue | Antique Bronze |
| Warm Greige | Brushed Gold |
| Matte Black | Brass |
These simple finishing touches can make a thrift store dresser or side table look like a boutique furniture find instead of a weekend DIY project.
Seal and Protect Your Paint Job

After spending time painting your furniture, the last thing you want is chipped paint, scratches, or stains. A protective finish helps keep your makeover looking fresh, especially on pieces that get daily use like dressers, nightstands, coffee tables, and cabinets.
The right topcoat depends on how the furniture will be used. High-traffic surfaces usually benefit from a durable water-based topcoat, while decorative pieces often look beautiful with furniture wax.
Step-by-Step Instructions
- Make Sure the Paint Is Fully Dry – Wait until the paint has dried completely before applying any protective finish.
- Choose Your Protective Finish – Select furniture wax for a soft vintage look or a water-based topcoat for added durability.
- Apply Thin, Even Coats – Use a clean brush or applicator and work in smooth strokes across the entire surface.
- Allow Proper Drying Time – Follow the manufacturer’s instructions for drying and curing.
- Avoid Heavy Use – Give the furniture time to fully cure before placing décor, books, or other items on the surface.
Wax vs. Topcoat
| Finish | Best For |
|---|---|
| Furniture Wax | Decorative pieces, vintage finishes |
| Matte Topcoat | Dressers, cabinets, bookshelves |
| Satin Topcoat | Tables, desks, frequently used furniture |
| Polycrylic Topcoat | High-traffic surfaces |
A protective finish is the final step that separates a temporary makeover from one that lasts for years.
Fix Common Furniture Painting Problems

Even experienced DIYers run into painting problems from time to time. The good news is that most furniture painting mistakes are easy to fix. Before you start over, identify the issue and make a simple adjustment.
Many problems happen because paint was applied too heavily, drying times were rushed, or the surface wasn’t cleaned thoroughly. Fortunately, these issues can usually be corrected with a little patience.
Step-by-Step Instructions
- Let Everything Dry Completely – Never try to fix wet paint. Allow the surface to dry before making corrections.
- Identify the Problem – Determine whether you’re dealing with brush marks, drips, uneven coverage, or bleed-through.
- Smooth the Area – Lightly sand only the affected spot if necessary.
- Reapply Paint – Use a thin coat to blend the repaired area with the rest of the piece.
- Reapply Protective Finish – If you’ve repaired a sealed area, add another coat of wax or topcoat once the paint dries.
Common Problems and Solutions
| Problem | Solution |
|---|---|
| Brush Marks | Apply thinner coats and use longer strokes |
| Paint Drips | Allow to dry, then smooth and repaint |
| Uneven Coverage | Add another thin coat |
| Streaky Finish | Use a foam roller for smoother application |
| Bleed-Through | Apply stain-blocking primer and repaint |
| Chipped Paint | Touch up and reseal the area |
Don’t get discouraged if your first furniture makeover isn’t perfect. Most painted furniture looks better after a few simple touch-ups, and every project helps build your confidence and skills.
Style Your Finished Thrift Flip

A fresh coat of paint can completely transform old furniture, but styling is what makes the piece feel intentional. The right accessories help highlight your hard work and make a budget-friendly makeover look like a high-end furniture find.
Modern vintage style works best when you balance old and new. Pair your painted furniture with clean lines, natural textures, and a few carefully chosen decorative pieces rather than overcrowding the surface.
Step-by-Step Instructions
- Add Updated Hardware – New knobs and pulls are one of the easiest ways to elevate painted furniture.
- Layer Decorative Accessories – Style the piece with a mix of practical and decorative items.
- Incorporate Natural Elements – Add greenery, branches, or fresh flowers to soften the look.
- Create Height Variation – Use items of different heights to create a balanced arrangement.
- Edit Before You Finish – Remove anything that makes the piece feel cluttered or overcrowded.
Easy Styling Ideas
| Furniture Piece | Styling Suggestions |
|---|---|
| Dresser | Lamp, framed art, vase, stacked books |
| Nightstand | Lamp, candle, small plant |
| Bookshelf | Books, baskets, greenery, décor objects |
| Entry Table | Mirror, lamp, tray, seasonal accents |
| Cabinet | Artwork, basket, decorative bowl |
The best furniture makeovers don’t just stop at paint. A few thoughtful styling touches can make a thrifted piece look like it came straight from a boutique home décor store.
Give Old Furniture a Beautiful Second Life

Learning how to paint old furniture without sanding is one of the easiest ways to refresh your home on a budget. With the right paint, a little preparation, and some patience, you can transform outdated thrift store finds into beautiful pieces that fit your style. Whether you’re updating a nightstand, dresser, bookshelf, or cabinet, these simple techniques can help you achieve a professional-looking finish without complicated tools or expensive supplies.
If you enjoyed this project, check out How to Paint Old Furniture for a Fresh Look (Thrift Flip Edition) for even more creative makeover ideas and budget-friendly furniture transformations.
Pingback: The Best Way To Paint Old Furniture For A Fresh Fall Look