

Affiliate Disclosure – This post may contain affiliate links. As an Amazon Associate, I earn from qualifying purchases at no extra cost to you.
If your shower has started spraying sideways, losing pressure, or leaving you standing under a weak stream of water, mineral buildup is probably the culprit. Hard water deposits can slowly clog your shower head, making even a great bathroom feel frustrating. The good news is that learning how to clean a shower head is incredibly simple and requires just a few household supplies. In this guide, I’ll show you exactly how to clean a shower head with vinegar, remove stubborn calcium buildup, and get your shower flowing like new again.
Master Supplies List
- Distilled White Vinegar
- Large Plastic Storage Bags
- Rubber Bands
- Microfiber Cleaning Cloths
- Old Toothbrush
- Needle Cleaning Tool Set
- Adjustable Wrench
- Soft Scrub Brush
- Spray Bottle
Why Shower Heads Get Clogged in the First Place

If you’ve been wondering why your shower pressure suddenly seems weaker, the answer is usually hiding inside the shower head itself. Every time water passes through the fixture, tiny amounts of minerals are left behind. Over weeks and months, those deposits build up inside the spray holes and internal channels, restricting water flow.
Homes with hard water often experience this problem more quickly because the water contains higher levels of calcium and magnesium. These minerals attach to the inside of the shower head and gradually form a hard, chalky coating. That’s why many people searching for how to clean calcium buildup on shower head notice white crust forming around the nozzles.
Common signs your shower head needs cleaning include:
- Uneven spray patterns
- Water shooting in random directions
- Reduced water pressure
- Visible white mineral deposits
- Clogged or blocked spray holes
Step-by-Step Instructions: Check Your Shower Head for Buildup
- Turn on the shower and observe the spray pattern.
- Look for streams spraying sideways or missing entirely.
- Examine the face of the shower head for white, green, or chalky deposits.
- Check whether individual spray holes appear blocked.
- Determine whether the buildup appears light, moderate, or severe before choosing a cleaning method.
The good news is that most mineral buildup can be removed with one inexpensive ingredient you probably already have in your kitchen: vinegar.
How Vinegar Breaks Down Calcium Buildup

When it comes to cleaning a shower head, vinegar is the secret weapon most homeowners swear by. Distilled white vinegar contains acetic acid, which helps dissolve calcium, lime, and mineral deposits without the harsh fumes or chemicals found in many commercial cleaners.
What makes vinegar so effective is its ability to slowly break down the hard crust that forms around spray holes and inside the shower head. As the buildup softens, it becomes much easier to rinse away or scrub off. This is why how to clean shower head vinegar is one of the most searched cleaning methods online.
The best part? Vinegar is inexpensive, easy to find, and safe for most standard chrome, stainless steel, and plastic shower heads.
Why Vinegar Works So Well
- Dissolves calcium and mineral deposits naturally
- Restores water flow without harsh chemicals
- Helps unclog blocked spray holes
- Affordable and readily available
- Requires very little effort
Step-by-Step Instructions: Prepare Your Vinegar Cleaning Solution
- Pour enough distilled white vinegar into a bowl or container to fully cover the shower head if you’re soaking it.
- If you’re cleaning the shower head while it’s attached, fill a large plastic bag about halfway with vinegar.
- Inspect the shower head and identify areas with the heaviest buildup.
- Make sure the vinegar comes into direct contact with all affected areas.
- Allow enough soaking time for the vinegar to begin dissolving mineral deposits before scrubbing or rinsing.
You may already notice some buildup loosening after a short soak, but the real transformation happens when the vinegar is left in contact with the deposits long enough to fully soften them.
How to Clean a Shower Head Without Removing It
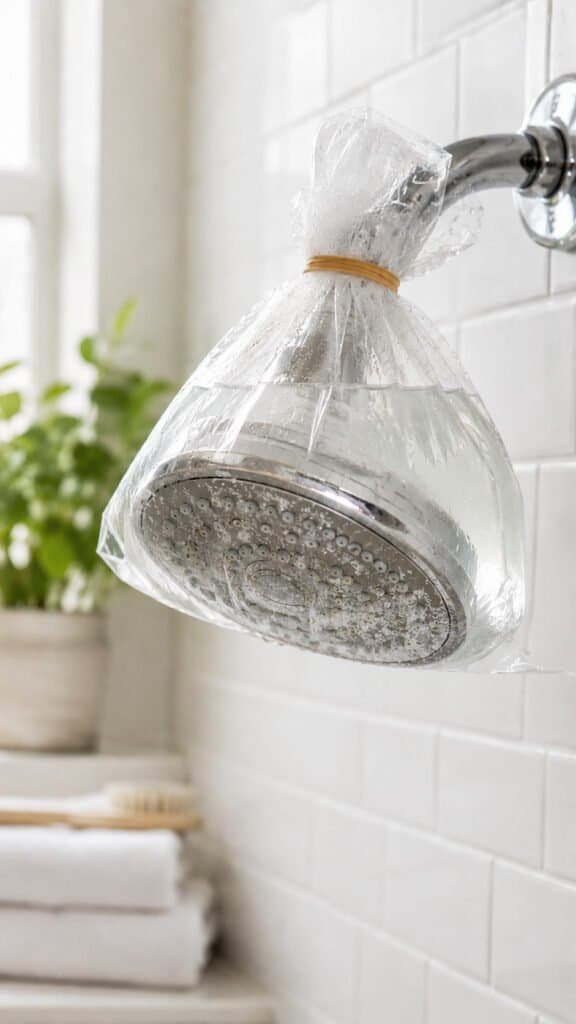
If you’re looking for the fastest way to clean a shower head, this method is for you. The vinegar bag technique allows you to deep-clean the fixture while it remains attached to the shower arm. It’s simple, budget-friendly, and works especially well if the buildup is mild to moderate.
This is often the best starting point for anyone searching for how to clean your shower head because it requires almost no tools. In many cases, a single soak is enough to restore better water pressure and clear partially clogged spray holes.
When This Method Works Best
- Light calcium buildup
- Minor spray pattern issues
- Routine maintenance cleaning
- Newer shower heads
- Quick monthly upkeep
Step-by-Step Instructions: Vinegar Bag Method
- Fill a large plastic bag about halfway with distilled white vinegar.
- Carefully place the bag over the shower head so the entire fixture is submerged in vinegar.
- Secure the bag tightly using a rubber band, zip tie, or twist tie.
- Leave the shower head soaking for at least 30 minutes. For heavier buildup, allow it to soak for 1 to 2 hours.
- Remove the bag and discard the vinegar.
- Turn on the hot water and let it run for several minutes to flush loosened mineral deposits from the shower head.
- Wipe the fixture clean with a microfiber cloth to remove any remaining residue.
After the rinse, you may notice stronger water pressure and a more even spray pattern almost immediately. If some spray holes remain blocked, don’t worry. The next sections will cover deeper cleaning methods and how to clean shower head holes individually.
How to Remove a Shower Head for a Deep Clean

Sometimes a simple vinegar soak isn’t enough. If your shower head has years of mineral buildup hiding inside, removing it allows you to clean areas that water and vinegar can’t easily reach while it’s attached. This method is especially useful if you’re dealing with severe hard water deposits or extremely low water pressure.
Many people are surprised by how much buildup is hiding inside the fixture. Once removed, you’ll be able to soak the entire shower head and inspect internal components for stubborn clogs.
Signs Your Shower Head Needs a Deep Clean
- Water pressure remains low after the bag-soak method
- Several spray holes remain clogged
- Thick white mineral crust is visible
- The fixture hasn’t been cleaned in years
- Water flow is uneven even after rinsing
Step-by-Step Instructions: Remove the Shower Head Safely
- Place a cloth around the shower arm connection to protect the finish from scratches.
- Use an adjustable wrench to gently loosen the shower head by turning it counterclockwise.
- Unscrew the shower head by hand once it becomes loose.
- Inspect the threads and connection point for visible mineral deposits.
- Check the filter screen inside the shower head if your model has one. These screens often trap sediment and debris.
- Remove any loose buildup with your fingers or a soft brush.
- Prepare the shower head for a full vinegar soak.
Removing the shower head may sound intimidating, but it’s usually a simple five-minute job that can dramatically improve the results of your cleaning efforts.
How to Clean a Shower Head in a Vinegar Soak
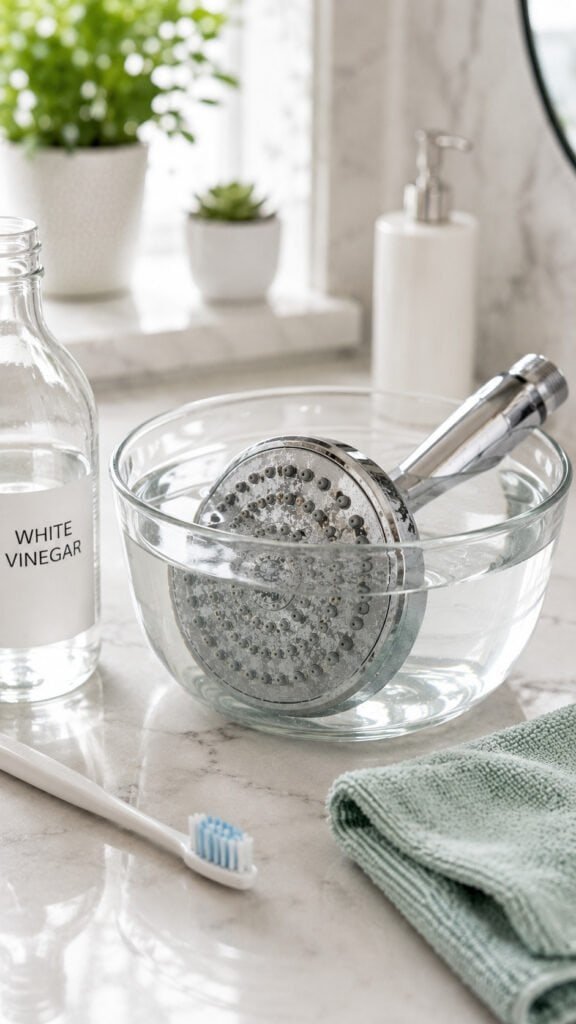
If you’ve removed the shower head, a full vinegar soak is the most effective way to dissolve mineral deposits hiding both inside and outside the fixture. This method gives the vinegar complete access to clogged channels, helping restore water flow and improve spray performance.
For anyone researching how to clean a shower head or how to clean shower head vinegar, this is often the method that delivers the biggest improvement. The longer soak allows the acid in the vinegar to break down stubborn calcium buildup that a quick rinse can’t touch.
What You Should Notice After Soaking
- Less visible mineral buildup
- Cleaner spray holes
- Improved water flow
- Reduced white crust around the nozzles
- A cleaner-looking finish overall
Step-by-Step Instructions: Deep Soak Method
- Fill a bowl or container with enough distilled white vinegar to completely cover the shower head.
- Place the shower head into the vinegar and ensure it is fully submerged.
- Allow it to soak for at least 1 hour.
- For heavy mineral buildup, let it soak for 4 to 8 hours or overnight.
- Remove the shower head from the vinegar.
- Use an old toothbrush to scrub the spray face, nozzles, and threaded areas.
- Gently scrub away any loosened calcium deposits.
- Rinse thoroughly under warm running water.
- Shake out any remaining debris trapped inside the fixture.
If some spray holes still appear blocked after soaking, don’t assume the cleaning failed. Mineral deposits can become trapped inside individual nozzles, which is why the next step focuses specifically on how to clean shower head holes.
How to Clean Shower Head Holes That Stay Clogged
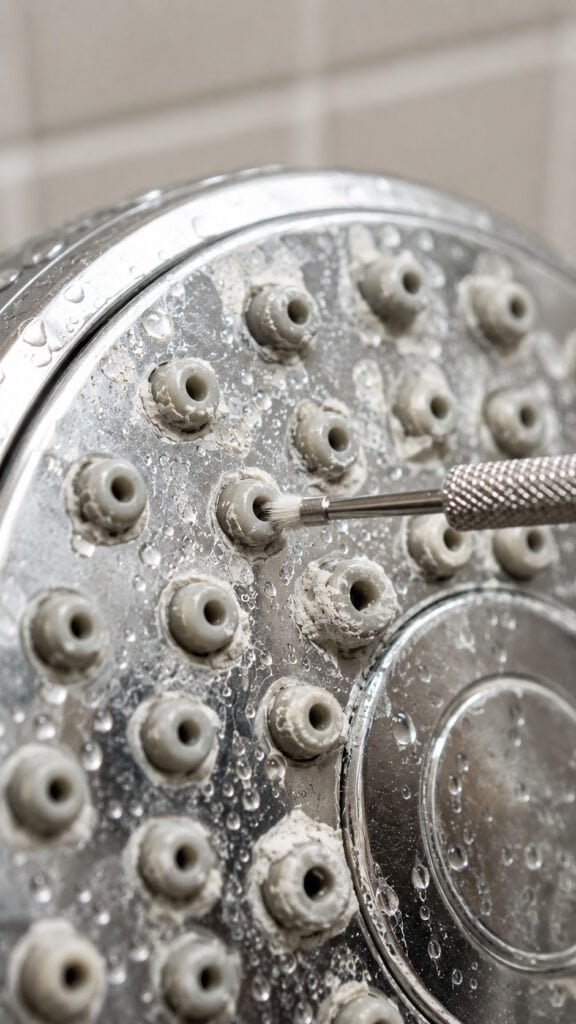
Even after a long vinegar soak, some spray holes can remain partially blocked. That’s because mineral deposits often become packed deep inside individual nozzles, especially in homes with hard water. If your shower still sprays unevenly, this step can make a huge difference.
This is one of the most important parts of cleaning a shower head because even a few clogged holes can affect water pressure and create those annoying streams that shoot sideways.
How to Tell the Holes Are Fully Clean
- Water sprays evenly from all nozzles
- No streams shoot sideways
- Water pressure feels stronger
- No visible white deposits remain around the openings
- Spray pattern looks consistent across the entire shower head
Step-by-Step Instructions: Clear Individual Spray Holes
- Hold the shower head under good lighting so you can clearly see each nozzle.
- Identify any holes that appear blocked or have visible mineral deposits.
- Carefully insert a cleaning needle, straight pin, or nozzle-cleaning tool into each clogged opening.
- Gently move the tool around to loosen trapped calcium buildup.
- Avoid forcing the tool too aggressively, especially on rubber nozzles.
- Scrub the face of the shower head with an old toothbrush to remove loosened debris.
- Rinse thoroughly under warm water.
- Turn on the shower and test the spray pattern.
Once the spray holes are fully clear, many shower heads perform almost like new again. If you still notice thick mineral crust or major pressure problems, the issue may be severe calcium buildup that requires additional treatment.
How to Clean Severe Calcium Buildup on a Shower Head

If your shower head is covered in thick white crust or still has poor water pressure after soaking, you’re likely dealing with heavy calcium deposits. This type of buildup develops over years and often requires a little extra patience. The good news is that most shower heads can still be saved without replacing them.
When people search for how to clean calcium buildup on shower head, this is usually the stage they’re dealing with. The deposits have hardened into a thick layer that doesn’t dissolve completely during a standard soak.
Signs of Severe Hard Water Buildup
- Thick white crust around nozzles
- Green or chalky deposits on metal finishes
- Significantly reduced water pressure
- Multiple blocked spray holes
- Visible buildup inside threaded connections
Step-by-Step Instructions: Remove Heavy Calcium Deposits
- Place the shower head back into fresh vinegar after the initial soak.
- Allow it to soak for an additional 4 to 8 hours if significant buildup remains.
- Remove the fixture and inspect areas where mineral deposits are still visible.
- Use a soft scrub brush to loosen thick crusted areas.
- Work around the spray face, threads, and edges where deposits commonly accumulate.
- Use a cleaning needle to clear any spray holes that remain blocked.
- Rinse thoroughly under warm water.
- Repeat the process if necessary until the buildup is removed.
When Repeating the Process Makes Sense
Not every shower head becomes spotless after one treatment. Older fixtures often require multiple cleaning cycles before all deposits dissolve. If you notice improvement after the first soak, that’s a good sign the vinegar is working. A second treatment often removes what the first one loosened.
At this point, most shower heads will be performing much better. If yours still isn’t functioning properly, there may be another issue besides mineral buildup. That’s where the next section comes in.
What to Do If Vinegar Doesn’t Fully Work

Vinegar solves most shower head problems, but occasionally the buildup is simply too severe or the fixture has other issues affecting performance. If you’ve soaked, scrubbed, and cleared the spray holes but still have weak water pressure, it’s time to investigate a little further.
The good news is that a stubborn shower head doesn’t automatically mean you need a plumber. A few additional troubleshooting steps can help you determine whether the problem is remaining mineral buildup, a clogged filter screen, or a worn-out fixture.
Step-by-Step Instructions: Troubleshoot a Shower Head That Still Isn’t Working Properly
- Reinstall the cleaned shower head and test the water pressure.
- Compare the pressure to how it felt before cleaning.
- Remove the shower head again and inspect the internal filter screen if one is present.
- Clean any debris trapped in the filter using a toothbrush and warm water.
- Check for damaged rubber washers or worn internal components.
- Repeat the vinegar soak if visible mineral deposits remain.
- Reassemble everything and test the spray pattern again.
When It May Be Time to Replace the Shower Head
- The fixture is heavily corroded
- Internal parts are cracked or damaged
- Water pressure remains poor after multiple cleanings
- The spray pattern never fully returns
- The shower head is many years old
Fortunately, most homeowners never reach this point. In many cases, vinegar soaking combined with cleaning the spray holes restores performance and eliminates the need for replacement.
How Often You Should Clean Your Shower Head

Once you’ve gone through the effort of deep-cleaning your shower head, the last thing you want is to deal with clogged spray holes all over again a few months later. A simple maintenance routine can prevent mineral buildup from becoming a major problem and help keep your water pressure strong.
The exact cleaning schedule depends on your water quality. Homes with hard water typically need more frequent cleaning, while homes with softer water can usually go longer between treatments.
Recommended Cleaning Schedule
| Water Type | Quick Cleaning | Deep Cleaning |
|---|---|---|
| Hard Water | Monthly | Every 3 Months |
| Moderate Water | Every 2 Months | Every 4–6 Months |
| Soft Water | Every 3 Months | Every 6–12 Months |
Step-by-Step Instructions: Prevent Future Buildup
- Inspect your shower head once a month for visible mineral deposits.
- Watch for changes in water pressure or uneven spray patterns.
- Wipe the shower head regularly with a damp microfiber cloth.
- Perform a quick vinegar bag soak as soon as you notice buildup starting.
- Schedule a deeper cleaning every few months, especially if you have hard water.
- Clear any clogged spray holes immediately before deposits have a chance to harden.
- Keep basic cleaning supplies on hand so maintenance is quick and easy.
Signs It’s Time for Another Cleaning
- Water pressure starts decreasing
- Spray pattern becomes uneven
- White deposits appear around the nozzles
- Water sprays sideways
- Some spray holes stop working
A little routine maintenance can save you from spending hours scrubbing stubborn deposits later. Most shower heads only need a quick vinegar treatment every few months to stay in great shape.
Enjoy a Cleaner Shower Head and Better Water Pressure
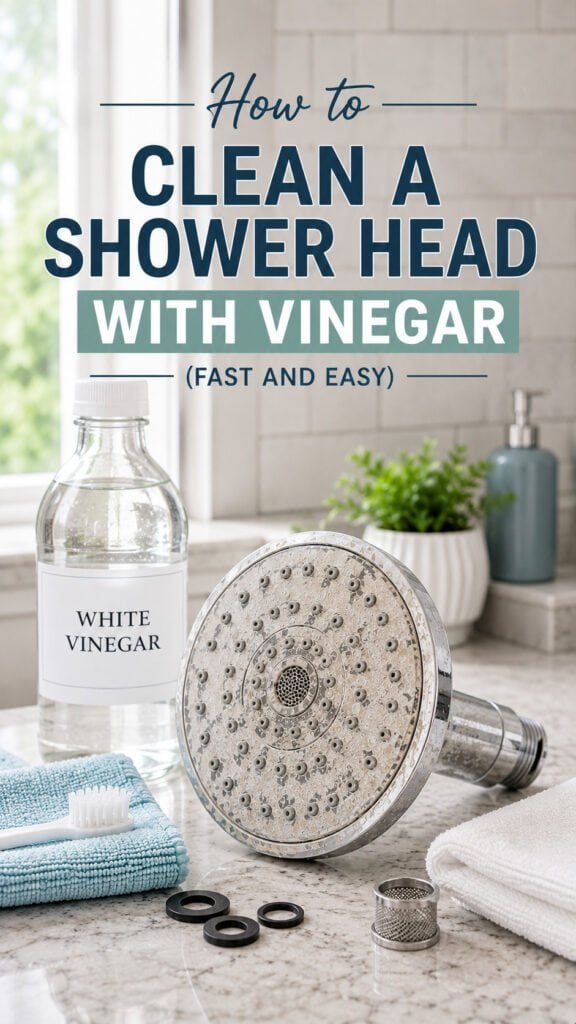
Learning how to clean a shower head with vinegar is one of the easiest ways to improve your shower without spending money on replacements or repairs. Whether you use the simple vinegar bag method or remove the fixture for a deep soak, regular cleaning can restore water pressure, clear clogged spray holes, and remove stubborn calcium deposits.
The best part is that it only takes a few inexpensive supplies and a little time. By making shower head maintenance part of your regular cleaning routine, you’ll enjoy stronger water flow and a better shower experience year-round.
Still battling hard water around the rest of your bathroom? Check out The Easiest Way to Remove Hard Water Stains for more simple cleaning solutions that help your fixtures, glass, and surfaces look sparkling clean again.

