This post contains affiliate links. If you purchase through my links, I may earn a small commission at no extra cost to you. Thank you for supporting Room Revival Studio!
You walk into someone’s home and it looks like a decorator came through. Custom signs, coordinating accents, everything with a font that ties it all together. Then you find out they made all of it with a Cricut. That is the moment you either nod because you already know, or you go buy a Cricut that same weekend.
These 16 Cricut home decor projects are the ones that actually change the look of a room. Not cute-but-forgettable crafts. Real, stylish, room-level upgrades that cost a fraction of what you would pay at a home goods store. If you have a Cricut and a few hours, your house is about to look very different.
1. Custom Wood Sign With Vinyl Lettering
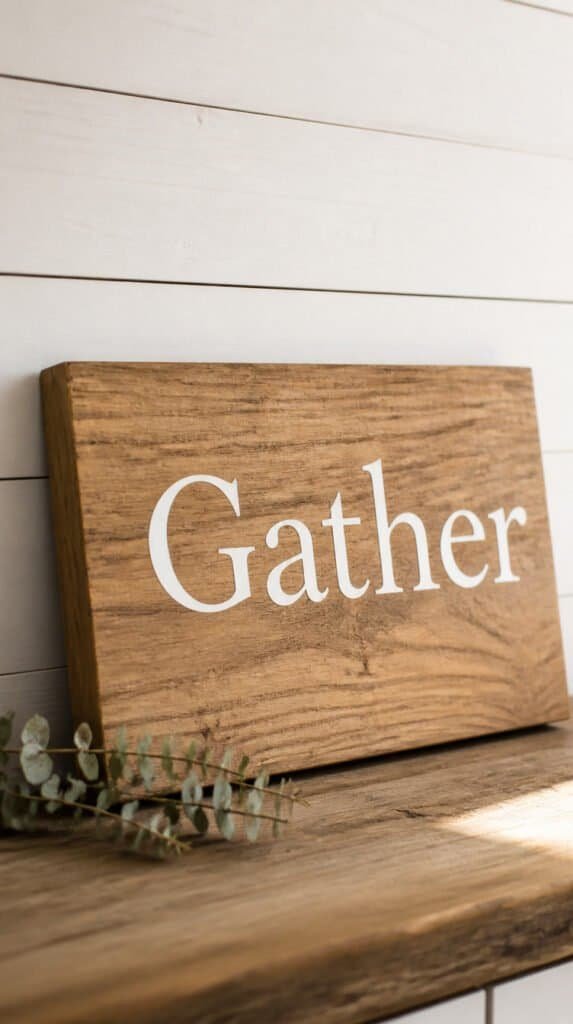
A custom wood sign is the project that makes non-crafters ask where you bought it. Pick a phrase, a family name, or a single word with weight. Cut it in vinyl, transfer it to a raw wood board, and you have something that looks like it came from a high-end home goods boutique for $12 in materials.
The trick here: sand the wood before applying vinyl. Any rough grain or raised fiber will catch the edge of the letters and peel them when you pull the transfer tape. A quick pass with 220-grit and a wipe with a tack cloth takes two minutes and saves the whole project. Hot tip: seal with a matte polycrylic after the vinyl is down. It locks everything in and gives a professional finish.
Fonts make or break this project. Lean into thin, serif fonts for an elegant look or hand-lettered scripts for a warm, organic feel. Stay away from fonts with tiny bridges, they are nearly impossible to weed cleanly. (Thicker letterforms are your friend here. They weed faster and look bolder on wood.) Hang with a ledge or command strips and step back. Done.
Shop the Look
- Oracal 631 Matte Removable Vinyl Roll
- Unfinished Wood Boards for Signs
- Clear Transfer Tape 12 Inch
- Matte Polycrylic Spray Sealer
2. Iron-On Throw Pillow Covers That Look Designer
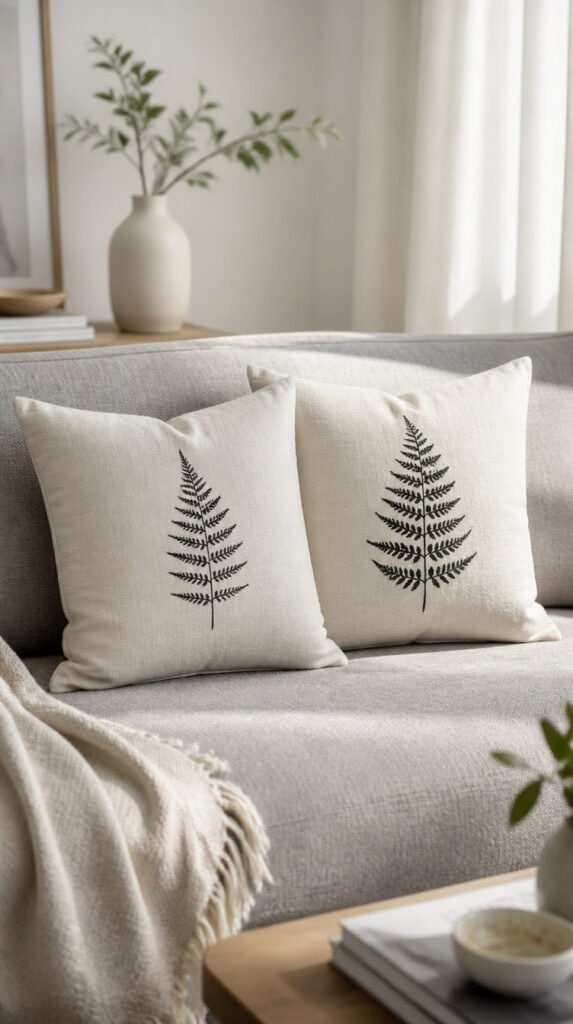
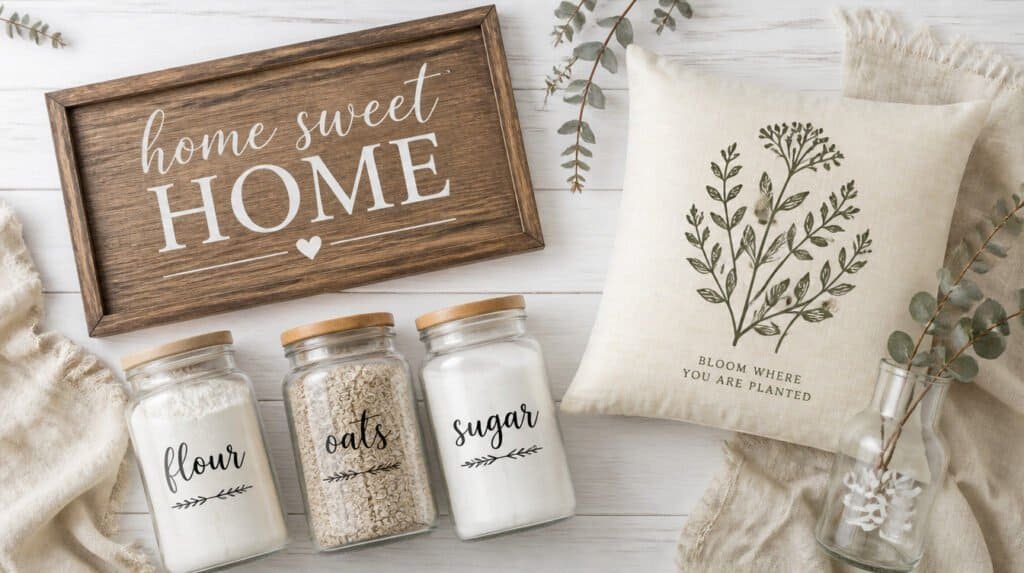
A plain linen or cotton pillow cover becomes a designer accent the moment you add an iron-on graphic. A minimalist botanical, a geometric shape, or a bold phrase in a clean font transforms a $7 IKEA pillow cover into something that costs $45 on Etsy. This project takes about thirty minutes and the results are genuinely stunning.
The trick here: use Cricut Everyday Iron-On or a similar heat transfer vinyl rated for fabric. Not all HTV behaves the same way on fabric, and pillow covers take a lot of wear. Press at the correct temperature for the fabric type and press for the full recommended time, under-pressing is the most common reason iron-on peels. Hot tip: press from the back of the design after initial application for better adhesion.
Keep the design simple and centered. A single motif on a plain pillow reads as intentional and editorial. More complex designs can look busy on a small surface. (One well-placed fern leaf. One word in a perfect font. That is all it takes.) Mix two or three coordinating pillows on the same sofa for a cohesive, styled look that looks assembled rather than random.
Shop the Look
- Cricut Everyday Iron-On Roll White
- Plain Linen Pillow Covers 18×18
- Cricut EasyPress Mini
- Teflon Pressing Sheet for Iron-On
3. Farmhouse Wall Art on Canvas or Wood

A vinyl quote on canvas or raw wood is one of the fastest ways to fill a blank wall with something that looks curated. Choose a phrase that actually means something to you and pair it with a font that complements your room’s style. Modern serif for a quiet luxury feel. Brush script for something warm and cottagecore. Block sans-serif for a clean, modern look.
The trick here: size matters more than you think. An undersized graphic on a large canvas looks timid. Fill the surface to within an inch or two of the edge and let the design breathe. Hot tip: paint the canvas or wood a flat color first rather than using the raw surface. It gives the vinyl something consistent to adhere to and lets you customize the background color to match your room.
Group two or three pieces of varying sizes for a gallery wall effect that looks intentional. A large center piece, a medium piece to the left, a narrow vertical piece to the right. (This is the formula interior designers use. It works every time.) Hang them with picture ledges rather than individual nails so you can rearrange without holes.
Shop the Look
- Blank Stretched Canvas Set Mixed Sizes
- Black Matte Permanent Vinyl Oracal 651
- Picture Ledge Shelf White
- Chalk Paint Matte Craft Paint Set
4. Vinyl-Labeled Glass Jars for the Kitchen or Pantry

Coordinated label sets on glass jars turn a messy pantry shelf into something that looks like a styled photo. Flour, sugar, oats, coffee, pasta, when everything has a matching label in the same font and color, the whole space reads as organized and thoughtful. This is one of those projects where the effort is small and the visual impact is enormous.
The trick here: use permanent vinyl for anything in a kitchen, Oracal 651 or equivalent. Removable vinyl is not rated for areas near moisture or that get wiped down frequently. Size your labels consistently across all containers so the finished shelf looks cohesive rather than haphazard. Hot tip: cut a small test label first and stick it to a glass jar. Let it sit for 24 hours before labeling everything to make sure the adhesion holds on your specific jar surface.
White vinyl on clear glass looks fresh and modern. Black vinyl on clear glass looks bold and editorial. Gold vinyl on white ceramic looks luxurious. (Pick one finish and commit to it across the whole set. Consistency is what makes this look professional rather than crafty.) Add a coordinating shelf liner and the whole wall of your pantry looks like a Pinterest photo.
Shop the Look
- Glass Airtight Canister Set Kitchen
- Oracal 651 White Permanent Vinyl
- Pantry Label Set Vinyl Template
- Shelf Liner Roll White Non-Slip
5. Monogram Decal for a Front Door Wreath

A front door monogram elevates an everyday wreath into something that looks custom-ordered. Cut a large letter initial in glitter vinyl or matte white and attach it to the center of a simple eucalyptus or magnolia wreath. The whole setup takes thirty minutes and the effect is genuinely polished. Neighbors will assume you paid someone to do this.
The trick here: use outdoor-rated vinyl for anything going on a front door. Doors get sun, rain, and temperature swings, indoor removable vinyl will not survive a season. Oracal 651 or 751 are both outdoor-rated and hold up through weather. Hot tip: size your monogram to fill at least a third of the wreath’s width. Too small and it disappears into the greenery rather than anchoring it.
Attach the letter to a small piece of clear acrylic or foam board first, then secure that to the wreath. Direct-to-wreath application makes removal and repositioning difficult. (The clear acrylic method lets you move the monogram between wreaths as you swap seasonal versions.) Change the wreath each season while keeping the same monogram piece.
Shop the Look
- Faux Eucalyptus Wreath Front Door
- Oracal 651 Glitter Gold Vinyl
- Clear Acrylic Sheet Small for Crafts
- Adjustable Wreath Door Hanger
6. Glass Vase Decals That Look Like Etched Glass

Frosted or matte white vinyl on a clear glass vase mimics etched glass for a fraction of the cost. A geometric shape, a botanical outline, or a simple word applied to the outside of a vase gives it a high-end, artisan look. It photographs beautifully and works in every room. Put one on your entry table, one on your bathroom shelf, one on your nightstand.
The trick here: clean the glass thoroughly with rubbing alcohol before applying any vinyl. Even fingerprints will prevent proper adhesion and cause the decal to lift at the edges. Use a squeegee or the back of a credit card to smooth out any air bubbles immediately after application. Hot tip: frosted window vinyl gives a more convincing etched-glass effect than white matte vinyl on transparent glass.
Simple outline designs work better than solid fills on glass. A filled shape reads as a sticker. An outline reads as etching. (This is the whole illusion. The outline lets the glass show through and makes it look like the design was cut into the surface.) Choose designs with clean, continuous lines for the most convincing result.
Shop the Look
- Clear Glass Vase Set Cylinder
- Frosted Window Vinyl Roll for Cricut
- Rubbing Alcohol Spray Bottle
- Vinyl Squeegee Application Tool Set
7. Custom Doormat With Iron-On Heat Transfer Vinyl
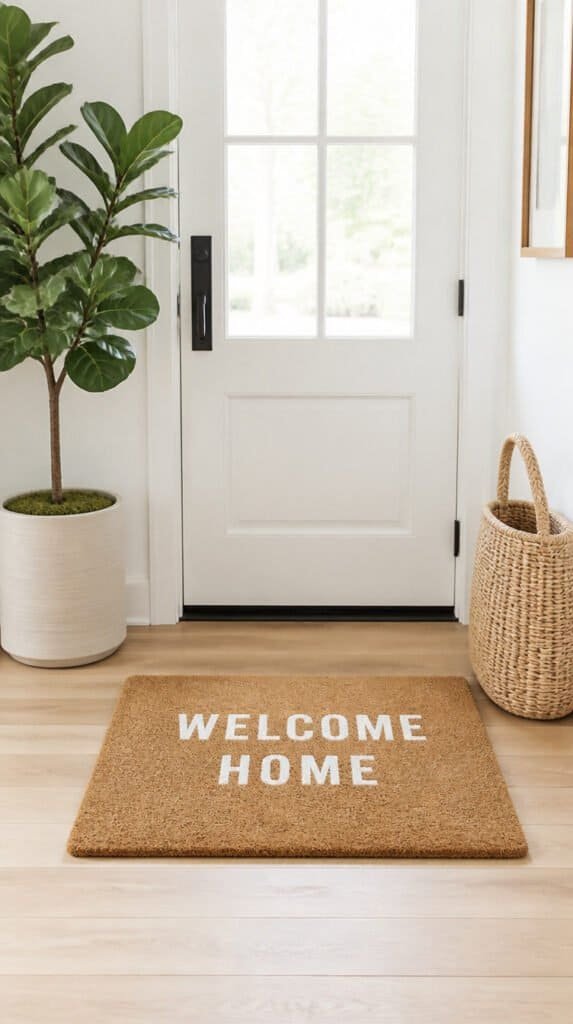
A plain coir doormat becomes a statement welcome the moment you add an iron-on phrase. “Come Back With Coffee.” “Oh Hello.” A simple monogram. A botanical outline. Custom doormats sell for $40 to $80 online. You can make one for under $15 in materials in about an hour. And yours will say exactly what you want it to say.
The trick here: use a stiff HTV rated for textured surfaces. Standard smooth HTV does not adhere well to the rough coir fibers of a natural mat. Cricut Strong Bond or a brand that specifically lists textured surfaces on the packaging. Press with firm, sustained pressure for longer than you would on fabric, coir is thick and needs extra heat transfer time. Hot tip: let the mat cool completely before peeling the carrier sheet.
Keep the design wide rather than tall on a horizontal mat, a tall vertical design gets cropped by the mat’s width and looks odd. Think landscape orientation for the text, or a design that reads left to right across the mat. (The wide, low profile reads better than a stacked design at the size you walk past it every day.) Simple and bold over intricate and tiny.
Shop the Look
- Plain Coir Doormat Natural
- Cricut Strong Bond Iron-On Vinyl
- Cricut EasyPress 2 10×10
- Weeding Tool Set for Vinyl Crafts
8. Mirror Decal With Vinyl Lettering

A vinyl phrase or word on a mirror adds dimension and personality to any wall. “You Look Good.” A botanical border. A repeating pattern around the frame. A single affirmation in a beautiful script at the bottom. The mirror stays functional while the vinyl transforms it from furniture to art. This costs almost nothing to do and looks extraordinary.
The trick here: measure your mirror first and size your design within the glass boundaries. Vinyl on the frame looks different from vinyl on the glass and is harder to apply cleanly because frames have seams. Going glass-only gives the cleanest result. Hot tip: use a level and a piece of painter’s tape to mark the center and bottom guide line before applying. Crooked text on a mirror is hard to un-see.
White vinyl reads softer and more organic on a mirror. Gold or rose gold metallic looks luxurious. Black reads bold and editorial. (Match the vinyl color to the rest of the mirror and room’s metal tones for a cohesive result.) A simple phrase at the bottom center of the glass, in a single elegant line, is the version that photographs best and sells the illusion of intentional design.
Shop the Look
- Arch Wall Mirror Boho Decor
- Gold Metallic Vinyl Oracal 651
- Low-Tack Painter Tape Blue
- Small Level Tool for Decor Hanging
9. Gallery Wall With Cricut-Made Quote Prints

A gallery wall made entirely with Cricut cut vinyl on matted prints is one of the most powerful room transformations you can make in an afternoon. Choose three to five quotes or phrases that fit the room’s energy. Cut each one in vinyl. Apply to cardstock, matboard, or canvas. Frame them in coordinating frames from the same collection. The wall looks like it cost $300. It cost $40.
The trick here: stick to two or three coordinating fonts maximum across the whole gallery. More than that and it looks like a ransom note rather than a curated collection. Hot tip: cut a paper template of each frame size, tape them to the wall, and live with the arrangement for a day before committing to holes. Moving frames after the first nails always leaves ghost marks.
Odd numbers of pieces look better than even numbers on a gallery wall, three, five, or seven pieces rather than two or four. The asymmetry feels natural and designed rather than symmetrical and stiff. (Interior designers learned this from painters. It holds up.) Mix vertical and horizontal orientations within the same collection for visual interest.
Shop the Look
- Picture Frame Set Matching 5 Piece
- White Cardstock Heavy Weight Pack
- Black Permanent Vinyl Roll for Cricut
- Gallery Wall Hanging Template Kit
10. Terracotta Pot Decals for a Styled Plant Shelf

Vinyl decals on terracotta pots turn a plant shelf from a collection of pots into a cohesive, styled display. Cut small botanicals, geometric shapes, or single letters in white or black vinyl. Apply one to the front of each pot and suddenly the whole shelf looks curated. This project takes about twenty minutes per pot once you have the vinyl cut.
The trick here: seal the terracotta first with a quick spray of matte sealer or Mod Podge. Raw terracotta is porous and the vinyl may not stick consistently. The sealer fills the surface pores and gives the adhesive something to grip. Hot tip: use permanent vinyl but do not go over it with a watering can. Water running over vinyl loosens the edges over time. Water from the bottom or use a drip tray.
Keep the decal design in scale with the pot. A tiny 1-inch decal on a 6-inch pot disappears. A 3-inch design on the same pot reads clearly. (Scale it up until it feels a little too big, then back off slightly. That is usually exactly right.) Paint the rim of the pot in matte black or gold before applying the decal for an extra editorial touch.
Shop the Look
- Terracotta Pots Set Multiple Sizes
- Oracal 651 White Permanent Adhesive Vinyl
- Matte Sealer Spray Mod Podge
- Gold Acrylic Paint Small Craft Bottle
11. Iron-On Linen Kitchen Towels That Look Like Boutique Finds
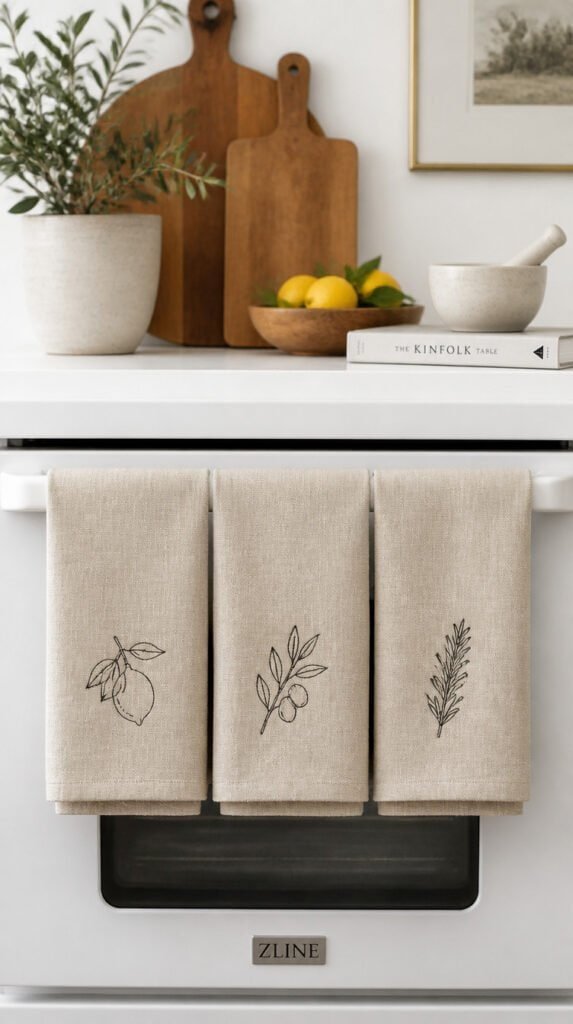
A plain white or natural linen kitchen towel with an iron-on botanical, a food illustration, or a simple phrase sells in home goods stores for $18 to $28 each. You can make a set of four for under $20 in materials. Hang them from an oven handle, fold them on a shelf, or frame one and hang it in the kitchen. They look like something you ordered from a small Etsy shop.
The trick here: wash and dry the towel before applying any iron-on. Fabric that has not been pre-washed shrinks on the first launder and takes the HTV with it, cracking the design. Pre-wash, pre-dry, then press. Hot tip: keep the design in the lower third of the towel. Designs at the top of a hanging towel fold back on themselves, lower placement keeps the graphic visible when hanging.
Simple line-drawn botanical illustrations work especially well on kitchen towels, a lemon, a sprig of rosemary, a small tomato, an olive branch. These fit the kitchen context and look editorial rather than crafty. (Keep the illustrations small enough to feel intentional. A 3 to 4 inch design centered on the lower half of the towel is the sweet spot.) Give them as housewarming gifts or keep the whole set for yourself.
Shop the Look
- Plain Linen Kitchen Towels Blank
- Cricut Everyday Iron-On Black
- Botanical SVG Files for Cricut Design
- Heat Resistant Pressing Mat
12. Floating Shelf Word Art in Vinyl
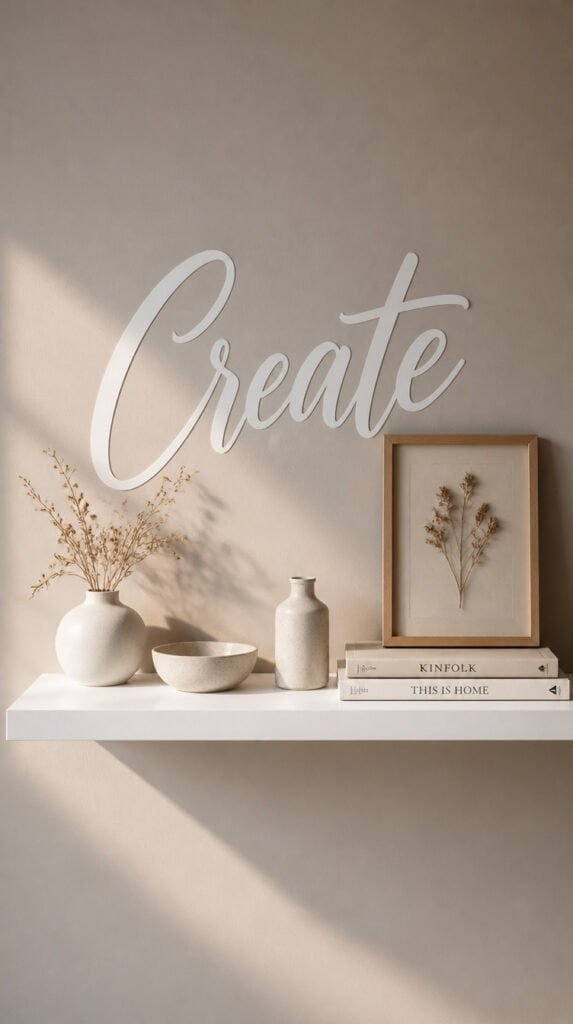
A styled floating shelf gets a layer of polish when you add a vinyl word directly to the wall behind it. “Gather.” “Create.” “Home.” Cut the word large 18 inches or wider and apply it centered above or behind the shelf so it frames the whole vignette. The shelf items and the word become a single composed display rather than a collection of objects sitting on a board.
The trick here: use a laser level to get the lettering perfectly horizontal. Even a slight angle is visible against the shelf’s straight edge and undermines the whole look. Hot tip: apply the letters in sections using the wet application method for larger words. Spray the wall with a light mist of water and dish soap, position the transfer tape, smooth it out, then let it dry before removing the transfer paper. This gives you time to adjust.
Choose a color that reads against your wall without being too heavy. White on white works beautifully in person, the texture of the vinyl creates a subtle, tone-on-tone effect that looks intentional and sophisticated. (It reads in person better than it photographs, which means guests notice it in a way that feels discoverable rather than obvious.) Dark colors on a light wall are bolder and photograph better.
Shop the Look
- Floating Wall Shelf White Wood
- White Matte Permanent Vinyl Roll
- Laser Level Small for Wall Hanging
- Clear Transfer Tape Roll for Cricut
13. Vinyl Decal on a Glass Lantern
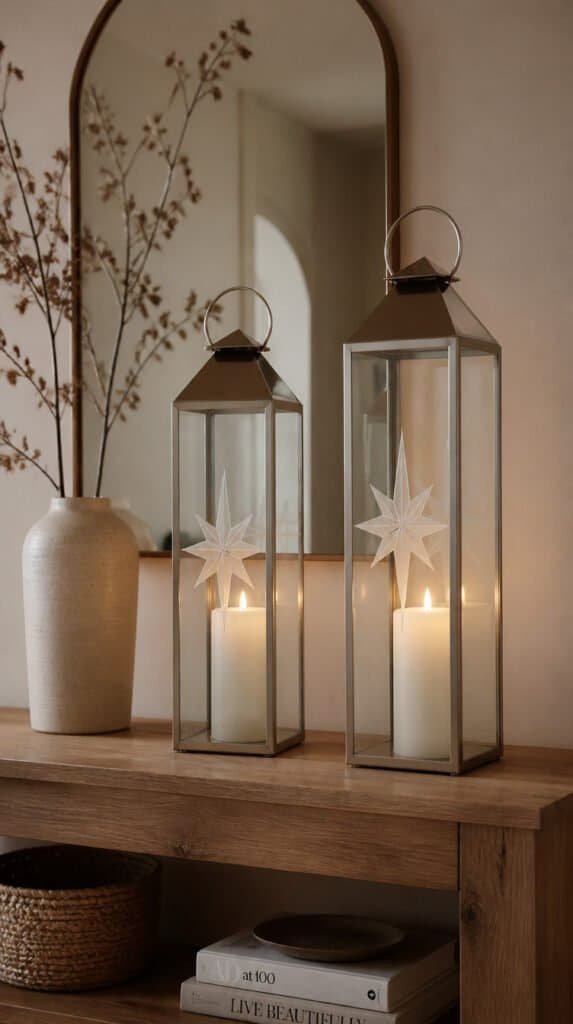
A glass lantern with a vinyl decal becomes an accent piece that looks custom-made. A geometric star, a botanical sprig, a monogram, or a seasonal phrase applied to the outside of the glass transforms a basic lantern into a focal point. Styled on a coffee table, an entryway shelf, or a mantel, this is one of the most versatile accents you can make.
The trick here: clean the glass with rubbing alcohol before applying. Any residue from packaging or handling will prevent adhesion. Apply the decal to the flat side panel of the lantern rather than trying to wrap it around a curved surface. Flat surfaces are forgiving; curves require more patience and a different application approach. Hot tip: use a lighter, minimalist design on a lantern so the candle or light inside still shows through attractively.
Try a frosted vinyl decal on a lantern to replicate the look of sandblasted glass. The diffused light through the frosted panel creates a warm, atmospheric glow that is completely different from clear glass. (This is the version that gets the most comments from guests.) Pair two matching lanterns at different heights on either side of a console table for a balanced, styled look.
Shop the Look
- Glass Lantern Set Indoor Decor
- Frosted Adhesive Vinyl for Cricut
- Pillar Candle Set Unscented
- Rubbing Alcohol Prep Wipes
14. Laundry Room Signs That Make a Utility Space Feel Styled

A laundry room is one of the easiest rooms to style with Cricut because the content writes itself. “Laundry Co.” “Wash. Dry. Repeat.” “Established” with your family name. Applied to tile, a painted wall, wood boards, or framed prints, these signs transform a functional space into something you actually want to walk into. It takes an hour and costs almost nothing.
The trick here: for laundry rooms that run humid, use permanent outdoor-rated vinyl. Moisture from the dryer and washing machine causes inferior vinyl to peel at the edges within months. Oracal 651 and 751 hold up reliably in humid environments. Hot tip: apply signs to tile using a specialized tile-safe adhesive vinyl, not all permanent vinyl sticks reliably to glazed tile without an extra bonding agent.
Group a set of three or four smaller signs rather than one large one. A cluster of signs at different widths, mounted in a vertical column, fills a narrow wall between appliances beautifully. (Narrow laundry rooms often have more vertical wall than horizontal, so plan your arrangement accordingly.) Add a small plant, a coordinating shelf, and your laundry room officially has a design presence.
Shop the Look
- Thin Wood Shims for Craft Signs
- Oracal 651 Black 12 Inch Roll
- White Matte Craft Paint Small
- Command Strips Picture Hanging Small
15. Faux Stained Glass Window Panel

Colored window cling film cut with a Cricut creates a stained glass effect on any window without the permanence or cost of real stained glass. Geometric shapes, a botanical motif, or a simple mandala pattern applied to a window pane catches the light and casts soft color into the room. It looks like a custom art installation and costs about $15 in materials.
The trick here: use static cling window film rather than adhesive vinyl. Static cling applies without any adhesive, which means zero residue when you remove it and easy repositioning during application. It also lets light pass through while still holding color. Hot tip: design your pattern with generous spacing between the colored pieces. Dense designs block light and lose the stained glass glow effect.
Place this on a window that receives direct or indirect sun for the most dramatic result. A bedroom window that gets afternoon light creates a color show on the opposite wall each day. (This is the detail people stop and ask about. Plan for it.) Choose a color palette that complements the room so the projected color adds to rather than fights with your existing decor.
Shop the Look
- Colored Window Cling Film Stained Glass
- Cricut Explore Air 2 Machine
- Deep Cut Blade for Cricut
- Squeegee Tool Window Film Application
16. Coordinating Vinyl Accents for a Bookshelf Styling Moment
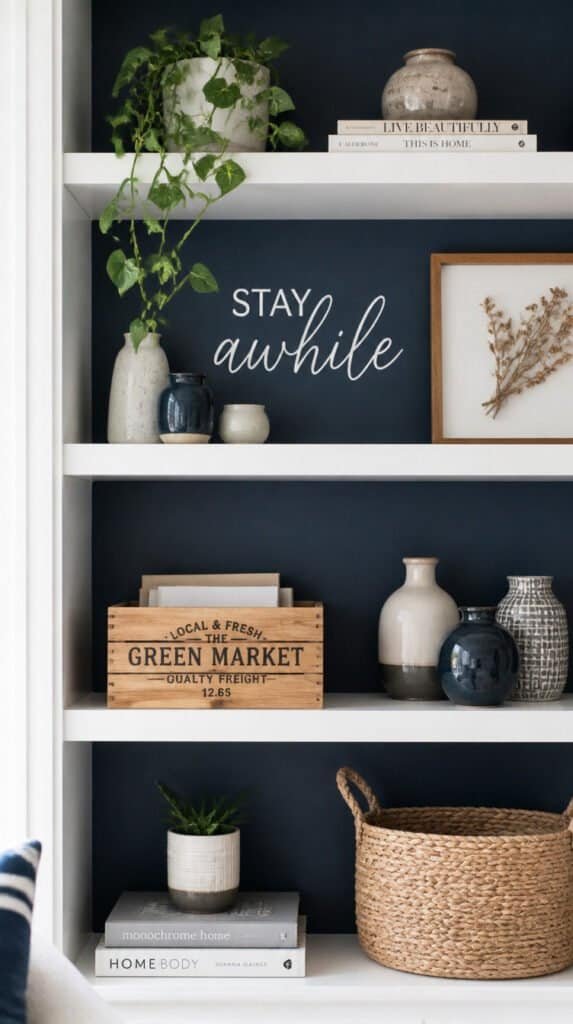
A styled bookshelf or set of floating shelves gets a designer finish when the small accents are coordinated with Cricut-made vinyl pieces. Vinyl quote strips on the back wall of the shelf, decals on small vases, labeled boxes, and word art on wooden frames, all tied together in the same color palette and font family. The shelf stops looking like storage and starts looking like art.
The trick here: paint the inside back panel of the shelf a contrasting color before adding any vinyl. A white vinyl word on a navy, sage, or charcoal background reads clearly and photographs beautifully. On a plain white wall, white vinyl disappears. The contrast is what sells the look. Hot tip: use permanent vinyl for shelf interiors, books and objects dragging across removable vinyl will lift the edges over time.
Think of the shelf as a composition, not a collection. Vary the height of objects, mix textures, and let each Cricut-made element serve as the tying thread that connects the disparate pieces. (A single consistent font across all the vinyl elements on one shelf is what makes an eclectic collection look curated rather than chaotic.) Stand back, photograph it, and edit until it feels right.
Shop the Look
- Bookshelf Decor Set Boho Neutral
- White Vinyl Roll Permanent Adhesive
- Small Wooden Crate Set Decor
- Navy Interior Paint Sample Small
Your Cricut Is the Most Underused Tool in Your Craft Room

Every single project on this list starts with a design in Cricut Design Space and ends with something on your wall, your shelf, your door, or your kitchen that looks like it belongs in a styled home shoot. That is the whole promise of a Cricut for home decor: it takes the gap between what you can imagine and what you can actually make and collapses it to almost nothing.
Pick one project from this list and do it this weekend. Start with the wood sign or the kitchen jar labels if you are new. Jump straight to the mirror decal or the stained glass window if you want something more ambitious. The machine is sitting there. The materials cost almost nothing. Your house is one afternoon away from looking completely different.