This post contains affiliate links. If you purchase through my links, I may earn a small commission at no extra cost to you. Thank you for supporting Room Revival Studio!
It’s that last stretch of summer and kids are already scrolling through backpack options. A brand-new backpack is exciting, but adding a DIY backpack charm makes it completely one of a kind. Summer is the perfect time to gather a few inexpensive craft supplies and create personalized backpack accessories before the back-to-school rush begins. These 15 DIY backpack charms and accessory ideas are fun, budget friendly, and easy enough for kids of all ages to make. From colorful polymer clay charms to embroidered keychains and beaded name tags, every project adds personality to a backpack they’ll be excited to carry on the first day of school.
1. Polymer Clay Initial Charms
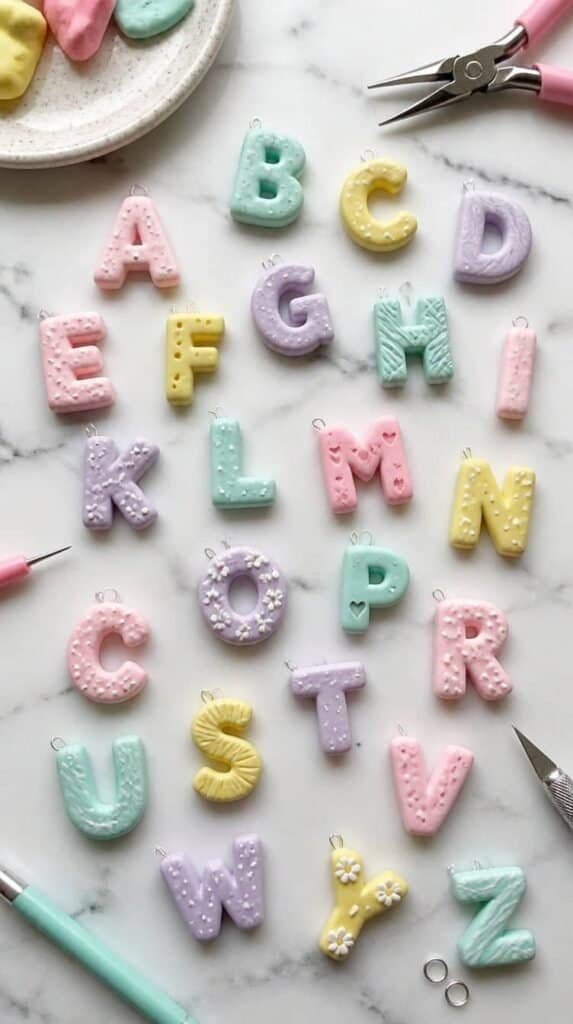
Roll polymer clay into small tiles, stamp with alphabet letters, and bake to create personalized initial charms. Pick a signature color combo and make a full name set to line up across the zipper. Every charm in the set ends up looking like something from a boutique shop.
Hot tip: poke the jump ring hole before baking so the clay hardens around the opening. Trying to drill through baked clay after the fact risks cracking. Thirty extra seconds up front saves a whole batch.
Shop the Look
- Pastel Polymer Clay Set
- Alphabet Stamps for Clay Crafts
- Silver Jump Rings Bulk Pack
- Lobster Clasp Keychain Rings Bulk
2. Friendship Bracelet Zipper Pulls
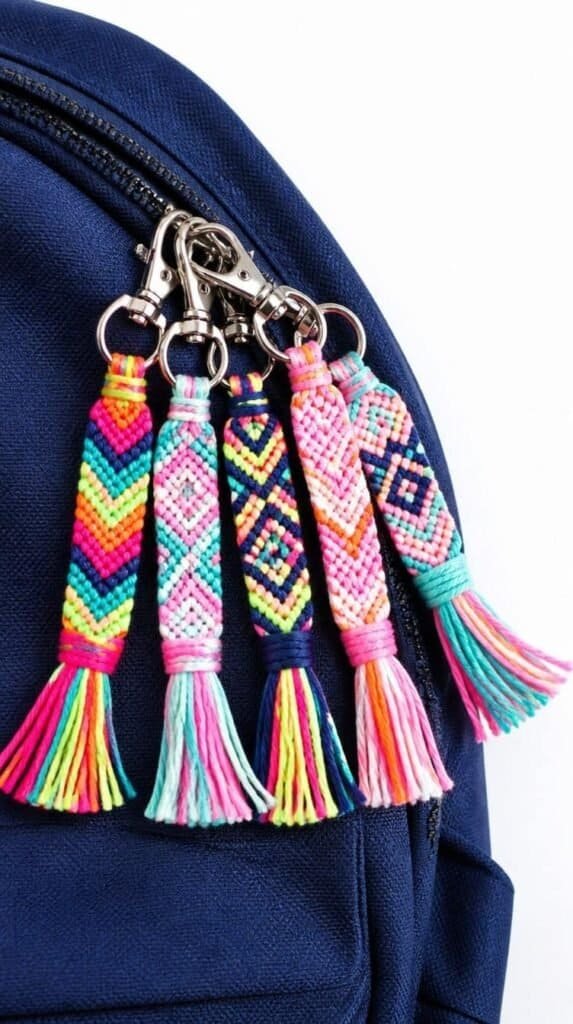
A short friendship bracelet tied directly onto a zipper pull adds color and moves beautifully when the bag swings. Work a basic flat knot or chevron pattern in embroidery floss and tie it through the zipper loop instead of onto a wrist. Five minutes per charm once kids get the hang of the pattern.
The trick here: use six strands of floss and keep the length short, about three inches knotted. A long bracelet gets tangled in the bag zipper within a week. Short and sweet holds up better and still looks great.
Shop the Look
- Bright Embroidery Floss Set
- Kids Friendship Bracelet Loom
- Embroidery Floss Bobbin Organizer
- Small Jewelry Pliers Craft Set
3. Mini Pom-Pom Keychains
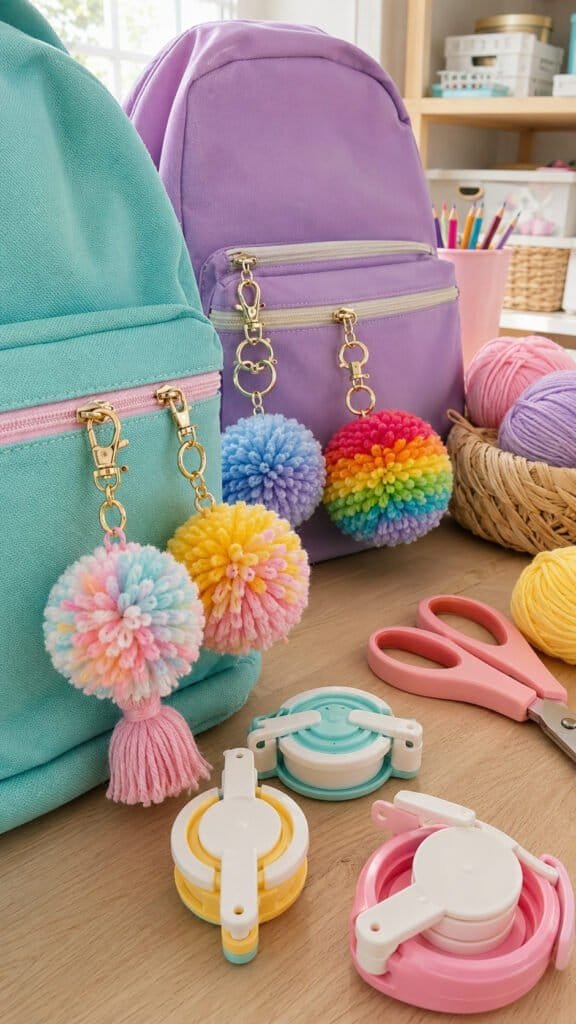
Wrap yarn around a pom-pom maker, tie the center tight, and trim into a fluffy ball. Thread onto a keychain ring and it’s done. Mix two colors in the same pom-pom for a gradient look that feels way more intentional than it is.
Hot tip: use a small pom-pom maker rather than the cardboard ring method. The maker produces a tighter, rounder pom-pom every single time. Kids under eight often struggle with the cardboard version anyway, and the maker is much faster.
Shop the Look
- Pom-Pom Maker Set
- Soft Assorted Colors Yarn Pack
- Silver Split Ring Keychains Bulk
- Mini Craft Scissors for Kids
4. Shrink Plastic Charms
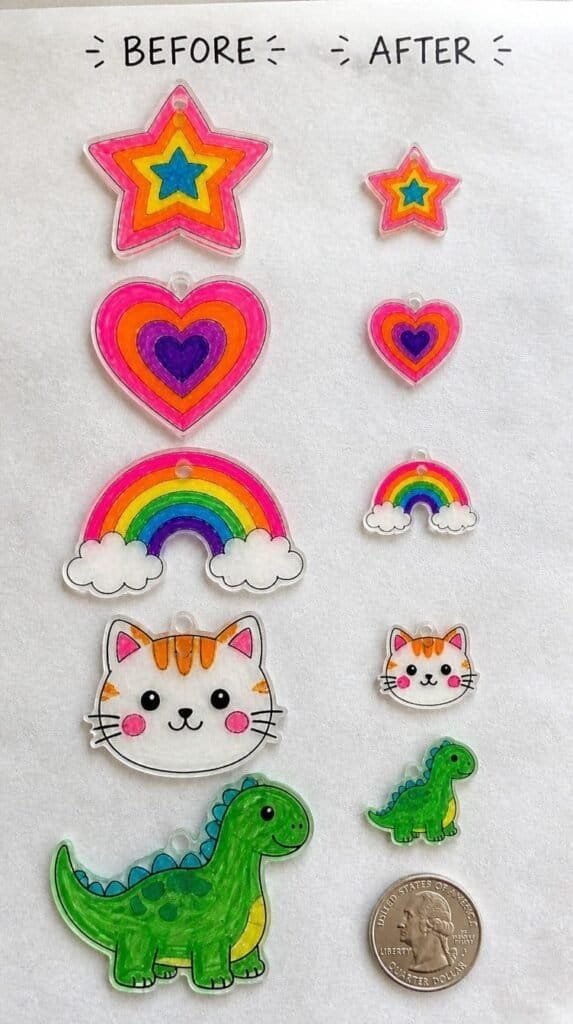
Draw designs on shrink plastic sheets with colored pencils or permanent markers, cut out, punch a hole, and bake. The plastic shrinks to about half the size and becomes thick and glossy. Kids are always surprised by how the drawing transforms once it comes out of the oven.
The trick here: sand the shrink plastic first with fine-grit sandpaper before coloring if you want colored pencil to stick well. Without sanding, pencil slides right off. A quick 30-second pass is all it needs.
Shop the Look
- Blank Shrink Plastic Sheets
- Bright Colored Pencil Set Kids
- Sharpie Fine Tip Markers Set
- Single Hole Punch for Crafts
5. Melted Bead Bag Tags
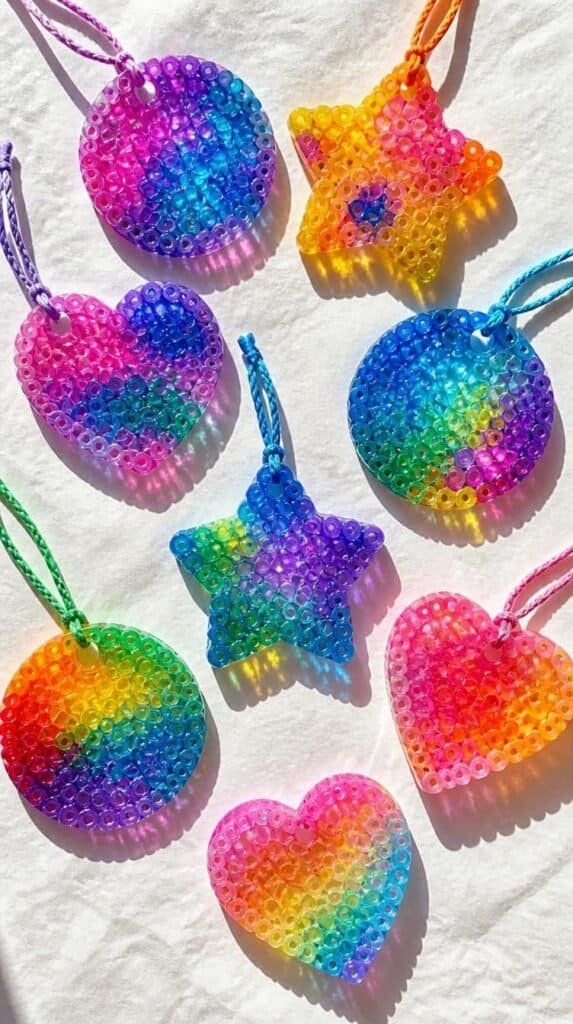
Arrange perler beads in a round or star-shaped pegboard, iron to fuse, and you’ve got a rigid, translucent bag tag. Thread a jump ring through one of the edge beads and clip to a zipper pull. Hold it up to sunlight and it looks like a little stained glass window.
Hot tip: use clear or translucent beads in the design for the best light effect. Solid opaque beads make a nice flat charm but lose the glow-through look entirely. Mix a few translucent beads into an otherwise solid design for a subtle sparkle effect.
Shop the Look
- Perler Beads Assorted Colors Bucket
- Perler Bead Pegboard Shape Set
- Parchment Ironing Paper for Crafts
- Perler Bead Tweezers Craft Tool
6. Macramé Mini Bag Charms
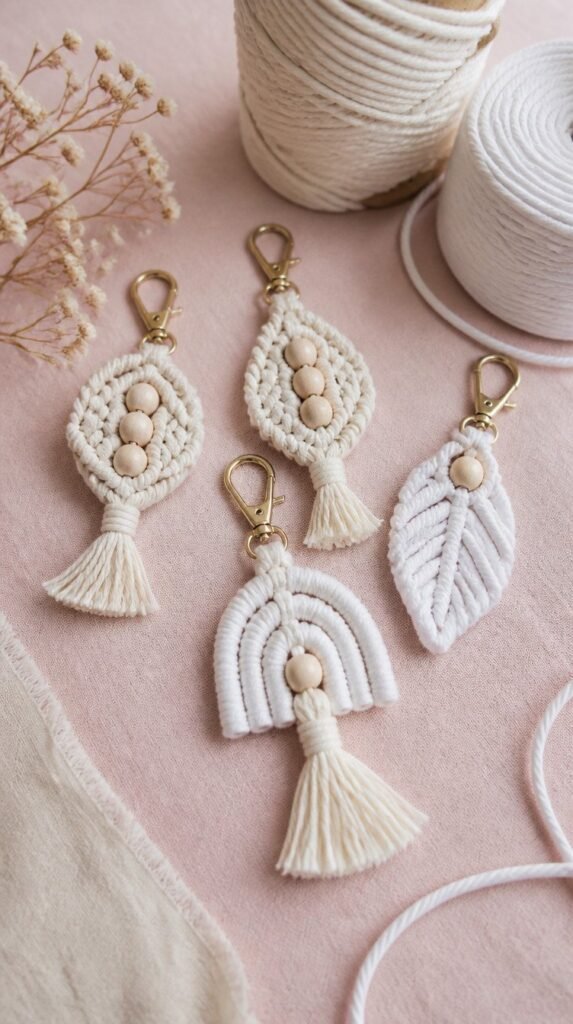
A few square knots in cotton cord with a wooden bead threaded through makes a tiny macramé pendant perfect for a backpack clip. Cut four strands of cord, fold in half over a keychain ring, and knot. Add a bead midway and tie off the fringe ends. The whole thing takes about ten minutes.
Here’s what nobody tells you: macramé cord frays the second you cut it. Dip the cord ends in clear nail polish and let dry before knotting. The tip stays tight and the finished charm doesn’t unravel at the bottom after a week in a backpack pocket.
Shop the Look
- 3mm Natural Cotton Macramé Cord
- Assorted Wooden Beads for Crafts
- Lobster Clasp Keychain Ring Set
- Clear Nail Polish Top Coat
7. Button Charm Clusters
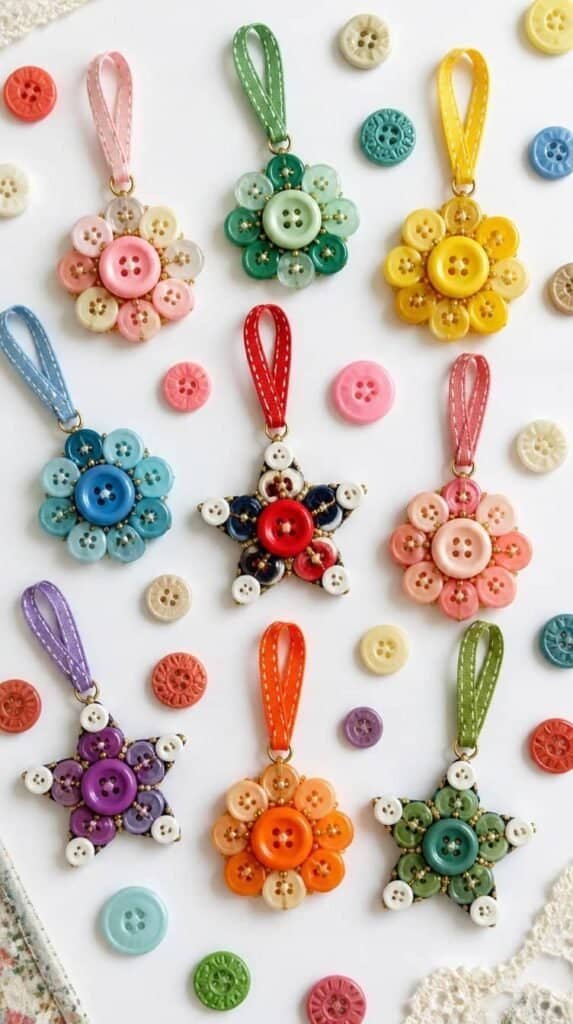
Stack three to five vintage buttons in graduating sizes on a short loop of ribbon tied through a keychain ring. The buttons layer on each other and the stack looks intentional and charming. A jar of mixed buttons from the craft store gives enough variety for a dozen different charms.
Hot tip: thread the ribbon through the buttons twice before knotting so they sit stacked flat rather than flopping sideways. One pass through and they swing loose. Two passes through and they stack neat. That single step changes the whole look.
Shop the Look
- Assorted Vintage Buttons Jar
- Narrow Satin Ribbon Rolls Assorted Colors
- Bulk Split Ring Keychain Set
- Hand Sewing Embroidery Needle Set
8. Embroidered Patch Keychains
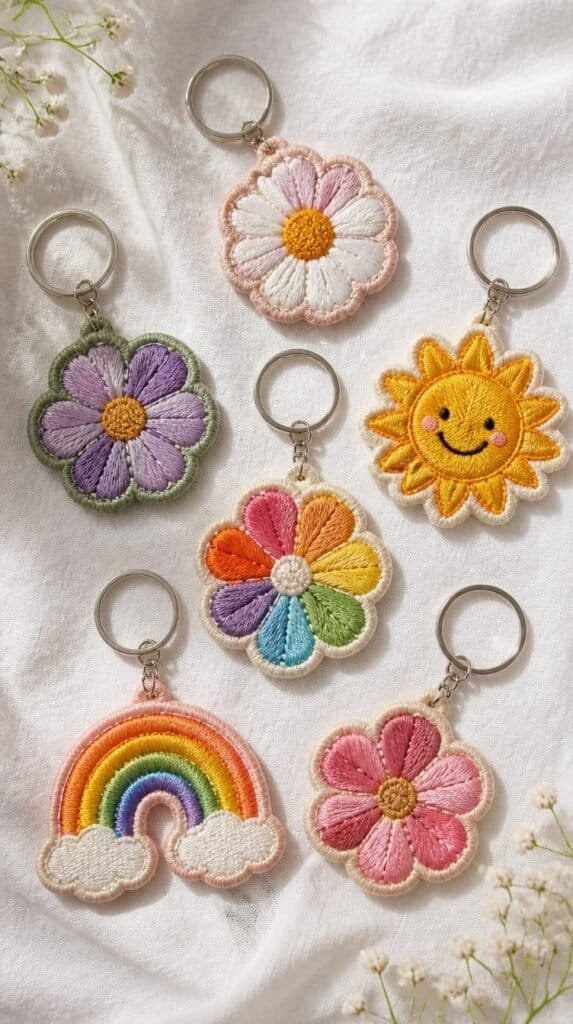
Embroider a small design on a fabric circle, cut it out, back it with felt, and sew a keychain ring through the top. Stars, flowers, simple letters, and tiny suns all work beautifully at two inches. The patch keychain looks handmade in the best possible way.
This one takes longer than most on the list, which makes it the best one for kids who love a project they settle into over a few afternoons. The payoff is a charm that feels genuinely special and not something you’d find at any store. Worth every stitch.
Shop the Look
- Small Embroidery Hoop Set for Beginners
- Embroidery Floss Color Set Bulk
- Assorted Felt Fabric Squares
- Kids Beginner Embroidery Needle Set
9. Rainbow Loom Bag Tags
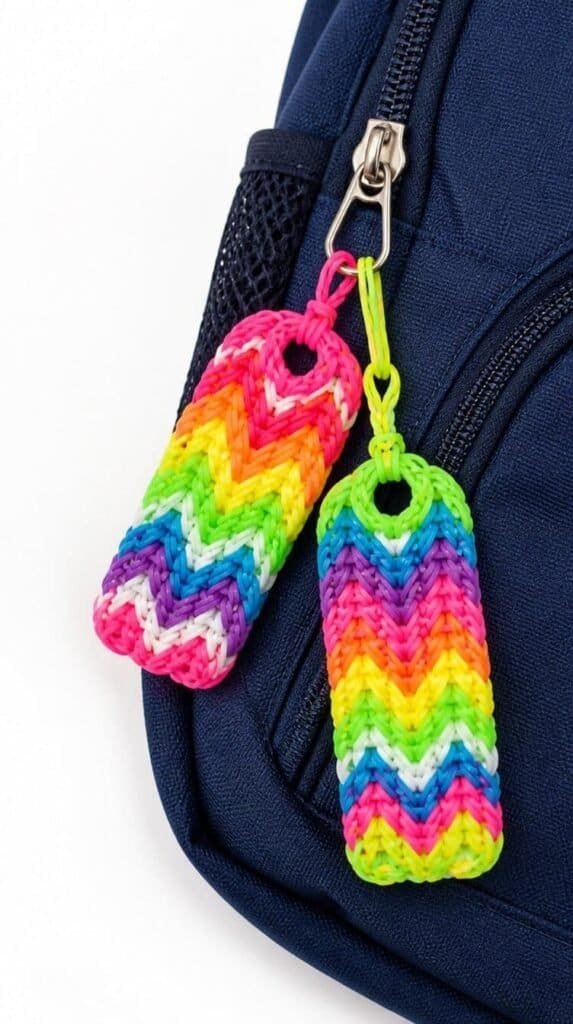
A rainbow loom bracelet finished with a connector clip at both ends instead of a typical bracelet clasp makes a perfect zipper pull. The stretchy bead tag wraps around the zipper pull and holds on without any hardware. Kids who already use a rainbow loom knock these out in minutes.
Here’s what nobody tells you: the c-clip connectors on loom bracelets come loose under daily backpack stress. Reinforce the end connection with a small safety pin clipped through before attaching. The pin adds one extra layer of security and the tag stays on all year.
Shop the Look
- Rainbow Loom Rubber Band Refill Bulk
- Complete Rainbow Loom Kit
- Loom C-Clip Connectors Bulk Pack
- Small Safety Pins Assorted Bulk
10. Nail Polish Marbled Keychains
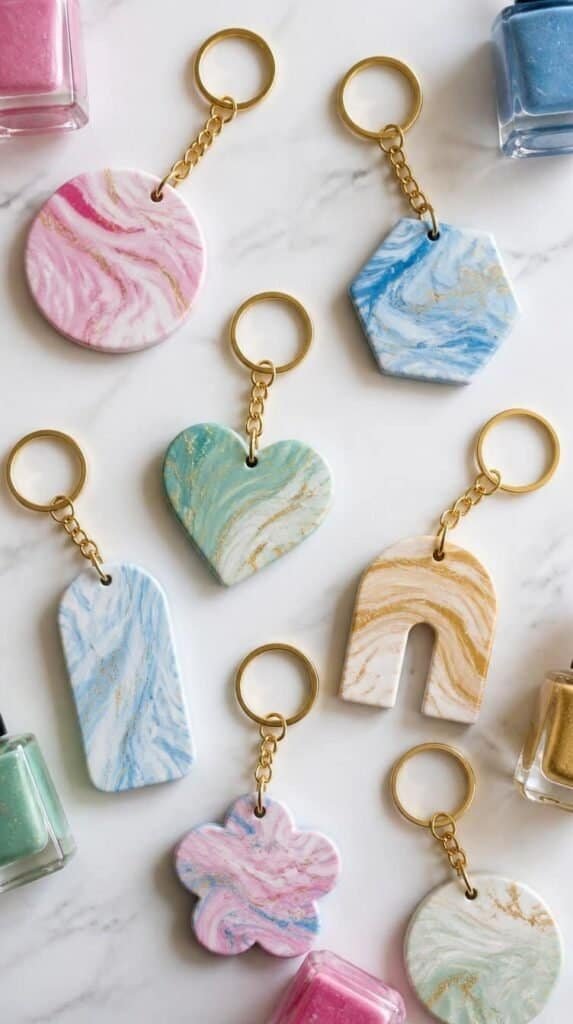
Fill a shallow bowl with water and drop several nail polish colors on the surface. Swirl lightly, dip a white clay or resin keychain blank through the surface, and pull out coated in a marbled pattern. The result looks like a polished store-bought piece every single time.
The trick here: work fast. Nail polish films over on water within two minutes and stops transferring cleanly. Have the keychain blanks ready before opening a single bottle. Dip, set aside to dry, then repeat with fresh polish for the next one.
Shop the Look
- Bright Nail Polish Set for Crafts
- White Round Polymer Clay Keychain Blanks
- Shallow Plastic Tray for Marbling Crafts
- Mod Podge Gloss Clear Sealer
11. Yarn Tassel Keychains
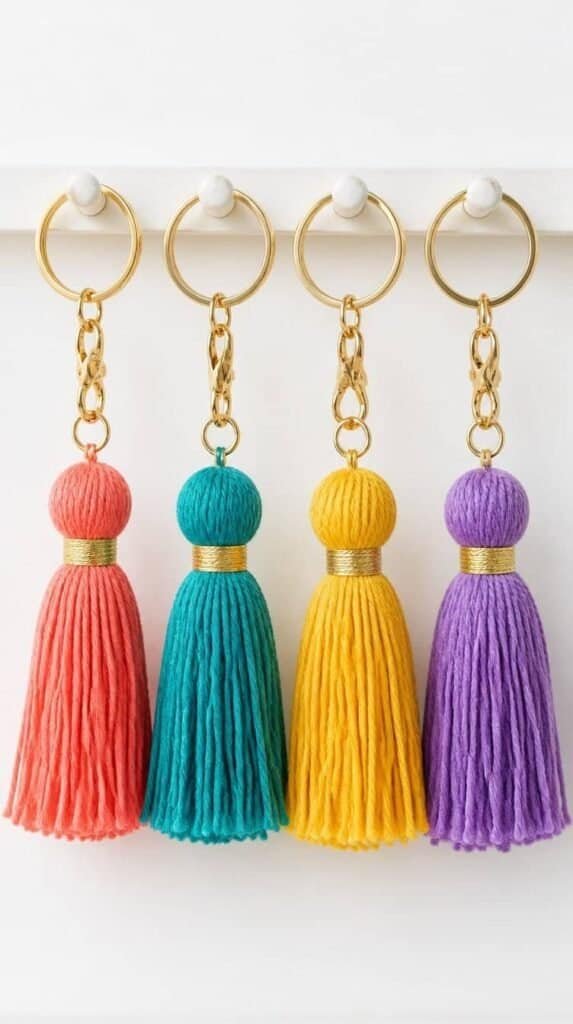
Wrap yarn around a piece of cardboard about thirty times, slide off, tie tight at the top, and cut the loops at the bottom for an instant tassel. Thread onto a keychain ring and done. Make five in different colors in under twenty minutes and give every zipper its own tassel.
Hot tip: wrap a separate piece of yarn tightly around the top quarter of the tassel and knot it to create the signature pinched-neck look. Without this step the tassel stays floppy and flat-topped. That one wrap transforms it from yarn bundle to actual tassel.
Shop the Look
- Bright Mini Skein Yarn Set for Crafts
- Gold Keychain Rings Bulk Pack
- Tassel Maker Tool for Crafts
- Sharp Fabric Craft Scissors
12. Beaded Name Bag Tags
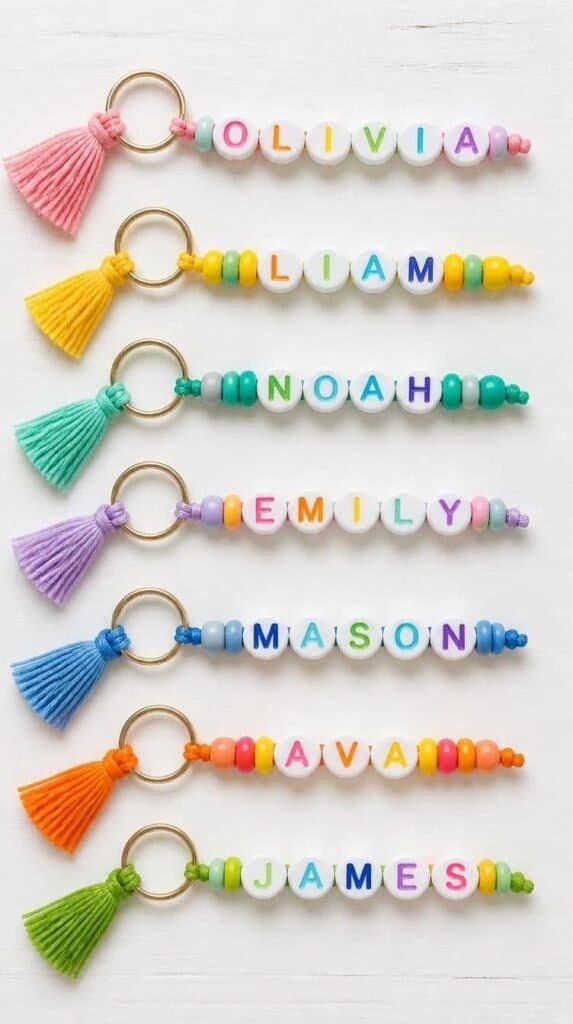
Spell out a first name in alphabet letter beads on elastic cord and add a few seed beads on either side for color. Tie the cord off through a keychain ring and you’ve got a bag ID tag that looks good and actually identifies the bag. Zero chance of mix-ups on the luggage carousel or the gym locker room.
Honest caveat: elastic cord wears out faster than beading wire under daily stress. Use 0.5mm stretchy elastic for short name tags under four inches. For longer names, switch to beading wire with crimp ends for a tag built to last the school year.
Shop the Look
- Bulk Alphabet Letter Beads
- 0.5mm Elastic Beading Cord
- Mixed Color Seed Beads for Crafts
- Crimp Beads Jewelry Making Set
13. Washi Tape Luggage Tags
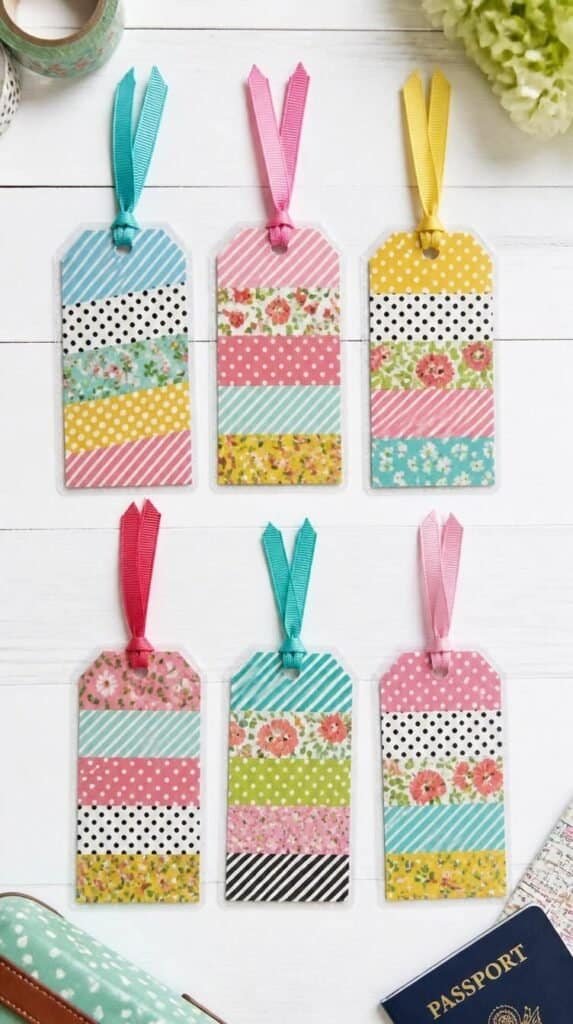
Cut a rectangle from heavy cardstock, cover with colorful washi tape strips in overlapping patterns, add a name label in the center, and laminate. Punch a hole at the top, loop a ribbon through, and the tag is ready. Every bag in the school looks different when kids design their own.
Hot tip: press the washi tape edges down firmly with a bone folder before laminating so they don’t peel up inside the pouch. Any lifted edge traps a bubble and the laminate never lies flat again. Thirty extra seconds of pressing saves the whole tag.
Shop the Look
- Assorted Pattern Washi Tape Set
- Laminating Pouches Letter Size Bulk
- Heavyweight White Cardstock Pack
- Ribbon Loop Luggage Tag Hardware
14. Air-Dry Clay Stamped Charms
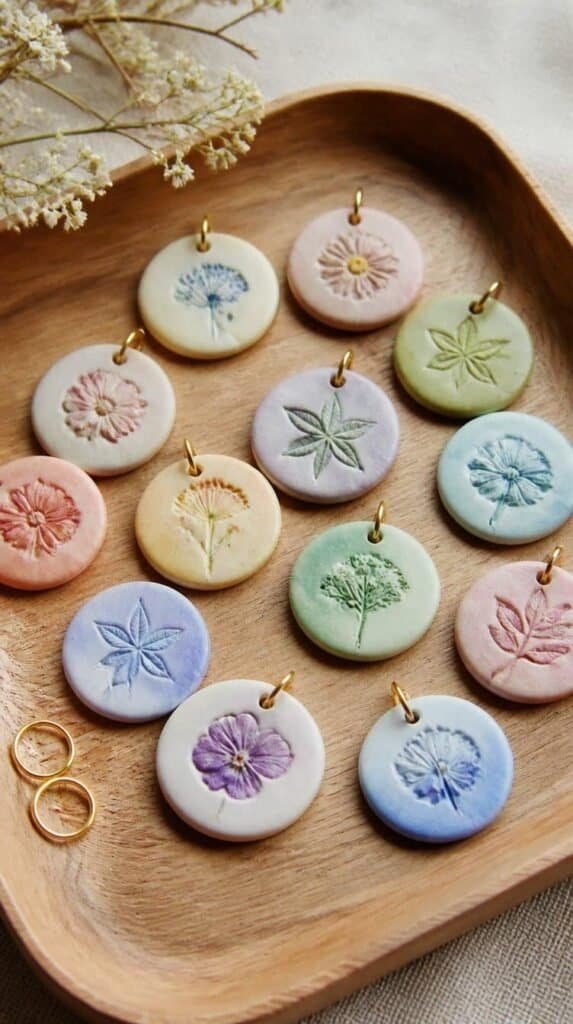
Roll air-dry clay into small rounds, press a stamp into the center, and set aside to dry fully overnight. Once dry, paint with watercolor or acrylic in soft tones and seal with clear varnish. The textured surface from the stamp gives each charm a sculptural quality no flat sticker or printed tag achieves.
The trick here: let the clay dry completely before painting. Painting damp clay causes the surface to crack and bubble. Twenty-four hours on a flat surface, flipped once halfway through, gives a fully dry charm ready for color.
Shop the Look
- White Air-Dry Clay for Kids
- Small Shape Rubber Stamps for Crafts
- Pastel Watercolor Paint Set Kids
- Mod Podge Gloss Sealer Small Bottle
15. Mini Cross-Stitch Keychains
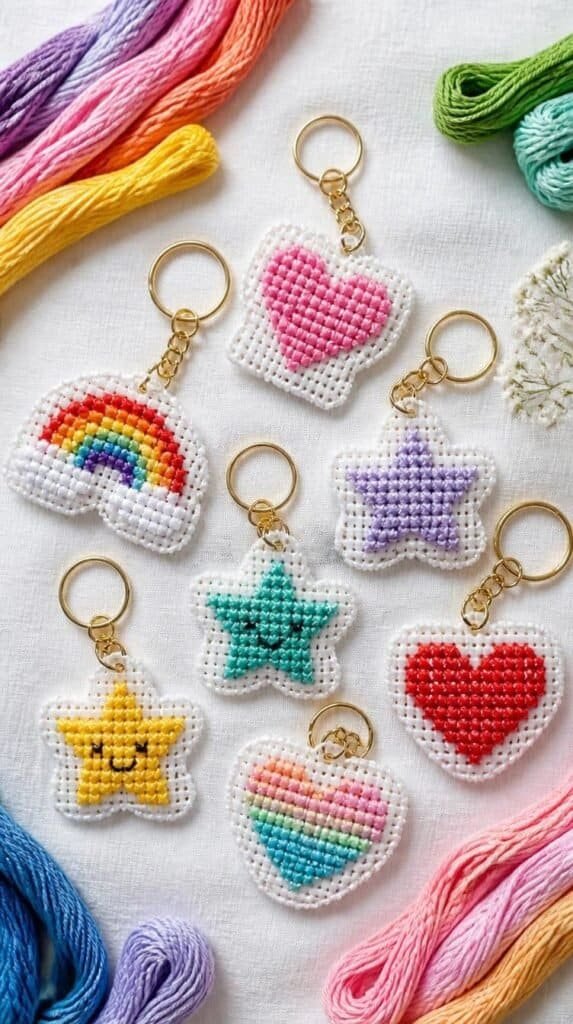
Work a tiny cross-stitch design on plastic canvas, cut it out with a one-hole border, and attach a keychain ring through a corner hole. Pixel-art hearts, stars, and rainbows at this small scale look like actual enamel pins from a distance. No one guesses they’re handmade unless you tell them.
This is the project for kids who love detail work and like to challenge themselves. The finished keychain looks nothing like a beginner project even when it is one. Plastic canvas is forgiving, washable, and durable. Perfect backpack charm material.
Shop the Look
- White Plastic Canvas Sheets
- Bright Embroidery Floss Color Set
- Plastic Canvas Tapestry Needle Set
- Small Embroidery Scissors for Crafts
Pick Three. Start This Weekend.
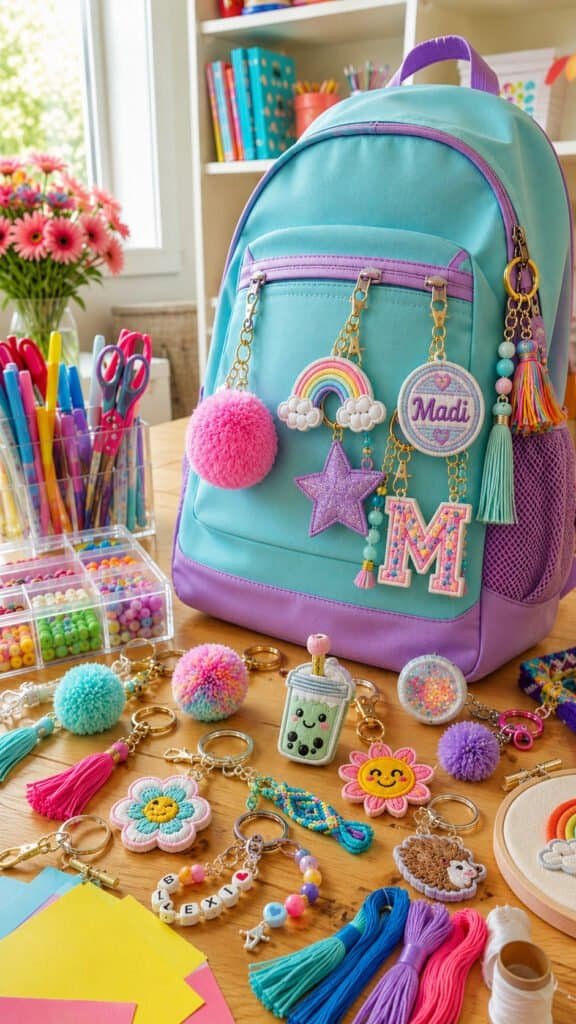
Summer is the perfect time to create backpack accessories that feel completely personal before the first day of school arrives. Whether kids choose polymer clay initials, colorful pom-poms, beaded name tags, or embroidered keychains, these DIY backpack charm ideas are easy to customize and fun to make together. Gather a few inexpensive supplies, spend an afternoon crafting, and send them back to school with something they proudly created themselves. Looking for even more creative back-to-school projects? Be sure to read 16 Back-to-School Classroom Decorations Kids Can Help Make for colorful classroom crafts that teachers and students will love.