This post contains affiliate links. If you purchase through one of these links, I may earn a small commission at no additional cost to you.
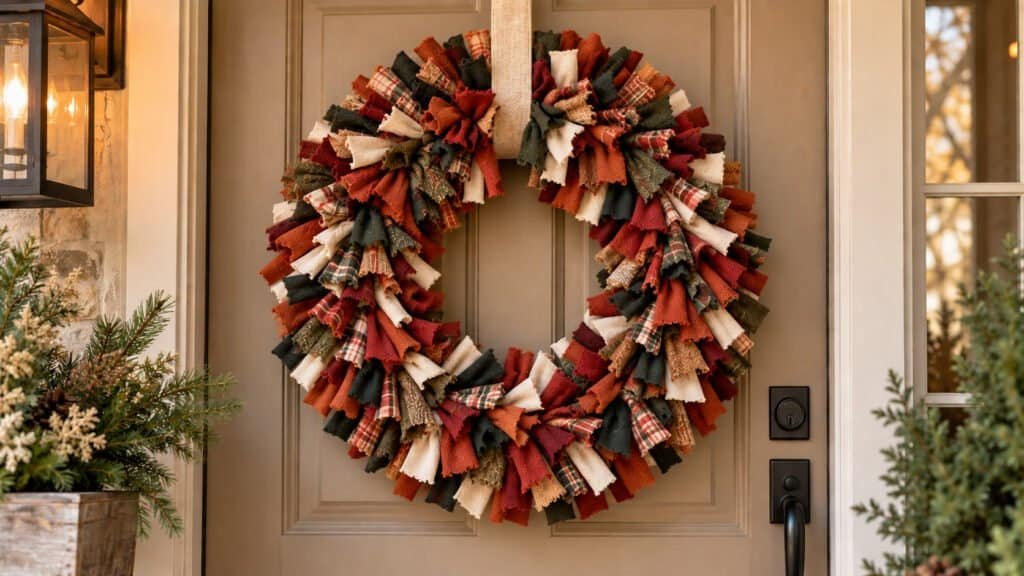
If you’ve been looking for a DIY fabric wreath that feels cozy enough for fall but can easily carry you into winter, this is such a fun one to make. There’s no sewing involved, and you don’t need advanced crafting skills to get a full, layered look. The mix of fabric colors, prints, and textures is what makes this simple craft project look so good once everything comes together. Even better, you can customize the palette for fall, Thanksgiving, winter, or Christmas without changing the basic technique.
1. Gather Your Fabric Wreath Supplies
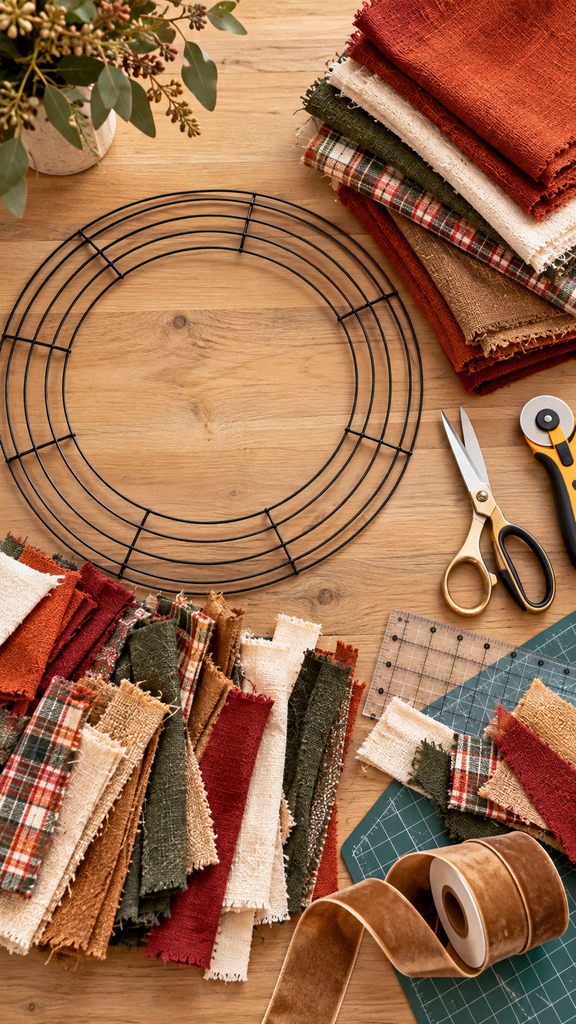
Before you start cutting fabric, get all of your supplies together in one place. The wreath form creates the structure, while your fabric choices determine how full, colorful, and seasonal the finished fabric wreath will look. For a fall-to-winter design, choose several coordinating fabrics instead of relying on one print. Mixing solids, plaids, small patterns, and different textures will give the wreath much more dimension.
What You’ll Need
- Wire Wreath Form
- Fall Fabric Bundle
- Christmas and Winter Fabric Bundle
- Fabric Scissors
- Rotary Fabric Cutter
- Self-Healing Cutting Mat
- Acrylic Quilting Ruler
- Velvet Ribbon for Wreaths
You don’t need every cutting tool listed above. Fabric scissors will work perfectly well, but a rotary cutter, ruler, and cutting mat can make the job much faster when you’re cutting a large number of strips.
For a wreath that transitions between seasons, start with warm neutrals and then add a few deeper colors. Cream, camel, rust, olive, forest green, cranberry, and classic plaid can take this DIY craft project wreath from late fall straight into the holiday season without making it feel overly themed.
2. Choose Your Fall-to-Winter Fabric Palette
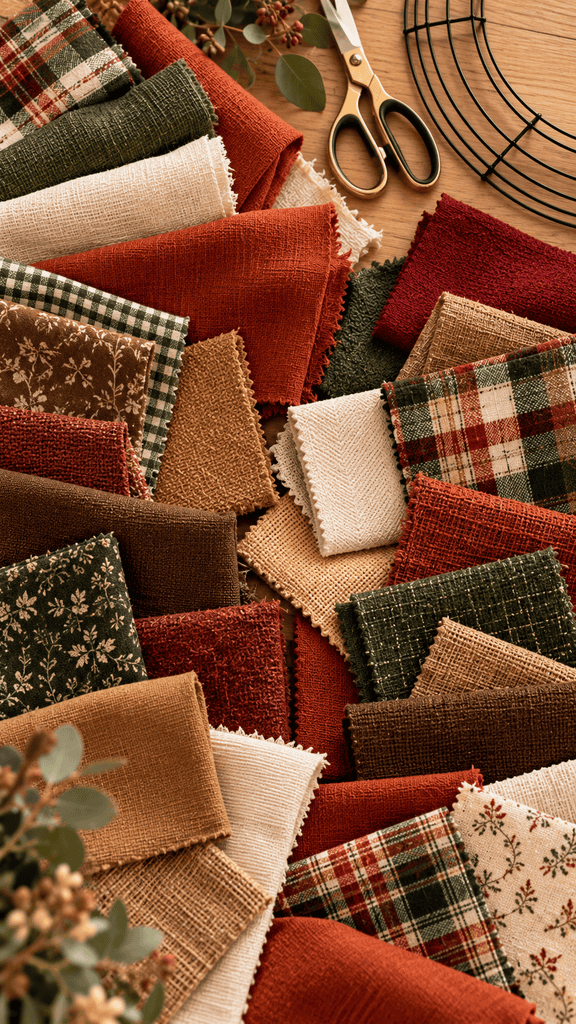
This is where you can really make your DIY fabric wreath fit your style. Since we’re creating a wreath that works from fall into winter, choose fabrics that feel seasonal without leaning too heavily into pumpkins, leaves, or Christmas prints. A mix of solids and subtle patterns will also keep the wreath looking more elevated and less like a traditional holiday craft.
For a warm fall-to-winter palette, try rust, camel, cream, olive, forest green, cranberry, and chocolate brown. Plaid, gingham, tiny florals, and subtle geometric prints can be mixed with solid fabrics to keep the design interesting.
Try One of These Fabric Combinations
- Warm & Earthy: Rust + olive + cream + camel plaid
- Cozy Traditional: Cranberry + forest green + cream + neutral plaid
- Organic Neutral: Oatmeal + taupe + chocolate brown + muted green
- Modern Holiday: Forest green + black + cream + subtle gold print
Aim for about 4 to 6 coordinating fabrics. You want enough variety to create movement around the wreath, but not so many patterns that the finished design starts to look busy.
The easiest approach is to choose one fabric you love first and build the rest of the palette around it. That gives your fabric wreath a clear color story while still leaving plenty of room for texture and pattern.
3. Prepare and Measure the Fabric
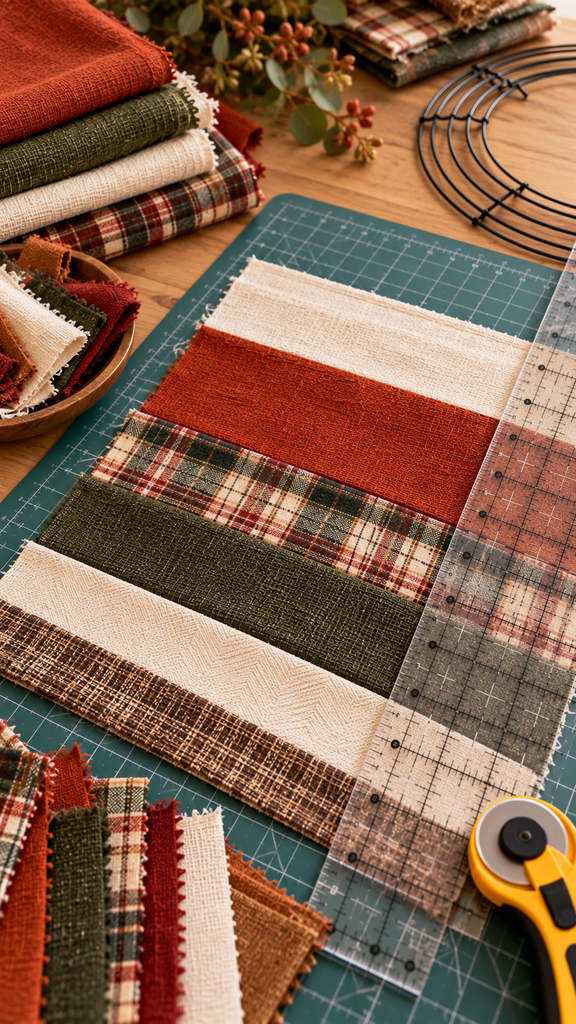
Before cutting, spread your fabrics on a clean, flat surface and smooth out any major wrinkles. A quick press with an iron or steamer will make measuring and cutting easier.
Get Your Fabric Ready
- Lay each fabric flat and line up the edges.
- Divide your colors evenly if you’re using 4 to 6 different fabrics.
- Cut one test strip first and place it against the wreath form to check the size.
- Cut in batches instead of cutting all your fabric at once. You can always make more strips as the wreath fills in.
How Much Fabric Do You Need?
The amount will depend on the size of your wreath form and how full you want your DIY fabric wreath to look. Larger wreaths and tightly packed strips will naturally require more fabric, so having a little extra on hand is helpful.
Once your fabric is organized and measured, you’re ready to start cutting your strips.
4. Cut the Fabric Into Strips
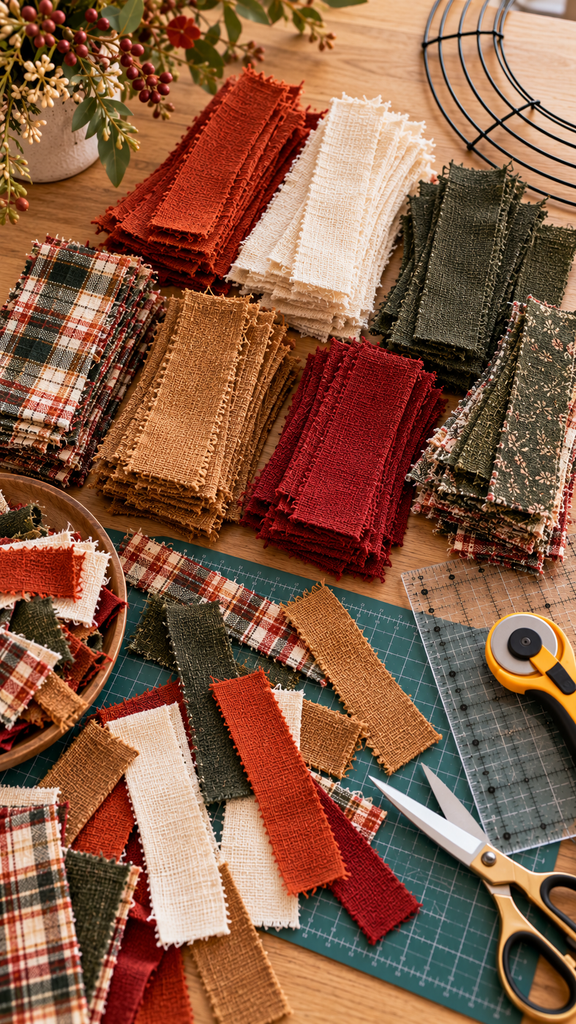
Now it’s time to cut your fabric into strips. Keeping the pieces close to the same size will give your DIY fabric wreath a balanced, full shape while still allowing the different colors and patterns to stand out.
Cut Your Fabric
- Measure your first strip using your ruler and cutting mat.
- Cut the fabric with sharp fabric scissors or a rotary cutter.
- Use the first strip as your template for the remaining pieces.
- Stack finished strips by color or pattern so they’re easy to grab once you start assembling the wreath.
- Cut a smaller batch first. You can always cut more if you need extra pieces to fill the wreath.
Your strips don’t have to be perfectly identical. Small variations actually add texture once everything is tied and fluffed into place.
Once you have a good stack of strips ready, you can start planning how the colors and patterns will repeat around the wreath.
5. Arrange Your Fabric Before You Start
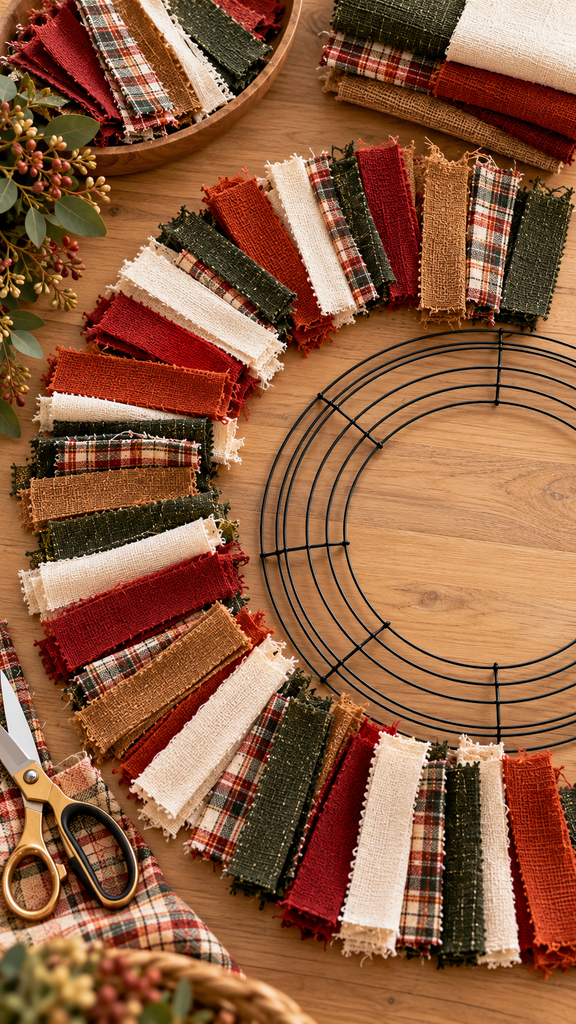
Before attaching the strips, take a few minutes to decide how you want your colors and patterns to repeat. Planning the order now keeps one fabric from becoming too concentrated in one area and gives your DIY fabric wreath a more balanced look.
Create a Simple Pattern
Lay several strips next to each other and test a repeating combination. For example:
- Rust + cream + olive + plaid
- Cranberry + forest green + cream + plaid
- Solid + pattern + solid + pattern
Once you find a combination you like, arrange your fabric into small groups in that same order. You can repeat the sequence as you work around the wreath without having to stop and choose your next fabric every time.
Don’t worry about making the pattern perfectly symmetrical. Slight variations in placement help the different colors and prints blend together naturally and give the finished fabric wreath more character.
6. Attach the First Fabric Pieces
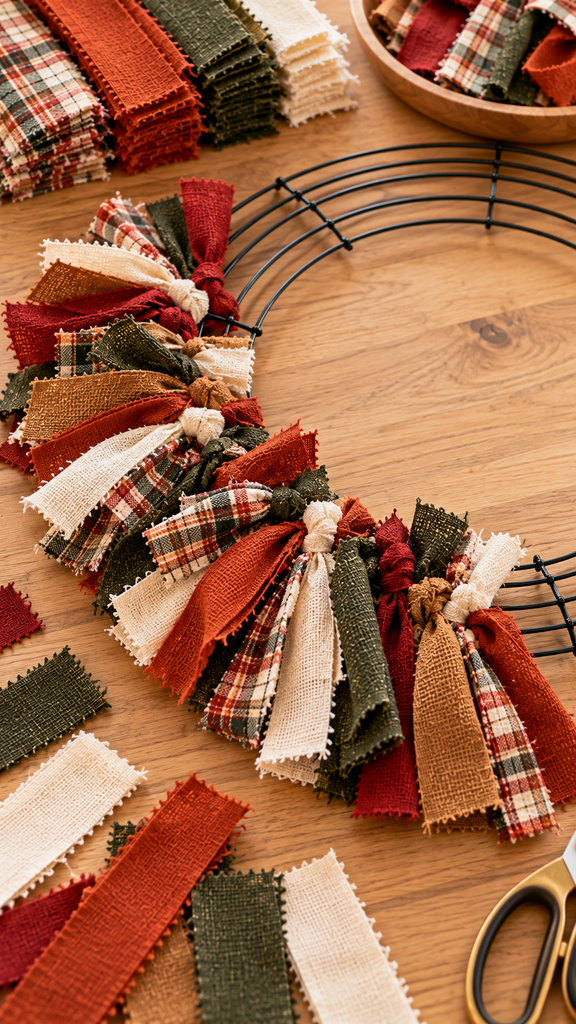
Now you can start building your DIY fabric wreath. Begin with one fabric strip and attach it securely around the wreath form. Pull the ends outward so the fabric sits toward the front of the wreath instead of disappearing behind the frame.
Start Attaching the Fabric
- Take one fabric strip from your prepared sequence.
- Wrap it around the wreath form and bring both ends toward the front.
- Tie the strip securely so it stays in place without bunching too tightly.
- Slide the fabric into position and gently spread the ends apart.
- Add the next strip beside it, following your planned color and pattern sequence.
Continue adding a few strips at a time. Keep them close enough together to cover the wreath form, but leave yourself room to adjust the fabric as the wreath becomes fuller.
After you’ve attached several pieces, stop and fluff them with your fingers. You should already start seeing the layered, textured look that makes this simple craft project come together.
7. Continue Around the Wreath
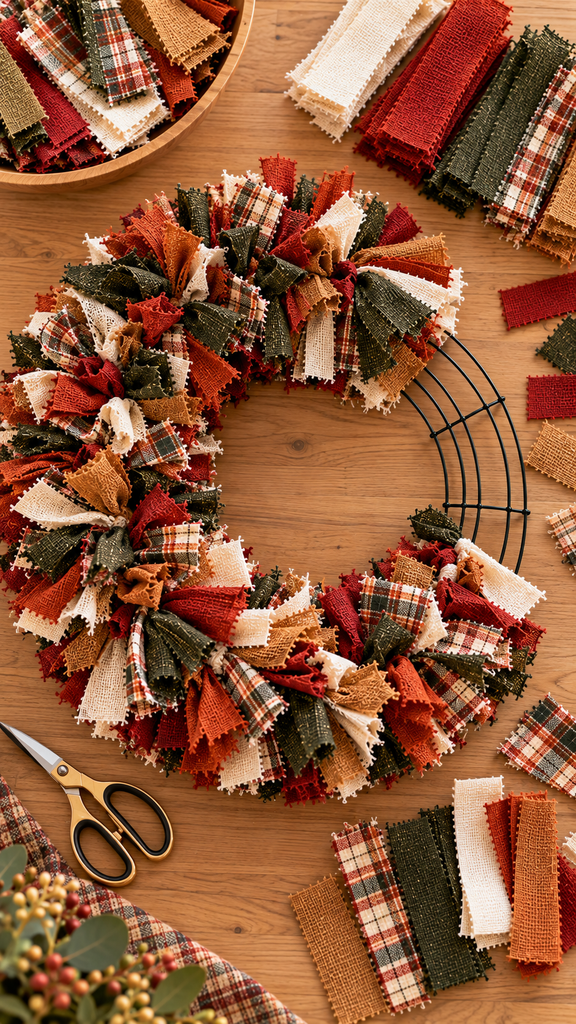
Keep attaching fabric strips around the wreath form using the same technique. Follow your planned fabric sequence, but don’t worry about making every section perfectly identical. A little variation helps the DIY fabric wreath look full and naturally layered.
Work Your Way Around
- Add strips one at a time, keeping them fairly close together.
- Alternate your colors and patterns as you move around the wreath.
- Push the strips together whenever you notice the wreath form showing through.
- Rotate the wreath as you work so you can check the shape from different angles.
- Fluff the fabric ends periodically instead of waiting until the very end.
Continue until the entire wreath form is covered. If one area looks thinner than the others, simply add another strip or slide the existing pieces closer together.
At this stage, focus on getting good coverage rather than making everything perfect. You’ll shape and fluff the entire fabric wreath in the next step.
8. Fluff and Shape the Fabric Wreath
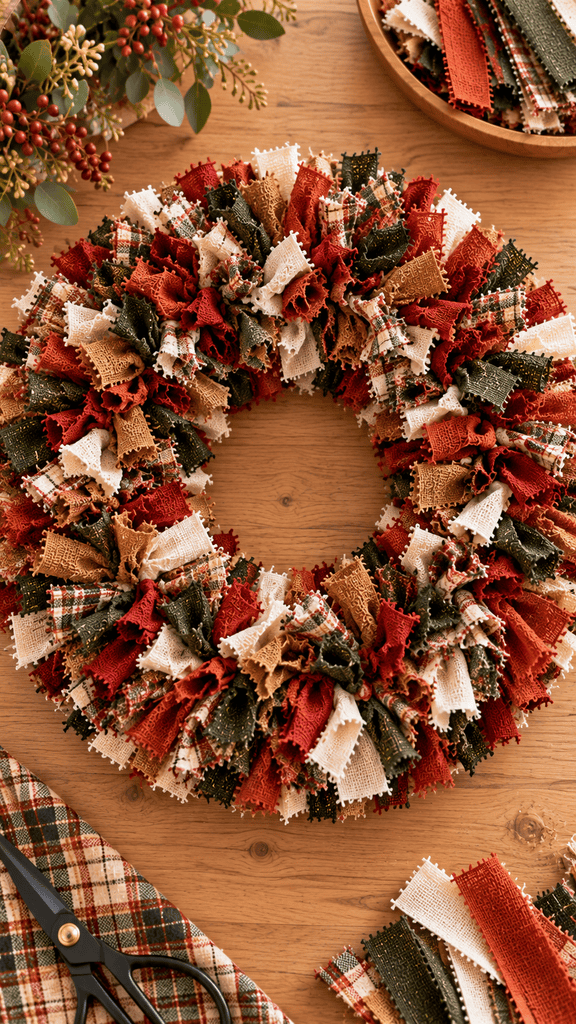
Once the wreath form is completely covered, it’s time to give the fabric some shape. This step makes a big difference because the strips may look a little flat or uneven after being tied.
Shape Your Wreath
- Separate the fabric ends with your fingers so they fan outward.
- Rotate and twist individual strips to bring different colors and patterns toward the front.
- Fill visible gaps by sliding nearby knots closer together.
- Add an extra fabric strip anywhere the wreath form is still visible.
- Check the overall shape from a few feet away and adjust any areas that look uneven.
You’re looking for a full, slightly tousled finish rather than perfectly arranged fabric. Once everything is fluffed, the different prints and colors should blend together while still giving your DIY fabric wreath plenty of texture and dimension.
9. Add Optional Fall or Winter Details
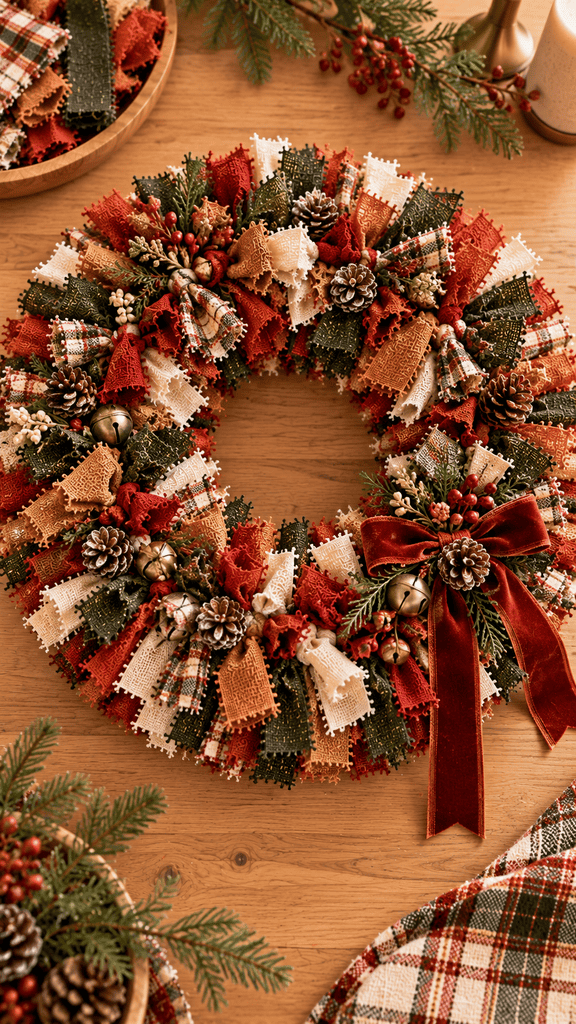
Your DIY fabric wreath can stay simple, or you can add a few seasonal accents to give it more of a fall or winter look. Keep these additions minimal so the fabric remains the main feature.
Customize It for the Season
For fall, try small pinecones, faux leaves, velvet ribbon, or muted berries. When winter arrives, swap those pieces for bells, evergreen sprigs, wooden ornaments, or a deeper holiday ribbon.
Choose removable accents whenever possible. This makes it easy to transition the same fabric wreath from October and November into the winter holiday season without making an entirely new wreath.
Shop Seasonal Accents
10. Add a Hanger and Display Your Wreath
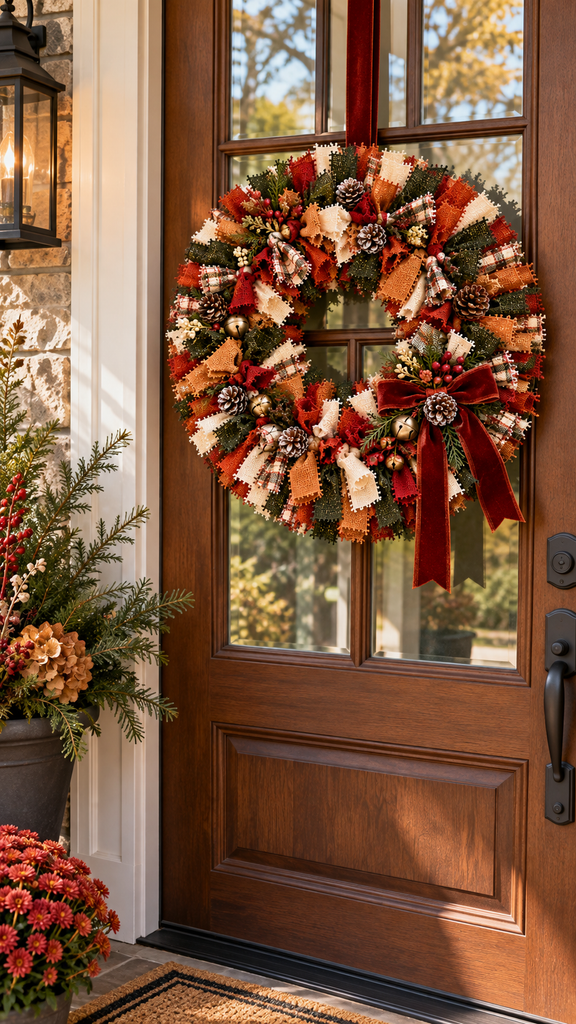
Your DIY fabric wreath is almost ready to hang. Before displaying it, give the fabric one final fluff and make sure the wreath looks balanced from every angle.
Hang Your Wreath
- Loop a piece of ribbon around the wreath form and tie it securely at the top.
- Adjust the ribbon length based on where you plan to display the wreath.
- Fluff the fabric around the hanger so the ribbon blends naturally into the design.
- Hang the wreath and step back to make any final adjustments.
Display your finished wreath on a front door, interior door, entryway wall, above a console, or as part of a seasonal mantel arrangement. A velvet or textured ribbon is especially pretty for a fall-to-winter holiday wreath because you can easily switch the color as your seasonal decor changes.
Shop the Finishing Supplies
When the season is over, store the wreath flat or hang it inside a wreath storage bag so the fabric doesn’t get crushed. A quick fluff next year should bring it right back to shape.
A Cozy Wreath You Can Use All Season

This DIY fabric wreath is one of those simple craft projects you can completely change just by switching the fabric. Warm rust, olive, and plaid work beautifully for fall, while forest green, cranberry, cream, and velvet accents can carry the same idea straight into winter. Best of all, the no-sew method makes it approachable even if you’re new to wreath making.
Once you’ve made one, try experimenting with different fabrics and seasonal color combinations to create your own holiday wreath ideas.
Looking for another easy seasonal project? Check out DIY Wooden Bead Box: How to Recreate This Look for more creative ideas you can make at home.