This post contains affiliate links. If you purchase through my links, I may earn a small commission at no extra cost to you. Thank you for supporting Room Revival Studio!
Your earring collection has the same five pairs it has had for three years. You know there is something better out there but the price tags say otherwise, and buying handmade online means waiting two weeks for something that looks nothing like the photo. What if you made them yourself in an afternoon? What if they looked so good people asked where you got them?
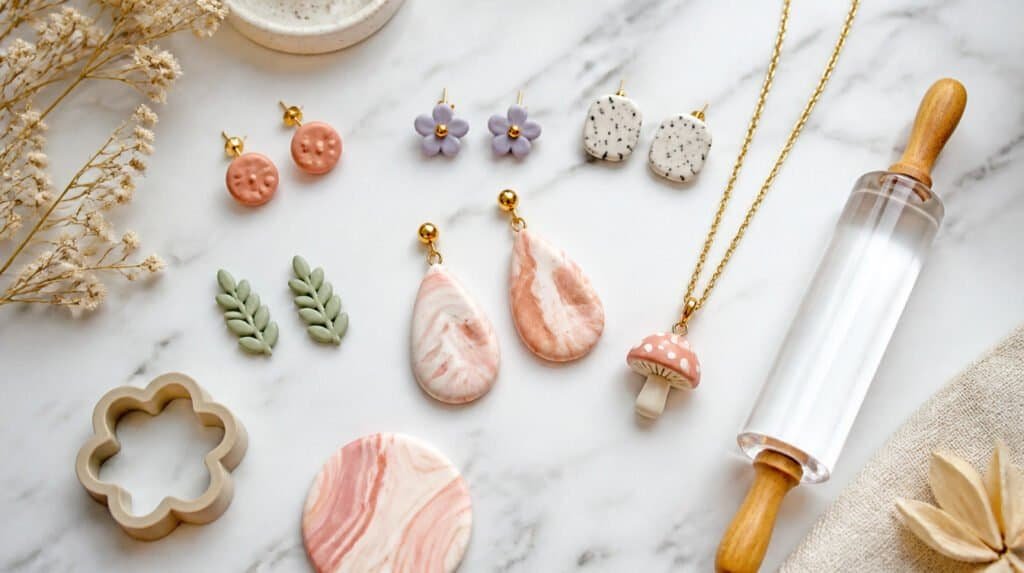
Polymer clay is the most beginner-friendly jewelry material out there. You do not need a kiln, a studio, or any special skills to get started just clay, a few basic tools, and an oven. These 15 polymer clay jewelry ideas for beginners cover everything from simple studs to statement drops, all designed to look polished even on your very first try.
1. Simple Polymer Clay Stud Earrings
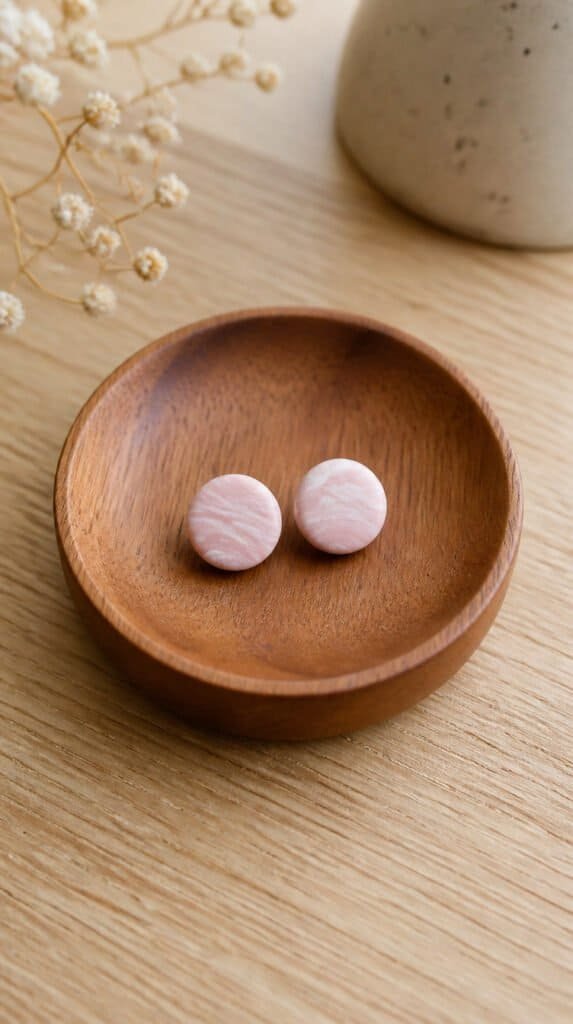
Start here if you have never touched polymer clay before. Roll a small ball, flatten it slightly, and press in a stud back, that is genuinely all it takes for your first pair. The magic is in the color combinations. Mix two colors together with a loose swirl and no two pairs will ever look exactly alike. Bake at 275°F for 15 to 20 minutes and you have earrings that look like they came from a boutique. One thing to know: thinner pieces can be brittle, so keep your studs at least 3mm thick. These are the earrings that will make you realize how easy this actually is.
Shop the Look
2. Marbled Clay Drop Earrings
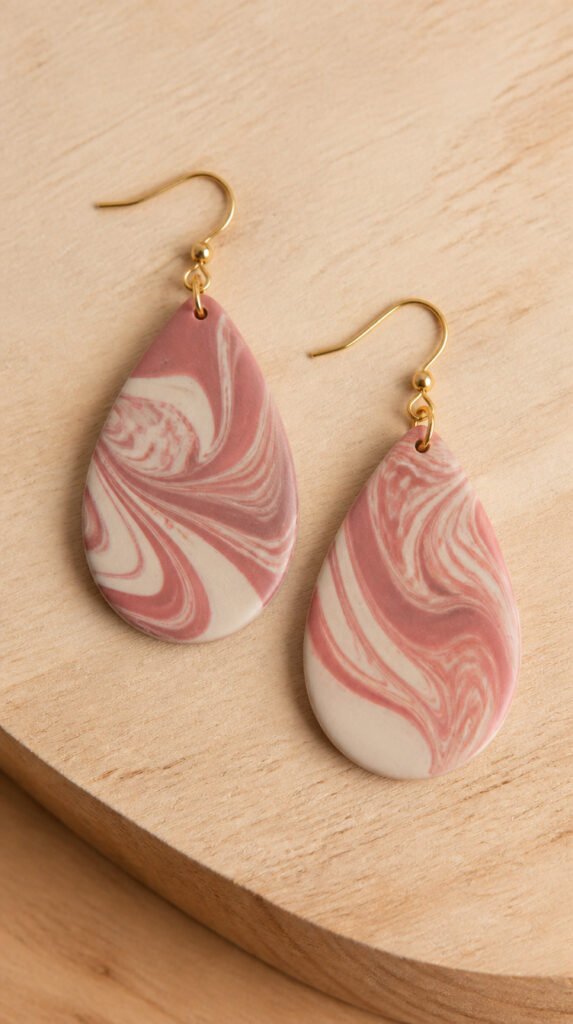
Marbling looks impressive and takes less than five minutes to achieve. Take two or three colors, twist them loosely together, and fold the clay a few times without fully mixing it. Roll it into a sheet, cut your shape, and the pattern inside is completely unique. Teardrop and oval shapes work best because they show off the swirl without competing with it. (It always looks more expensive than it has any right to.) The trick here: stop mixing earlier than you think, over-blending kills the marble effect and gives you mud. Add a simple gold ear wire and you have a pair that earns compliments every single time.
Shop the Look
3. Mini Clay Flower Earrings
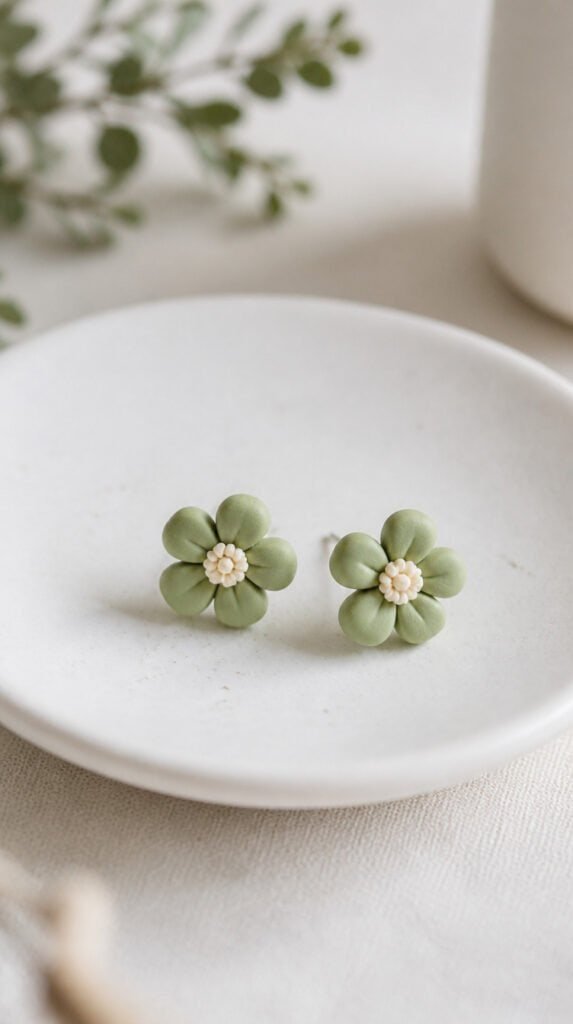
These tiny floral studs have a handmade quality that mass-produced earrings never quite capture. Roll five small balls for petals, press them around a slightly larger center piece, and flatten gently with your finger. A small silicone flower mold speeds this up significantly if you want consistent shapes across multiple pairs. Soft colors, blush, cream, sage; photograph beautifully and go with almost everything in a wardrobe. One honest caveat: the petals can separate at the edges if your clay is too dry, so condition it well before shaping. Finished with a tiny stud back, these look delicate and intentional even when you made them in 20 minutes flat.
Shop the Look
- Silicone Flower Molds for Clay
- Pastel Polymer Clay Set
- Mini Round Stud Earring Posts
- Clay Conditioning Tool
4. Geometric Statement Earrings
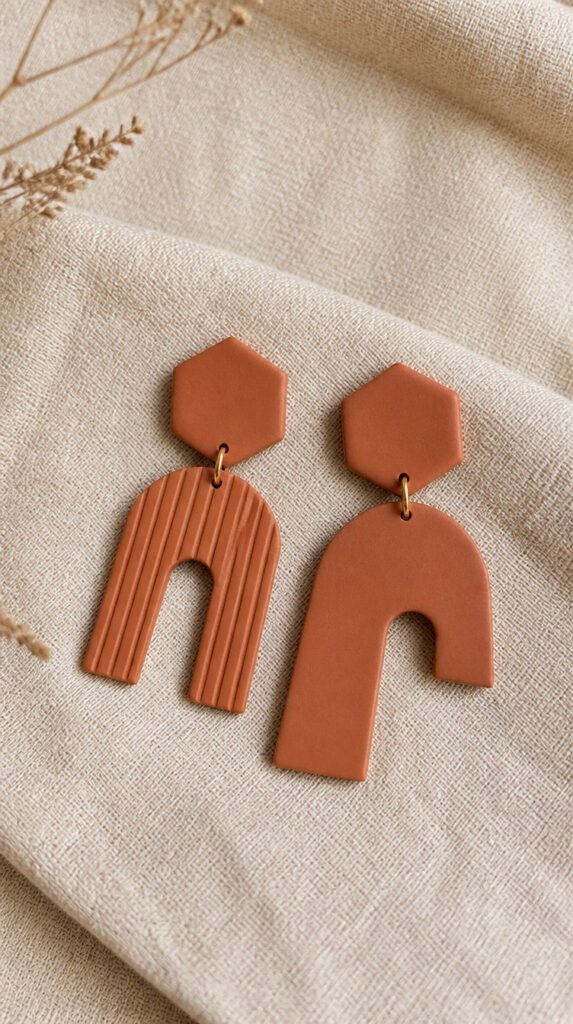
Clean lines and bold shapes are where polymer clay really shines. Triangles, hexagons, and asymmetric arches can be cut with precision using a craft knife and a ruler, no special skills required, just patience on the first cut. A monochromatic palette in terracotta, sage, or cream makes these look high-end instead of homemade. These are the earrings that work equally well with a linen blazer or a simple white tee. Hot tip: sand the edges lightly after baking with 400-grit sandpaper for a polished, professional finish that most beginners skip. At this size, a lightweight jump ring and a simple hook are all you need to complete them.
Shop the Look
5. Clay Charm Necklace
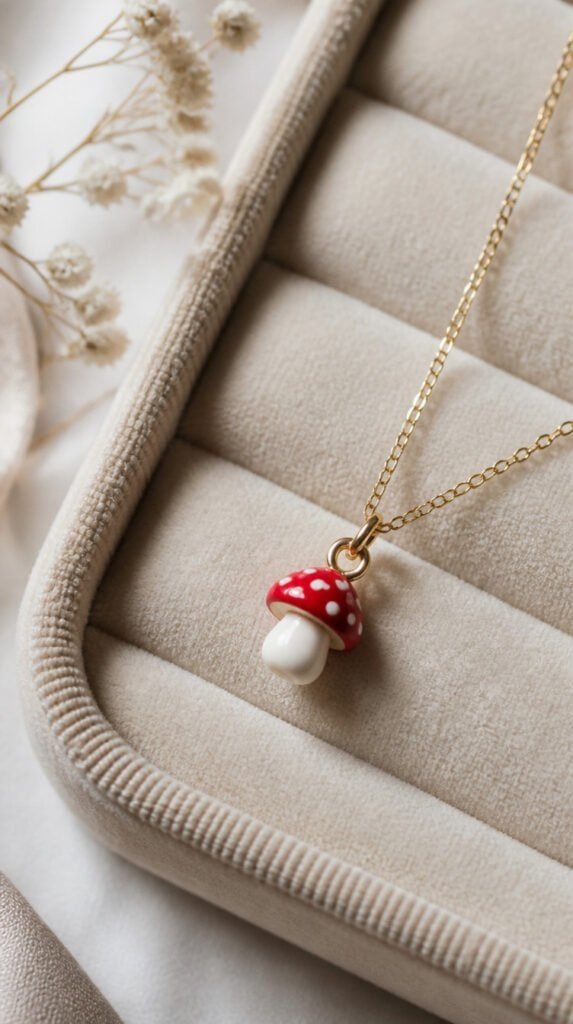
A single clay charm on a dainty chain is one of the most wearable things you will ever make. Shapes that work well at pendant size: mushrooms, stars, moons, abstract blobs, tiny houses, and mini fruit. Pierce a hole through the top before baking using a toothpick or a headpin, and the loop stays clean and centered. Keep the pendant small, about the size of a thumbnail and it layers beautifully with other necklaces. You can paint on surface details with acrylic paint after baking if you want to add color blocking or fine line designs. A 16-inch gold chain keeps it minimal and lets the charm do all the talking.
Shop the Look
- Dainty Gold Chain Necklace
- Acrylic Paint Set for Clay
- Headpins for Jewelry Making
- Jewelry Making Pliers Set
6. Textured Disc Earrings
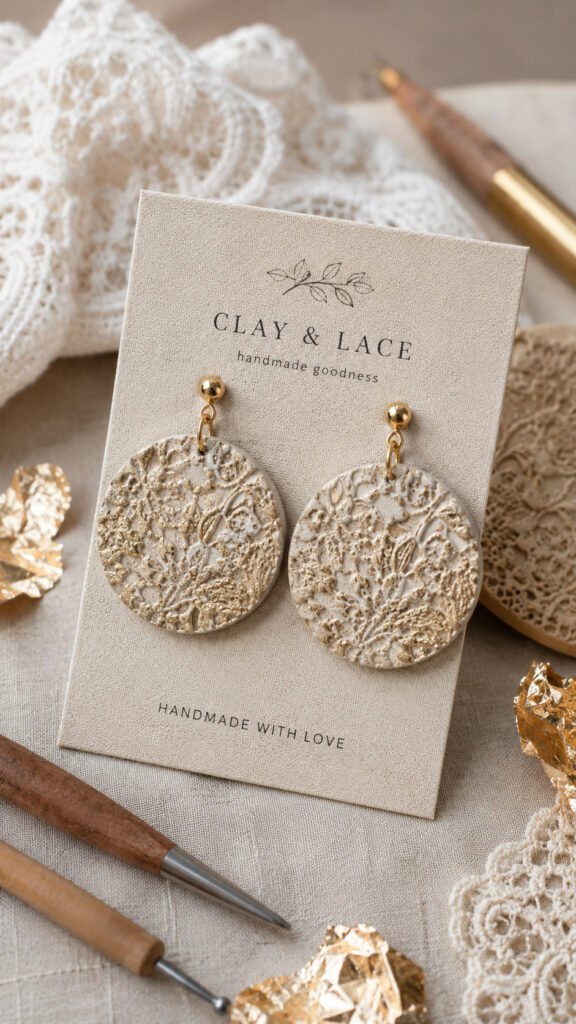
Texture is the fastest way to make a simple shape look intentional. Roll your clay flat, then press in texture using everyday items: a piece of lace, a toothbrush, a crumpled piece of foil, or a textured mat. Cut out a circle or square, add an ear wire hole at the top, and bake. The result looks like something from a handmade market stall, not a first project. Hot tip: press your texture tool straight down and lift cleanly, dragging it sideways blurs the pattern. A neutral clay color lets the texture take center stage, while a metallic powder brushed lightly over the surface before baking gives the whole piece an elevated finish.
Shop the Look
- Clay Texture Sheets
- Mica Powder for Polymer Clay
- Round Circle Clay Cutters
- Craft Knife Replacement Blades
7. Gradient Ombre Earrings
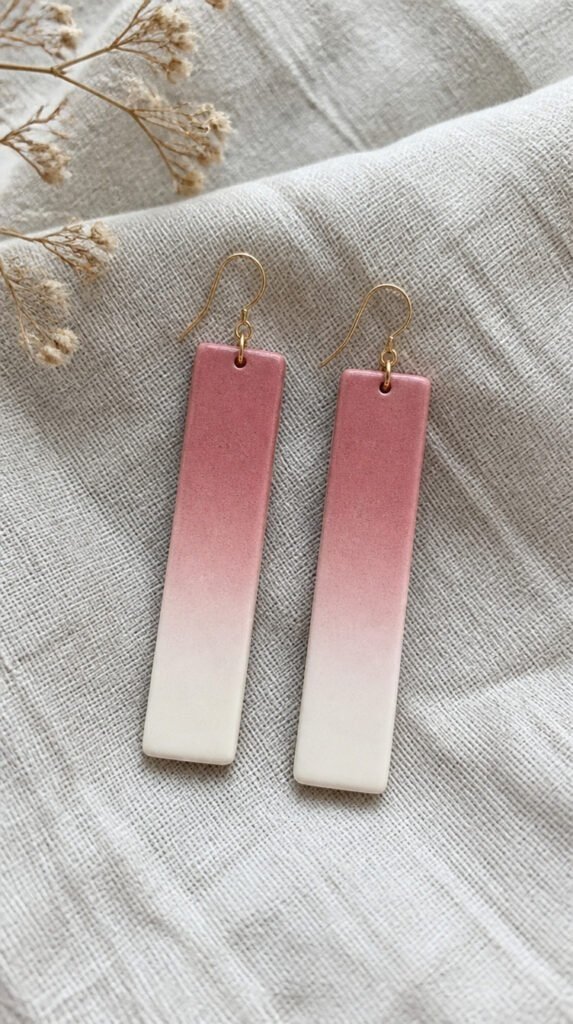
Ombre clay is one of those effects that looks complicated but takes under ten minutes to learn. Take two colors, say dusty rose and white and blend them together in the center of a clay sheet, keeping each color solid on its respective end. Roll out and cut your shape, positioning the cutter so it captures the full gradient transition from top to bottom. Long rectangular or curved shapes show off the blend better than short compact ones. Keep your hands clean between colors or the blend muddies before you get to cut it. The finished earrings photograph beautifully and look like something from a high-end accessories brand.
Shop the Look
- White Polymer Clay Block
- Rectangle Clay Earring Cutters
- Clay Earring Display Cards
- Portable Clay Work Board
8. Clay Hoop Earrings
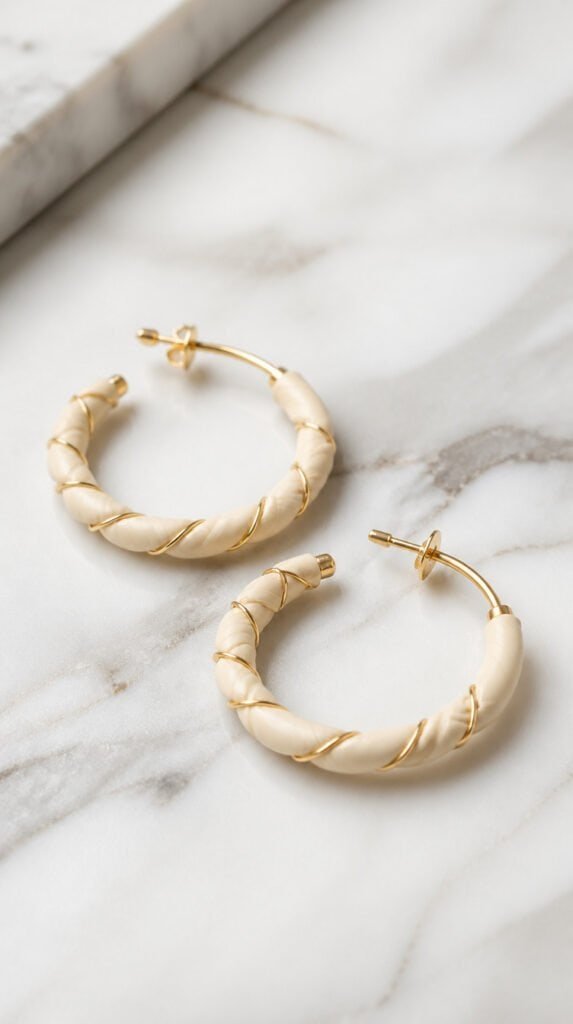
Polymer clay wrapped around a wire hoop creates a look that is totally different from anything you can buy at a regular store. Condition your clay until it is very soft and pliable, then wrap it tightly around a pre-formed hoop wire, smoothing out any gaps or fingerprints as you go. You can leave the surface smooth, add texture, or press in tiny dots for a beaded effect. Bake the clay directly on the hoop, the wire acts as a built-in support and the piece comes out sturdy. One thing to know: use nichrome or copper wire, not aluminum, which can soften in the oven. The finished hoops feel lightweight and wear better than you would expect from something this easy to make.
Shop the Look
9. Leaf-Shaped Earrings
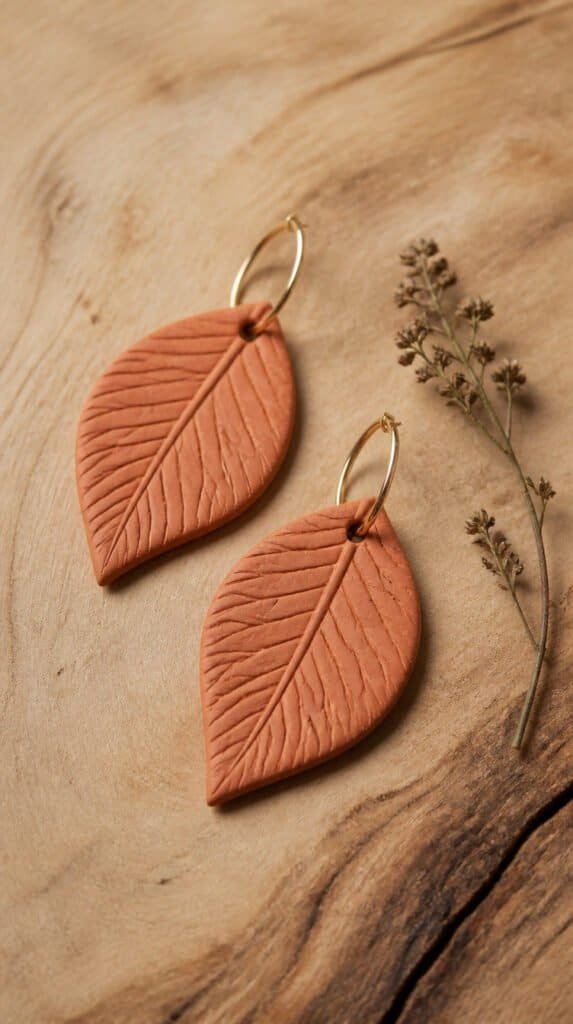
Leaf earrings in polymer clay have a natural, organic feel that works beautifully with the current boho and earthy aesthetic trending everywhere. Use a leaf-shaped cutter or cut freehand with a craft knife for a more organic edge. Press in vein details using a toothpick or the edge of a ruler, light pressure, not deep grooves. Green clay in sage, olive, or forest tones looks stunning, but terracotta, cream, and even black all read as intentional. (The terracotta ones look like something from an Anthropologie display.) Seal with a matte varnish after baking to protect the surface and give the piece a finished, professional look.
Shop the Look
- Leaf Shape Clay Cutters
- Matte Varnish for Polymer Clay
- Sage Green Polymer Clay
- Polymer Clay Starter Bundle
10. Clay Bead Bracelet
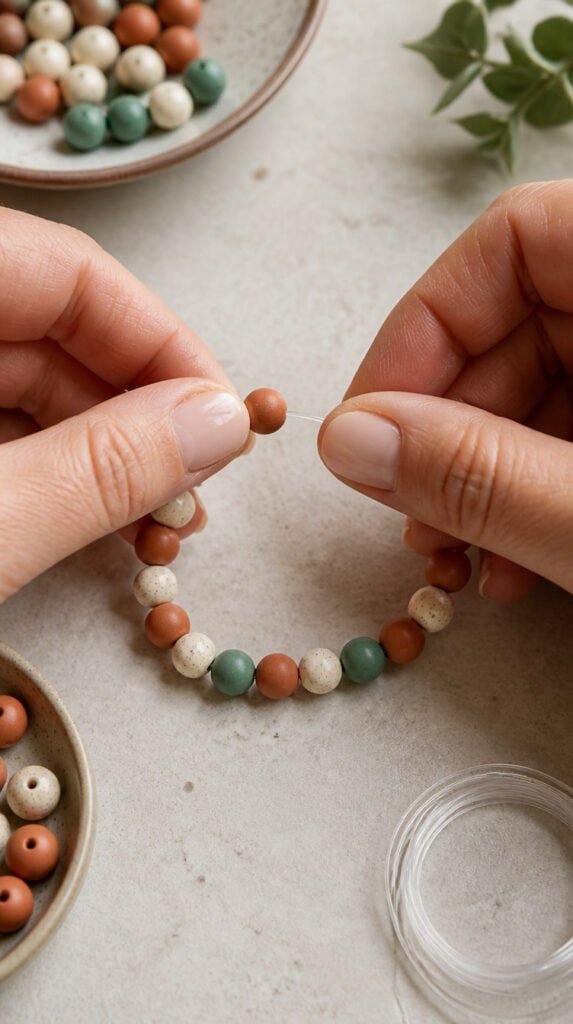
Handmade clay beads on an elastic cord make a bracelet that looks custom and costs almost nothing to produce. Roll uniform balls between your palms, consistent sizing takes a few tries but comes quickly with practice. Pierce each bead through the center with a toothpick before baking, keeping the hole centered and large enough for your elastic. Bake on a bead baking rack so the clay does not flatten on the bottom. Mix matte and glossy beads on the same bracelet for texture contrast or stick to a single-color family for a more refined look. String on 0.7mm elastic and tie a secure double knot, this bracelet will last longer than most store-bought ones.
Shop the Look
11. Moon and Star Earrings
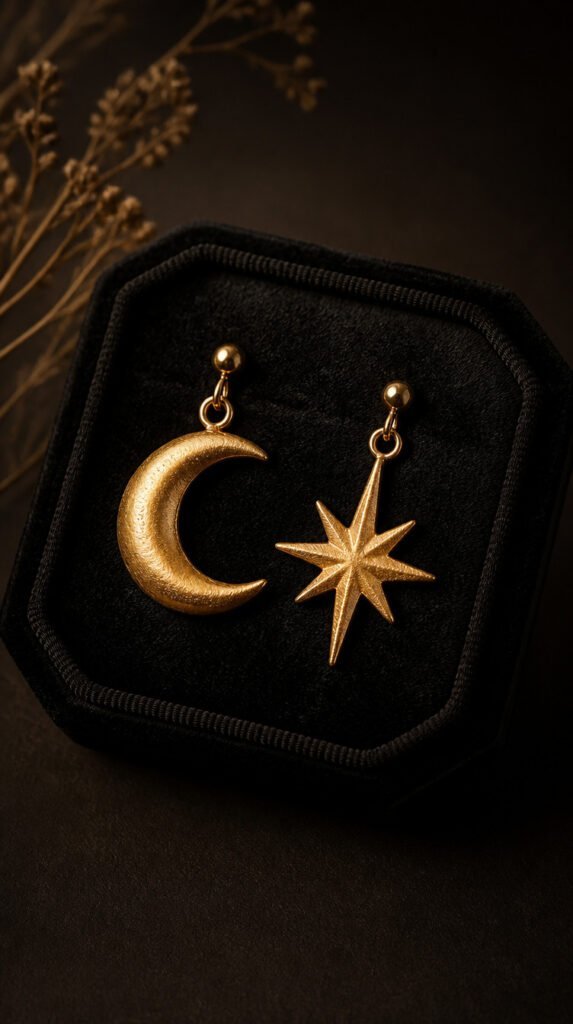
Celestial shapes in polymer clay have been everywhere, and for good reason, they are simple to cut, immediately recognizable, and appeal to a wide audience. A crescent moon cutter and a small star cutter are all you need. Pair them as a mismatched set (moon on one ear, star on the other) for a look that feels current without trying too hard. Gold metallic clay or a cream base with gold mica powder brushed over the surface both give these earrings an elevated, almost cast-metal finish. These are genuinely one of the easiest designs on this list, which makes them perfect for gifts. Make six pairs in an afternoon and you will have thoughtful handmade presents ready for months.
Shop the Look
12. Abstract Blob Earrings
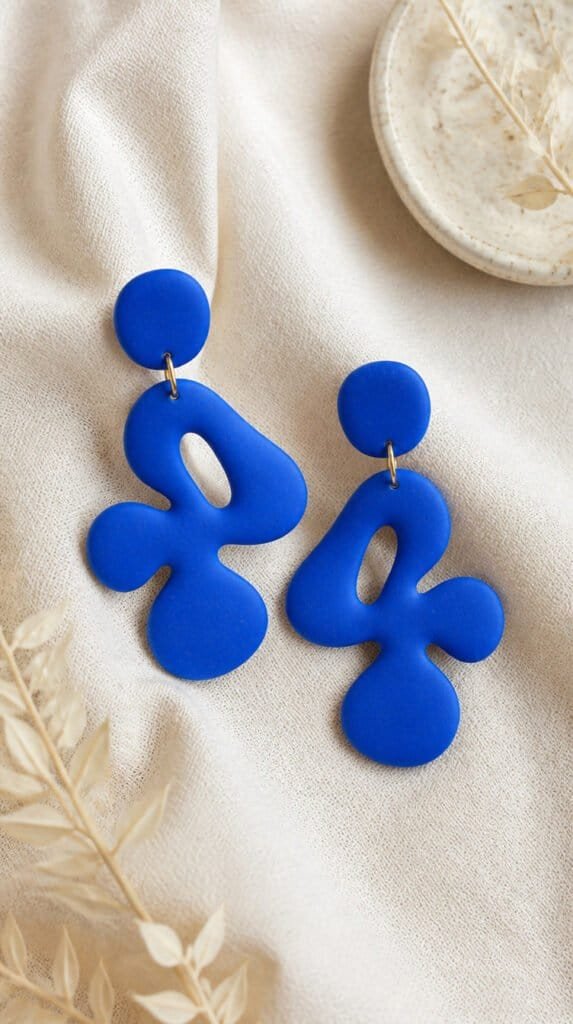
Abstract blob earrings are having a major moment, and they are genuinely the most forgiving shape for beginners because there is no wrong way to cut them. Freehand an irregular organic shape with a craft knife, think kidney bean meets amoeba and no two pairs will ever match, which is the whole point. A solid bold color works best here: ochre, cobalt, rust, or a deep forest green. Size them generously, around 4 to 5 centimeters, so the shape reads clearly when worn. The trick is to sand the edges after baking for a smooth, refined silhouette that does not look like it was cut with kitchen scissors. These photograph incredibly well and consistently perform on Pinterest.
Shop the Look
- Bold Color Polymer Clay Blocks
- Precision Craft Knife Set
- 400 Grit Waterproof Sandpaper
- Clay Pasta Machine
13. Clay Initial Pendant
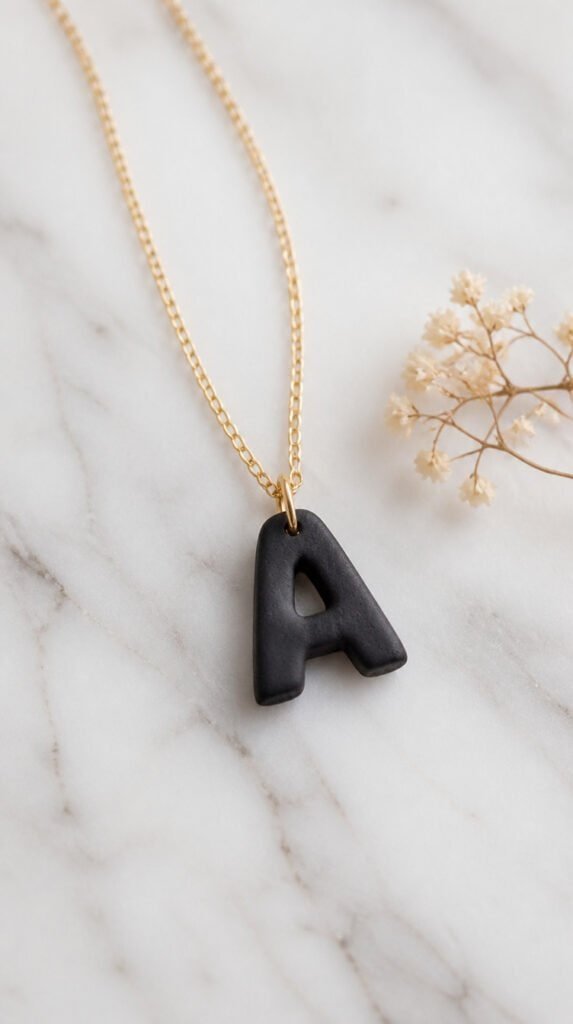
A personalized initial pendant in polymer clay costs a fraction of what gold letter necklaces sell for, and the handmade quality gives it something manufactured pieces do not have. Shape individual letters by hand using thin rolls of clay, or use alphabet stamps pressed into a flat clay tile. Pierce a hole at the top before baking and sand smooth after for a clean finish. Gold clay, black clay, or white with hand-painted gold edges all look intentional and refined. These make exceptional gifts because they are so personal, you can make someone’s initial in an hour and present it on a simple chain. (Nobody has to know it cost you $3 in materials.)
Shop the Look
- Alphabet Stamps for Clay
- Black Polymer Clay Block
- Gold Paint Pen for Clay
- Chain Nose Pliers for Jewelry
14. Pressed Flower Clay Earrings
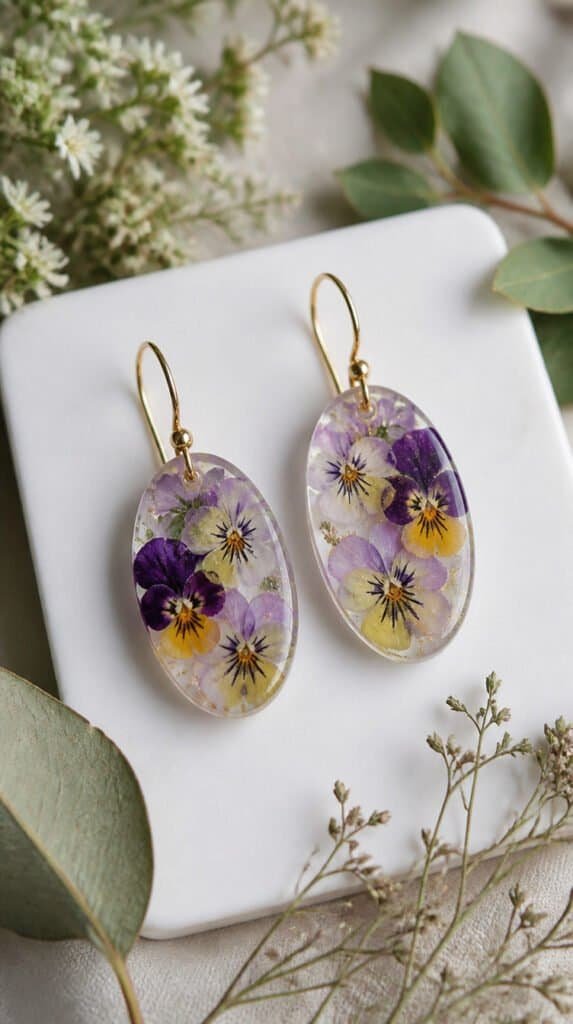
Real pressed flowers embedded in translucent polymer clay create earrings that look like tiny botanical specimens completely unique and genuinely beautiful. Use translucent clay as your base, press a dried flower or leaf into the surface before baking, and the clay turns slightly clear around it once cured, framing the flower naturally. Dry your botanicals completely first or they will steam inside the clay during baking and brown. Small florals, baby’s breath, pansies, tiny herb sprigs, work best at earring scale. Seal the surface with a clear gloss varnish after baking to protect the flower and add depth. These are the earrings that stop people mid-sentence and make them ask where you got them.
Shop the Look
- Translucent Polymer Clay
- Dried Pressed Flowers for Crafts
- Clear Gloss Varnish
- Botanical Flower Press Kit
15. Checkered Clay Earrings
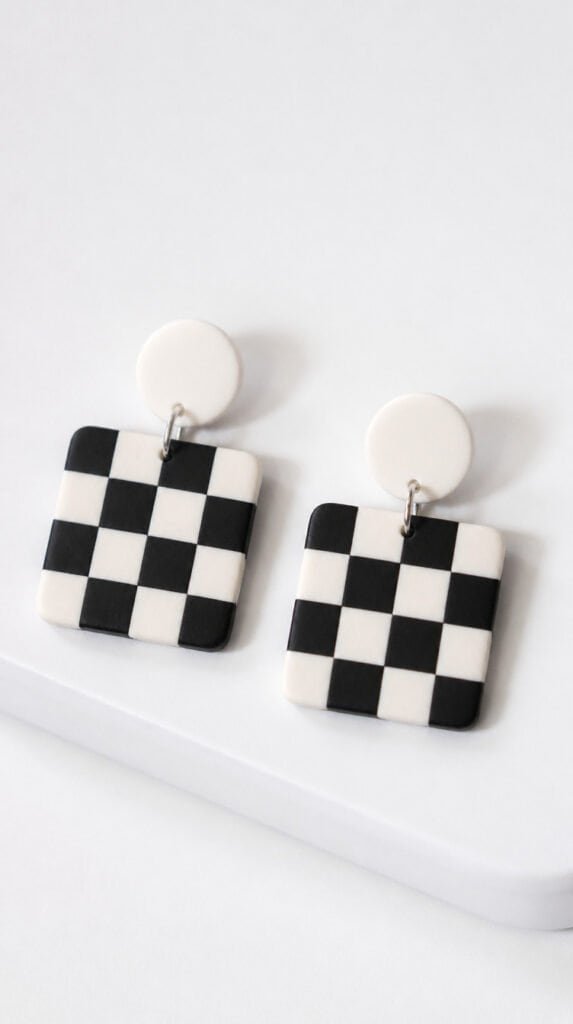
The checkerboard pattern has made a full comeback, and polymer clay is one of the easiest ways to wear it without looking like a theme park souvenir. Create a two-tone clay cane by stacking thin alternating layers of two colors, slicing them into squares, and reassembling in a checkerboard pattern. Slice thin pieces off the cane and use them as a veneer over a plain clay earring shape. The pattern stays crisp and clean as long as you work with chilled clay, warm clay tends to blur the edges between colors. Black and white is the classic, but terracotta and cream, or navy and sage, give the trend a more grown-up feel. These are genuinely impressive for a beginner project.
Shop the Look
- Black and White Polymer Clay
- Clay Blade Slicer Tool
- Polymer Clay Conditioning Machine
- Wax Paper Sheets for Clay
Your First Pair Is Already in There
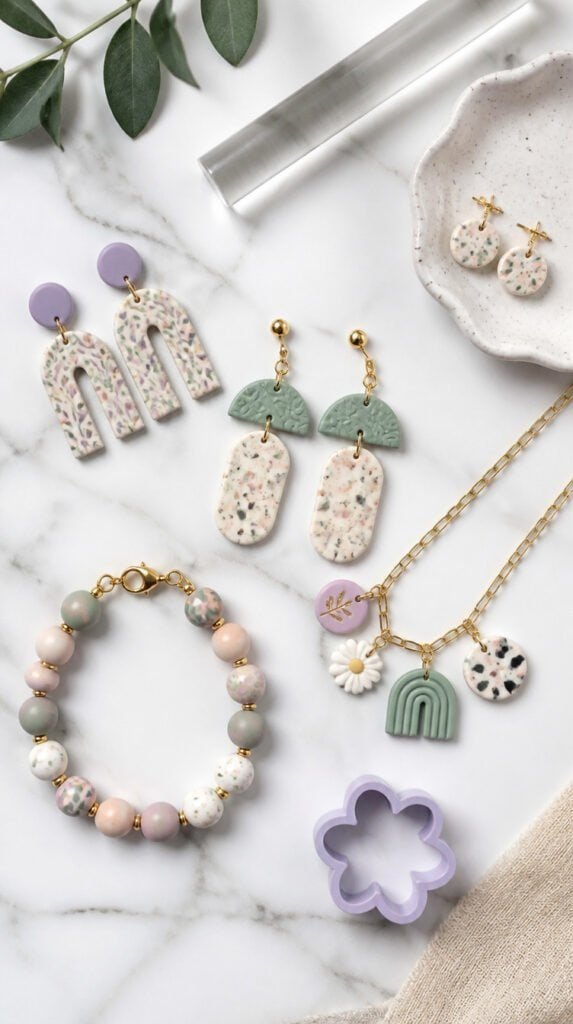
Polymer clay jewelry does not require talent, it rewards patience and a willingness to experiment. Pick the one idea on this list that made you think “I could actually do that” and start there. Buy one block of clay, one pair of ear wires, and make something today. The first pair teaches you more than an hour of research ever will, and the next pair will be better, and the one after that better still. Want to take it further? Check out our post on easy DIY crafts that sell at markets for what to do when your jewelry starts looking too good to keep.