This post contains affiliate links. If you purchase through my links, I may earn a small commission at no extra cost to you. Thank you for supporting Room Revival Studio!
You walk into a boutique and spot a hand-poured candle, a woven wall hanging, a resin tray that catches the light. You flip the price tag: $65, $120, $89. You set it down. The thing is, you could make every single one of those pieces for less than the cost of a takeout dinner. Same look. Same quality. Made in your own kitchen on a Tuesday night.
These 14 adult craft ideas are the ones that actually get finished and displayed proudly, not shoved in a drawer. Some are meditative. Some are surprisingly fast. All of them deliver that specific satisfaction of making something you are genuinely proud of, no matter your experience level.
1. Macramé Wall Hanging That Looks Like It Cost $80

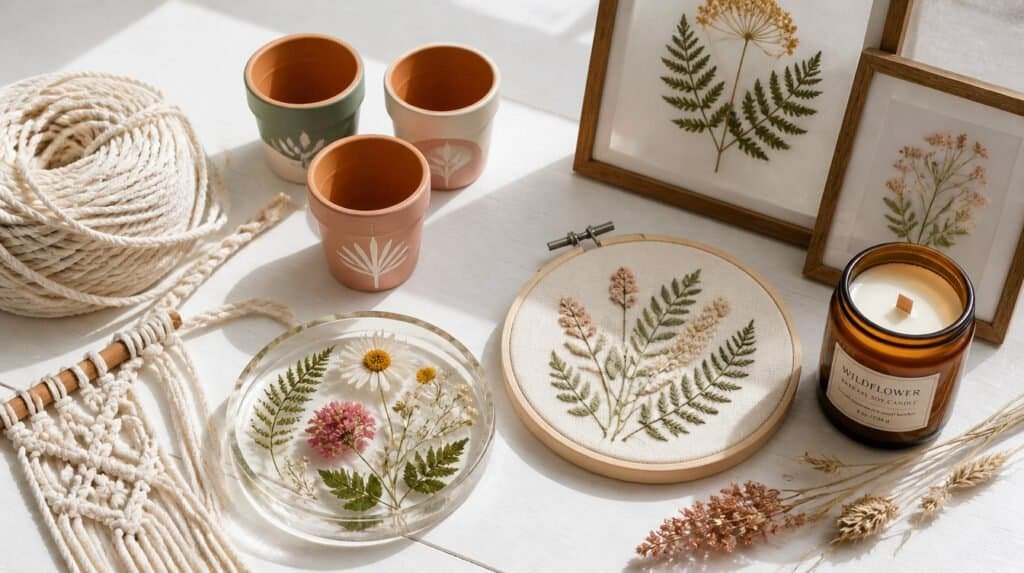
There is a reason macramé is still having a moment. A finished wall hanging adds texture, warmth, and that handmade-but-make-it-artisan energy that no mass-produced print can replicate. You need cotton rope, a dowel rod, and about two hours. The knots are simple once you learn the square knot and the spiral, those two alone will get you through the whole project.
The trick here: buy natural white cotton rope and leave it undyed. It photographs better, matches everything, and looks more expensive than colored versions. Hot tip: a longer fringe always looks more intentional. Trim it after you hang it, not before.
Go slow on the dowel placement. A crooked center point is the one thing that makes a macramé piece look DIY in the wrong way. Measure twice. (It’s always the dowel placement, isn’t it.) Your wall goes from bare to bohemian in an afternoon. Chunky texture, soft shadow play, the light filtering through the knots.
Shop the Look
- Cotton Macramé Rope 3mm Natural White
- Natural Wood Dowel Rod 18 Inch
- Macramé Finishing Comb
- Wooden Ring for Wall Hanging
2. Resin Epoxy Tray That Looks Like a Gallery Piece

Resin trays look intimidating until you do one. Then you get obsessed. Pour clear epoxy resin into a silicone tray mold, drop in dried flowers, glitter, or swirls of color, and let it cure overnight. The result is a piece that genuinely looks like something you would find at a curated home goods store for $75.
The trick here: use a heat gun or lighter on low to pop surface bubbles right after pouring. This is the single move that separates beginner-looking pieces from professional ones. Hot tip: start with a round tray mold, they are more forgiving for color placement than rectangular ones.
Resin has a learning curve on temperature. Warm resin cures faster and levels more smoothly. If your workspace is cold, the surface can end up cloudy. Warm it slightly before mixing. (That one surprised me the first time.) You set it on a shelf, tuck a candle in the center, and the whole room looks upgraded.
Shop the Look
- Epoxy Resin Clear Casting Kit
- Silicone Round Tray Mold Set
- Alcohol Ink Drops for Resin
- Dried Flower Petals for Embedding
3. Hand-Painted Terra Cotta Pots That Look Pottery Barn Worthy

Terra cotta pots are one of those blank canvases that make every creative choice look deliberate. A little acrylic paint, some patience, and you have something you will want in every room. Abstract brush strokes, geometric patterns, color blocking, all of them work. All of them look curated.
Hot tip: seal your finished pot with a matte varnish before planting anything in it. This protects the design from water and dirt. Without it, the paint chips fast. The trick here: use chalk paint for a matte, vintage look, or regular acrylic for something brighter and more graphic.
Layer your colors in thin coats. Terra cotta absorbs moisture quickly, so thick brushstrokes can crack as they dry. Two thin coats always outperform one thick one. (And yet we always try the thick coat first.) Your windowsill goes from cluttered to curated in forty minutes.
Shop the Look
- Terra Cotta Pot Set with Saucers
- Acrylic Paint Set for Crafts
- Craft Sealant Matte Finish Spray
- Fine Tip Paint Brushes Set
4. Pressed Flower Art That Looks Like a Botanical Illustration

This one surprises people because it looks complex and it is not. Pick flowers or leaves from your yard, press them flat inside a heavy book for two weeks, then arrange them on cardstock and frame them. The finished pieces look like botanical prints that belong in a country home library or a studio apartment with serious style.
The trick here: the drying time is non-negotiable. Flowers pressed for less than a week stay damp and will mold once framed. Two weeks minimum. Hot tip: dried hydrangeas, ferns, and wild grasses give the most texture. Avoid thick, fleshy flowers, they shrink unevenly and lose their shape.
Use acid-free cardstock and UV-protective glass in your frame to keep the colors from fading over time. This is where people cut corners and then wonder why the colors dull within a year. (Worth the extra three dollars, every time.) Hang three in a row and the wall goes from blank to collected, like someone who has always had taste.
Shop the Look
- Botanical Frame Set 5×7 Inch Black
- Acid-Free White Cardstock
- Flower Pressing Kit with Heavy Boards
- Rubber Cement Adhesive for Paper
5. Poured Soy Candles That Smell Like a High-End Spa

Hand-poured candles are one of the most satisfying adult craft ideas to make and keep. The process is simple: melt soy wax flakes, add fragrance oil, pour into a vessel, center the wick, and wait. What comes out smells expensive, looks beautiful, and makes the best gift you will ever give, including to yourself.
The trick here: the vessel is everything. A vintage teacup, a marble votive holder, a minimalist apothecary jar — the container transforms the candle from craft project to home decor. Hot tip: add fragrance at around 170°F, not at full melt temperature. This preserves the scent throw significantly.
Soy wax can develop a rough or frosted surface as it cools. This is normal for natural wax and part of the charm. If you want a smoother top, do a second thin pour after the first layer has hardened. (Two pours, no excuses.) Light it for the first time and the whole room smells like something you paid $40 for.
Shop the Look
- Natural Soy Wax Flakes 2 lb
- Cotton Candle Wick Set with Holders
- Fragrance Oil Set for Candle Making
- Amber Glass Candle Jars 8 oz
6. Decoupage Tray That Looks Like a One-of-a-Kind Antique

Decoupage is the art of gluing paper cutouts onto a surface and sealing them. That sounds basic. The results are not. Tear pages from old books, maps, botanical prints, or vintage sheet music and apply them to a wooden tray with Mod Podge. The layered, aged effect looks intentional, artistic, and genuinely one-of-a-kind.
The trick here: tear your paper instead of cutting it. Torn edges blend into the surface and look more seamless. Cut edges show as hard lines that read as craft project rather than art piece. Hot tip: seal with three to four coats of Mod Podge on top and let each coat dry completely before adding the next.
The paper can bubble if you apply the Podge too fast or too thick. Work in small sections, smooth each piece as you go, and do not rush. (Patience here is genuinely rewarded.) The finished tray sits on your coffee table and looks like you found it at a flea market in France.
Shop the Look
- Unfinished Wooden Serving Tray
- Mod Podge Gloss Finish Large Bottle
- Vintage-Style Decorative Tissue Paper
- Foam Brush Set for Decoupage
7. Embroidered Hoop Art That Looks Like Fine Textile Work

Embroidery hoop art has had the longest comeback in craft history, and it deserved every moment of it. Stretch fabric in a wooden hoop, transfer a simple design, and stitch. The result is something that feels slow and intentional in the best way, the kind of craft you do while watching something good on a Friday night.
The trick here: the hoop IS the frame. You do not need to remove the embroidery. Trim the extra fabric, leave a little overhang, tuck it behind, and hang it as-is. Hot tip: use a light box or trace your design with a water-soluble fabric pen, both disappear completely when you are done.
Tight tension on the fabric matters more than most tutorials mention. Loose fabric makes stitches uneven and the finished piece looks sloppy. Tighten the outer hoop screw before you start and check it every thirty minutes. (It loosens as you work. Always.) The finished hoop goes on a gallery wall and everyone asks where you bought it.
Shop the Look
- Embroidery Hoop Set Wooden 6 and 8 Inch
- Embroidery Floss Kit 50 Colors
- Water Soluble Fabric Marking Pen
- Natural Linen Fabric for Embroidery
8. Air Dry Clay Ring Dish That Looks Handmade in Italy

Air dry clay has completely changed what you can make at home without a kiln. A small ring dish takes less than ten minutes to shape and twenty-four hours to dry. You can pinch it into a simple bowl, imprint it with a leaf or lace for texture, or keep it smooth and paint it after. All three options look expensive on a dresser or bathroom shelf.
Hot tip: imprint texture before the clay dries, not after. Press a leaf, a piece of burlap, or a flat stamp into the surface within the first five minutes of shaping. Once it firms up, the impressions become permanent. The trick here: seal the finished dish with a clear coat spray so it holds up to real daily use.
Air dry clay can crack if it dries too fast. Cover it loosely with plastic wrap for the first few hours to slow the drying. A cracked dish is not always ruined, fill small cracks with a little fresh clay and smooth over but prevention is easier. (Ask me how I know.) It sits on your dresser and makes even a bare surface look intentional.
Shop the Look
- Air Dry Clay White 2 lb Block
- Round Jewelry Dish Mold Silicone
- Gold Paint Pen for Ceramics
- Matte Sealer Spray for Clay Crafts
9. Poured Paint Abstract Canvas That Belongs in a Gallery

Pour painting is exactly what it sounds like: you thin acrylic paint, pour it over a canvas, tilt to move the colors, and let it dry. The results look like they required real artistic talent. They require patience and a tarp under your workspace, but the actual technique is completely accessible to anyone.
Hot tip: use a pour medium like Floetrol mixed into each color. This thins the paint without diluting the pigment and helps the colors flow together without muddying. The trick here: choose three or four colors that share a tonal family. Random color combinations almost always get muddy in the pour. Pick a palette and stick to it.
The paint keeps flowing for a few minutes after you set the canvas down. Resist the urge to touch it. This is the part where most beginners ruin a good pour, set a timer, walk away, and let it move. (Trust the process. It rewards you.) The finished canvas dries to something that looks like a curated abstract print, and people will ask about the artist.
Shop the Look
- Stretched Canvas Multi-Pack 8×10 and 11×14
- Acrylic Pour Paint Set 8 Colors
- Floetrol Paint Conditioner Bottle
- Silicone Pour Mixing Cups Set
10. Block Printed Tea Towels That Look Custom Designed

Block printing is an ancient art form you can do at your kitchen table with a foam brayer and a carved stamp. Lay plain cotton tea towels flat, dip your stamp into fabric ink, and press. The result looks like expensive artisan linen from a market in Oaxaca, and it costs almost nothing to make a full set.
The trick here: use fabric ink, not regular acrylic paint. Fabric ink is made to move with the textile rather than cracking as it dries. It also survives washing, which regular acrylic often does not. Hot tip: do a few test prints on scrap fabric first to get your pressure and ink load right before you touch the final towel.
Uneven prints are the whole point. Perfect, mechanical repetition looks store-bought. Slightly imperfect block printing looks handmade in the best way. Lean into variation, different pressure, different ink loads, slightly off-center placements. (The inconsistency is what makes it art.) Stack them on a kitchen shelf or hang them from the oven handle. The whole kitchen feels curated.
Shop the Look
- Plain Cotton Flour Sack Tea Towels
- Fabric Ink Block Printing Set
- Foam Brayer for Printing
- Carved Rubber Stamp Set Botanical
11. DIY Terrarium That Looks Like a Miniature Landscape

A glass container, a few handfuls of gravel, some activated charcoal, potting mix, and a few small plants or succulents. That is the whole terrarium. The finished piece sits on a bookshelf or a coffee table and looks like it belongs in an editorial photo. It also mostly takes care of itself, which is the best possible outcome.
The trick here: layer your materials in order, gravel on the bottom for drainage, a thin layer of charcoal to prevent mold, then potting mix, then plants. Skip the charcoal layer and you will have a smelly terrarium within three weeks. Hot tip: use closed containers for humidity-loving plants like moss and ferns, and open containers for succulents and cacti.
The glass vessel matters more than the plants. A wide-mouth apothecary jar, a geometric glass box, or a repurposed fishbowl all work beautifully. (The plants are secondary. The vessel is the art.) It sits on your shelf and people assume you have a green thumb, a good eye, and a lot more patience than you actually do.
Shop the Look
- Glass Geometric Terrarium Container Open
- Decorative River Pebbles Small Bag
- Miniature Succulents Assorted 2 Inch
- Activated Charcoal for Terrariums
12. Painted Glass Vases That Look Like Vintage Ceramics

Clear glass bottles and vases transform completely with a coat of chalk paint or glass paint. Color them, marble them, distress them, or make them look like aged stone with spray paint and a dry brush technique. Line up three in different heights on a shelf and it looks like a styled vignette from a home decor magazine shoot.
The trick here: clean the glass thoroughly before painting. Any oil from fingerprints will cause the paint to peel. Wipe down with rubbing alcohol first, let dry completely, then paint. Hot tip: chalk paint gives a matte, vintage look that is much harder to achieve with glossy paints and requires fewer coats.
You do not have to be precise. Abstract brushstrokes, color drips, imperfect finishes, all of these read as intentional on glass. The accident looks artistic here more often than not. (Some of the best pieces are happy mistakes.) A trio of painted vases with a single dried stem in each, and the shelf goes from clutter to collection in one afternoon.
Shop the Look
- Clear Glass Cylinder Vases Assorted Heights
- Chalk Paint Set in Neutrals
- Small Foam Roller for Glass Painting
- Matte Finish Spray Sealer for Glass
13. Leather Tassel Keychain That Looks Boutique Priced

A leather tassel keychain takes about fifteen minutes and costs almost nothing if you buy leather scraps by the pack. Cut thin strips, fold them over a keyring, and secure the fold with a smaller strip of leather wrapped and glued. That is it. The result looks like something you would pay $28 for at an artisan market.
The trick here: use genuine leather scraps, not faux leather. Faux leather does not cut as cleanly, fray in the same way, or develop the same patina over time. Even a small pack of genuine leather offcuts makes a significant difference in the finished look. Hot tip: a rotary punch tool gives you clean holes for the keyring connection, scissors and awls leave rough, uneven holes.
The strips should all be cut to the same width for a polished look. Uneven strips look unfinished. Measure once, cut in batches, then assemble. (A ruler and a cutting mat pay for themselves on this project.) It hangs from your bag and looks like you spent money on the details, because it looks like you thought about the details.
Shop the Look
- Genuine Leather Scrap Assorted Pack
- Gold Keyring Hardware Set
- Leather Glue Contact Cement
- Rotary Leather Punch Tool
14. Photo Transfer on Wood That Looks Like Vintage Artwork

Photo transfers onto wood look wildly impressive and the technique is simpler than it should be. Print your image on regular inkjet paper, apply Mod Podge to the wood surface and to the paper, place the paper face-down on the wood, let it cure completely, then wet and rub away the paper. The ink stays embedded in the grain. The result looks like a vintage photograph that has always belonged to the wood.
The trick here: the image must be printed in reverse for it to read correctly after the transfer. Flip it horizontally in any photo editing app before printing. Hot tip: use lighter-grained wood for the best image clarity. Dark or heavily grained wood swallows detail and contrast.
This technique works best on smooth, sanded wood. Rough surfaces create air bubbles and uneven adhesion. Sand your surface to at least 150 grit, wipe clean, and let it dry completely before starting. (Skipping the sanding is the most common rookie mistake, and it shows.) The finished piece goes on a wall, a shelf, a bedside table. It looks like a family heirloom someone found in an attic.
Shop the Look
- Basswood Plank Set for Photo Transfer
- Mod Podge Photo Transfer Medium
- Fine Grit Sandpaper 150 and 220
- Foam Brush Set for Mod Podge
Pick One. Start Tonight.

You do not need a craft room, a big supply budget, or years of experience. You need one project, the right materials, and an evening to actually try. Pick the one that caught you first, not the one that seems most practical, but the one you kept looking at. That instinct is usually right.
Start small. One candle, one pot, one hoop. Your hands remember how to make things, even if they are out of practice. And the satisfaction of finishing something beautiful, something that lives in your home, that people notice, that cost almost nothing, is something you do not forget quickly.