
Affiliate Disclosure – This post may contain affiliate links. As an Amazon Associate, I earn from qualifying purchases. This comes at no extra cost to you and helps support Room Revival Studio.
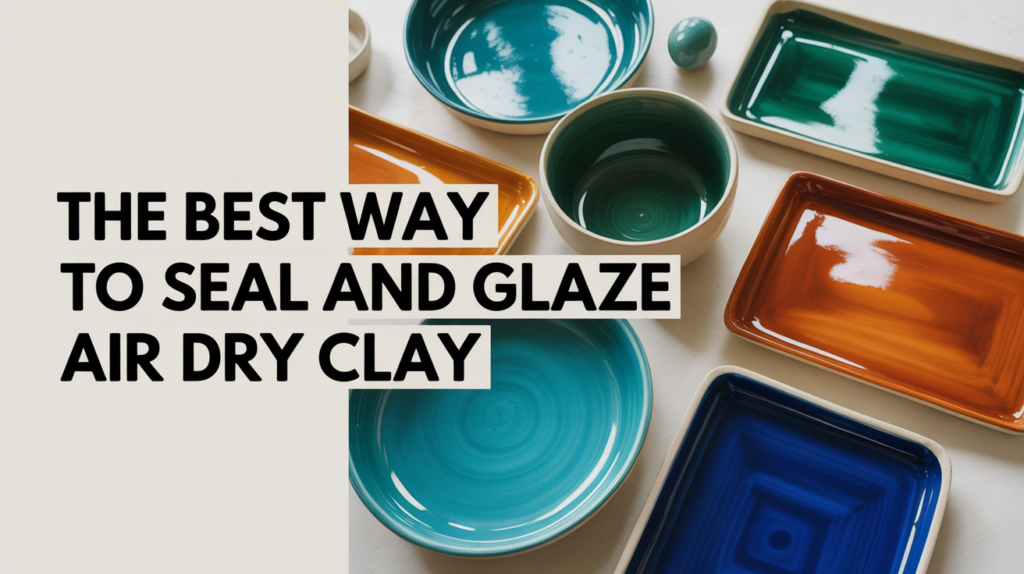
If you’ve ever finished a clay piece and thought, “Why does this look dusty instead of glossy?” you’re not alone. Air dry clay can look chalky, streaky, or uneven if you skip one critical step. I’ve glazed everything from ring dishes to trays and wall art, and the difference between amateur and polished always comes down to sealing correctly.
If you want to glaze air dry clay so it looks smooth, durable, and almost ceramic-level polished, I’m going to walk you through exactly how to do it right.
Why You Must Seal Before You Glaze Air Dry Clay
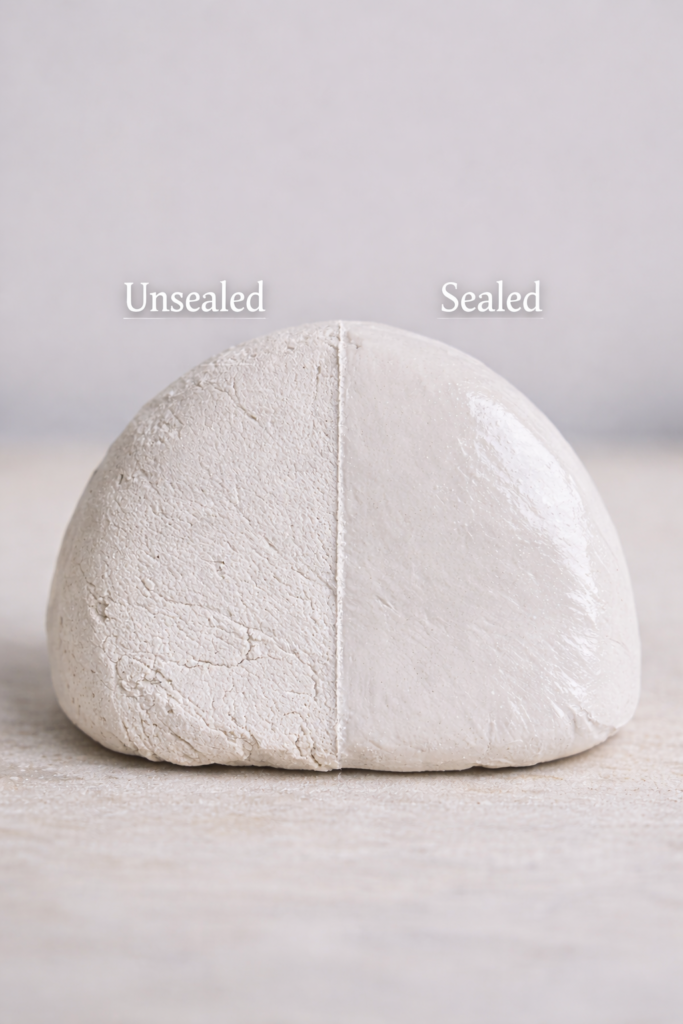
Air dry clay is extremely porous. That means it absorbs moisture fast, including paint and glaze. If you apply glaze directly to raw clay, it sinks in unevenly, dries cloudy, and can even create micro-cracks over time.
Sealing creates a barrier. It smooths the surface, prevents blotchiness, and gives your air dry clay glaze something solid to sit on instead of soaking in. If your finished pieces have ever looked streaky or dull, this is likely the step that was skipped.
Think of sealing as primer for your clay. Without it, your glaze for air dry clay won’t perform the way you expect.
Shop the Supplies
Prep Your Clay for a Smooth, Professional Finish
If you want your air dry clay glaze DIY to look smooth and intentional, prep is where the magic actually happens. Even the best glaze cannot hide rough edges, fingerprints, or uneven surfaces. What you do before sealing determines how polished your final result will look.
Start by letting your clay dry completely. Not “feels dry.” Completely dry. Depending on thickness, that can take 24 to 72 hours. If you rush this part, moisture trapped inside can cause cloudiness once you glaze air dry clay.
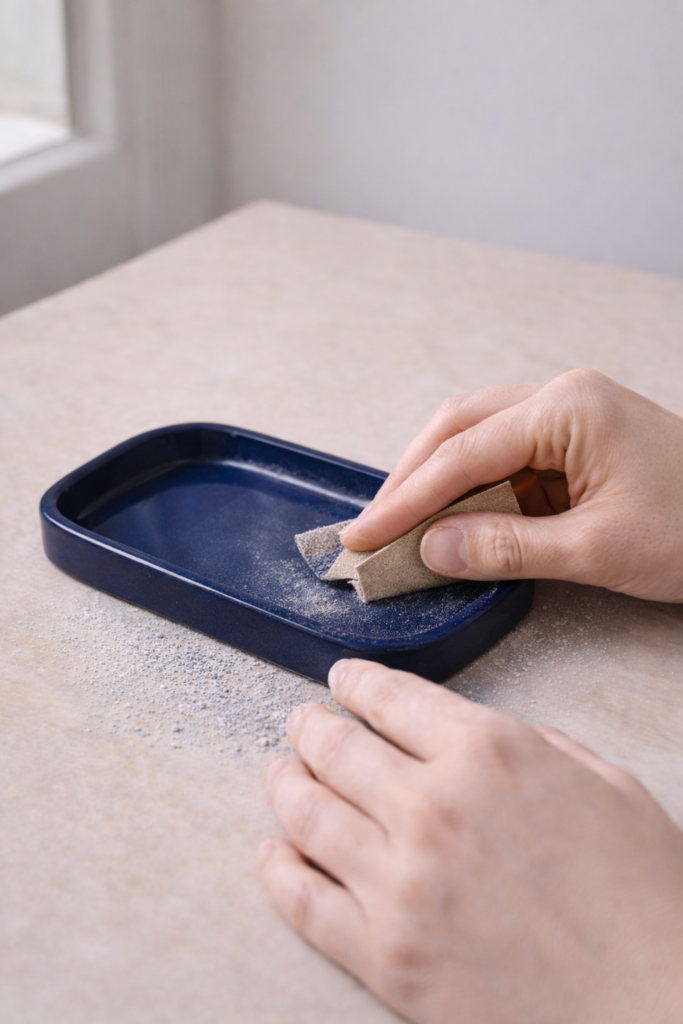
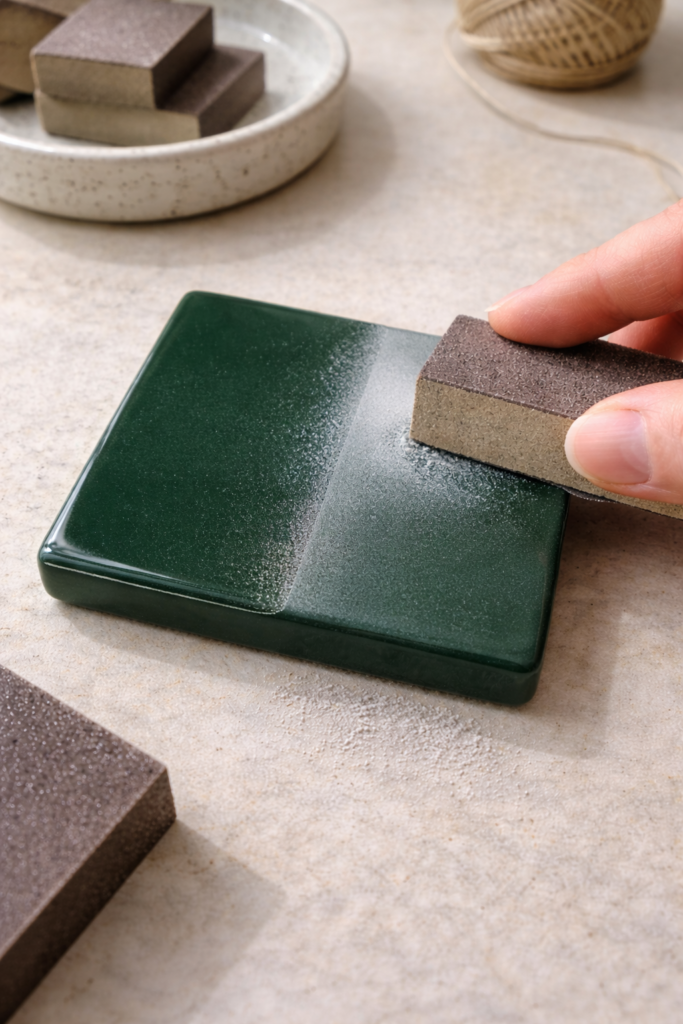
Next, sand the surface lightly. Use fine grit sandpaper and move in soft circular motions. Focus on edges, seams, and any raised texture you do not want visible. After sanding, wipe everything down with a microfiber cloth to remove dust. If you skip the dust removal, your glaze will trap those particles and create a gritty finish.
If you plan to paint your piece, apply your acrylic paint now and let it dry fully before sealing. Paint gives depth. Sealing protects it. Then you move on to glaze.
Shop the Supplies
Best Clear Sealers for Air Dry Clay
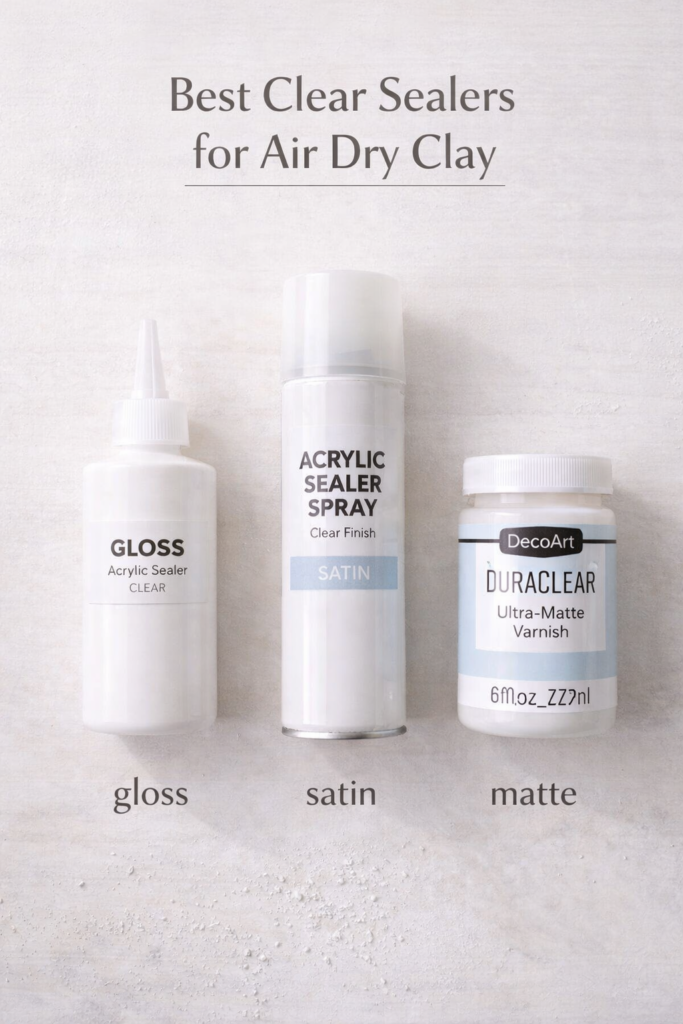
Not all sealers are created equal. If you’re serious about learning how to glaze air dry clay the right way, choosing the correct base sealer makes a huge difference in durability and final finish.
Some sealers stay flexible. Some dry rock hard. Some give you a soft satin look, while others create a slick glossy base that makes your air dry clay glaze pop. The key is matching your sealer to your project’s purpose.
Here’s a simple breakdown:
| Product Type | Finish | Dry Time | Durability Level |
|---|---|---|---|
| Mod Podge (Gloss or Matte) | Gloss or Matte | 15–30 min per coat | Light to Moderate |
| Polycrylic Clear Coat | Satin or Gloss | 1–2 hours | Moderate to High |
| Acrylic Spray Sealer | Matte, Satin, Gloss | 20–30 min | Moderate |
| Clear Craft Varnish | Satin or Gloss | 1–2 hours | Moderate |
Mod Podge works well for decorative pieces like trinket trays or wall art.
Polycrylic gives stronger protection and works better for coasters or pieces that get handled often.
Spray sealers are great when you want smooth, brush-stroke-free coverage.
No matter what you choose, apply thin coats and allow full drying time between layers. Heavy coats cause streaking and tackiness, which ruins your glaze finish.
Shop the Supplies
How to Glaze Air Dry Clay for a Glossy Finish
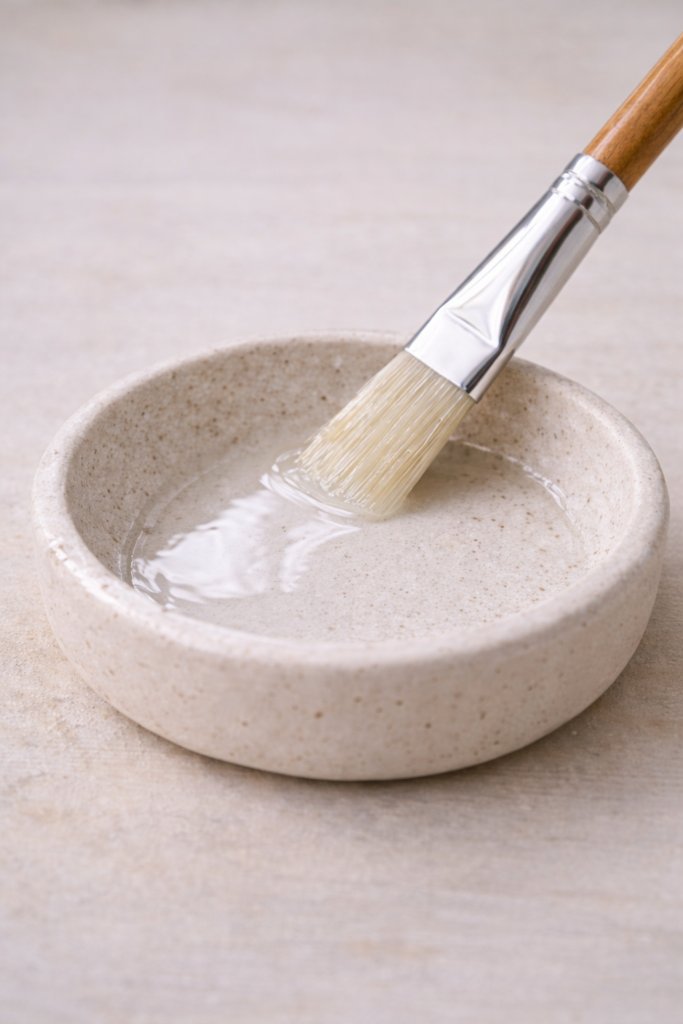
Now we’re at the part everyone cares about. This is where your piece goes from handmade to polished. If you want that smooth, almost ceramic look, here’s exactly how to glaze air dry clay without streaks or cloudiness.
First, make sure your piece is fully sealed and completely dry. If the sealer is even slightly tacky, your glaze will drag and create texture lines.
Apply a thin layer of glaze using a soft brush. Work in one direction instead of brushing back and forth. Overworking the glaze is what causes bubbles and uneven shine. Let that first coat dry fully. Depending on the product, that can take 30 minutes to a few hours.
Once dry, apply a second thin coat. Two thin layers always look better than one heavy coat. The finish should look smooth, evenly reflective, and clear.
If you notice small bubbles, lightly tap your brush against them before the glaze sets. Do not keep brushing once it starts to dry. That is how streaks happen.
Shop the Supplies
DIY Glaze for Air Dry Clay (Budget-Friendly Option)
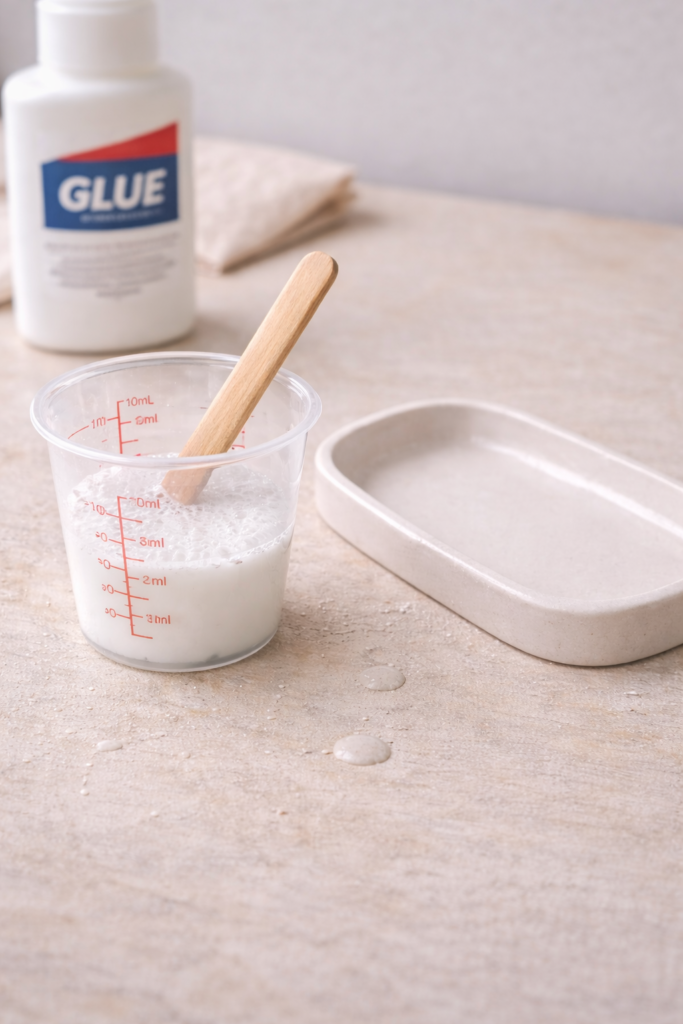
If you don’t want to buy a specialty product, you can absolutely create a DIY glaze for air dry clay using materials you may already have. It will not be identical to commercial glaze, but it can give you a clean, sealed finish when done correctly.
Option 1: Glue + Water Method
Mix white glue with a small amount of water until it thins slightly. Think light cream consistency, not runny. Apply in thin layers using a soft brush. Let each layer dry completely before adding another. Two to three coats usually create a smooth satin-like finish.
Option 2: Acrylic Medium
Clear acrylic medium works beautifully as an air dry clay glaze DIY alternative. It dries clear, resists yellowing, and gives you more control over sheen depending on whether you choose gloss or matte.
Option 3: Clear Nail Polish
This works best for very small pieces like charms or jewelry. Apply carefully and evenly. It dries fast and can create high shine, but it may yellow over time if exposed to sunlight.
Before committing to any homemade method, test it on a scrap piece. DIY options vary in durability, and some may not hold up to heavy handling.
Shop the Supplies
Matte, Satin, or Gloss: Understanding Finish Types
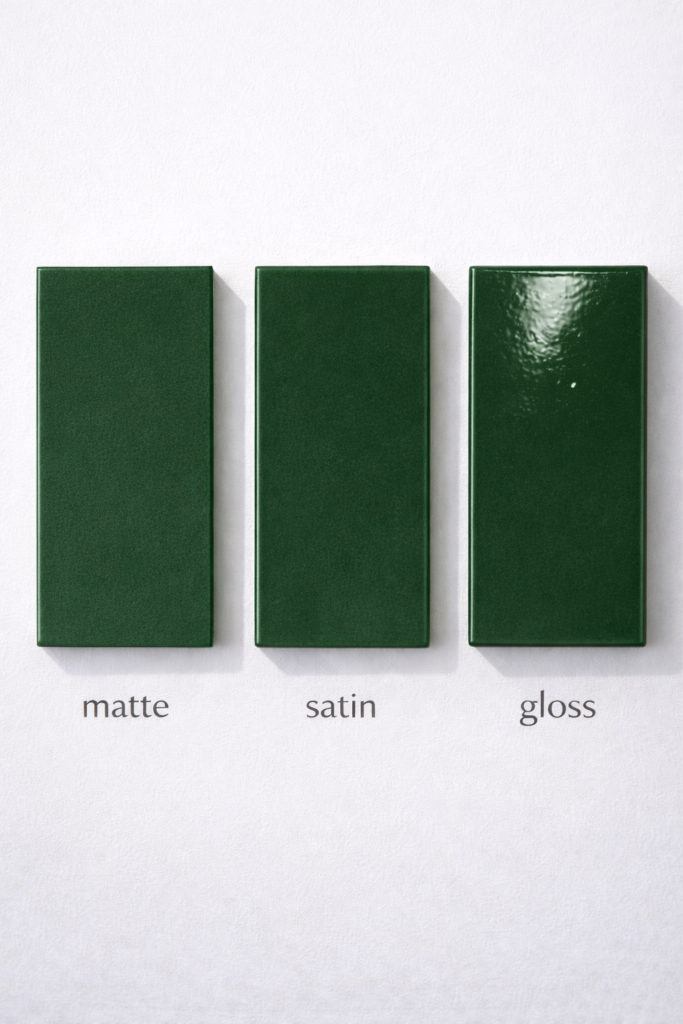
When choosing a glaze for air dry clay, the finish matters just as much as the product. The sheen you pick changes how light hits your piece, how texture shows up, and how professional the final result feels.
Here’s a simple breakdown:
| Finish | Appearance | Surface Feel | Durability Level |
|---|---|---|---|
| Matte | Soft, flat, non-reflective | Smooth but subtle | Light to Moderate |
| Satin | Low sheen, soft glow | Slightly slick | Moderate |
| Gloss | High shine, reflective | Smooth and glassy | Moderate to High |
Matte finishes hide minor imperfections but can dull bold paint colors.
Satin gives you a clean, elevated look without heavy shine.
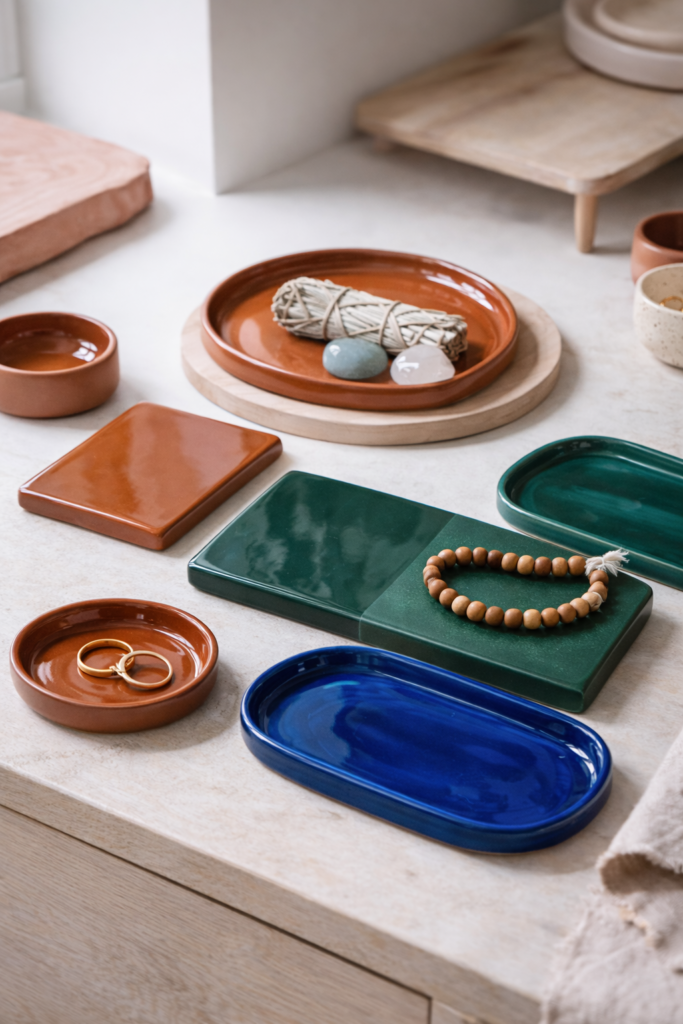
Gloss delivers that almost ceramic effect most people want when they glaze air dry clay.
If you want your project to look store-bought and polished, gloss or satin usually wins. If you’re going for a modern, muted aesthetic, matte can look intentional and refined.
Shop the Supplies
How to Make Air Dry Clay Water-Resistant
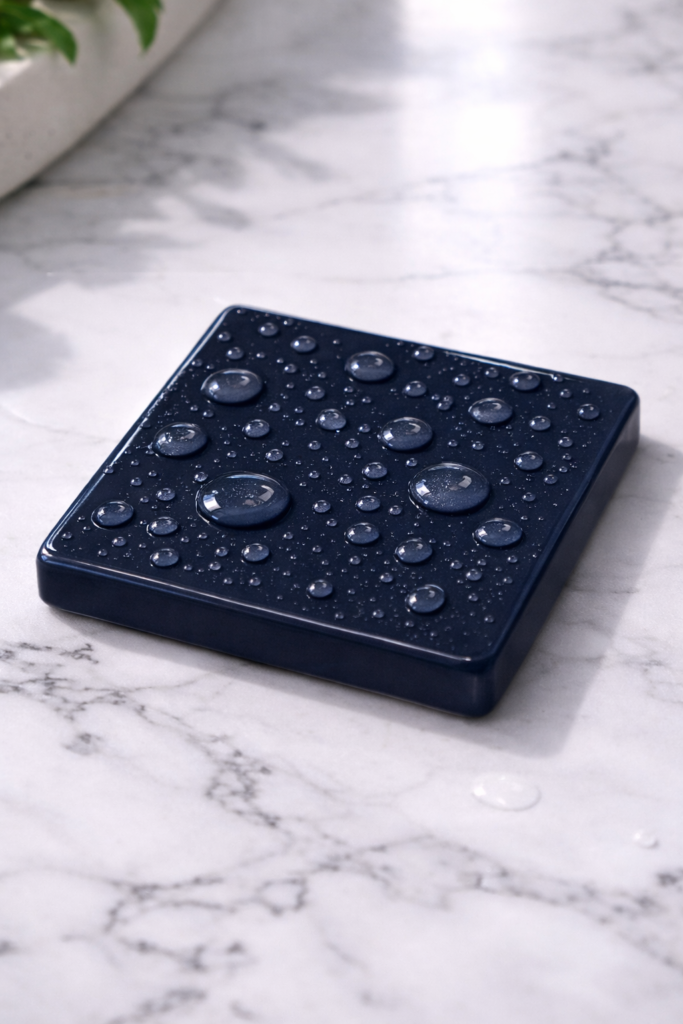
Let’s clear this up first. Air dry clay is not fully waterproof. But you can make it water-resistant enough for everyday use if you seal and glaze it properly.
If you plan to use your piece for coasters, trays, plant saucers, or bathroom decor, layering is everything. After your base sealer dries, apply at least two thin coats of your glaze for air dry clay. Let each coat cure completely before adding the next. Rushing this part is what causes tackiness and cloudy spots.
For added durability, you can apply a final protective top coat like polycrylic or even a thin layer of resin. Resin gives you the most water resistance, but it changes the look slightly and requires careful mixing and curing.
Even with heavy sealing, avoid soaking your pieces in water or putting them in the dishwasher. Water resistance means splash-safe, not submerge-safe.
Shop the Supplies
How to Fix Streaks, Bubbles, or Cloudy Glaze
Even when you follow every step, things can still go sideways. The good news is most glaze mistakes are fixable. You do not need to throw your piece away.
If your air dry clay glaze looks streaky, cloudy, or slightly uneven, the first rule is simple. Let it cure completely. Do not try to fix it while it is tacky. That makes everything worse.
Once fully dry, lightly sand the surface using very fine grit sandpaper. You are not stripping it. You are just smoothing out imperfections. Wipe away dust with a microfiber cloth. Then reapply a thin, even coat of glaze. Focus on long, single-direction strokes and stop once it looks evenly covered.
If bubbles formed and dried into the surface, sanding is still your best reset button. Thin coats always give better results than heavy ones when you glaze air dry clay.
Shop the Supplies
Do’s and Don’ts of Glazing Air Dry Clay
If you remember nothing else from this guide, remember this table. Most glaze problems come from rushing or skipping prep.
| Do’s | Don’ts |
|---|---|
| Let clay dry 24–72 hours before sealing | Seal clay that feels cool or damp |
| Sand lightly before sealing | Skip surface prep |
| Apply thin, even coats | Glob on thick layers |
| Let each coat dry fully | Rush dry time between coats |
| Test DIY glaze on scrap pieces | Assume every product reacts the same |
| Brush in one direction | Overwork glaze once it starts drying |
Simple discipline is what makes the difference between a handmade look and a polished, professional finish.
Smooth, Sealed, and Done Right
Now you know exactly how to glaze air dry clay the right way. Seal first. Sand lightly. Use thin coats. Let everything dry completely. Most glaze issues are not product problems. They are timing and prep problems.
If your clay pieces have been cracking before you even get to the glazing stage, that is a separate issue. I break that down step-by-step in Why Your Air-Dry Clay Is Cracking (And How to Fix It) so you can fix the root problem before sealing and glazing.
When you slow down and follow the process, your air-dry clay glaze will look smooth, clear, and durable. And that is when your pieces start looking store-bought instead of homemade.

