

Affiliate Disclosure: This post may contain affiliate links. If you purchase through these links, Room Revival Studio may earn a small commission at no extra cost to you.
Resin crafts are everywhere right now, and for good reason. They look high-end, feel customizable, and instantly elevate even the simplest DIY into something gift-worthy or sellable. But if you’ve ever Googled how to use resin and immediately felt overwhelmed by tools, safety warnings, and mixed advice, you’re not alone. This guide breaks it all down in a clear, beginner-friendly way so you can decide if resin is right for you and actually enjoy the process instead of stressing over it.
What Resin Is and Why It’s So Popular
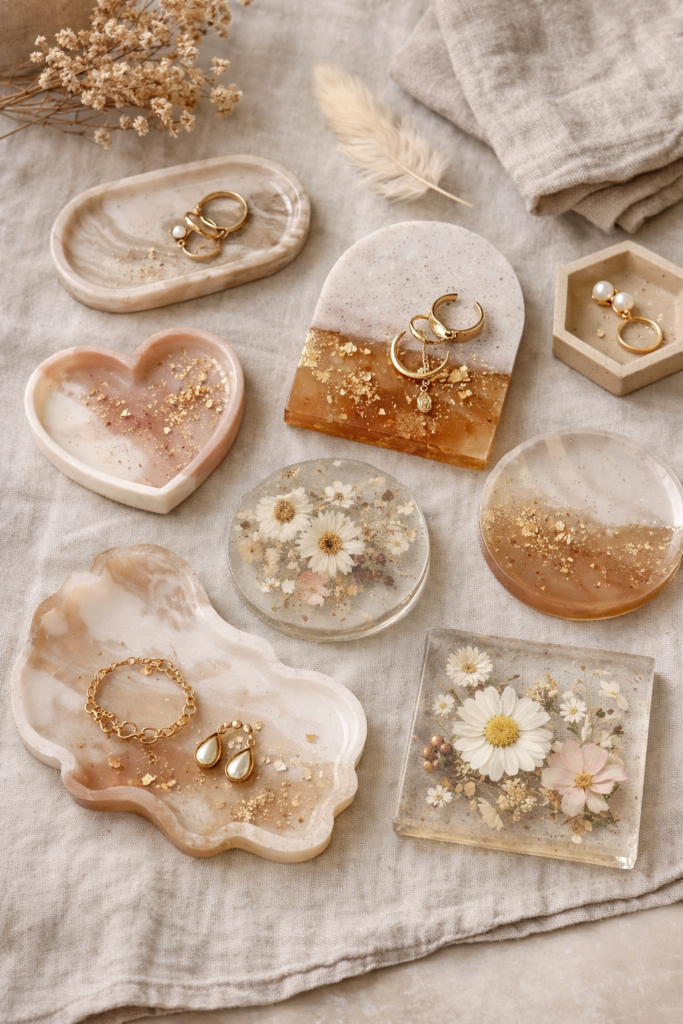
Resin is a liquid crafting material that hardens into a smooth, glossy, glass-like finish once it cures. In the DIY world, it’s loved because it can turn simple molds, trays, and small decor pieces into polished, professional-looking projects with very little shaping or skill required.
What makes resin especially popular right now is how versatile it is. You can keep it minimal and neutral for modern home decor, or go bold with pigments, florals, gold flakes, and layered designs. It works just as well for functional pieces like resin dishes and coasters as it does for decorative accents and gifts.
The biggest misconception is that resin is only for advanced crafters. In reality, most beginner issues come from skipping basics like proper measuring, mixing, and workspace setup. Once those are handled, resin becomes one of the most forgiving and satisfying craft mediums to work with.
Why this matters: Understanding what resin actually is helps you avoid overcomplicating the process and buying tools or materials you don’t need when you’re just starting out.
Shop the Look:
Types of Resin Used in Crafts
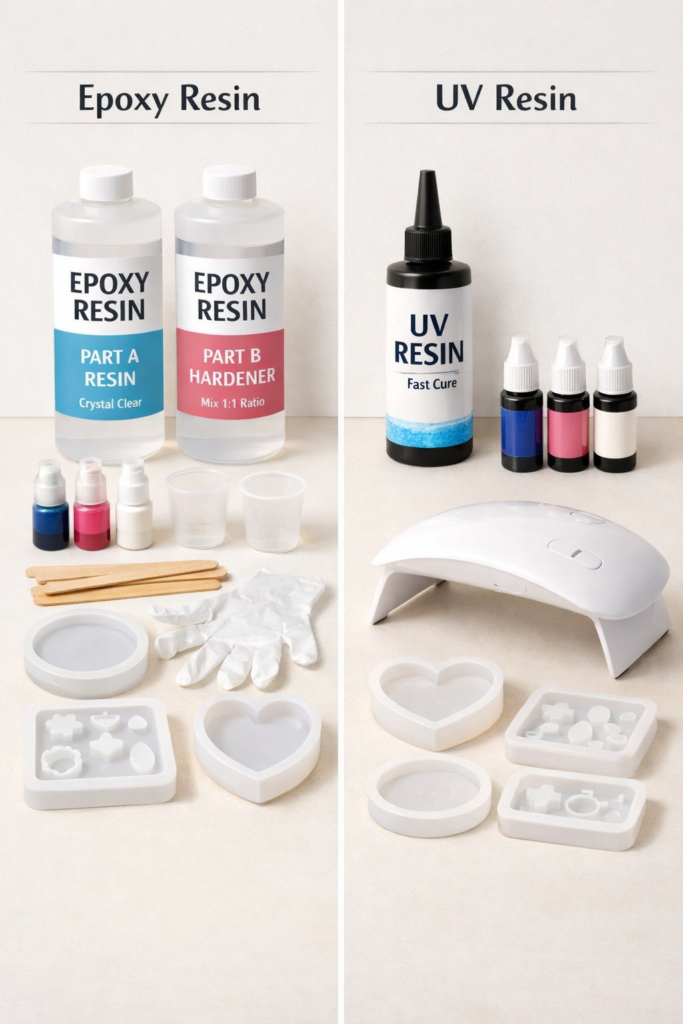
Not all resin is the same, and choosing the right type from the start makes everything easier. For most DIY resin crafts, you’ll be deciding between epoxy resin and UV resin, and each serves a very different purpose.
Epoxy resin is the most common option for beginners. It’s mixed in two parts, gives you more working time, and is ideal for larger projects like resin dishes, trays, coasters, and decorative home accents. It cures slowly, which means fewer rushed mistakes and smoother finishes once it sets.
UV resin, on the other hand, cures almost instantly under a UV lamp or direct sunlight. It’s best for small, thin projects like jewelry, charms, or quick fixes. While it sounds convenient, it’s less forgiving for beginners and not great for deep molds or larger pours.
If you’re just starting out, epoxy resin is the better choice nine times out of ten. It gives you room to learn, experiment, and correct small errors without wasting materials.
Why this matters: Using the wrong resin for your project is one of the fastest ways to end up with sticky finishes, bubbles, or pieces that never fully cure.
Shop the Look:
Essential Resin Tools You Actually Need

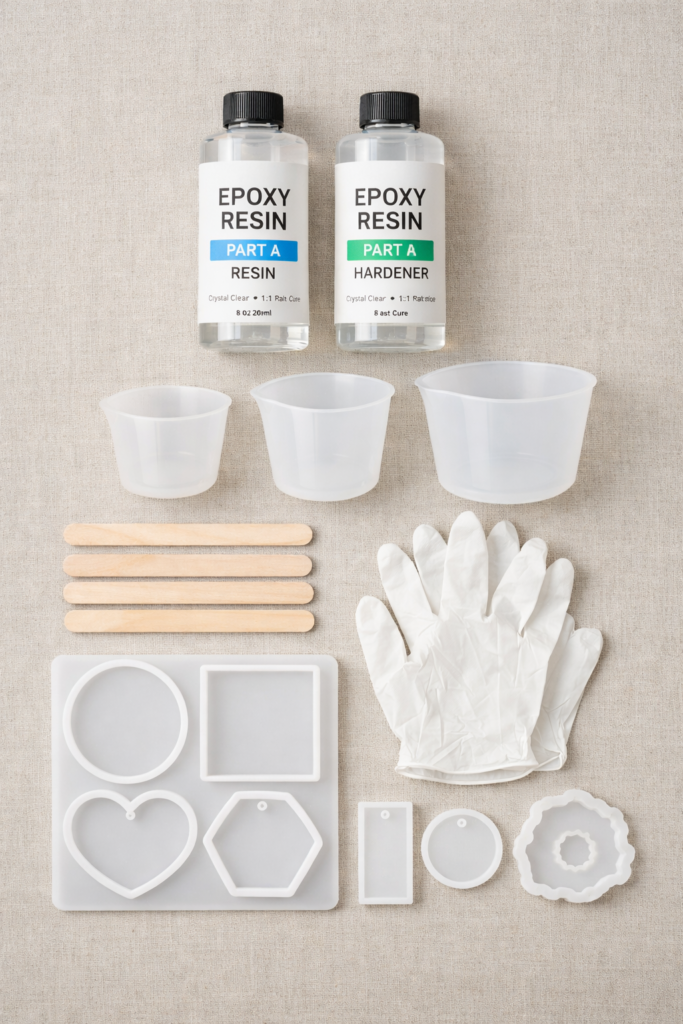
Resin tools can get out of hand fast if you’re not careful. Scroll any craft haul and suddenly it feels like you need twenty different supplies just to pour one tray. The truth is, you only need a small core set of resin tools to get clean, professional-looking results, especially as a beginner.
At the very least, you’ll need proper mixing tools, silicone molds, and basic safety gear. Silicone is non-negotiable because resin doesn’t stick to it, which makes cleanup easier and prevents ruined projects. A heat source like a heat gun or small torch is also key for popping surface bubbles and improving the final finish.
Everything else is optional and should be added only after you’re comfortable with the basics. Starting simple keeps the process fun and prevents wasted resin and frustration.
Why this matters: Having the right tools makes resin crafts feel controlled and predictable instead of messy and stressful.
Shop the Look:
Do’s and Don’ts
Do
- Use silicone tools whenever possible
- Protect your workspace every time
- Wear gloves, even for small pours
Don’t
- Mix resin in paper cups
- Skip bubble removal
- Assume resin cleans up easily once cured
Resin Safety Basics (Read This First)
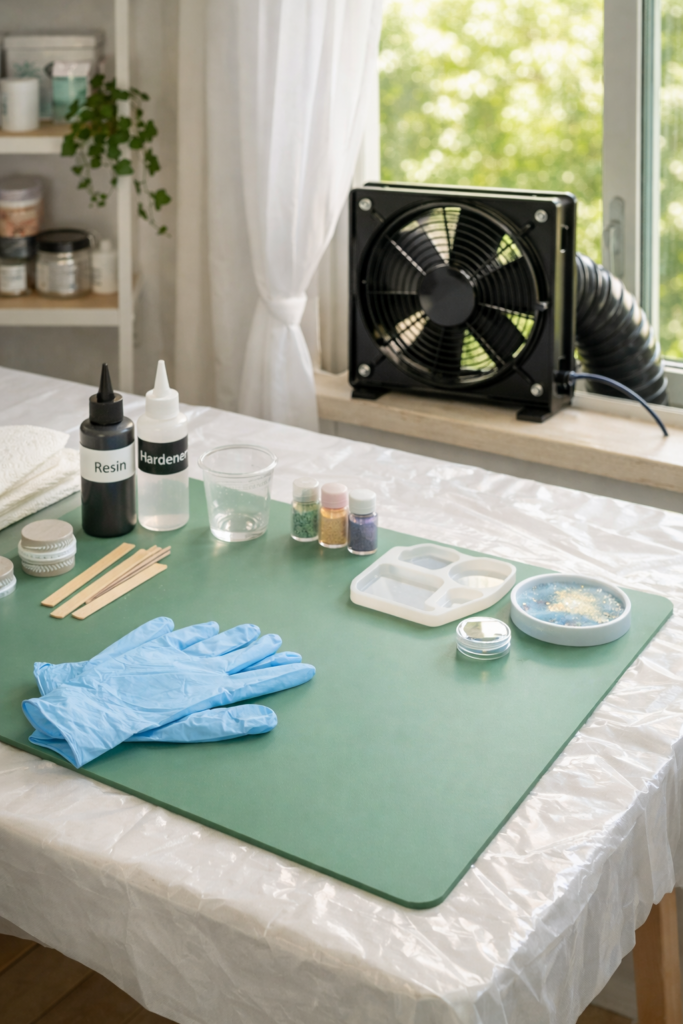
Resin safety sounds scarier than it actually is, but it’s something you need to take seriously from day one. Most issues happen when crafters skip ventilation, work on unprotected surfaces, or assume quick projects don’t require safety steps. A simple setup goes a long way.
Always work in a well-ventilated area. Open windows, use a fan, or craft near an exhaust vent if possible. Protect your skin with gloves and avoid working directly on porous surfaces like wood or fabric. Once resin cures, it’s safe to handle, but uncured resin should never touch bare skin.
Setting up a dedicated resin workspace makes the entire process calmer and more enjoyable. When safety is handled upfront, you can focus on creativity instead of worrying about cleanup or mistakes.
Why this matters: Safe resin habits prevent ruined projects, damaged surfaces, and unnecessary stress.
Do’s and Don’ts
Do
- Work in a ventilated space
- Cover your table completely
- Wear gloves every session
Don’t
- Pour resin near food or pets
- Touch uncured resin
- Cure pieces in enclosed, unventilated spaces
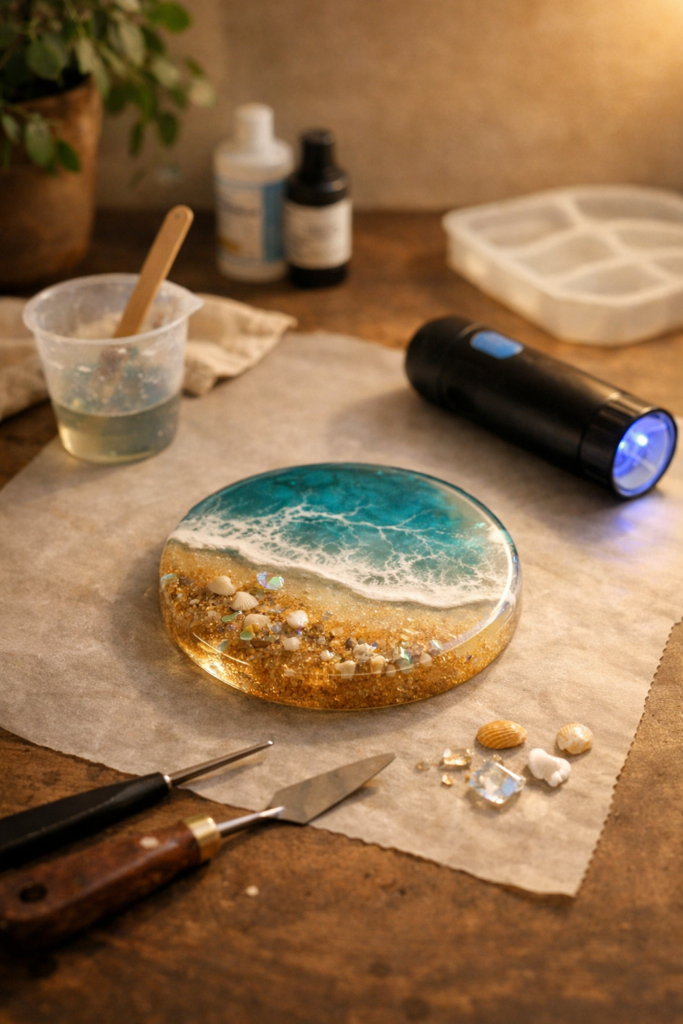
How to Use Resin Step by Step
Once you understand the basics, using resin is a very repeatable process. Most beginner mistakes come from rushing or eyeballing steps that really need precision. Slow down, follow the order, and resin becomes surprisingly easy to work with.
Start by preparing your workspace. Cover your surface, put on gloves, and lay out all tools before mixing anything. Resin waits for no one once it’s mixed, so setup matters more than speed.
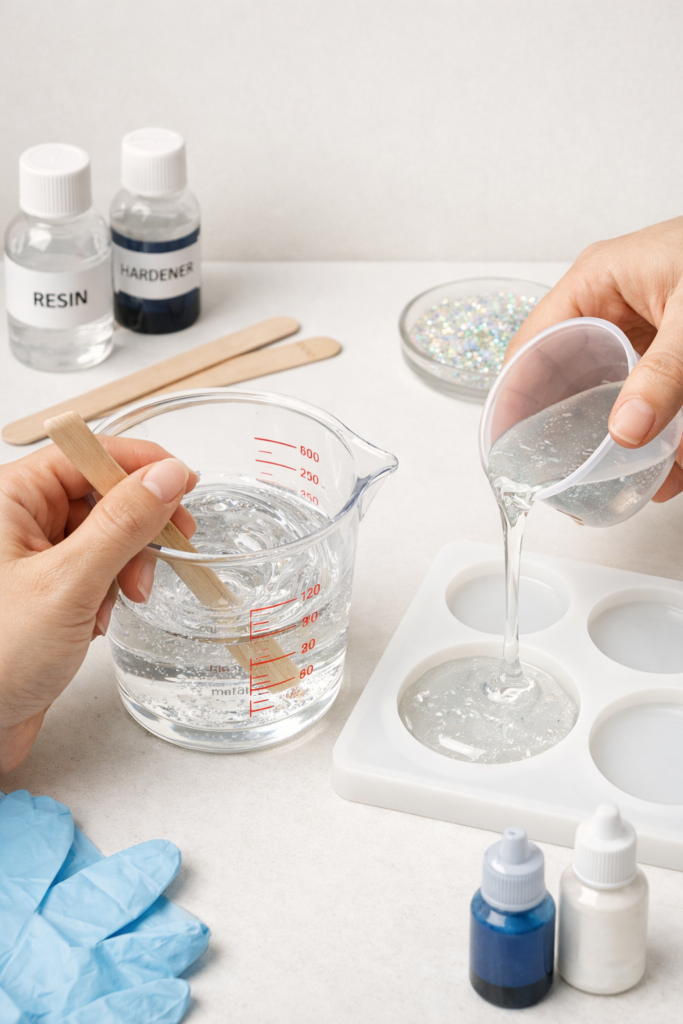
Next comes measuring and mixing. Epoxy resin must be measured exactly according to the brand’s instructions, usually a 1:1 ratio. Mix slowly but thoroughly, scraping the sides and bottom of the cup to avoid soft or sticky spots later. Once mixed, pour into your mold slowly to reduce bubbles.
After pouring, use a heat gun or torch briefly over the surface to release trapped air bubbles. Then let the resin cure undisturbed for the full recommended time. Touching or moving it too early is one of the fastest ways to ruin an otherwise perfect piece.
Why this matters: Proper measuring, mixing, and patience are what separate clean, glossy results from cloudy or tacky finishes.
Basic Resin Workflow
- Prepare and protect your workspace
- Measure resin precisely
- Mix slowly and completely
- Pour evenly into molds
- Remove bubbles
- Let cure fully before handling
Easy Resin Crafts for Beginners
If you’re new to resin, starting with the right projects makes all the difference. Beginner-friendly resin crafts are small, flat, and forgiving. They don’t require deep pours, complex layers, or perfect timing, which means you can focus on learning how resin behaves instead of fixing mistakes.
Resin dishes and trays are some of the best first projects because they cure evenly and look polished even with simple designs. Coasters are another great option since they teach you how to control bubbles and edges without using a lot of material. Jewelry trays and ring dishes also work well because they’re functional, giftable, and easy to customize with color or subtle texture.
These projects build confidence fast and give you finished pieces you’ll actually want to keep or gift, which makes the learning curve feel rewarding instead of frustrating.
Why this matters: Starting with simple, proven projects helps you master resin basics without wasting supplies or losing motivation.
Beginner Project Ideas
- Resin dishes and catchalls
- Coasters
- Jewelry trays
- Small decorative accents
Shop the Look:
Common Resin Mistakes and How to Fix Them
Even experienced crafters run into resin issues from time to time, so if something goes wrong, it doesn’t mean you failed. Most resin problems have simple explanations and fixes once you know what to look for.
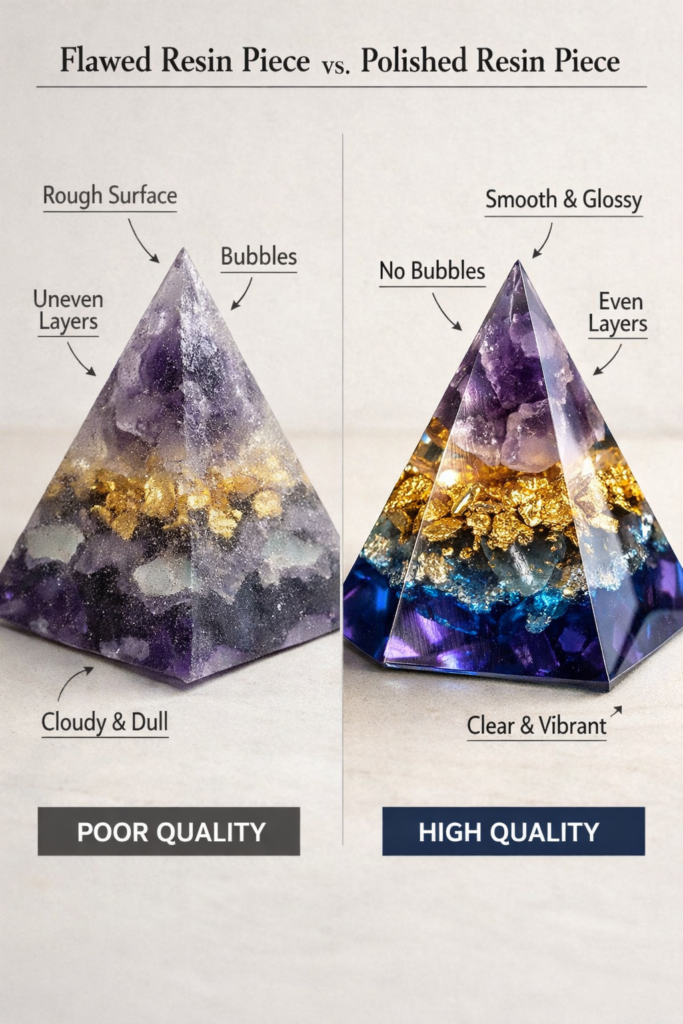
Sticky or tacky resin usually means the mixture wasn’t measured or mixed correctly. This can sometimes be fixed by applying a thin top coat of properly mixed resin once the piece has fully cured. Cloudy or dull finishes often come from moisture, cold temperatures, or overmixing too aggressively. Warping typically happens when resin is poured too thick or cured on an uneven surface.
Learning to troubleshoot these issues early saves materials and builds confidence. The more projects you complete, the easier it becomes to recognize and prevent problems before they happen.
Why this matters: Understanding common mistakes keeps small issues from turning into wasted time, money, and motivation.
Quick Resin Fixes
- Sticky surface: Apply a thin, properly mixed top coat
- Cloudy finish: Work in a warmer, dry environment
- Warping: Use level surfaces and shallow pours
Using Resin for Home Decor
Resin isn’t just for small crafts or hobby projects. When it’s used intentionally, it fits beautifully into modern home decor. The key is restraint. Clean shapes, subtle color, and intentional finishes keep resin pieces from feeling overly crafty or trendy.
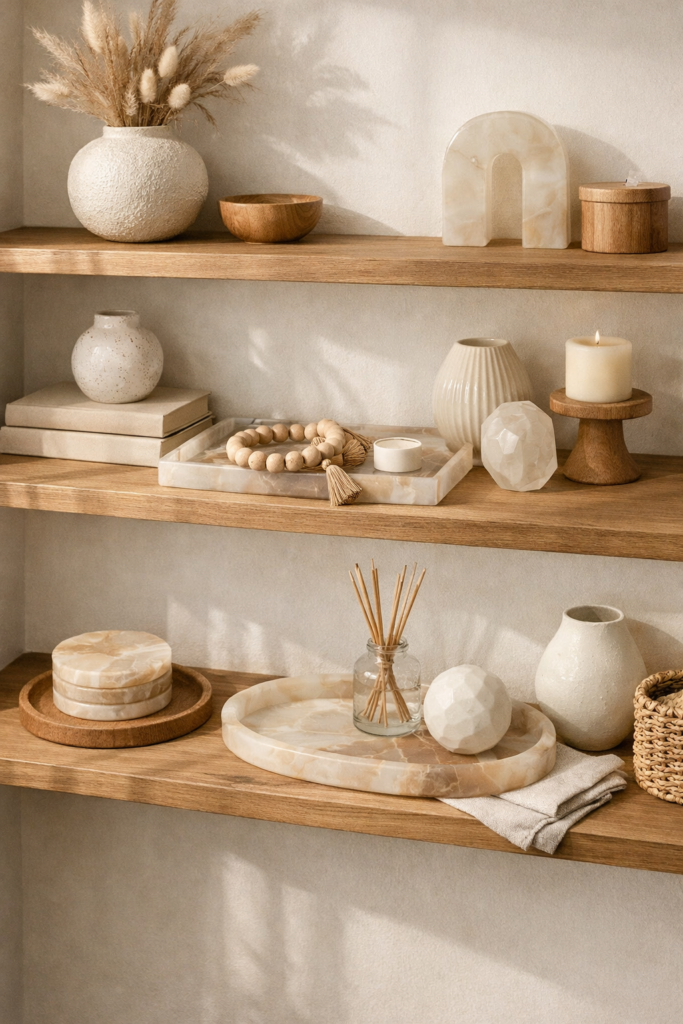
Neutral resin dishes, trays, and coasters work especially well in kitchens, bathrooms, and entryways. Soft whites, warm beiges, muted terrazzo, and light marbling look elevated and timeless. If you love color, use it sparingly through accents like gold flakes, dried florals, or gentle pigment swirls instead of bold, opaque pours.
Styling also matters. Resin pieces look best when paired with natural textures like wood, linen, stone, or ceramic. This contrast keeps the space grounded and helps resin blend seamlessly into your existing decor.
Why this matters: Thoughtful design choices turn resin crafts into decor pieces that look intentional, not homemade.
Style Tips
- Stick to simple shapes for decor pieces
- Use neutral or muted color palettes
- Pair resin with natural materials for balance
Resin Crafts to Sell
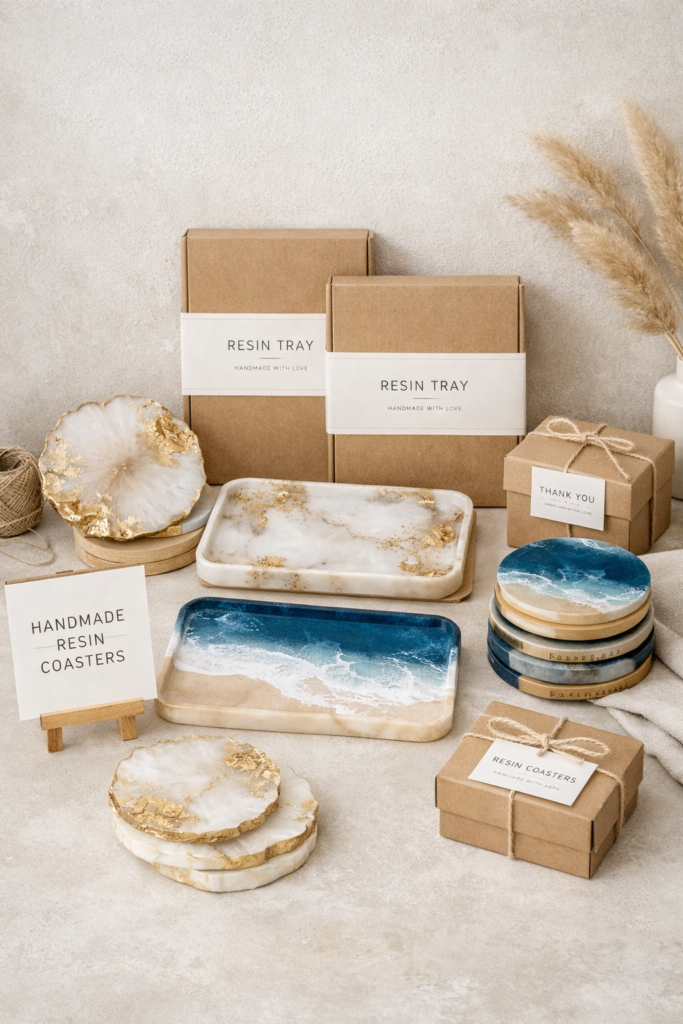
Resin can absolutely be a profitable craft, but not every project is worth selling. The pieces that perform best are functional, consistent, and easy to reproduce. Buyers are usually looking for resin items that feel polished, practical, and giftable rather than experimental or overly busy designs.
Resin trays, coasters, jewelry dishes, and small organizers tend to sell well because they serve a clear purpose and photograph beautifully. Simple designs with neutral colors often outperform bold patterns because they fit into more homes and appeal to a wider audience. Consistency matters more than creativity when selling. Clean edges, smooth finishes, and repeatable results are what build trust with buyers.
Pricing should reflect your material costs, time, and skill level, but it also needs to stay realistic. Resin buyers are willing to pay for quality, not complexity. A well-finished minimalist tray will often sell faster than an intricate layered piece that took triple the time to make.
Why this matters: Selling resin successfully is less about flashy designs and more about quality, consistency, and usability.
Beginner-Friendly Resin Items to Sell
- Jewelry trays and ring dishes
- Coasters and small serving trays
- Desk organizers
- Giftable home accents
Is Resin Worth Learning
Resin is worth learning if you enjoy hands-on projects, like seeing tangible results, and want a craft that feels both creative and functional. It’s especially rewarding if you love making pieces you can actually use around your home or turn into gifts or products. Resin isn’t a fast, mindless craft, but it’s also not as complicated as it looks once you understand the basics.
That said, resin isn’t for everyone. If you prefer instant-gratification crafts or don’t want to deal with measuring, curing time, or workspace setup, resin may feel frustrating. But if you’re willing to slow down and follow a process, it becomes one of the most satisfying DIY skills to learn.
Why this matters: Knowing whether resin fits your crafting style helps you invest your time and money wisely.
Resin crafts don’t have to feel intimidating or overly technical. Once you understand how resin works, choose the right tools, and start with beginner-friendly projects, the process becomes surprisingly approachable. Whether you’re making resin dishes for your home, experimenting with decor pieces, or exploring resin crafts to sell, the key is starting simple and building confidence with each pour.
If you enjoyed learning about resin and want to explore another beginner-friendly craft, you might also love checking out one of our other popular DIY guides on Room Revival Studio to keep the creativity going.

