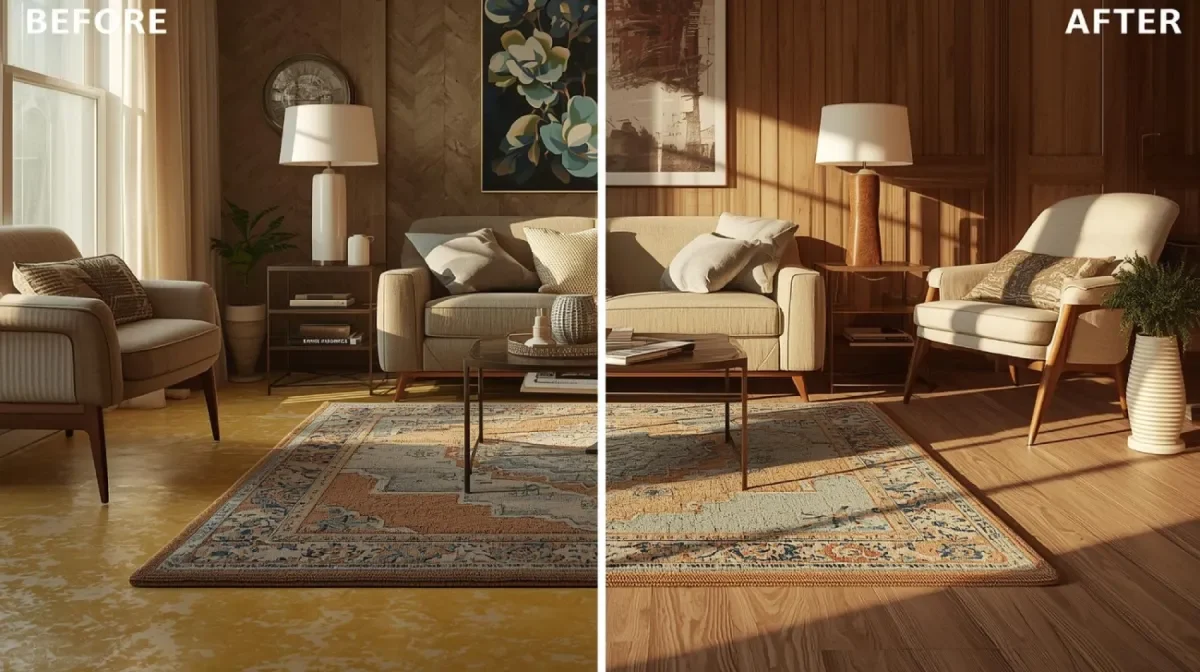
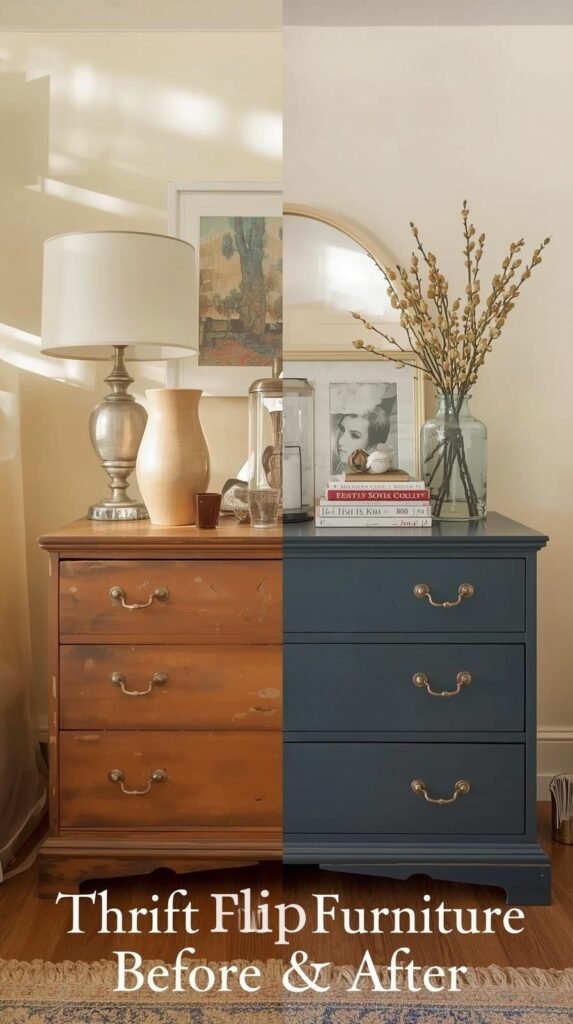
There’s something addictive about a good thrift flip furniture project. You start with a scratched-up dresser or outdated nightstand, and before long, you’ve turned it into a piece that looks straight out of a boutique showroom. Whether you’re in it for the creative rush or the resale profit, painting old furniture is one of the easiest ways to breathe new life into something forgotten.
In this tutorial, we’ll walk through how to transform thrift store furniture into a showstopper — from prep to paint to that final topcoat glow. Whether you love hand-painted furniture, refurbished furniture DIY ideas, or just want a weekend win, this is your step-by-step roadmap to making old furniture repurposed feel brand new again.
1. Start with the Right Piece

When it comes to furniture flipping ideas, your project is only as good as the bones you start with. Look for solid wood or sturdy composite — not particle board that’s already crumbling. Check for signs of water damage, wobbling legs, or chipped veneer that might need extra prep.
Pro Tip: Simple silhouettes and clean lines are the easiest to modernize. Avoid ornate pieces unless you’re going for a vintage furniture makeover look.
Shop the Look:
Do’s and Don’ts:
- Do: Pick pieces with good structure.
- Don’t: Get swayed by decorative hardware alone.
2. Prep Like a Pro

Every stunning thrift flip furniture project starts with a little elbow grease. No matter how gorgeous your paint color is, it won’t stick if the surface isn’t prepped correctly. This is where the real transformation begins — stripping away years of grime, sticky residue, and uneven finishes so your new paint can glide on smooth.
Start by removing all hardware, drawers, and doors. You’ll want a clean slate before tackling the surface itself. Wipe down the entire piece with a degreaser or warm water and mild soap to remove oils, waxes, and any lingering polish from thrift store furniture. Once it’s fully dry, sand every inch lightly using 120- to 220-grit sandpaper — just enough to scuff the surface and help the primer grip.
For heavily coated or glossy finishes, a liquid deglosser can save time. It breaks down slick top layers, especially on laminated or vintage furniture makeover pieces. If your furniture has dents or cracks, fill them with wood filler, let it dry, and sand smooth before priming.
Pro Tip: Always sand in the direction of the wood grain. It prevents scratch marks and keeps the finish looking natural once painted.
Texture Tip: Wipe the piece down with a tack cloth after sanding — it picks up every speck of dust, leaving the surface silky clean and ready for primer. This one small step makes all the difference between “DIY project” and “boutique finish.”
Shop the Look:
Do’s and Don’ts:
- Do: Take time to remove all hardware before sanding — paint around handles never looks clean.
- Do: Use a vacuum or microfiber cloth to remove dust from crevices.
- Don’t: Skip sanding because you’re “just painting over it.” Even chalk paint benefits from a quick scuff.
- Don’t: Rush drying time between cleaning and sanding — trapped moisture can ruin adhesion.
3. Prime for a Smooth Base
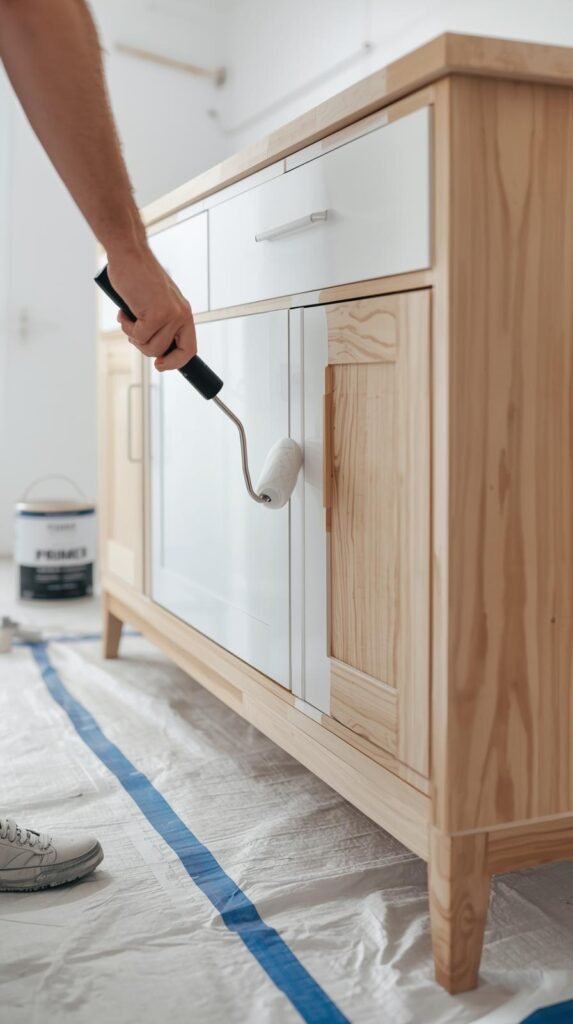
Primer is the unsung hero of any thrift flip furniture makeover. It’s what keeps your hard work from peeling, chipping, or yellowing over time — especially on slick or stained thrift store furniture. Think of primer as the foundation that gives your paint something to hold on to and ensures that dreamy finish actually lasts.
Start by choosing the right formula for your surface:
- Bonding primer works best for laminate, veneer, or glossy surfaces that resist standard paint.
- Shellac-based primer blocks tannins and old stains (a must for vintage furniture makeovers).
- Stain-blocking primer prevents discoloration from water rings or nicotine.
Once you’ve chosen your primer, apply it with a foam roller for flat areas and a high-quality brush for corners or carved edges. Always work in thin, even coats — one solid layer is usually enough, but heavily stained or dark furniture might need two.
Pro Tip: Don’t skip this step, even if your paint says “no primer needed.” Primer evens out color tone and dramatically improves adhesion — which means fewer chips and touch-ups later. For upcycled furniture before and after photos, a good primer often makes the “after” look professionally done.
Finish Tip: If you’re going dark, go with a gray-tinted primer for faster coverage. For whites or pastels, use pure white to keep colors clean and bright.
Shop the Look:
Do’s and Don’ts:
- Do: Let primer cure overnight before sanding lightly for the smoothest finish.
- Don’t: Skip it just because the furniture “looks fine.” The difference always shows in the end.
4. Choose Your Paint Wisely
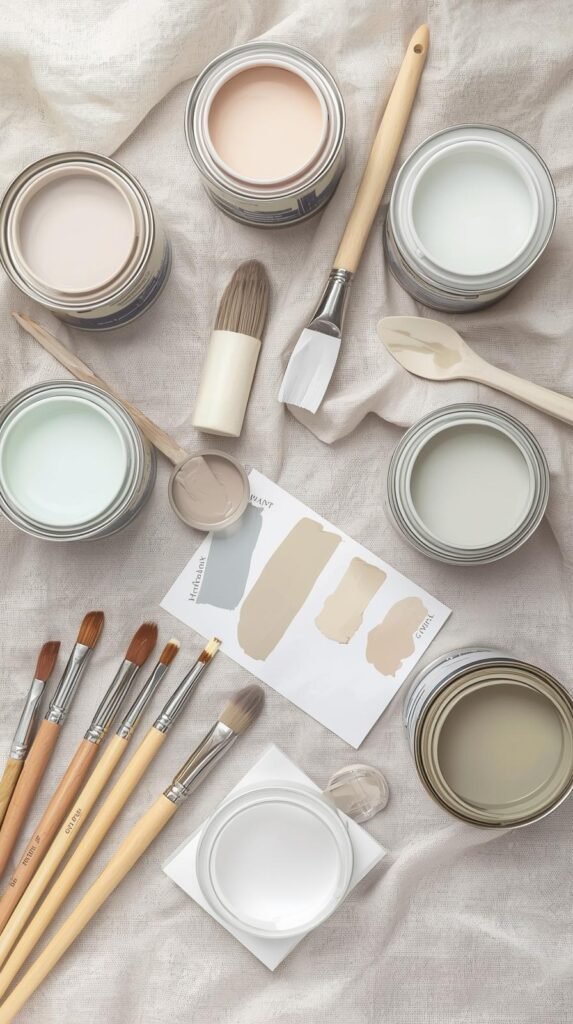
Picking paint isn’t just about color — it’s about personality. The finish, texture, and formula you choose can completely change how your thrift flip furniture project feels and functions. From matte farmhouse charm to glossy mid-century polish, the right paint brings your vision to life and gives your refurbished furniture DIY ideas staying power.
Let’s break down your main options:
- Chalk Paint: A go-to for thrifted home decor DIY ideas. It has a soft, velvety matte finish that makes even dated old furniture repurposed look instantly modern. It requires minimal prep, dries fast, and distresses beautifully for a relaxed, vintage feel.
- Milk Paint: If you love vintage furniture makeovers, this is your secret weapon. Milk paint naturally chips and crackles, creating an aged, authentic look — perfect for farmhouse or cottage-style pieces.
- Acrylic Paint: Great for repurposed furniture DIY upcycling projects where you want bright, smooth, and durable coverage. It works well for modern, colorful accents or statement pieces in a neutral room.
- Latex Paint: A reliable, budget-friendly choice that delivers excellent coverage and long-term durability. Ideal for dressers, side tables, and any piece that sees frequent use.
- Spray Paint: When working with detailed carvings or metal accents, a spray formula gives clean, even coverage that brushes can’t.
Pro Tip: Always consider the finish sheen. Matte hides imperfections but is less washable; satin offers soft durability; semi-gloss makes colors pop; and gloss reflects light for a polished designer vibe.
Texture Tip: For extra depth, layer different sheens — like a matte base with glossy drawer fronts — or lightly distress high-touch areas once the paint dries for that authentic, hand-finished look.
Shop the Look:
- Rust-Oleum Chalked Paint
- Annie Sloan Chalk Paint
- Milk Paint by Fusion
- Acrylic Paint Set for Furniture
Do’s and Don’ts:
- Do: Test your chosen paint on a hidden area first to see how it adheres and looks when dry.
- Do: Choose high-quality brushes or rollers to avoid streaks and bristles stuck in your finish.
- Don’t: Skip reading the label — some paints need sealing or don’t work well over oil-based finishes.
- Don’t: Assume all white paints look the same. Undertones (warm vs. cool) can completely shift your final result.
5. Master the Technique
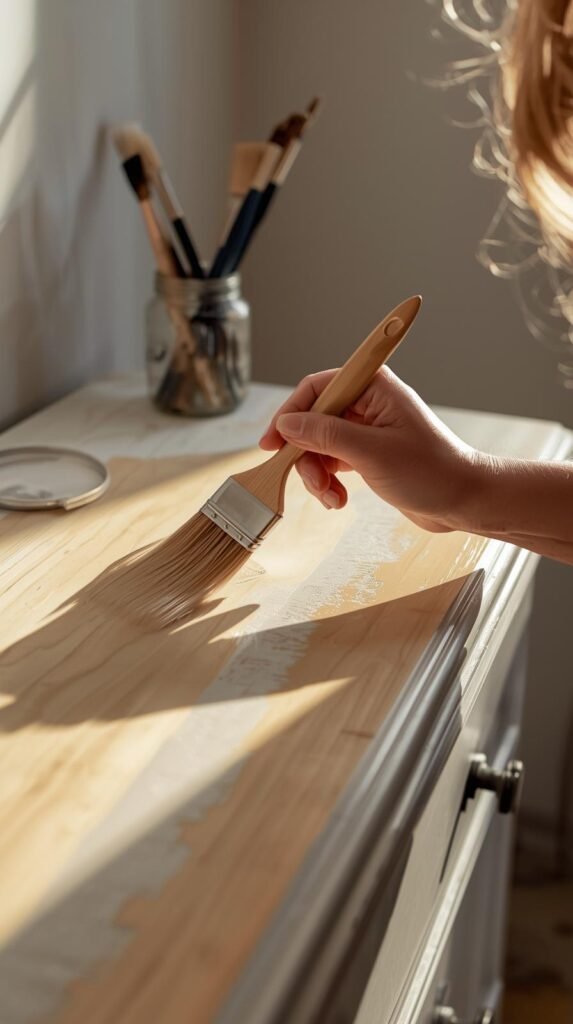
This is where your thrift flip furniture project starts looking less “weekend DIY” and more “boutique resale.” The way you apply paint matters just as much as the product you use. Smooth, even coverage takes patience — but it’s what turns repurposed furniture DIY upcycling from a good idea into a stunning finish.
Start with a high-quality brush or foam roller, depending on your piece:
- Foam rollers create flawless coverage on large, flat areas like dresser fronts or tabletops.
- Angled brushes help you cut into corners, beveled edges, and carved details.
Apply paint in thin, consistent coats, letting each layer dry completely before adding the next. It’s tempting to pile on color fast, but multiple light coats always beat one heavy one. Paint too thick and it’ll drip, streak, or peel later — especially on slick thrift store furniture surfaces.
Between coats, lightly sand with fine-grit paper (320+) to remove any texture and help the next layer grip. You’ll feel the difference — buttery smooth and professional to the touch.
Pro Tip: Work with the grain of the wood whenever possible, and keep your brush strokes long and steady. Short, choppy motions leave texture behind that becomes impossible to fix once sealed.
Texture Tip: For hand-painted furniture that feels high-end, try dry brushing. Dip just the tip of your brush in paint, wipe most of it off, and sweep it across raised details. It gives that subtle, layered depth you see in designer pieces — especially on carved legs or cabinet doors.
Shop the Look:
Do’s and Don’ts:
- Do: Paint in natural light — you’ll spot streaks and uneven coverage better.
- Do: Keep a damp cloth nearby for quick cleanup of drips or mistakes.
- Don’t: Paint over dust — always wipe between coats for a professional finish.
6. Seal the Deal
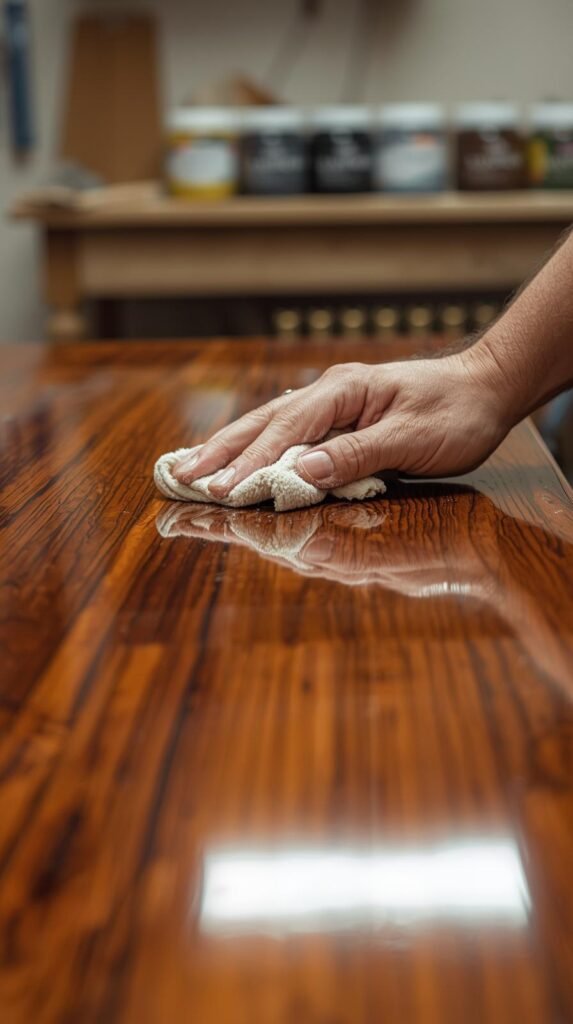
The last step is what separates an average DIY from a refurbished furniture DIY idea that actually lasts. Sealing your piece not only locks in color and protects it from chips and moisture but also gives it that final, polished glow that makes thrift store furniture feel brand new again.
Your sealer choice depends on the paint and the look you’re after:
- Wax Finish: Best for chalk and milk paints. It gives a velvety matte sheen and feels soft to the touch — ideal for a rustic, vintage furniture makeover vibe.
- Polycrylic: Water-based, fast-drying, and easy to clean up. Perfect for light-colored hand-painted furniture where you want protection without yellowing over time.
- Polyurethane: More durable and moisture-resistant — great for tabletops or furniture that’ll get heavy use. Opt for the water-based version to avoid strong fumes.
- Spray Sealers: Excellent for small or detailed pieces where brushing might disturb the paint.
Apply thin, even layers using a foam brush or lint-free cloth, following the grain of the wood. Let each coat cure completely before adding another (patience pays here). You’ll know it’s sealed properly when the surface feels smooth but not sticky.
Pro Tip: If you’ve used chalk paint, buff wax with a soft cloth after it dries for a subtle, professional-looking sheen. For higher traffic pieces, add a second coat of sealant — it makes your thrift flip decor more durable and easy to clean.
Texture Tip: Try a matte or satin sealer for a modern, natural feel, or a high-gloss finish if you want that bold, lacquered look. Mixing finishes in one room — like a matte dresser next to a glossy accent chair — can create visual balance.
Shop the Look:
Do’s and Don’ts:
- Do: Let the sealer fully cure before styling or moving the piece — at least 24–48 hours.
- Don’t: Apply sealant in humid conditions; it can cloud the surface.
7. Add Character with Details
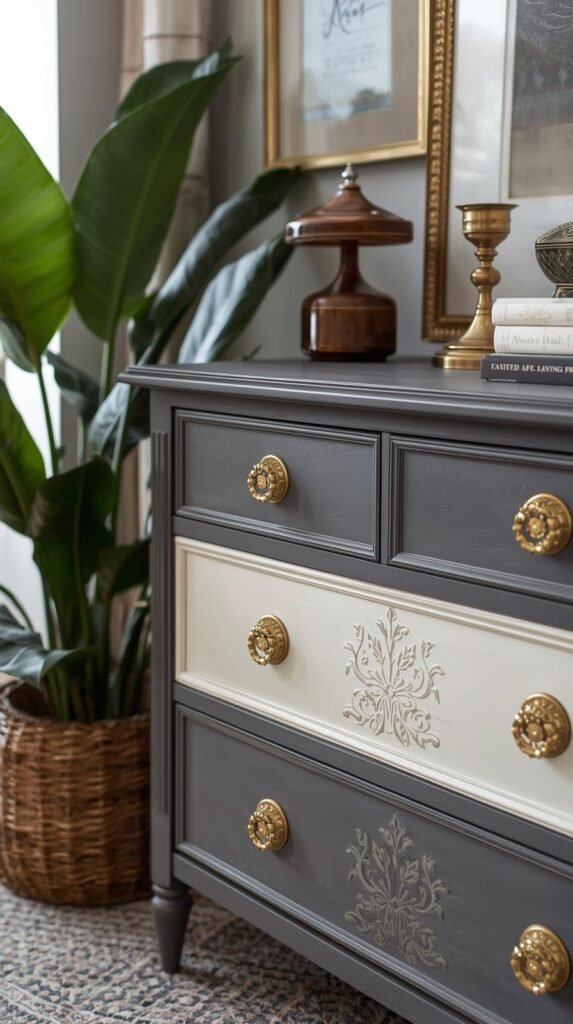
Once the paint dries, the fun begins — this is where your thrift flip furniture goes from basic refresh to full-blown statement piece. Small design choices make a huge difference. Whether you’re adding new hardware, stenciling patterns, or mixing two paint colors, it’s these subtle details that define your piece and make it one-of-a-kind.
If your style leans classic, stick to clean hardware lines like matte black or brushed brass. For vintage furniture makeovers, try glass knobs, crystal pulls, or aged bronze handles for that “found-it-in-an-antique-store” charm. You can even paint hardware in metallic tones — gold, pewter, or champagne — for a cohesive, modern touch.
Want more personality? Stencils and painter’s tape are your best friends. Add a thrift flip décor moment by painting geometric shapes on drawer fronts, dipping furniture legs in contrasting colors, or using wallpaper inside drawers for a surprise pop. These techniques cost little but look designer-level when executed cleanly.
For a creative twist, mix textures: pair a matte chalk finish body with high-gloss drawer fronts or metallic detailing on edges. That subtle sheen contrast feels intentional and upscale.
Pro Tip: If you’re going bold with color or pattern, balance it with minimal styling. Let the furniture be the focal point — not the clutter around it.
Texture Tip: Consider adding tactile elements like cane inlays, linen panels, or fabric-lined shelves for layered dimension. Combining hand-painted furniture surfaces with natural materials instantly makes your piece feel bespoke.
Shop the Look:
Do’s and Don’ts:
- Do: Keep embellishments cohesive — repeat one metal tone or color accent throughout.
- Do: Play with placement. Sometimes shifting hardware just an inch modernizes the entire piece.
- Don’t: Overdecorate. Too many add-ons can make refurbished furniture DIY ideas look cluttered instead of curated.
- Don’t: Forget scale — oversized pulls or tiny knobs can throw off balance fast.
Your Turn to Flip
When you step back and look at your finished thrift flip furniture, it’s more than just a before-and-after moment — it’s proof of what a little creativity (and sandpaper) can do. You took something forgotten, dated, or headed for the curb and gave it new life. That’s the heart of repurposed furniture DIY upcycling: turning potential into pride, one brushstroke at a time.
From the prep work to the primer to that final coat of sealer, every layer tells a story. Your story. And the best part? Each project gets easier, faster, and more stylish the more you do it. Soon, you’ll start seeing thrift store furniture as opportunity — not clutter.
Whether you flip for profit or for the thrill of transformation, vintage furniture makeovers remind us that style doesn’t need to come with a high price tag. With the right products, patience, and a good eye for detail, even the most tired dresser or dated cabinet can become the star of your space.
So grab that next piece, roll up your sleeves, and start your next furniture flipping idea. The possibilities are endless — and your home will never look “off-the-shelf” again.
Ready for another project? Check out 10 Easy Home Decor Projects You Can Do in a Weekend — packed with thrifted home decor DIY ideas that pair perfectly with your new furniture flips. From simple wall art to stylish storage hacks, it’s your next weekend win waiting to happen.