Affiliate Disclosure: This post contains affiliate links. That means I may earn a small commission if you purchase through my links at no extra cost to you.
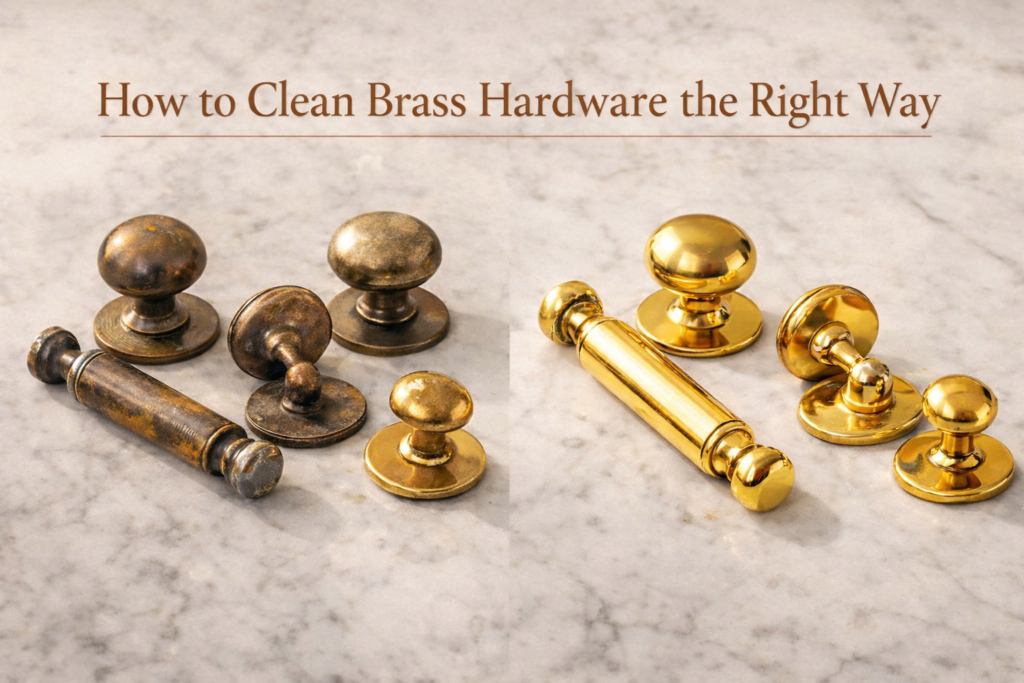
There’s nothing worse than reaching for a door handle or cabinet pull and noticing that warm golden gleam has gone flat and greenish. Tarnished brass hardware is one of those small things that quietly drags down the whole look of a room. The good news? You don’t need a professional or expensive products to fix it. With a few ingredients you probably already have at home, you can clean brass hardware and restore that rich, luminous shine in under an hour. This guide walks you through every method, from gentle everyday cleaning to tackling serious tarnish, so your fixtures look intentional and elevated again.
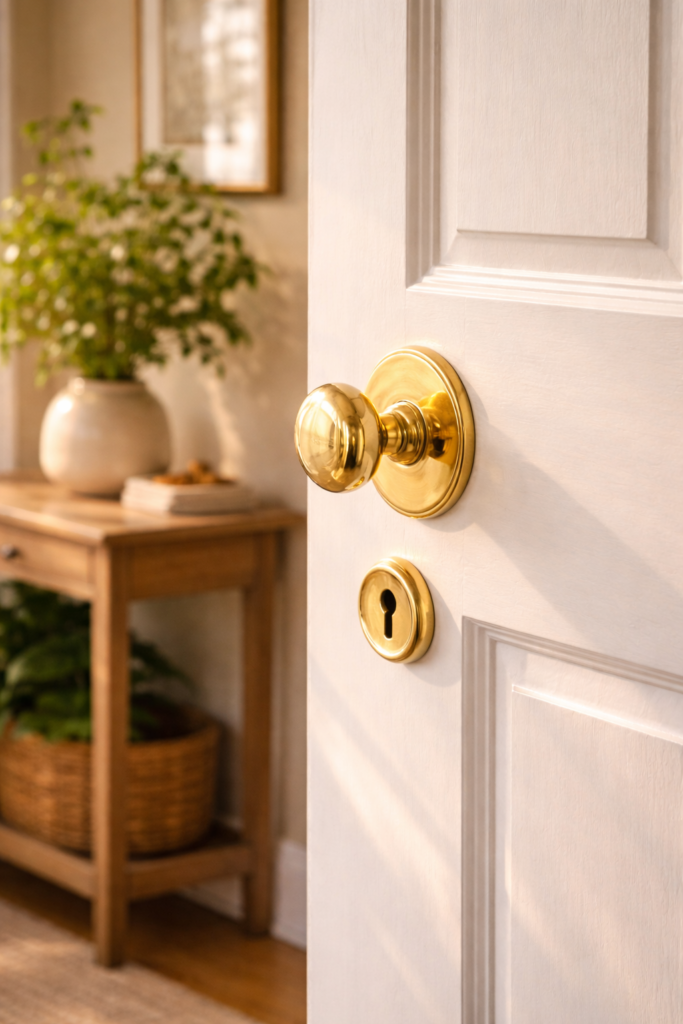
Know Your Brass: Solid vs. Plated

Before you clean anything, you need to know what you’re actually working with. Solid brass and brass-plated hardware look nearly identical, but they respond very differently to cleaning methods. Using the wrong approach on plated hardware can strip the finish and leave you with a bigger problem than tarnish. The magnet test is your best friend here: solid brass is not magnetic, so if a magnet sticks to your hardware, it’s plated. This one step can save you from an expensive mistake before you even pick up a cloth.
- Solid brass can handle acidic cleaners like vinegar and lemon juice without damage
- Brass-plated hardware needs gentler methods to protect the thin metal coating
- When in doubt, start with the mildest cleaning method and work your way up
Key Takeaway: Always identify whether your hardware is solid or plated before cleaning to avoid damaging the finish.
Shop the Look:
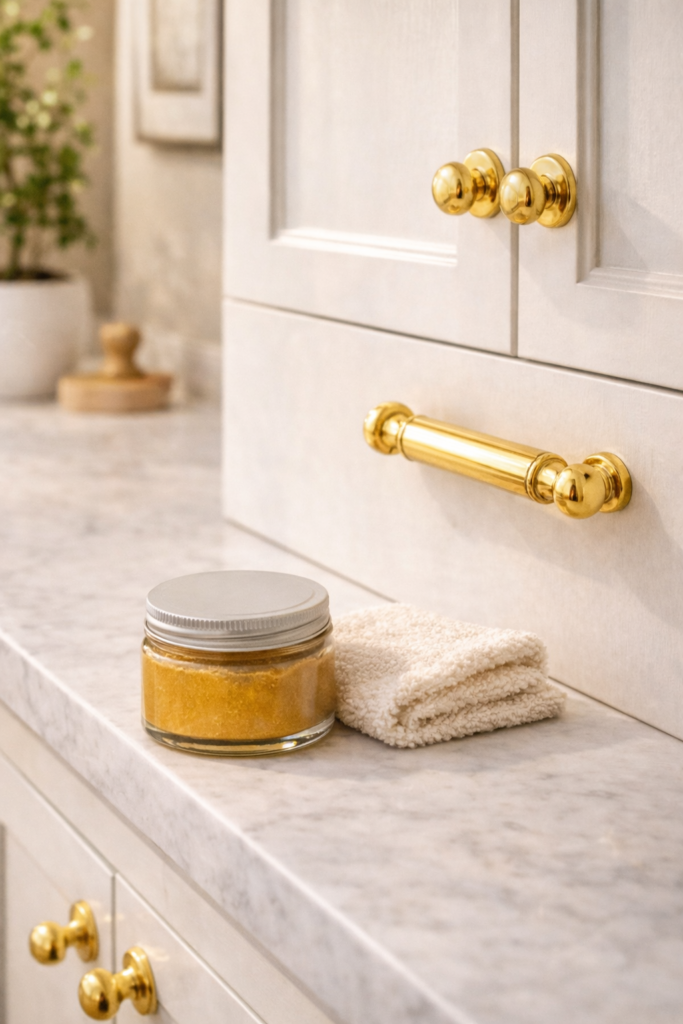
What You’ll Need: Tools and Ingredients
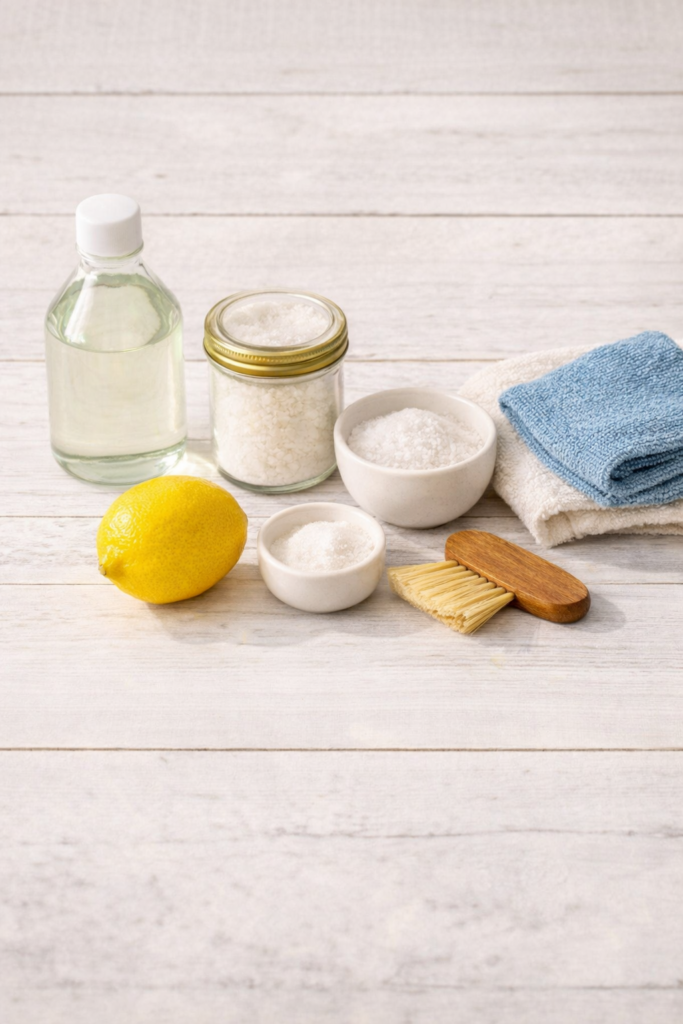
Cleaning brass hardware the right way doesn’t require a trip to the hardware store. Most of the best homemade brass cleaner ingredients are already sitting in your kitchen. White vinegar, salt, flour, lemon juice, and baking soda are the heavy hitters here, each one working to break down oxidation and lift tarnish without harsh chemicals. You’ll also want a few soft cloths, an old toothbrush for getting into grooves and crevices, and a small bowl for mixing. Having everything laid out before you start makes the process faster and keeps you from scrambling mid-clean with tarnish on your hands.
- White vinegar and salt dissolve tarnish through a mild acid reaction
- Lemon juice and baking soda create a fizzing paste that lifts oxidation gently
- A soft-bristled toothbrush is essential for detailed hardware with ridges or engravings
Key Takeaway: The most effective DIY cleaning brass toolkit is simple, affordable, and already in most homes.
Shop the Look:
- White Distilled Vinegar
- Soft Bristle Detail Cleaning Brush Set
- Microfiber Polishing Cloths
- Small Mixing Bowls Set
How to Clean Brass Hardware With Vinegar
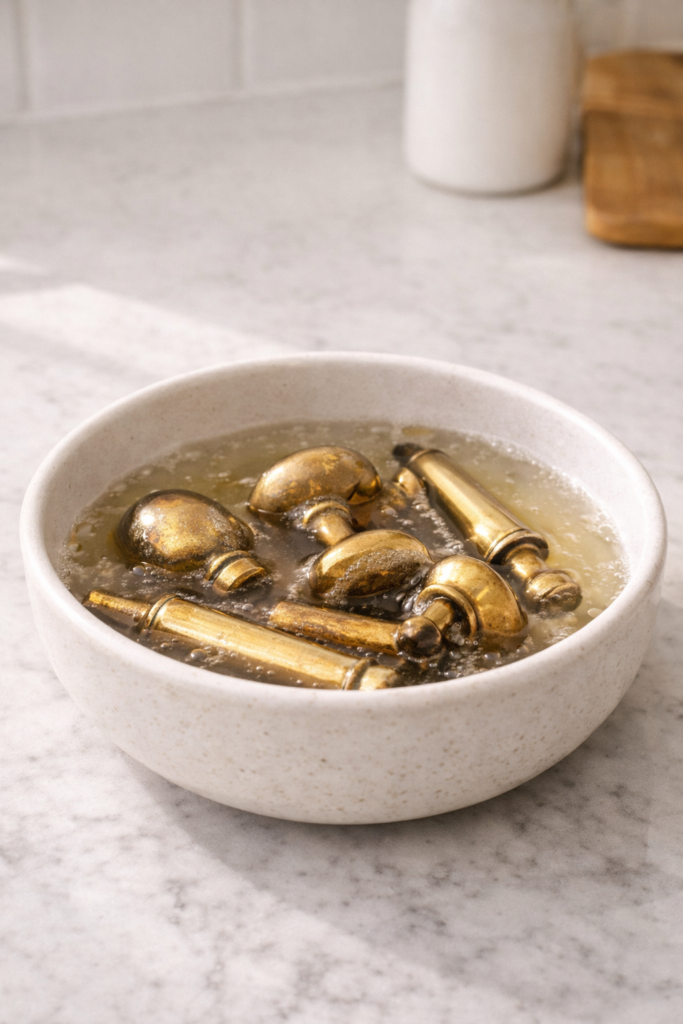
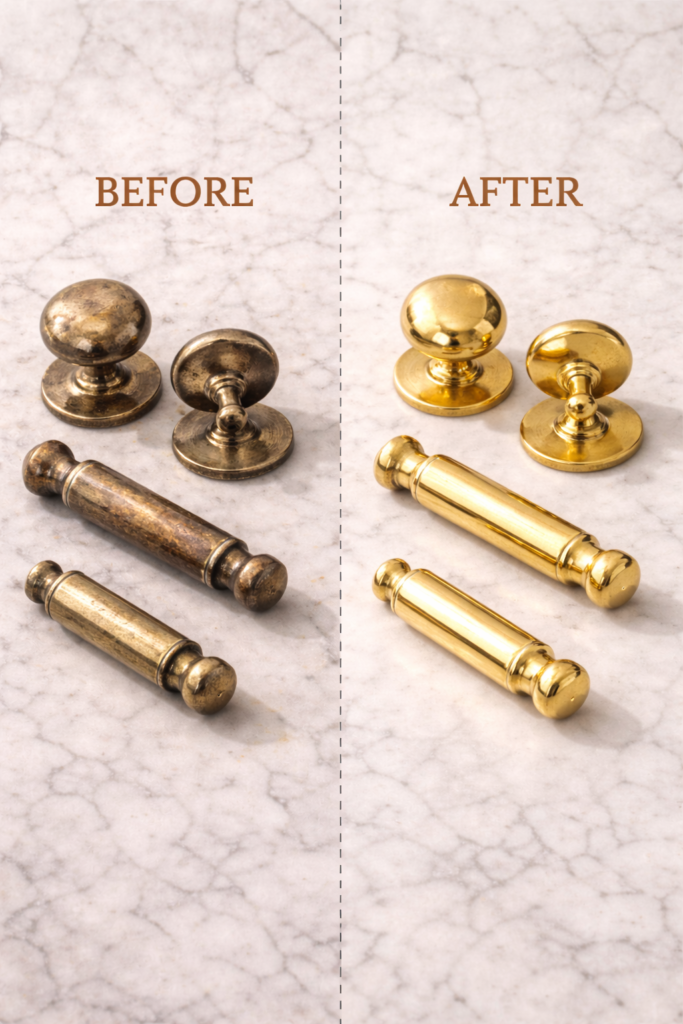
The vinegar and salt method is the gold standard for cleaning solid brass hardware, and once you try it, you’ll understand why. The acidity in white vinegar breaks down tarnish fast while the salt acts as a gentle abrasive to lift oxidation from the surface. For removable hardware like cabinet pulls, drawer knobs, or hinges, start by unscrewing them and dropping them into a bowl of equal parts white vinegar and warm water with a teaspoon of salt mixed in. Let them soak for 10 to 30 minutes depending on how heavy the tarnish is, then scrub gently with a soft brush, rinse thoroughly with warm water, and buff dry with a microfiber cloth. The difference is immediate and genuinely satisfying.
- Remove hardware from surfaces before soaking whenever possible for the best results
- Soak time depends on tarnish level: 10 minutes for light buildup, up to 30 for heavier tarnish
- Always dry brass completely after rinsing to prevent new water spots or oxidation
Key Takeaway: Soaking brass hardware in a vinegar and salt solution is one of the fastest and most effective ways to remove tarnish at home.
Pro Tip: Add a tablespoon of flour to your vinegar and salt mixture to create a paste that clings to vertical surfaces and fixed fixtures that can’t be soaked.
Shop the Look:
Homemade Brass Cleaner Paste (Lemon + Baking Soda)
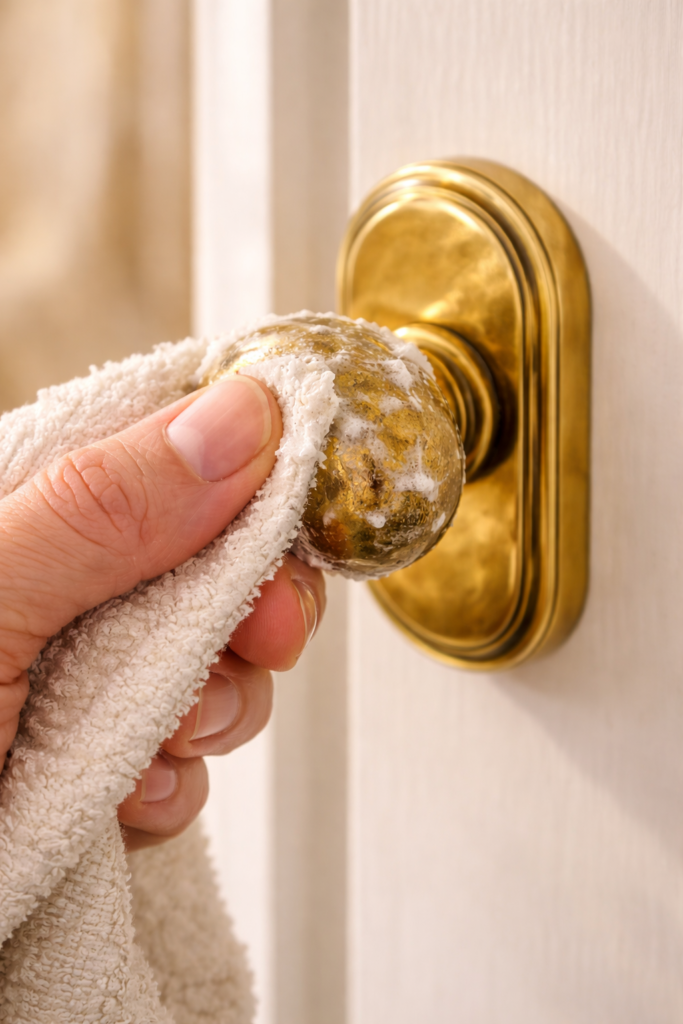
When your brass fixtures are fixed in place and soaking isn’t an option, a lemon and baking soda paste is your go-to homemade brass cleaner. The citric acid in lemon juice cuts through tarnish while baking soda adds just enough gentle abrasion to buff the surface clean without scratching. Mix equal parts lemon juice and baking soda into a thick paste, apply it directly to the hardware with your fingers or a soft cloth, and let it sit for 10 to 15 minutes. Then scrub gently with an old toothbrush to get into any grooves, wipe away the paste with a damp cloth, and buff dry immediately. The brass that comes out of this process has a warm, bright glow that looks like you just installed brand new hardware.
- Apply the paste generously and let it dwell for the full 10 to 15 minutes for best results
- Use a toothbrush to work the paste into engraved details, screw holes, and edges
- Buff with a dry microfiber cloth in circular motions to bring out the shine after rinsing
Key Takeaway: A lemon and baking soda paste is the most effective homemade brass cleaner for fixed fixtures that can’t be removed or soaked.
Common Mistakes to Avoid: Don’t use this paste on brass-plated hardware. The acidity of lemon juice can eat through the thin plating and expose the base metal underneath.
Shop the Look:
- Baking Soda Cleaning Grade
- Lemon Juice Bottle
- Detail Toothbrush Cleaning Set
- Microfiber Polishing Cloths
How to Remove Heavy Tarnish From Brass
Sometimes brass hardware has been neglected for years, and a simple vinegar soak or lemon paste just won’t cut through that thick, dark layer of oxidation. For heavy tarnish, you need to level up your approach without reaching for anything that will scratch or damage the metal. Start with a longer vinegar and salt soak, up to an hour, then follow with the lemon and baking soda paste as a second pass. If the tarnish is still stubborn after that, a commercial brass cleaner like Brasso or Bar Keepers Friend is your next move. These products are formulated specifically for tarnished metal and will tackle buildup that DIY methods can’t fully remove. Apply with a soft cloth, work in small sections, and never scrub aggressively.
- For extremely tarnished brass, repeat the vinegar soak and paste method twice before moving to a commercial cleaner
- Bar Keepers Friend works on both solid brass and some plated finishes when used gently with a damp cloth
- Steel wool and abrasive scrubbers are never the answer, they will scratch the surface permanently
Key Takeaway: Heavy tarnish on brass responds best to a layered approach, starting with DIY methods and stepping up to a commercial cleaner only when needed.
Pro Tip: After removing heavy tarnish, apply a thin coat of car wax or brass polish to the hardware. It creates a protective barrier that slows down future oxidation significantly.
Shop the Look:
How to Clean Brass-Plated Hardware Without Damage
Brass-plated hardware requires a completely different mindset than solid brass. The plating is a thin layer of brass over a base metal, and it’s far more vulnerable to acids, abrasives, and even aggressive scrubbing. The safest and most effective method for plated hardware is warm soapy water and a soft cloth. Mix a few drops of mild dish soap into warm water, dip a microfiber cloth into the solution, and gently wipe down the hardware in small circular motions. For light tarnish on plated pieces, a tiny amount of non-gel toothpaste applied with a soft cloth can work beautifully without risking the finish. Always rinse with a clean damp cloth and dry immediately and thoroughly.
- Never use vinegar, lemon juice, or any acidic cleaner on brass-plated hardware
- Avoid abrasive scrubbers, steel wool, or rough cloths that can scratch through the plating
- Dry plated hardware completely after every cleaning to prevent moisture from accelerating tarnish
Key Takeaway: Gentle soap and water is the safest and most reliable method for cleaning brass-plated hardware without stripping or damaging the finish.
Common Mistakes to Avoid: Skipping the magnet test before cleaning is the number one mistake people make with brass hardware. One round of vinegar on a plated piece can permanently ruin the finish and leave you shopping for replacements.
Shop the Look:
- Mild Dish Soap
- Soft Microfiber Cleaning Cloths
- Brass Plated Cabinet Hardware
- Non-Gel White Toothpaste
How to Keep Brass Hardware Clean Longer
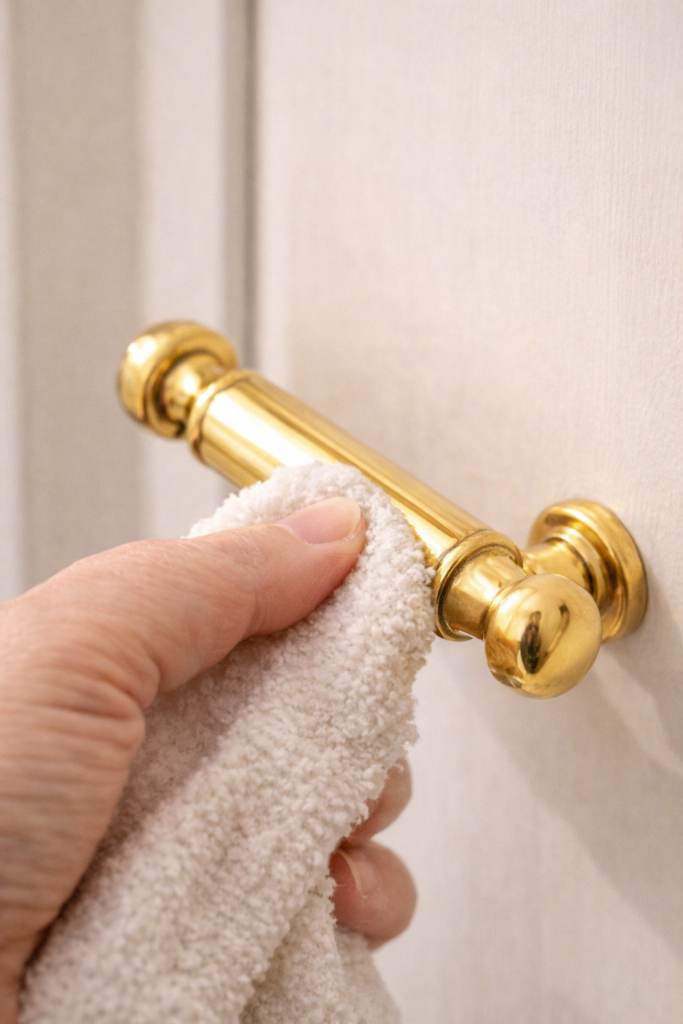
Cleaning brass hardware is satisfying, but keeping it clean is even better. Tarnish is a natural result of brass reacting with oxygen and moisture in the air, so the goal is to slow that reaction down as much as possible between deep cleans. After every cleaning session, apply a thin, even coat of paste wax, car wax, or a dedicated brass sealant to create a protective barrier on the surface. For high-touch hardware like door handles and cabinet pulls, a quick buff with a dry microfiber cloth every week or two removes fingerprints and surface oils before they have a chance to accelerate tarnish. Humidity is brass’s biggest enemy, so in bathrooms and kitchens, consider a small dehumidifier to keep moisture levels in check.
- Apply paste wax or brass sealant after every deep clean to lock in the shine and slow oxidation
- Wipe down high-touch brass hardware weekly with a dry cloth to remove oils and fingerprints
- In humid spaces like bathrooms, a dehumidifier significantly extends the time between deep cleans
Key Takeaway: A thin coat of wax or sealant after cleaning is the single most effective habit for keeping brass hardware looking polished longer.
Pro Tip: Renaissance Wax is a favorite among antique restorers for protecting brass and other metals. It creates an ultra-thin, invisible barrier that preserves the finish without altering the color or sheen of the brass.
Shop the Look:
Brass hardware is one of those details that punches way above its weight in a room. When it’s clean and polished, it adds warmth, character, and that finished, intentional look that pulls everything together. Now you have every method you need to clean brass hardware the right way, whether you’re dealing with a light buildup on a cabinet pull or years of tarnish on a vintage fixture. Start with the magnet test, choose the right method for your hardware, and make waxing part of your routine. The results are worth every minute. Ready to keep the momentum going? Check out How to Clean a Crystal Chandelier Without Taking It Down for more ways to bring old fixtures back to life.