
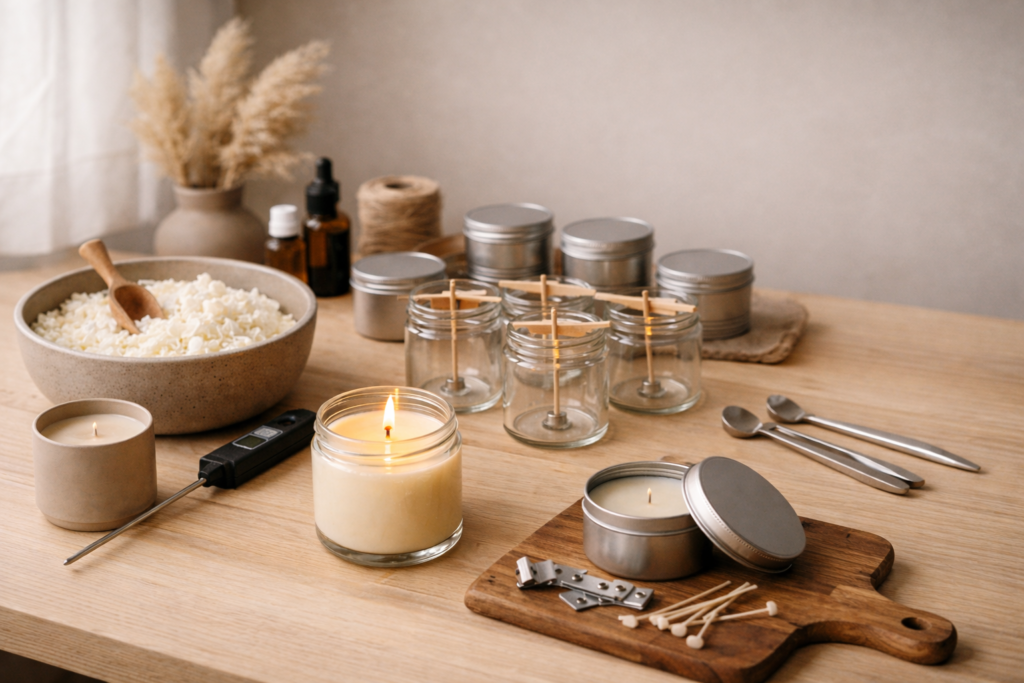
If you have ever made a candle that tunneled straight down the middle or burned lopsided and wasted half the wax, you are not alone. Uneven burns are the number one frustration with handmade candles, especially when you are just getting started. I have tested this process more times than I can count, and once you understand what actually affects the burn, candle making becomes way more satisfying. In this guide, I am breaking down exactly what matters so your candles look good, smell amazing, and burn evenly from edge to edge.
1. Choose the Right Wax (This Is Where Even Burns Start)
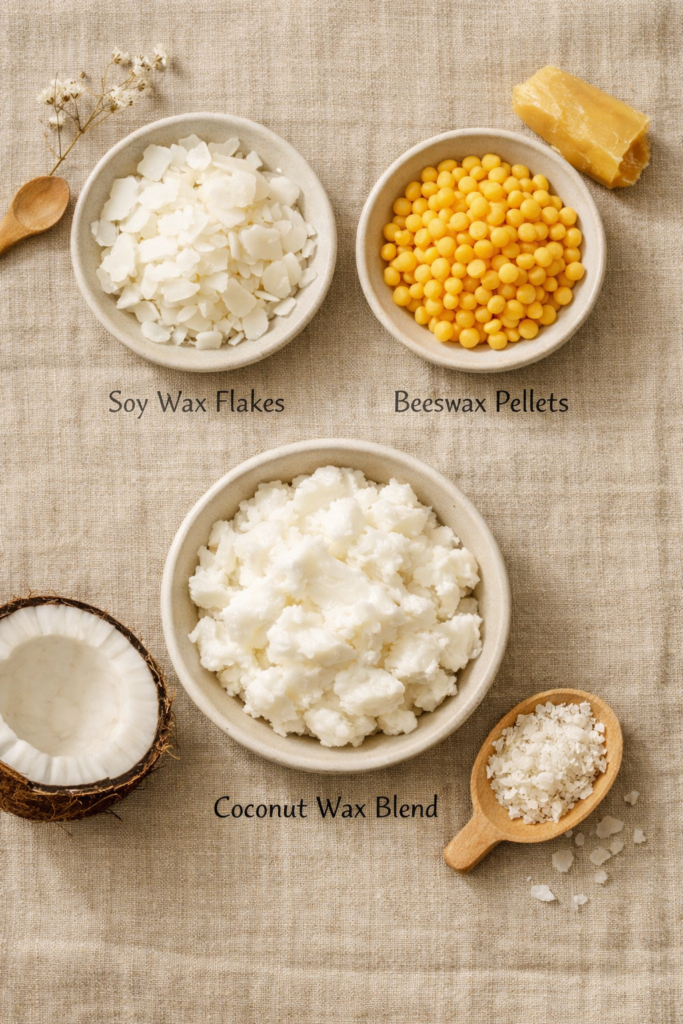
If your candle is not burning evenly, the wax is usually the problem. Different waxes melt, pool, and hold heat in completely different ways, and choosing the wrong one can cause tunneling before you even light the wick. For handmade candle DIY projects, wax choice is the foundation of everything that comes after.
Soy wax is the most beginner-friendly option and is known for a slower, more even burn when wicked correctly. Coconut wax and soy blends create a smoother finish and stronger scent throw but need precise temperatures. Beeswax burns clean and long but runs hotter, which can make it trickier in smaller containers like candles in tins.
Why this matters: Even-burning candles start with a wax that melts at a consistent rate across the container, not one that melts too fast or too unevenly.
Pro Tips
- Start with soy wax if you are new and want predictable results.
- Always melt wax slowly to avoid overheating, which can cause uneven cooling later.
- Match your wax to your container size before choosing your wick.
Shop the Look
2. Wick Size Matters More Than You Think
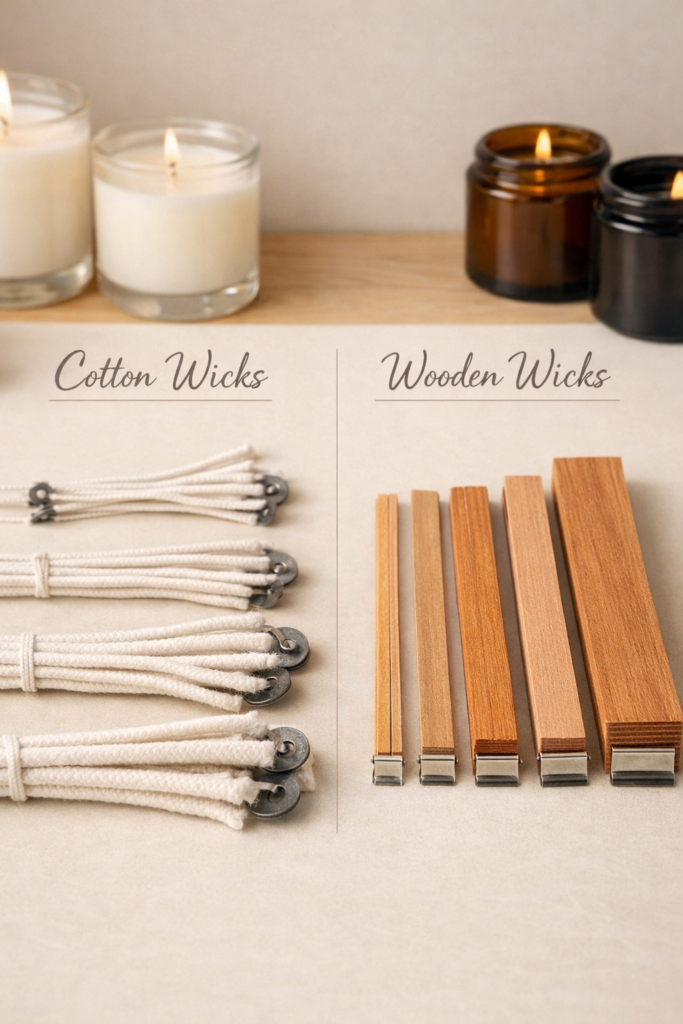
If your candle tunnels, smokes, or burns unevenly, nine times out of ten the wick is the culprit. Wick size controls how wide and hot the melt pool gets, and if it is too small, the wax never reaches the edges. If it is too large, the candle burns too fast, soots, and wastes wax. For handmade candles, this step is non-negotiable.
Wick sizing depends on the diameter of your container, not the height. A small jar with a wide opening needs a stronger wick than a tall, narrow one. Cotton wicks are reliable and beginner-friendly, while wooden wicks create that aesthetic crackle but require more testing to get an even burn.
Why this matters: The right wick creates a full melt pool within 2–3 hours, which trains the candle to burn evenly for its entire life.
Do’s and Don’ts
- Do measure your container opening before choosing a wick.
- Do test burn at least one candle before gifting or selling.
- Don’t assume one wick size works for every jar or tin.
- Don’t oversize the wick just to avoid tunneling. That creates soot and safety issues.
Shop the Look
3. Containers That Actually Support an Even Burn
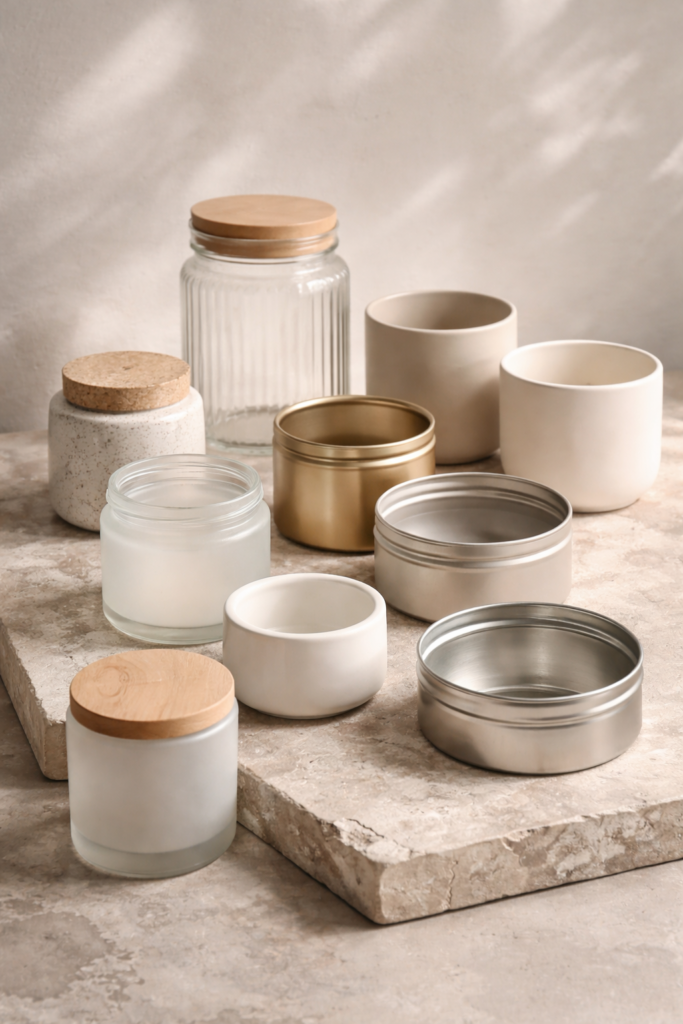
Not all candle containers are created equal, even if they look cute on a shelf. The container you choose affects heat distribution, melt pool width, and how evenly your candle burns from start to finish. If you want handmade candles that perform well and still look aesthetic, this choice matters more than people realize.
Glass jars hold heat steadily and are the most forgiving for beginners. Metal tins heat up faster and can help prevent tunneling, but they require careful wick sizing to avoid overheating. Ceramic containers look elevated and work beautifully for candles aesthetic DIY, but they need thicker walls and proper testing to ensure an even burn.
Why this matters: A container that distributes heat evenly allows the wax to melt consistently across the surface instead of pulling inward or burning unevenly along the sides.
Pro Tips
- Wide-mouth containers burn more evenly than narrow ones.
- Always test burn new container styles before making multiples.
- Avoid thin glass or decorative containers not labeled as heat safe.
Shop the Look
4. Fragrance Oil Ratios That Won’t Ruin the Burn
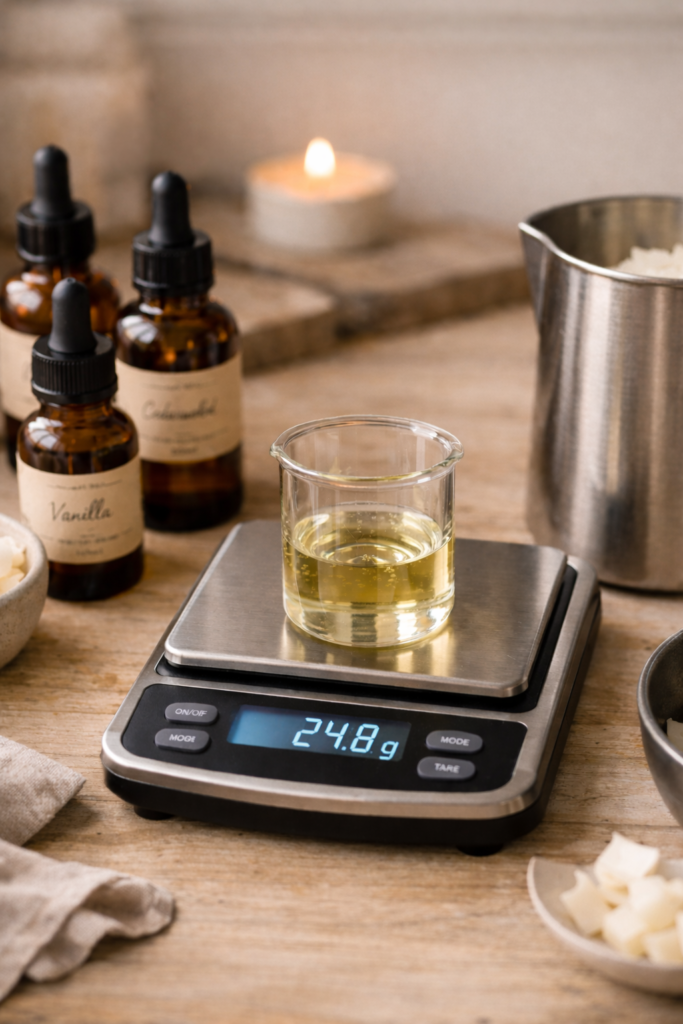
It is tempting to load your candle with fragrance, especially if you want a strong scent throw, but too much oil is one of the fastest ways to ruin an otherwise perfect burn. Over-fragranced candles struggle to melt evenly, tunnel more easily, and can even sweat oil on the surface. When you are learning how to make handmade candles, restraint here pays off.
Most waxes perform best with a fragrance load between 6 and 10 percent by weight. Going higher does not always mean stronger scent. It often means unstable wax and poor combustion. Adding fragrance at the right temperature also matters, because overheated oils can separate and affect how the candle burns.
Why this matters: Proper fragrance ratios keep the wax stable, allowing the wick to melt the surface evenly instead of fighting against excess oil.
Mistakes to Avoid
- Adding fragrance without weighing it.
- Exceeding the wax manufacturer’s recommended load.
- Mixing fragrance when the wax is too hot or too cool.
Shop the Look
5. Pour Temperature Makes or Breaks the Candle
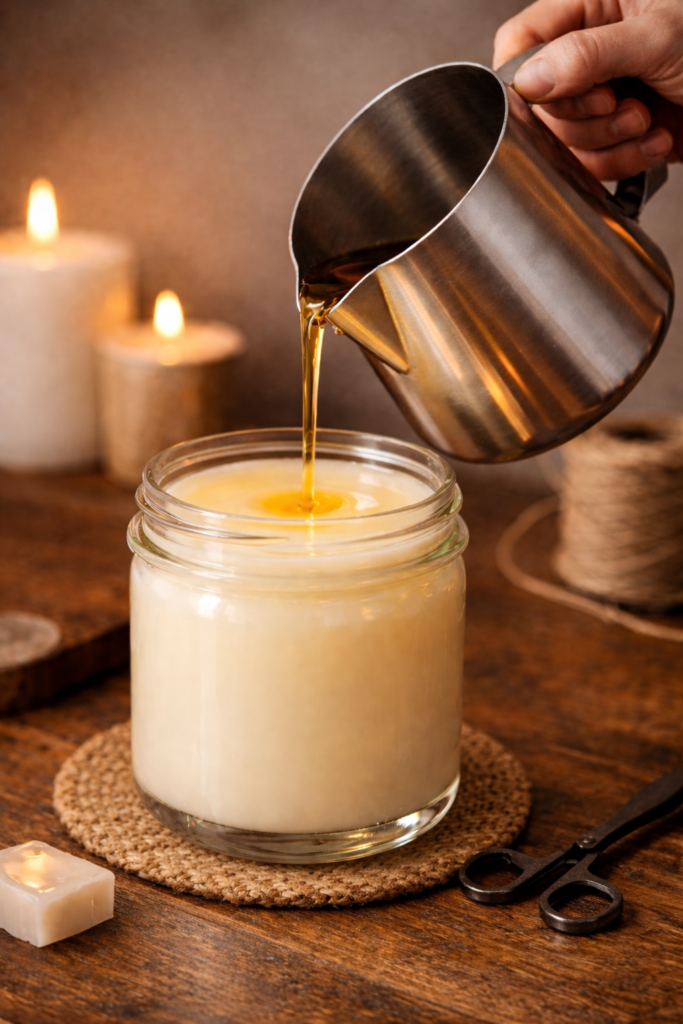
Pouring wax at the wrong temperature can undo all the work you have done up to this point. Too hot and the wax cools unevenly, creating sinkholes and rough tops. Too cool and the wax can cling to the sides of the container, leading to poor adhesion and uneven burns. This step is a big reason some homemade candles to sell look professional while others do not.
Each wax has a recommended pouring range, and sticking close to it helps the candle cool evenly from the center outward. Slow, steady cooling is what allows the wick to form a balanced melt pool once the candle is lit. Rushing the pour or eyeballing temperatures almost always leads to cosmetic or burn issues later.
Why this matters: Proper pour temperature creates a smooth surface and stable structure that supports an even burn over time.
Pro Tips
- Pour slowly to avoid air bubbles.
- Let candles cool at room temperature, not in the fridge.
- If sinkholes form, a small top-off pour can fix them.
Shop the Look
- Infrared Thermometer
- Stainless Steel Pouring Pitcher
- Wax Melting Double Boiler
- Silicone Heat-Resistant Mat
6. How to Center and Secure Your Wick Properly
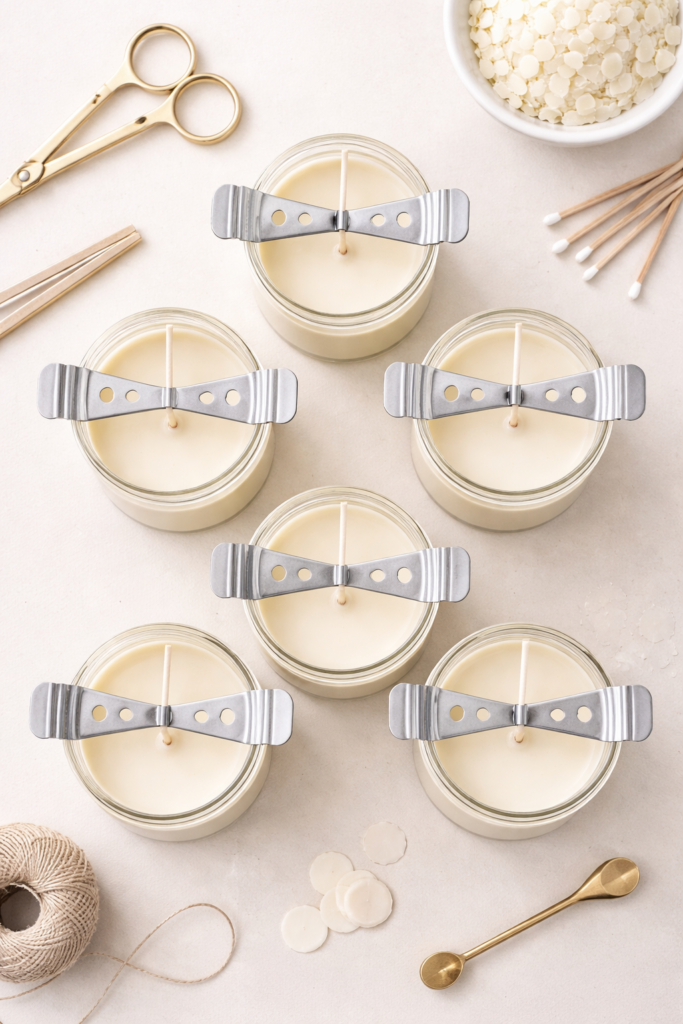
A perfectly sized wick will still burn unevenly if it is off-center. Wick placement controls how the melt pool spreads, and even a slight shift can cause one side of the candle to melt faster than the other. If your handmade candles lean or burn crooked, this is usually why.
The wick should be centered and held in place from the moment you pour until the wax fully sets. Wick holders and centering bars make this easy and keep everything aligned while the wax cools. Skipping this step often leads to drift, especially in wider containers or candles in tins where the wax cools faster around the edges.
Why this matters: A centered wick creates a symmetrical melt pool, which is essential for an even burn from the first light to the last.
Step-by-Step
- Secure the wick to the bottom of the container with a wick sticker or adhesive.
- Press firmly and center it before pouring wax.
- Use a centering bar or holder to keep the wick upright.
- Leave in place until the candle is fully cooled and set.
Shop the Look
7. Curing Time Is Non-Negotiable

This is the step most people skip, and it is exactly why their candles do not burn evenly. Curing is the time your candle needs to fully harden and bond the wax, fragrance, and wick together. Lighting a candle too soon can lead to weak scent throw, uneven melt pools, and early tunneling, especially with handmade candles.
Most soy candles need at least 7–14 days to cure properly. Coconut and blended waxes often cure a bit faster, while beeswax benefits from even longer rest time. During curing, the wax structure stabilizes, which allows the wick to perform the way it was designed to.
Why this matters: A fully cured candle burns cleaner, melts evenly, and holds fragrance better throughout its life.
Pro Tips
- Store curing candles in a cool, dry place away from direct sunlight.
- Do not cover candles tightly while curing; airflow matters.
- Label your candles with pour dates so you know when they are ready to burn or sell.
Shop the Look
8. First Burn Rules You Should Never Skip
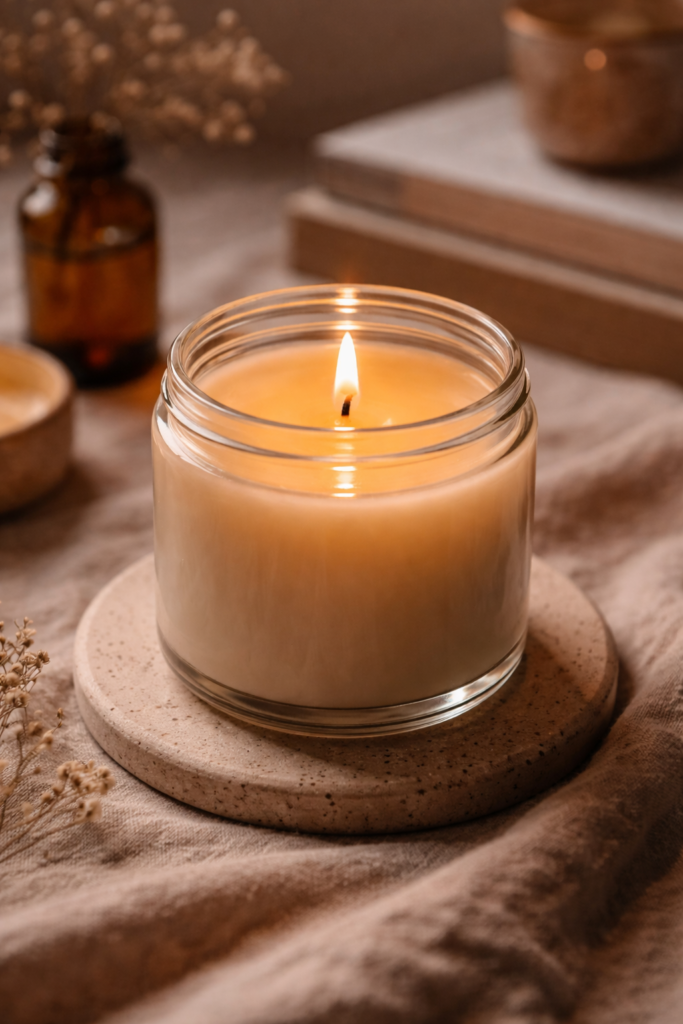
The first time you light a candle sets the tone for every burn that follows. This is called candle memory, and it is especially important for handmade candles. If the wax does not melt all the way to the edges on the first burn, the candle will continue to tunnel no matter how well it was made.
As a general rule, candles should burn one hour for every inch of container diameter on the first burn. That gives the melt pool enough time to reach the sides and establish an even pattern. Skipping this step is one of the most common reasons people think their candle “does not burn evenly,” when it is actually a burn habit issue.
Why this matters: The first burn trains the candle to melt evenly and prevents wasted wax around the edges.
Pro Tips
- Always trim the wick to about ¼ inch before lighting.
- Place candles on a flat, draft-free surface.
- Never blow out a candle before the melt pool reaches the container edges.
Shop the Look
9. How to Fix Tunneling (Yes, You Can Save It)
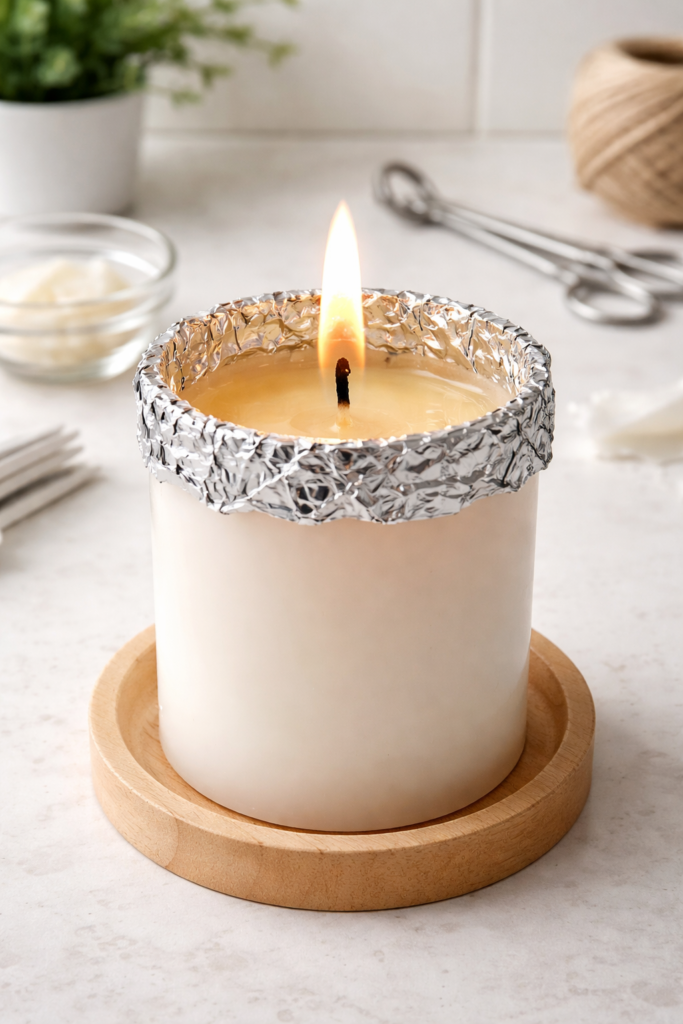
If a candle has already started tunneling, it is not automatically a lost cause. Many handmade candles can be fixed with a simple method that helps the wax melt evenly again. The key is correcting the heat distribution so the wax around the edges can catch up.
The aluminum foil method is the most reliable fix. Wrapping foil around the top of the candle traps heat and allows the outer wax to melt fully into the existing melt pool. This resets the candle’s memory and can prevent tunneling from continuing.
Why this matters: Fixing tunneling early saves wax and extends the life of your candle.
Step-by-Step
- Wrap aluminum foil around the top edge of the candle, leaving a small opening at the center.
- Light the candle and let it burn until the wax melts evenly to the sides.
- Remove the foil once the melt pool is even.
- Trim the wick before the next burn.
Safety Notes
- Never leave a foil-wrapped candle unattended.
- Do not let foil touch the flame.
- Stop using the candle if the container becomes too hot.
Shop the Look
10. Making Candles That Are Pretty and Profitable
Even-burning candles are not just about performance. They are what separate hobby candles from candles people actually want to buy again. If you are creating homemade candles to sell, consistency matters just as much as aesthetics. Customers notice when a candle tunnels, burns unevenly, or leaves wax stuck to the sides.
Design choices like container shape, label placement, and wick style should always support the burn first, then the look. Minimal vessels, cohesive color palettes, and intentional fragrance blends create unique candle making ideas DIY buyers are drawn to, while proper testing ensures they burn the way customers expect.
Why this matters: Candles that burn evenly feel higher quality, last longer, and build trust with buyers.
Shop the Look

Making handmade candles that burn evenly is not about luck. It is about understanding how wax, wicks, containers, and burn habits work together. Once you dial in these fundamentals, your candles will look better, perform better, and feel more intentional from the very first light.
If you love creating things that feel elevated but still approachable, you might also enjoy exploring other creative DIY projects over on Room Revival Studio. Start with a project that pairs perfectly with candle making and helps you style your space with intention.

