Affiliate Disclosure – This post contains affiliate links. If you purchase through these links, Room Revival Studio may earn a small commission at no extra cost to you.
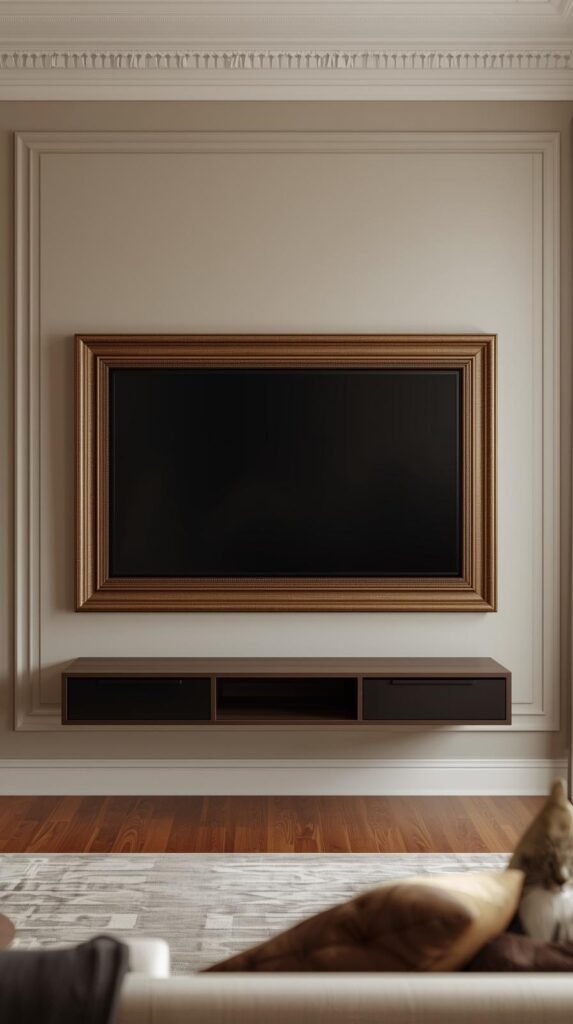
A beautiful room can survive a lot. A questionable throw pillow. A rental ceiling fan. Even a pile of laundry you swear is “sorted.” But a big black TV screen on the wall? That’s the vibe killer. The good news is you do not need a Samsung Frame TV or an expensive custom bezel to fix it. This DIY TV frame works for any size TV, looks intentional, and makes your screen feel like part of the decor instead of the main character.
Why a DIY TV Frame Changes Everything
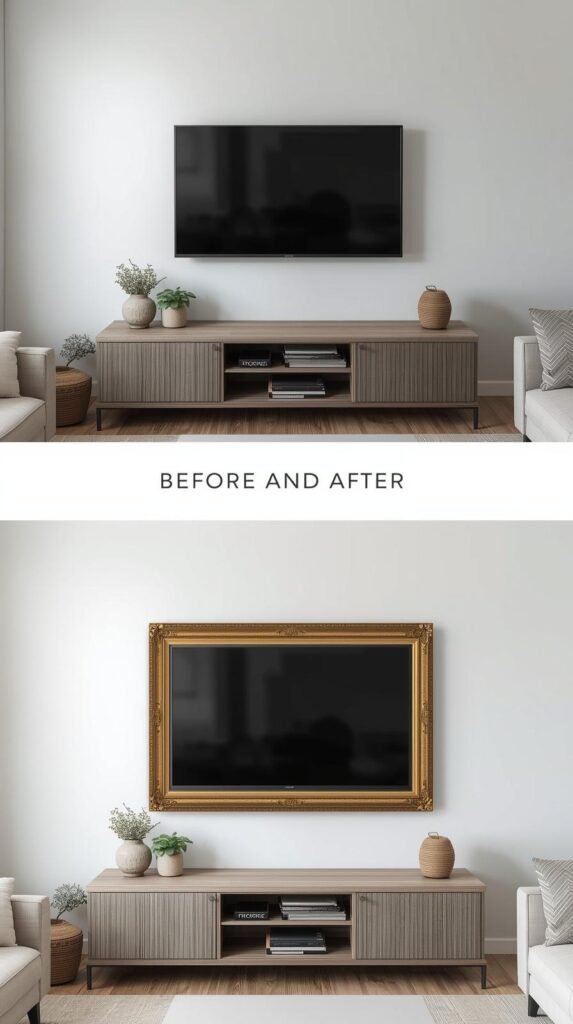
A DIY TV frame is one of those upgrades that makes your room feel instantly more styled without you buying a single new piece of furniture. Framing the screen creates a visual border, which tricks the eye into reading your TV like a piece of wall art instead of a floating rectangle. It also helps your TV “belong” on the wall, especially if you’ve got gallery frames, shelves, or warm wood tones nearby.
This is also the smartest route if you love the Samsung The Frame look but do not love the price tag or the limitations. A custom TV frame lets you match your exact style: moody and modern, light and minimal, warm and vintage, even eclectic with a chunky profile. And because you’re building it to fit your own screen, this becomes a true DIY TV frame any size hack, not a one-model solution.
Style Tip: If you want it to look expensive, focus on two things: a clean profile and a finish that feels intentional. Matte black, warm walnut, soft oak, or a painted tone that matches your wall color will always look more elevated than shiny anything.
Key Takeaway: A frame does not just “decorate” your TV. It makes it look planned, polished, and integrated into the room.
Shop the Look
Measuring Your TV the Right Way
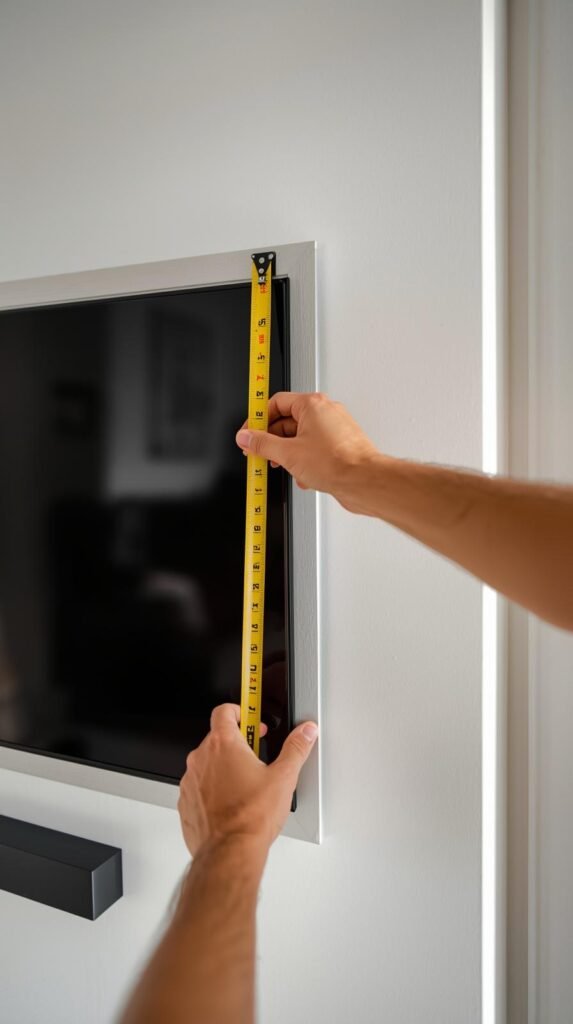
If your frame looks off, nine times out of ten it’s a measuring issue. This step is what makes the difference between a DIY that looks custom and one that looks like an afterthought. The goal is to build a frame that floats cleanly around the screen without blocking vents, sensors, or ports.
Precise measuring creates a frame that feels custom-built instead of slapped on. The overlap hides imperfections, while the clearance keeps everything functional. This is the secret behind a clean frame TV hack that works on standard flat screens and custom bezel-style builds.
Step-by-Step: How to Measure for a DIY TV Frame
- Measure the visible screen width and height
Measure only the part of the TV you actually see when it’s mounted, not the bezel edge. Write these numbers down. - Decide your overlap
Plan for the frame to overlap the TV screen by about ¼–½ inch on each side. This hides the screen edge and keeps the frame from looking undersized. - Add clearance for vents and sensors
Check the bottom and sides of your TV for:- IR sensors
- Power lights
- Speaker vents
Your frame should sit just outside these areas so nothing gets blocked.
- Measure the depth of your TV
This matters more than people think. If your TV sticks out 1.5 inches from the wall, your frame needs to be at least that deep to sit flush and look intentional. - Mark final frame dimensions
Add your overlap and clearance to the original screen measurement. These final numbers are what you’ll use when cutting your trim.
Pro Tips That Save You from Rebuilding
- Always measure twice, especially if your TV is already wall-mounted.
- Use painter’s tape to mock up the frame shape directly on the wall before cutting anything.
- If your TV is slightly off-level, square your frame to the wall, not the screen. It will look better visually.
Shop the Look
Best Materials for a Lightweight DIY TV Frame
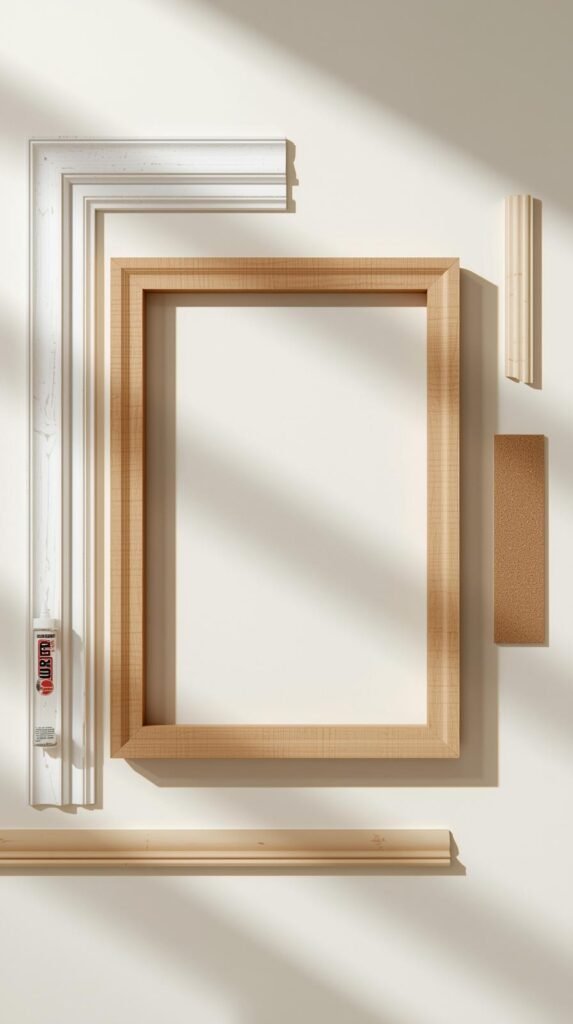
Choosing the right material is what makes this project renter-friendly, TV-safe, and easy to install. Your frame does not need to be heavy or solid wood to look high-end. It just needs the right profile, depth, and finish. Lightweight materials also make mounting safer, especially if you are using adhesive strips or magnetic systems instead of drilling.
A lightweight frame protects your TV, simplifies mounting, and keeps the project approachable. The material choice determines whether this looks like a high-end custom bezel or a bulky add-on. When done right, this DIY TV frame reads as built-in decor, not a craft project.
Top Materials That Actually Work
MDF Trim or Boards
MDF is smooth, budget-friendly, and easy to cut. It paints beautifully, which makes it perfect for modern, moody, or color-drenched looks. This is one of the best options if you want a clean custom TV frame without visible wood grain.
Pine or Poplar Wood Trim
These are lightweight real-wood options that work well if you want a natural or stained finish. They feel more traditional and pair nicely with gallery walls or warm wood consoles.
Foam or Polyurethane Decorative Trim
This is the secret weapon for renters. It is extremely lightweight, easy to cut with a utility knife, and looks surprisingly luxe once painted. Perfect for larger TVs where weight matters.
Prefinished or Faux Wood Trim
Great if you want minimal finishing. These work best for modern or minimalist spaces and are ideal if you do not want to paint or stain.
How to Choose the Right Material for Your Space
- Go MDF or foam trim if you want clean lines and easy installation
- Go real wood if your room already has visible wood tones you want to match
- Keep frame depth between 1 to 2 inches for the most realistic “art frame” look
- Avoid anything too chunky unless you are intentionally going bold or vintage
Shop the Look
How to Build a TV Frame for Any Size TV
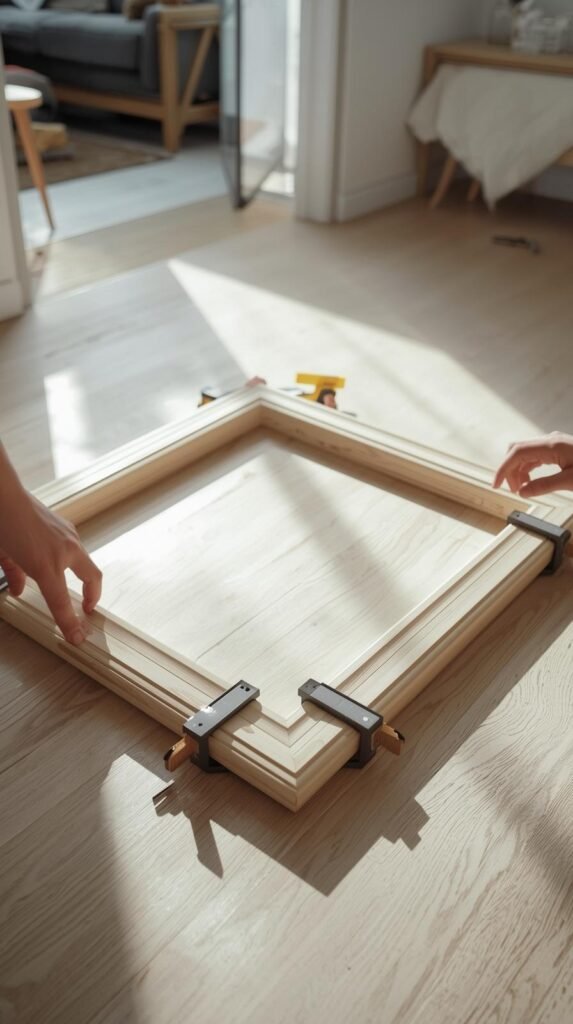
This is where the project actually comes together. Building the frame correctly is what makes it look custom instead of craft-store DIY. A clean build ensures straight lines, tight corners, and a frame that sits flush without warping or shifting over time.
Step-by-Step: Building the Frame
- Cut your trim pieces
Cut four pieces of trim based on your final measurements from Section 2. Use 45-degree miter cuts at each corner for a classic picture-frame look. Dry fit the pieces on a flat surface before assembling. - Dry fit around the TV
Hold or place the frame pieces around the TV to confirm fit and overlap. Check that vents, sensors, and buttons are clear. Make adjustments now before anything is glued. - Assemble the frame
Apply wood glue to each mitered edge. Press corners together firmly and secure with corner clamps. Let the frame sit flat while drying so it stays square. - Reinforce the corners
Once the glue sets, add small brad nails or finishing nails at each corner if needed. For foam or lightweight trim, adhesive alone is usually enough. - Sand and smooth
Lightly sand the corners and edges to remove gaps or uneven seams. Wipe away dust so the finish adheres properly.
Pro Tips for a Clean Build
- Assemble the frame on the floor or a large table to keep everything level
- Wood filler can fix small gaps, but tight cuts matter more than filler
- If your cuts are slightly off, adjust the least visible corner, usually the bottom
Shop the Look
Frame Styles That Actually Look Expensive
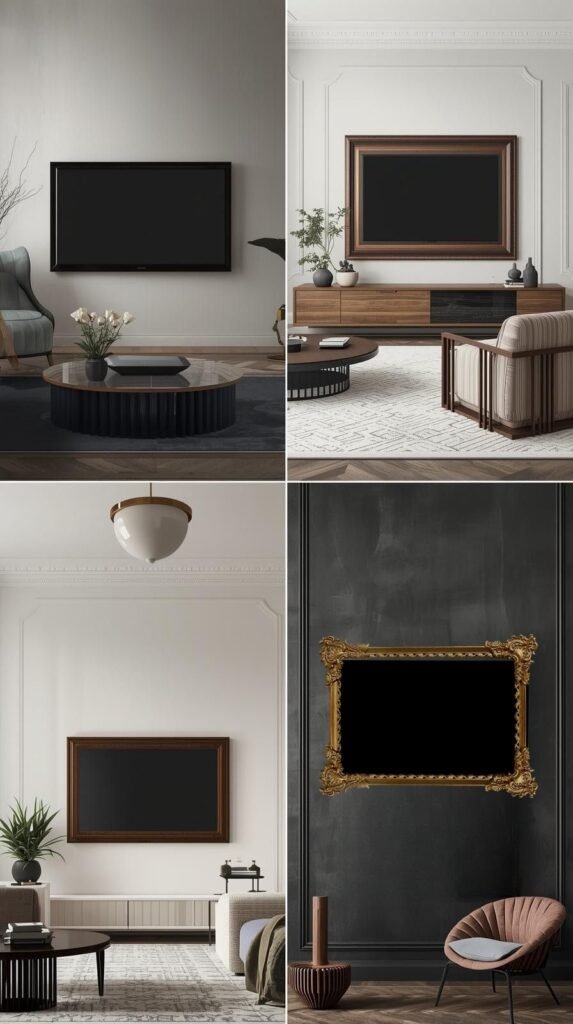
The style of your frame is what determines whether this reads as high-end wall art or a basic DIY add-on. A well-chosen profile and finish can make even a standard flat-screen feel intentional and elevated. This is where you align the frame with your room’s personality instead of treating it like an afterthought.
Popular Frame Styles That Work
Minimal Modern
Slim profiles with straight edges in matte black, soft white, or warm gray feel clean and architectural. This works especially well in modern, Japandi, or minimalist spaces.
Classic Gallery Frame
A slightly wider profile with subtle detail mimics traditional art frames. Think soft oak, walnut, or a painted neutral that blends into your wall color.
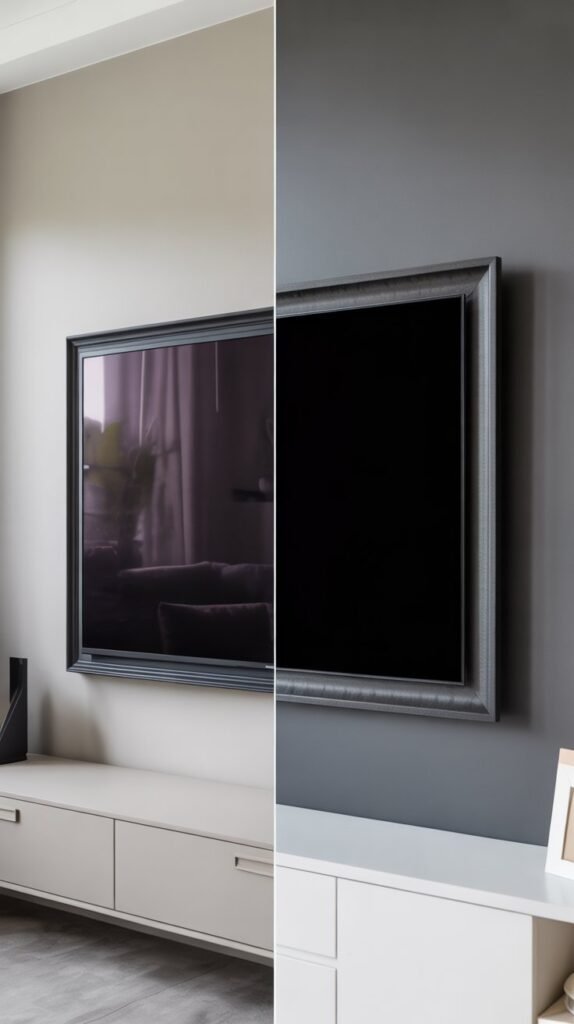
Moody Luxe
Deeper frames in charcoal, espresso, or dark bronze finishes add drama. These styles pair beautifully with darker walls, textured paint, or layered lighting.
Sculptural or Fluted
Fluted or ridged trim adds dimension without overwhelming the wall. This style works best when the rest of the space is restrained so the texture can shine.
How to Choose the Right Style
- Match the frame finish to nearby furniture or shelving
- Keep larger TVs paired with simpler profiles to avoid bulk
- Use bold frames only if the wall itself is calm or neutral
Shop the Look
How to Mount the Frame Without Damaging Your TV
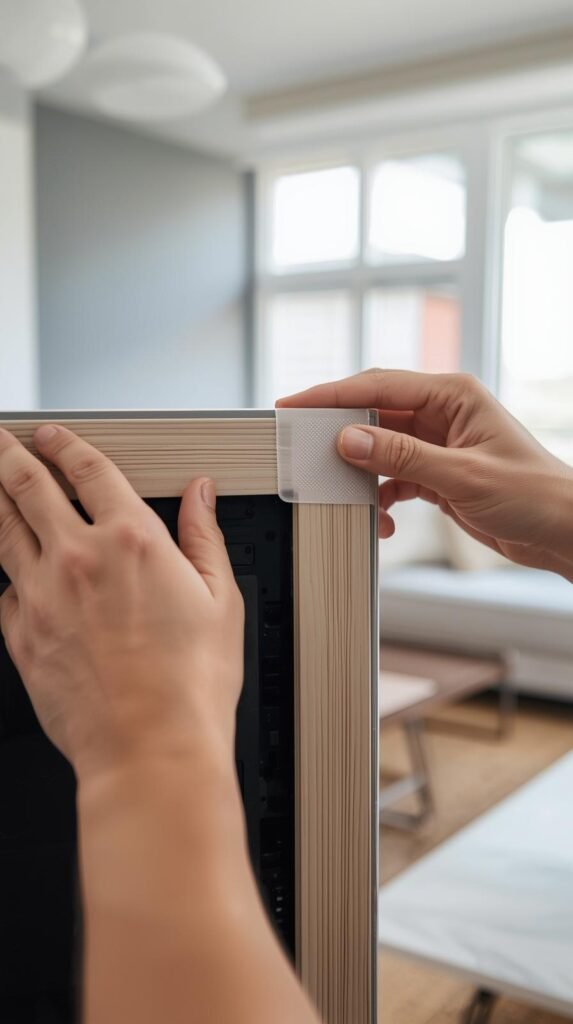
Mounting is the moment where most people get nervous, and for good reason. The right attachment method keeps your frame secure while protecting your screen, vents, and sensors. When done correctly, the frame should feel solid but removable, especially if you rent or plan to update the look later.
Step-by-Step: Safe Frame Mounting Options
Option 1: Heavy-Duty Command Strips
This is the most renter-friendly method and works best with lightweight MDF or foam frames.
- Clean the TV bezel with rubbing alcohol and let it dry
- Apply strips to the back of the frame, not the screen
- Press the frame gently into place and hold for 30 seconds
Option 2: Industrial Velcro Strips
Ideal if you want the option to remove the frame for cleaning or seasonal updates.
- Attach one side to the frame and the other to the TV bezel
- Keep strips at least one inch away from vents or sensors
- Test alignment before pressing firmly
Option 3: Magnetic Mounting (Advanced)
Best for frequent frame swaps or design updates.
- Attach thin metal strips to the back of the frame
- Use adhesive-backed magnets on the TV bezel
- Ensure magnets are rated for the frame’s weight
Pro Tips for Mounting Success
- Never block bottom sensors or speaker vents
- Keep attachment points evenly spaced for balance
- If the frame feels too tight, reduce overlap slightly
Shop the Look
Custom Frame TV Hack for Samsung, LG, Sony & More
This hack works because the eye responds to proportion and edge definition, not brand names. Once a frame breaks up the hard perimeter of the screen and adds depth, your TV visually shifts from “electronics” to “intentional wall feature.” That illusion holds whether the TV is a Samsung Frame, a standard flat screen, or anything in between.
How This Works Across Different TV Brands
Samsung (Including The Frame)
For Samsung Frame TVs, this DIY acts as a true custom bezel alternative. It lets you bypass limited stock frame styles and match your decor exactly. For standard Samsung models, keep clearance along the bottom edge where sensors and indicators usually live.
LG, Sony, TCL, Vizio
Most of these TVs are slightly deeper than The Frame, which actually helps the illusion. A deeper profile allows the frame to sit more naturally and feel like real art. Just confirm that side and bottom vents remain clear.
Wall-Mounted vs Stand-Mounted TVs
Wall-mounted TVs create the most seamless look, but stand-mounted TVs can still work if the frame depth is kept minimal and visually supported by a console or cabinet underneath.
Fit Details That Make the Difference
- Add depth if your TV sits farther off the wall
- Reduce overlap near sensor-heavy edges
- Use darker finishes if the screen projects forward
Shop the Look
Styling the Wall So the TV Blends In
This step matters because even the best DIY TV frame will still feel obvious if the surrounding wall is empty or mismatched. The goal is to make the TV part of a larger visual story so it doesn’t dominate the room. When the wall is styled intentionally, the frame reads as decor instead of a workaround.
Ways to Make the TV Disappear Visually
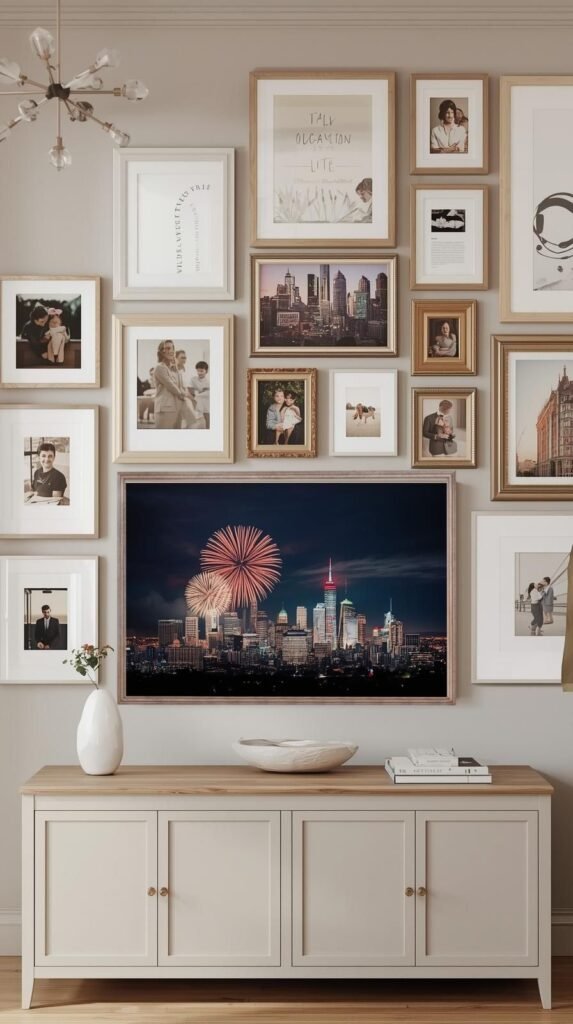
Build a Gallery Wall Around It
Mix framed art, prints, and photos in similar tones to your TV frame. Vary sizes but keep finishes cohesive so the TV feels like just another piece in the layout.
Use Color or Wallpaper Strategically
Painting the wall behind the TV a darker shade or using subtle wallpaper softens the contrast of the screen. This is especially effective for moody or modern spaces.
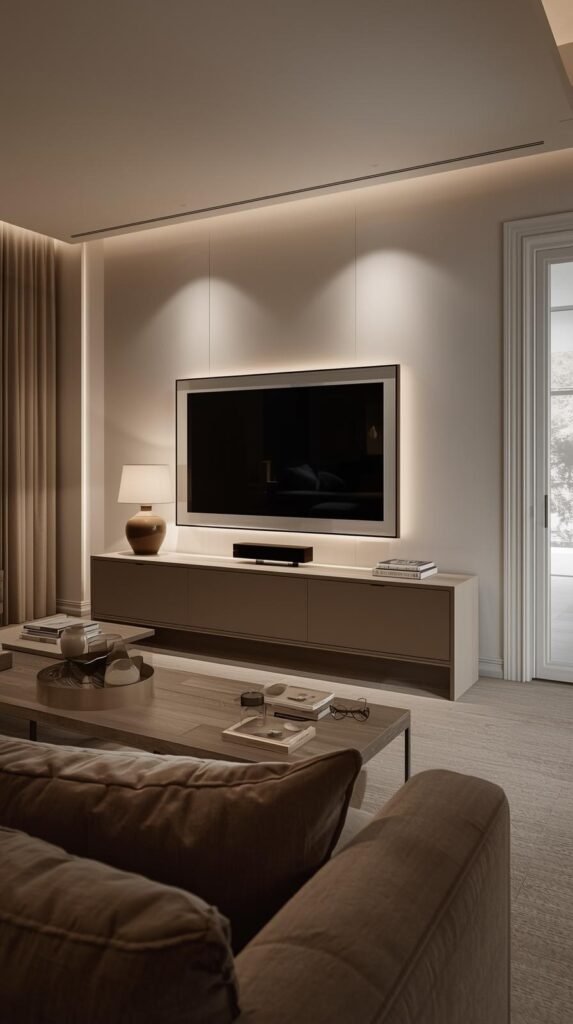
Anchor With Furniture
A media console, floating shelf, or low cabinet grounds the TV and frame visually. This prevents the screen from feeling like it’s floating awkwardly on the wall.
Layer Lighting
Sconces, picture lights, or LED bias lighting behind the TV add depth and reduce harsh contrast. Soft lighting helps the screen blend into the wall when it’s off.
Style Tips That Elevate the Look
- Keep frames and decor within one color family
- Avoid overcrowding the wall with too many competing elements
- Repeat materials like wood, metal, or fabric elsewhere in the room
Shop the Look
Common DIY TV Frame Mistakes (And How to Avoid Them)
This section matters because most TV frame issues are not about skill, they’re about small oversights that compound visually. A frame can be well-built and still look off if proportions, placement, or finish are slightly wrong. Knowing what typically goes wrong helps you avoid redoing work later.
Mistakes That Make a Frame Look DIY (Not Custom)
Going Too Thick for the TV Size
Oversized frames overwhelm the screen and pull attention back to the TV instead of disguising it. Larger TVs almost always look better with slimmer profiles.
Ignoring TV Depth
If the frame is shallower than the TV, it creates a shadow line that breaks the illusion. The frame should visually wrap the screen, not sit behind it.
Blocking Sensors or Vents
Covering sensors causes remote issues, while blocked vents trap heat. Both are easy to avoid with proper measuring and slight overlap adjustments.
Skipping Finish Prep
Uneven paint, visible seams, or rough corners instantly downgrade the look. Light sanding and a clean finish are what separate a custom look from a rushed one.
Mounting Before Testing
Mounting without a dry fit often leads to crooked alignment. A quick test placement saves time and frustration.
How to Get It Right the First Time
- Keep frame width proportional to screen size
- Match frame depth to TV depth or go slightly deeper
- Dry fit everything before final mounting
- Finish the frame completely before attaching it to the TV
Shop the Look
Is a DIY TV Frame Worth It?
This matters because not every DIY is worth the effort, and this one only works if it actually improves how you live in the space. A DIY TV frame earns its place when it reduces visual clutter, upgrades the room, and feels intentional rather than temporary. The payoff here is not just aesthetic. It is about making your main living space feel calmer and more finished.
When a DIY TV Frame Is Absolutely Worth It
- You want the look of a Frame TV without replacing a perfectly good screen
- Your TV is the visual focal point and currently feels out of place
- You enjoy hands-on projects that deliver high visual impact
When You Might Skip It
- Your TV is rarely visible or tucked into built-ins
- You plan to replace the TV soon
- The wall around the TV is already visually busy
The Bottom Line
A well-executed DIY TV frame is one of the most cost-effective ways to elevate a room. It works across TV sizes and brands, adapts to different design styles, and gives you full control over the look. If your goal is a space that feels styled instead of screen-centered, this project delivers.
Shop the Look
This DIY custom TV frame works because it solves a real design problem without forcing you to buy a new TV or redesign the entire room. By focusing on proportion, material choice, and thoughtful styling, you turn a screen into something that actually belongs on your wall. The result feels intentional, polished, and flexible enough to evolve as your style changes.
If you are already thinking about how to elevate the rest of the space, this project pairs perfectly with a layered wall approach. Next, check out 14 Aesthetic Wall Decor Ideas That Transform Any Bedroom on Room Revival Studio to see how gallery walls, texture, and art placement can help your framed TV blend even more seamlessly into your home.