

Air dry clay is everywhere right now and for good reason. It’s one of the easiest ways to get into DIY crafts without investing in expensive tools or equipment. If you’ve ever wanted to make handmade decor, gifts, or small creative projects but felt intimidated, this is your sign to start here. This guide breaks down exactly how air-dry clay works, what you need, and what to expect so you can create pieces that actually look good and hold up.
What Air-Dry Clay Is (and Why It’s So Popular)
Air dry clay is a lightweight, moldable crafting material that hardens naturally as moisture evaporates. Unlike ceramic clay, it does not require a kiln, and unlike polymer clay, it does not need to be baked. That single detail makes it incredibly accessible for beginners, apartment dwellers, and anyone crafting at a kitchen table.
What’s driving its popularity is the balance between ease and results. You can shape it by hand, let it dry overnight, and end up with decor that looks handmade but intentional. It works especially well for small-scale projects like trays, bowls, ornaments, and sculptural accents where texture and form matter more than durability.
Air dry clay also fits perfectly into the current DIY and home decor space. It supports slow crafting, neutral and modern aesthetics, and personalized pieces that feel elevated without being precious. For beginners, it’s forgiving enough to experiment with while still producing satisfying finished pieces.
Shop the Look


Types of Air-Dry Clay You’ll See (Store-Bought vs DIY)
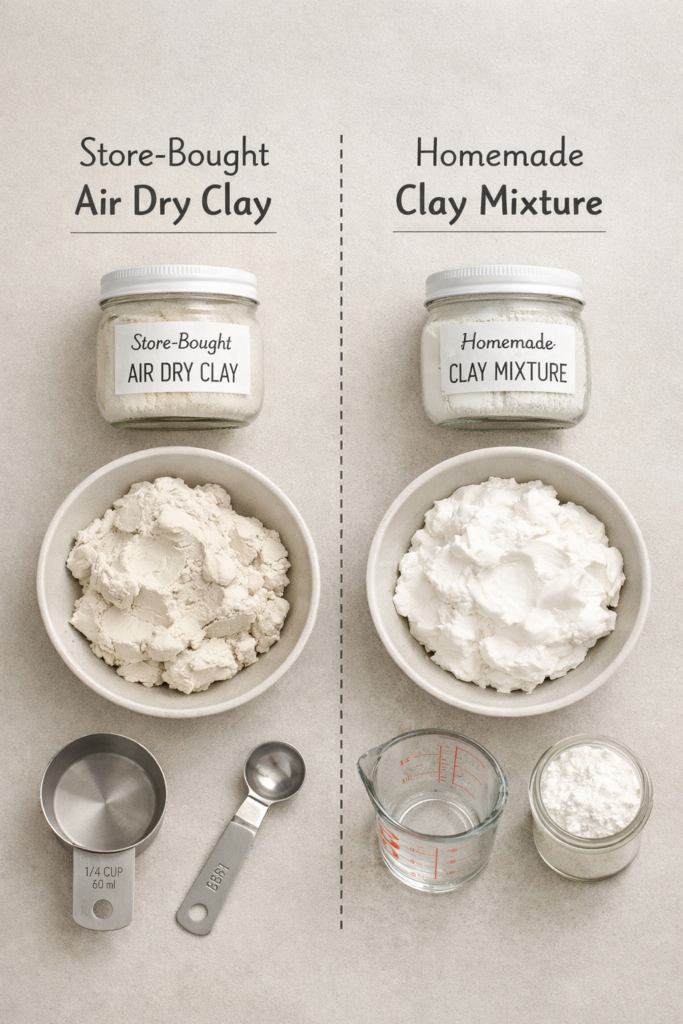
Not all air dry clay behaves the same, and knowing the difference upfront saves a lot of frustration. Store-bought air dry clay is formulated for consistency, smoother texture, and more predictable drying, which makes it the better option for decor pieces, gifts, and anything you want to look polished. It holds detail well, sands more evenly, and tends to crack less when shaped at an even thickness.
Homemade air dry clay, on the other hand, is best thought of as a learning or experimentation medium. It’s inexpensive and easy to make, but the texture is usually softer and more prone to shrinkage and cracking as it dries. DIY clay works well for practice, kid-friendly projects, or quick crafts where perfection is not the goal. It’s less reliable for long-term decor or detailed sculpting, especially if you plan to paint or seal the finished piece.
The key difference comes down to control. Store-bought clay gives you a more ceramic-like finish and predictable results, while homemade clay trades durability and smoothness for accessibility and cost savings. Choosing the right one depends on whether your priority is learning the process or creating finished pieces you’ll want to display.
Shop the Look
Best Beginner-Friendly Air-Dry Clay Brands to Start With
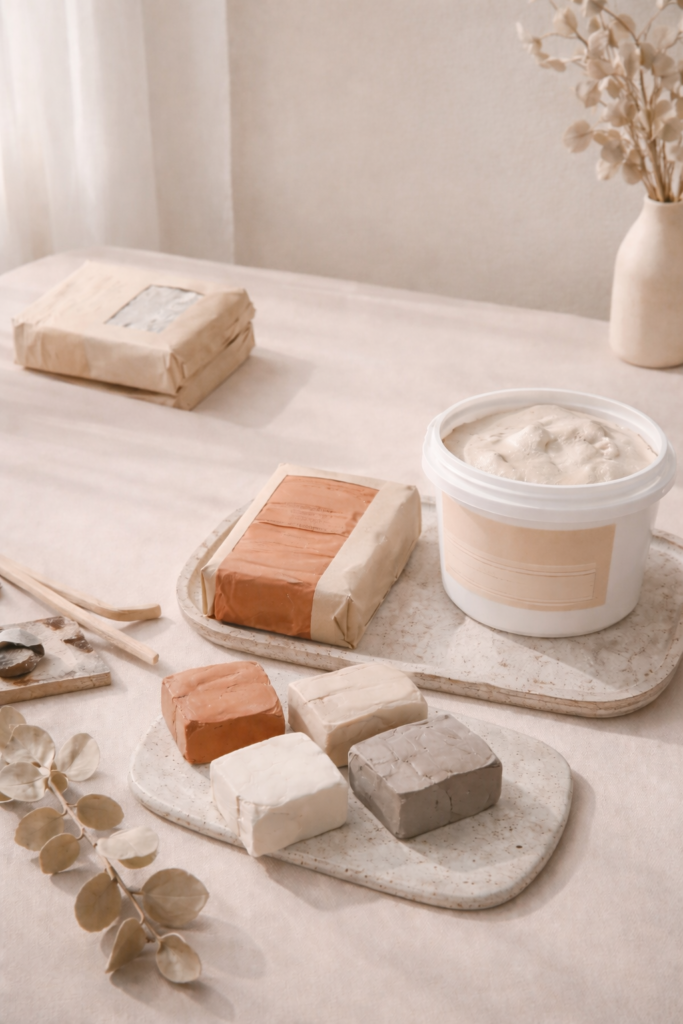
Choosing the right air dry clay brand makes a noticeable difference, especially when you’re just starting out. Beginner-friendly brands tend to have a smoother texture, stay workable longer, and dry more predictably, which reduces cracking and frustration. They also sand and paint better, making it easier to achieve a finished look that feels intentional rather than homemade in a rushed way.
Some brands are designed more for practice and casual crafting, while others are better suited for home decor and display pieces. For beginners, the goal is finding clay that is forgiving during shaping but still strong enough once dry to hold its form. These brands are widely available, reliable, and easy to work with, which is why they are often recommended for first projects.
If you plan to make trays, bowls, ornaments, or simple sculptural decor, starting with a quality store-bought clay sets you up for better results from the beginning.
Shop the Look

- Stress-Free Crafting – DAS airdry clay boasts a smooth, even texture that doesn’t require oven-baking; the clay air-hard…
- Artistic Versatility – This modeling clay can be used to mold, sculpt and create models and figures. Create fantastic de…
- Perfectly Pliable – Each brick of air dry sculpting clay is extremely malleable. Molding and forming the clay into your …

- CRAYOLA AIR DRY CLAY: Includes 5 pounds of Crayola Sculpting Clay in a re-sealable bucket.
- BULK TEACHER SUPPLIES: Stock up on teacher classroom must haves, including Crayola bulk packs of crayons, markers, and m…
- DIY CLAY PROJECTS: Crayola Air Dry Clay lets you use traditional clay sculpting techniques such as coil, slab, pinch, an…
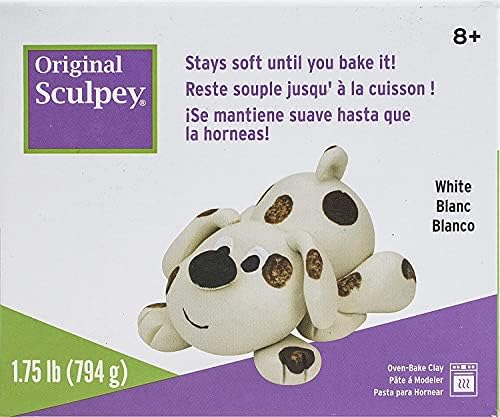
- 100% polymer clay
- STAYS SOFT UNTIL BAKED: Does not air dry. Remains soft and flexible until it is baked in your home oven – No kiln needed…
- FUN TO PAINT & FINISH: After baking, it can be sanded, drilled, carved and painted with water-based acrylic paints. Crea…

- A new, premium, professional grade air-dry clay from ACTIVA, the industry’s leading source for the highest quality clays…
- A superior, self-hardening, natural earth clay with exceptional plasticity and an ultra-fine grain that achieves excelle…
- A great choice for studio, classroom and hobbyist use, its superior formulation is easily worked by hand or tool for sup…
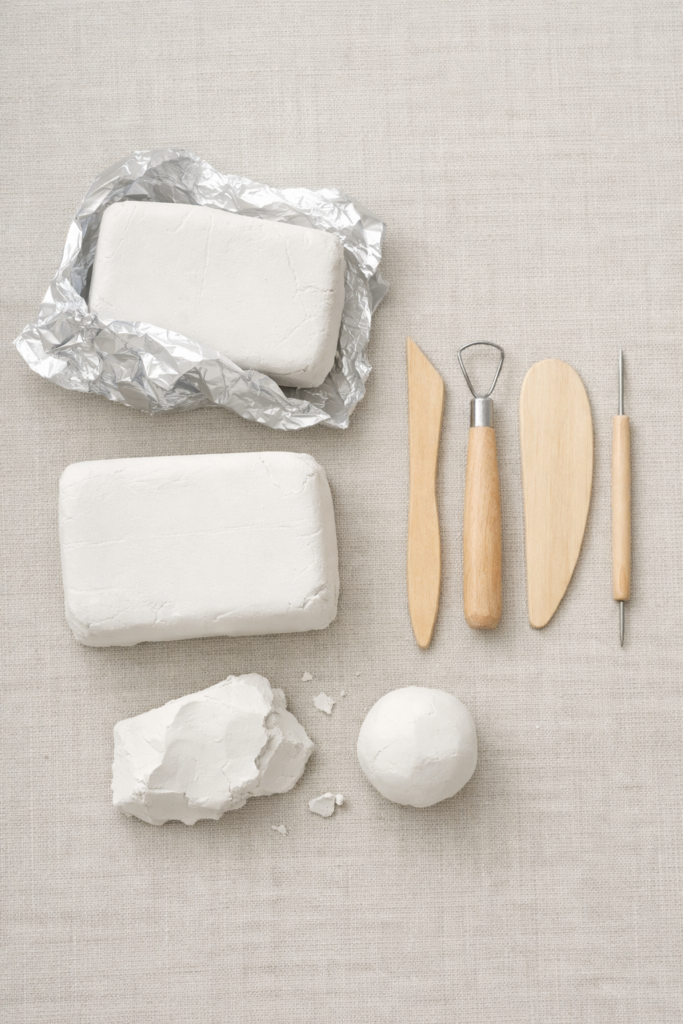
Tools You Actually Need (and What You Can Skip)
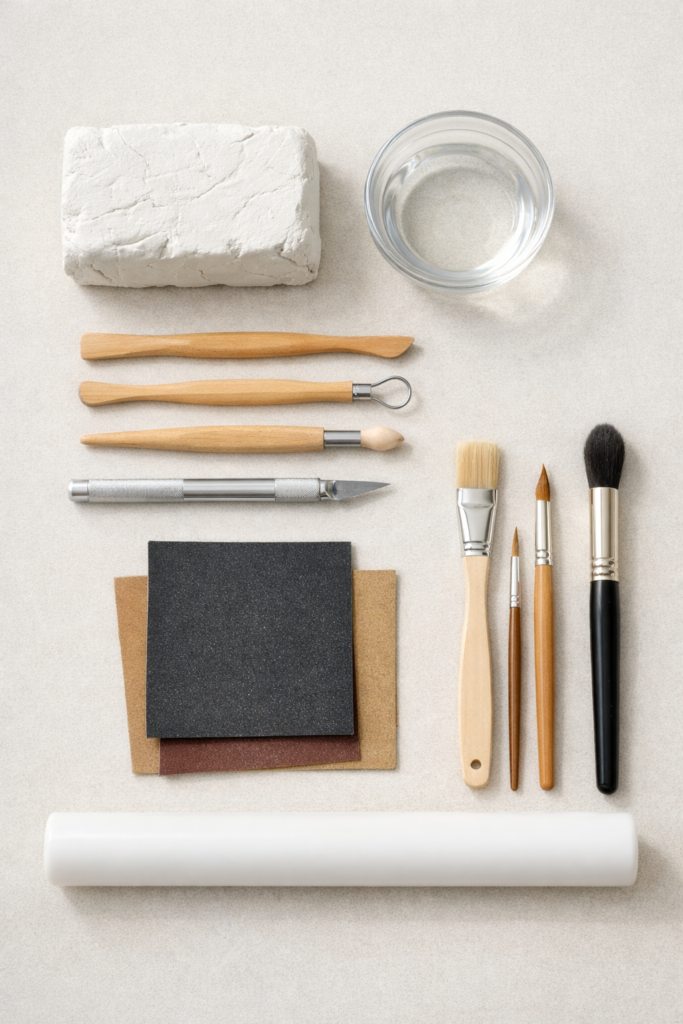
One of the best things about working with air dry clay is how minimal the setup can be. You do not need a fully stocked craft studio to get clean, professional-looking results. A small set of basic tools helps with shaping, smoothing, and detailing, but many specialized tools can be replaced with simple household items. This keeps the barrier to entry low and makes air dry clay an easy medium to try without overcommitting.
Essential tools focus on control and finish. Sculpting tools help define edges and curves, a craft knife allows for clean cuts, and sandpaper refines the surface once the clay is fully dry. Soft paint brushes are useful not just for painting, but also for brushing away dust during sanding and smoothing seams. Items like toothpicks, butter knives, and old credit cards can stand in for many shaping tools when you’re just getting started.
What you can skip are expensive molds, heavy-duty cutting tools, or specialty equipment designed for kiln-fired clay. Air dry clay performs best when kept simple, and too many tools often complicate the process rather than improve the result.
Shop the Look


How to Prep, Roll, and Shape Air Dry Clay
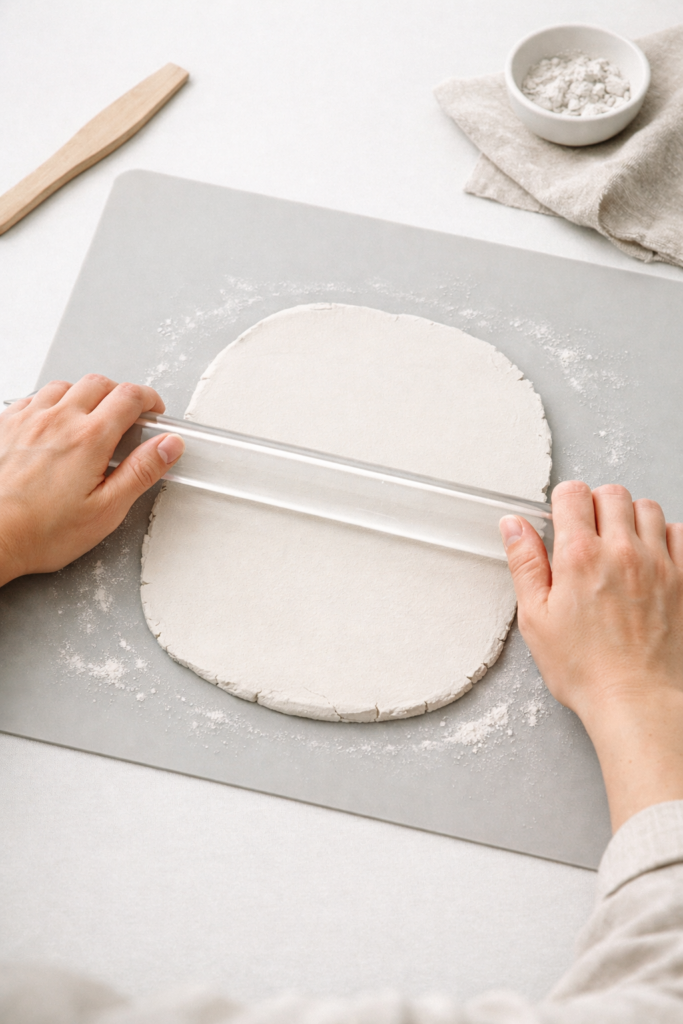
How you prep and handle air dry clay at the beginning has a direct impact on how it dries and how strong it becomes. Proper conditioning warms the clay slightly and distributes moisture evenly, which helps prevent weak spots that lead to cracking later. Skipping this step is one of the most common reasons pieces warp or split as they dry.
Rolling the clay to an even thickness is just as important as shaping it. Uneven areas dry at different speeds, creating stress in the clay that causes curling or fractures. A smooth, consistent slab gives you better control whether you are cutting shapes, forming bowls, or building small sculptural pieces. Shaping should be done gently and deliberately, using light pressure rather than force to avoid compressing the clay too much in one area.
Smoothing edges and surfaces before drying saves time later. Small cracks, fingerprints, or rough seams are much easier to fix while the clay is still workable than after it has hardened. A slightly damp fingertip or tool is usually enough to create clean edges and a refined finish without over-wetting the clay.
Step-by-Step Instructions
- Knead the clay until soft and pliable
- Roll it to an even thickness
- Cut or shape your piece
- Smooth edges and surfaces before drying
Shop the Look


Drying Time, Shrinkage, and Crack Prevention
Air dry clay changes significantly as it cures, and understanding this process helps set realistic expectations. As the moisture slowly evaporates, the clay shrinks slightly, which is completely normal. Problems arise when different parts of a piece dry at different speeds, creating tension that leads to cracking or warping. This is why thickness, airflow, and surface contact all matter more than most beginners realize.
Drying time varies based on the size and thickness of your project, but most pieces need at least 24 to 48 hours to fully harden. Larger or thicker pieces may take several days. Placing clay on a breathable surface and allowing air to circulate evenly helps it dry more consistently. Flipping pieces partway through drying can prevent one side from staying damp longer than the other, which often causes curling.
Patience is essential during this stage. Handling clay too soon, forcing it to dry faster, or adding too much water during shaping almost always leads to cracks. Letting the clay cure slowly and naturally results in stronger, more stable pieces that are much easier to sand and finish later.
Mistakes to Avoid
- Drying pieces too quickly near heat or direct sunlight
- Over-handling clay while it is still curing
- Shaping pieces with uneven thickness
Shop the Look
Sanding, Sealing, and Painting Like a Pro
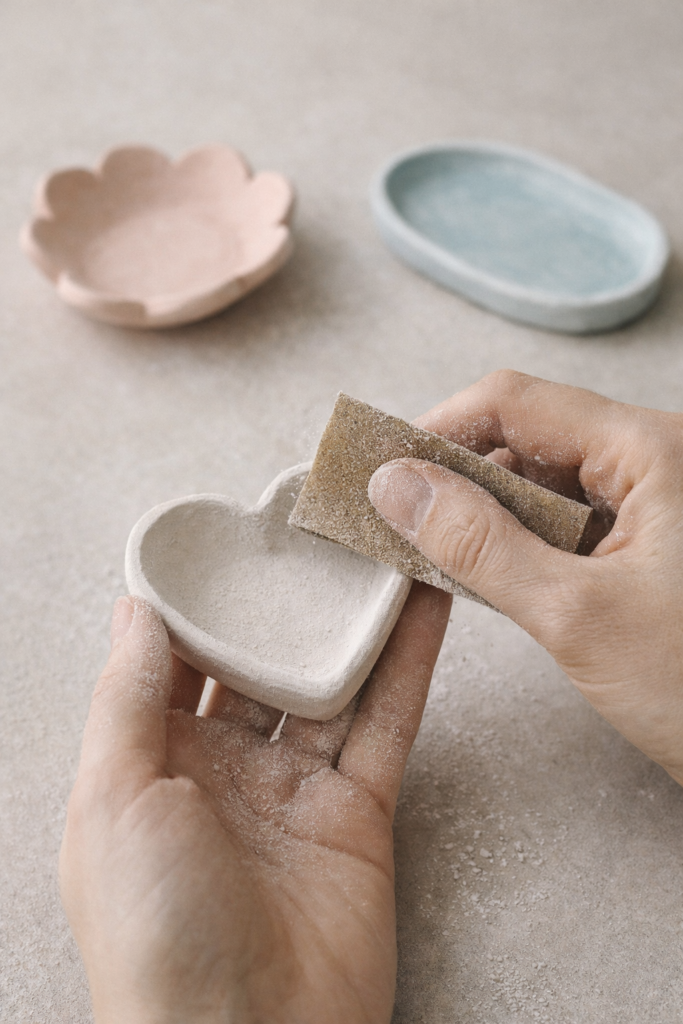
Once air dry clay is completely cured, finishing is what transforms it from a craft project into something that feels intentional and polished. Sanding smooths out imperfections, softens sharp edges, and removes small cracks or seams that naturally appear during drying. This step should be done gently and only after the clay is fully dry to avoid weakening the structure.
Sealing is essential if you plan to paint your piece or want it to last longer. Air dry clay is porous, so applying a sealer creates a barrier that improves durability and helps paint adhere evenly. Acrylic paints work especially well and allow you to control the final look, whether you prefer a matte, satin, or slightly glossy finish. Thin layers of paint build a cleaner result than one heavy coat.
A final topcoat adds protection and unifies the surface. While sealed air dry clay is more durable, it is still best suited for decorative use rather than constant handling or exposure to moisture. Understanding these limits helps your finished pieces stay looking good over time.
Step-by-Step Instructions
- Lightly sand the fully dried piece
- Apply a clay sealer
- Paint in thin, even layers
- Finish with a protective topcoat
Shop the Look
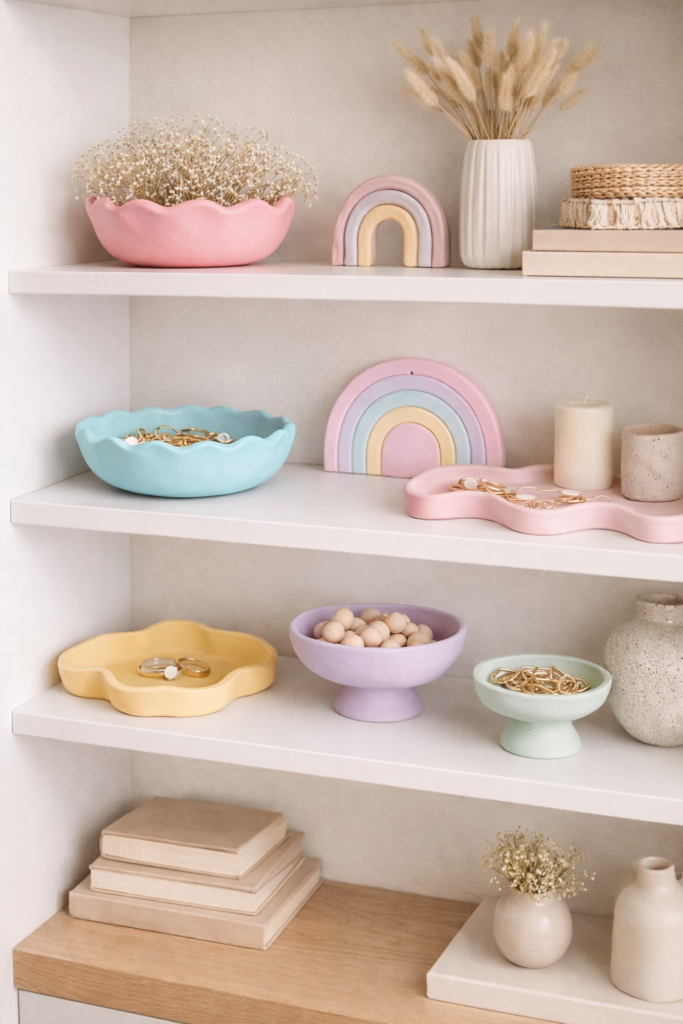
Best Beginner Air Dry Clay Projects
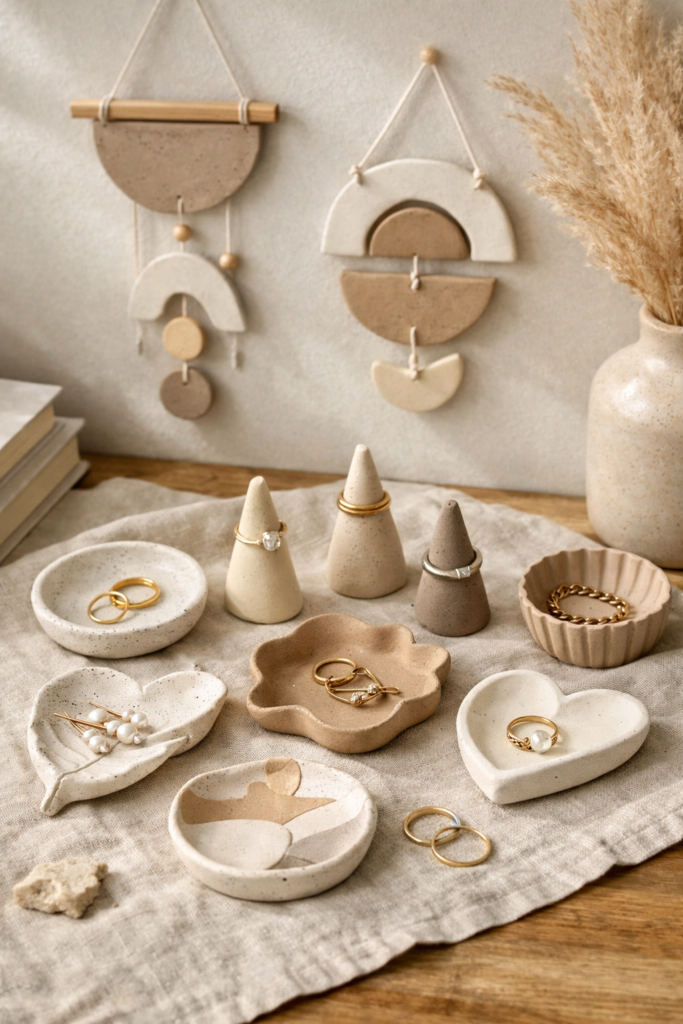
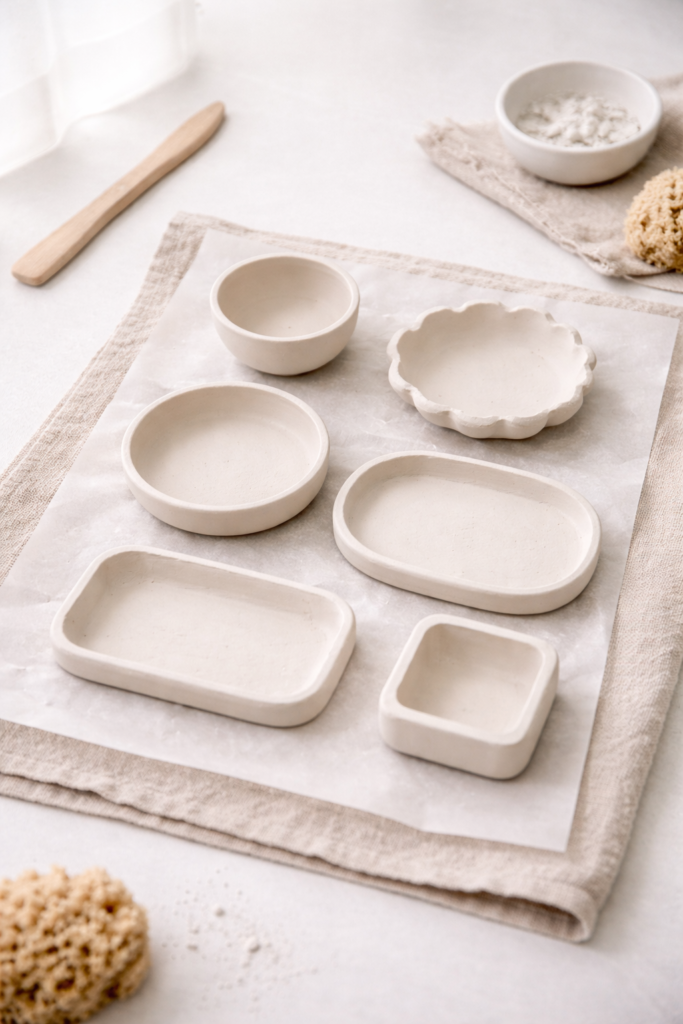
Air dry clay works best when projects are simple, balanced, and not overly thick, which is why certain beginner-friendly shapes consistently turn out better than others. Flat or gently curved pieces dry more evenly, hold their shape, and are easier to smooth and finish. These projects also allow you to focus on technique rather than fighting the material, which builds confidence quickly.
Trinket dishes and small trays are ideal starting points because they require minimal shaping while still looking intentional once finished. Ring cones and sculptural accents introduce vertical form without putting too much stress on the clay. Wall hangings and decorative tiles work well because they stay lightweight and don’t need to withstand frequent handling. Minimal vases can also be successful when designed as decorative objects rather than functional containers.
Choosing the right first project makes the entire experience more enjoyable. When the clay dries evenly and the final piece feels usable or display-worthy, it reinforces why air dry clay is such an approachable medium for DIY decor and creative projects.
Project Ideas
- Trinket dishes
- Ring cones
- Wall hangings
- Minimal decorative vases
Shop the Look


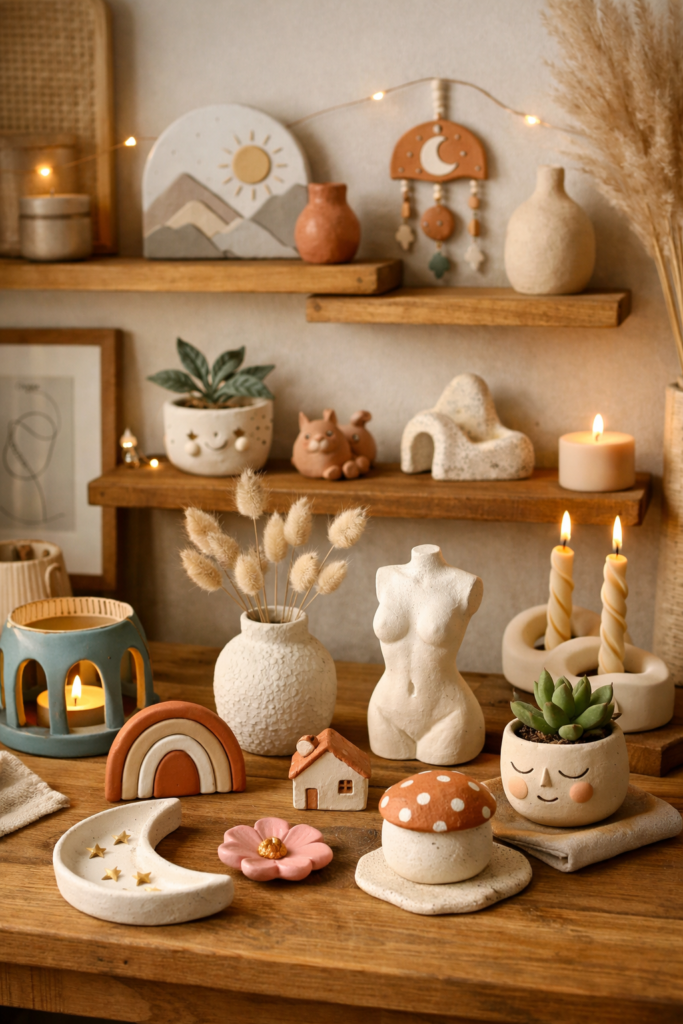
Air Dry Clay for Home Decor (What Holds Up)
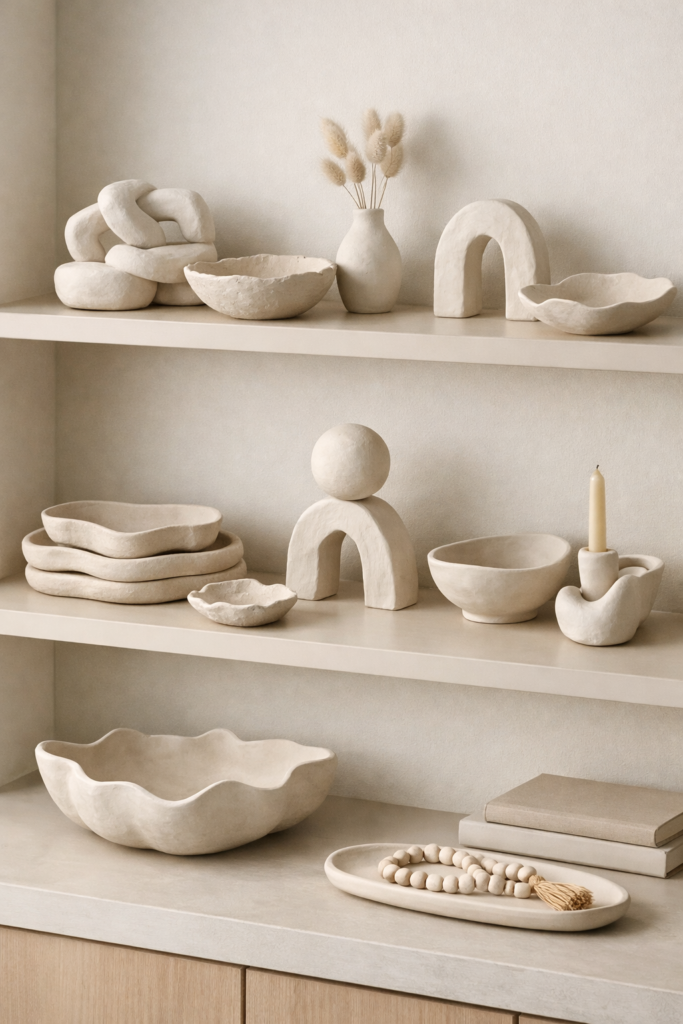
Air dry clay works beautifully for home decor when used thoughtfully. It performs best in pieces that are decorative rather than functional, where visual impact matters more than long-term wear. Items placed on shelves, consoles, or walls tend to hold up well because they are not exposed to constant handling, moisture, or weight.
Decorative trays, sculptural bowls, wall art, and accent objects are all strong candidates for air dry clay. These pieces benefit from sealing and gentle handling and can look surprisingly high-end when finished with soft textures or matte paint. Where air dry clay struggles is in environments that involve water, heat, or frequent use. Kitchens, bathrooms, and high-traffic surfaces can shorten the life of a clay piece, even when sealed.
Using air dry clay successfully in home decor is about placement and expectations. When treated as an artistic material rather than a utility one, it becomes an easy way to add handmade character and texture to a space without compromising style.
Shop the Look
Common Air Dry Clay Mistakes (and How to Fix Them)
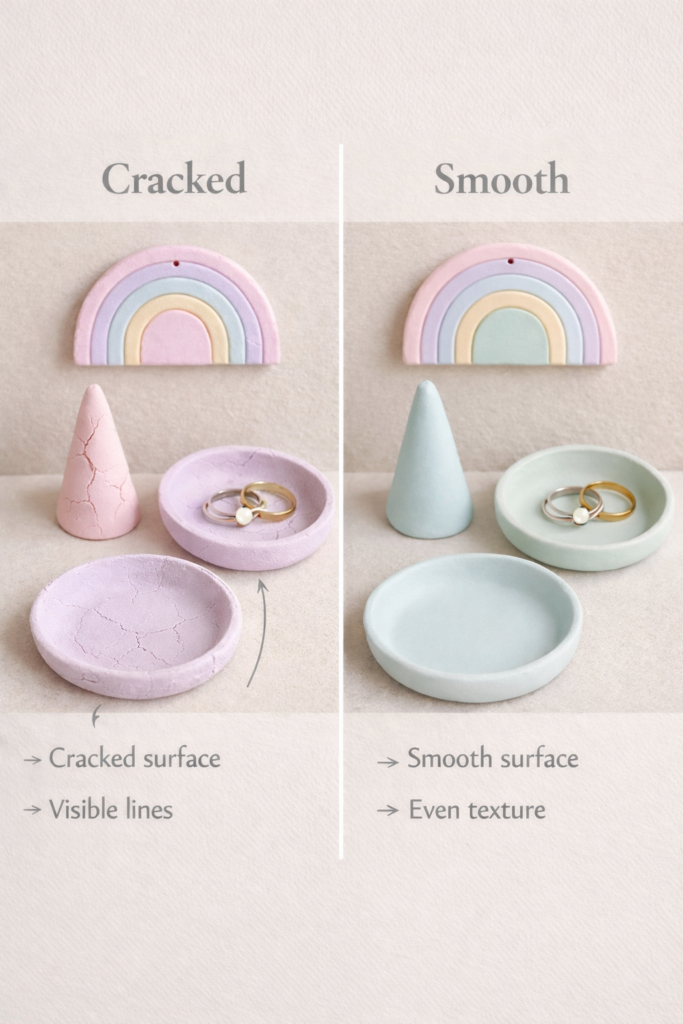
Most air dry clay issues come from small missteps early in the process rather than the material itself. Cracking, warping, and breakage are usually signs that the clay dried unevenly, was shaped too thick in some areas, or was handled too aggressively while curing. Understanding the cause makes it much easier to fix or avoid these problems in future projects.
Hairline cracks often appear when moisture escapes too quickly. These can sometimes be repaired by gently filling them with a thin layer of fresh clay or smoothing with a damp fingertip before sealing. Warping is typically caused by uneven thickness or leaving a piece flat on a non-breathable surface for too long. Breakage usually occurs when pieces are too thin or used in ways air dry clay was never meant to handle.
Learning to recognize these issues is part of working with the medium. Each project teaches you how the clay responds, and small adjustments in prep and drying habits lead to noticeably better results over time.
Quick Fix Table
| Problem | Likely Cause | How to Fix It |
|---|---|---|
| Cracks | Uneven drying or excess water | Fill with fresh clay or sand and seal |
| Warping | Uneven thickness | Roll evenly and flip while drying |
| Breakage | Too thin or over-handled | Reinforce thickness or use as decor only |
Is Air Dry Clay Worth It? (Final Take)
Air dry clay is absolutely worth using if your goal is to explore creativity, make decorative pieces, or ease into DIY without a steep learning curve. It’s affordable, accessible, and flexible enough to support a wide range of projects, especially for beginners and casual crafters. When used with realistic expectations, it delivers a lot of visual payoff for minimal investment.
That said, it’s important to understand its limitations. Air dry clay is not designed for heavy-use items, food-safe pieces, or long-term exposure to moisture. If you’re looking for durability above all else, polymer or ceramic clay may be a better fit. But for home decor accents, gifts, and creative experimentation, air dry clay strikes a smart balance between effort and results.
If you enjoy hands-on projects, slow crafting, and creating pieces that feel personal and intentional, air dry clay is one of the easiest materials to fall in love with.
Why Air-Dry Clay Is a Great Place to Start
Air dry clay makes DIY feel approachable instead of overwhelming. From understanding how it dries to choosing the right projects and finishes, a little knowledge goes a long way in getting better results. When you work with the material instead of against it, you can create pieces that look thoughtful, modern, and handmade in the best way.
If you’re ready to put this into practice, start small and build confidence with simple shapes and decor-focused projects. For a great next step, check out a beginner-friendly DIY craft project on Room Revival Studio that pairs perfectly with air dry clay and helps you turn inspiration into something tangible.


Pingback: 18 Clay Ideas That Are Easy, Cute, And Totally Addictive