
This post contains affiliate links. As an Amazon Associate, I earn from qualifying purchases at no extra cost to you.
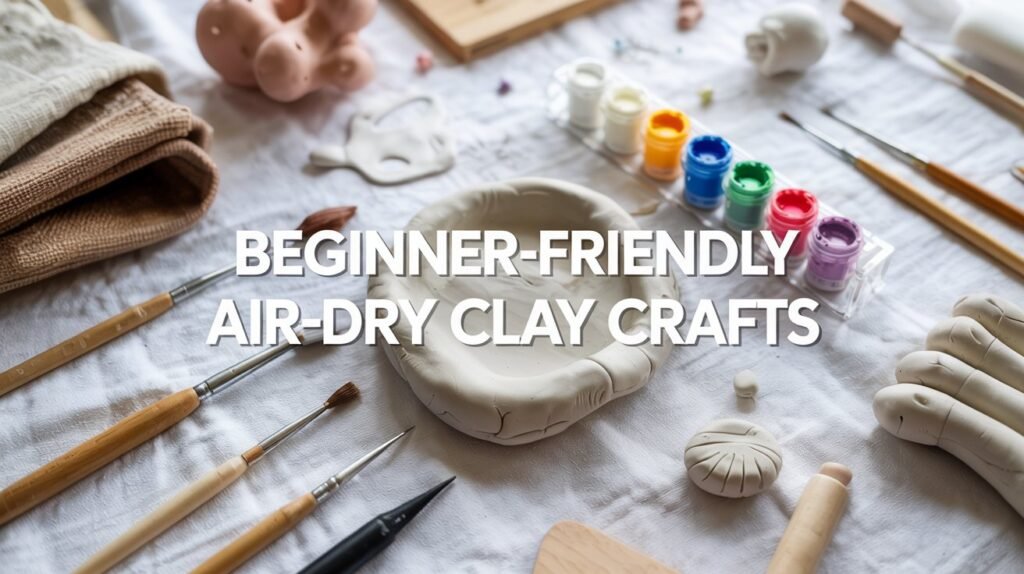
If you have been wanting to try air dry clay but feel like you are not artistic enough, this is your sign to start. Air dry clay is one of the easiest DIY materials to work with because it is affordable, forgiving, and dries beautifully without special tools. Even if you are a complete beginner, you can make pieces that look clean, modern, and store bought. Today you are getting ten beginner-friendly air-dry clay projects that are simple, aesthetic, and perfect for gifting, selling, or keeping for yourself. Just pick one idea and start shaping.
Speckled Mini Trinket Dishes
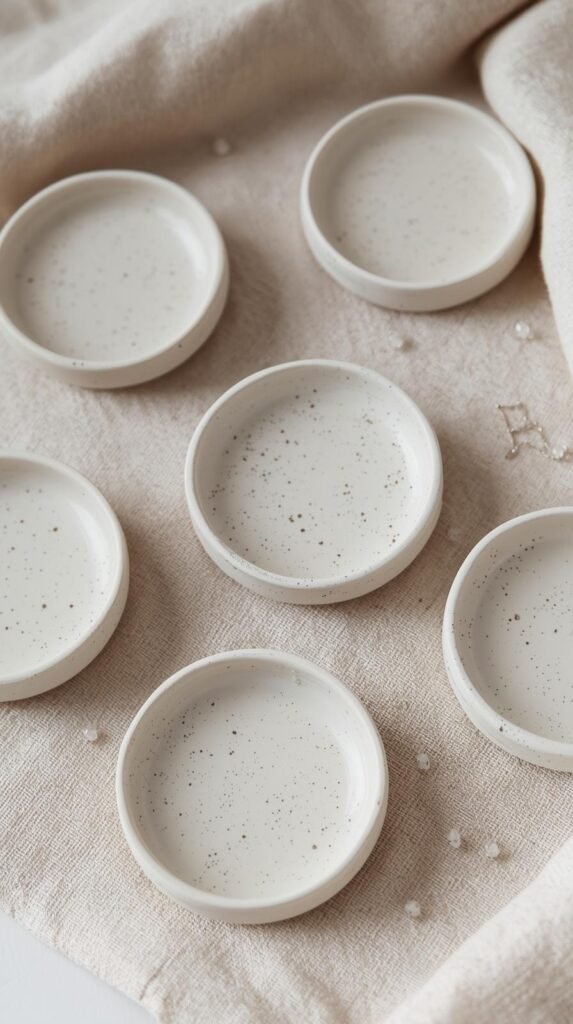
These tiny trinket dishes are the perfect starter project if you are new to air dry clay. They dry into a smooth, ceramic-inspired finish and look beautiful on a dresser, nightstand, or bathroom counter. The speckled paint effect adds that modern handmade charm without requiring advanced sculpting skills. They also make great air dry clay gifts for friends or quick items to sell.
How to Make It
- Roll out your clay until it is about a quarter inch thick.
- Use a bowl or cookie cutter to cut a clean circle.
- Lift the edges gently and pinch upward to form a shallow dish shape.
- Let the dish dry completely, then lightly sand the rim to smooth any rough spots.
- Paint the dish in your chosen color and flick a small amount of contrasting paint across the surface to create the speckled effect.
- Seal with a clear matte varnish to protect the finish.
Shop the Look
Air Dry Clay Trinket Tiles (Mini Decor Tiles)

These mini clay tiles are simple, modern, and incredibly versatile. You can use them as tiny decor pieces, flat catch-alls, coasters, labels, or even small art tiles on a gallery wall. Beginners love this project because each tile is small, quick to make, and easy to customize with color blocking, texture, or stamped designs. They dry flat and smooth, giving you that Pinterest-worthy artisan look.
How to Make It
- Roll out your clay until it is about a quarter inch thick.
- Cut small square, rectangle, or arch-shaped tiles using a craft knife or cutter.
- Smooth the surface with slightly damp fingers to remove marks.
- Let the tiles dry completely on a flat surface to prevent warping.
- Paint them with simple patterns, abstract brushstrokes, or minimal color blocks, then seal.
Shop the Look
Stamp-Imprinted Clay Ornaments
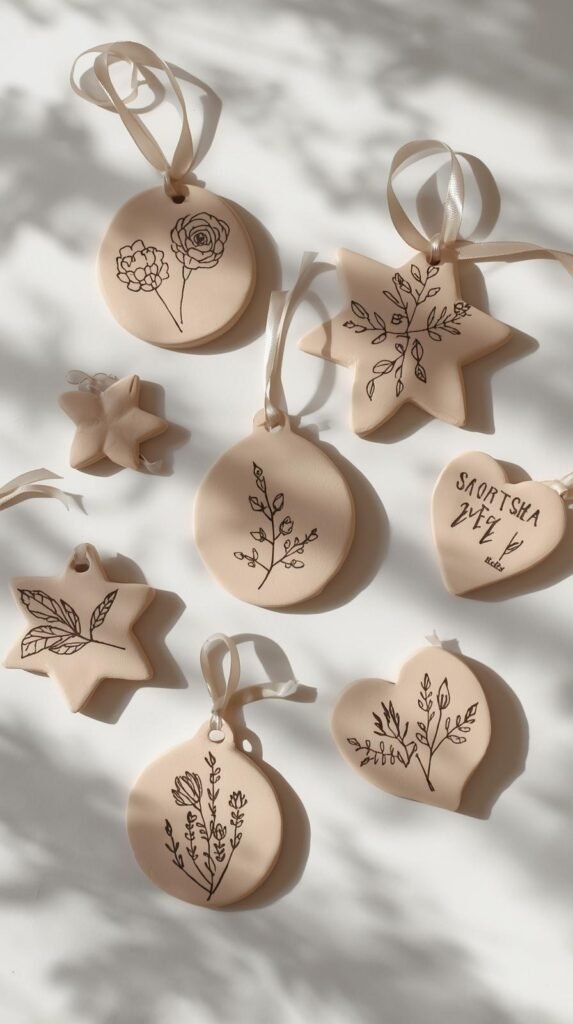
These stamp-imprinted ornaments are simple, aesthetic, and perfect for gifting or decorating year round. You can personalize them with initials, meaningful words, or botanical textures from leaves and flowers. They dry beautifully and look just as good unpainted as they do with a soft wash of color. This is a great project if you want beginner friendly air dry clay ideas that still feel thoughtful and custom.
How to Make It
- Roll your clay to about a quarter inch thickness.
- Use cookie cutters to create your desired shapes such as circles, stars, or hearts.
- Press alphabet stamps, lace, greenery, or textured tools into the surface to create your design.
- Use a straw to make a small ribbon hole at the top.
- Let the ornaments dry fully before painting or sealing.
Shop the Look
Minimalist Clay Candle Holders
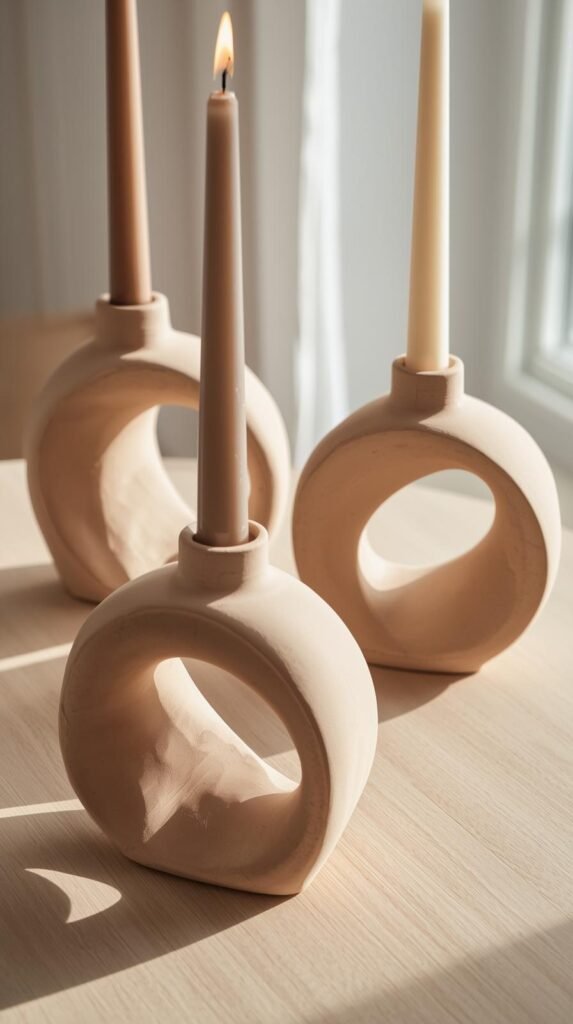
These minimalist candle holders look modern and sculptural without needing any advanced shaping skills. The soft, organic curves make them feel handmade in the best way, and they fit seamlessly into almost any decor style. This is one of the easiest air dry clay projects to sell because each piece feels unique but takes very little time to create.
How to Make It
- Roll a thick coil of clay using your hands.
- Shape the coil into a simple circle, oval, or spiral form.
- Press the base of a taper candle into the center to create the opening, making sure it fits snugly.
- Smooth the surface with a small amount of water to refine any cracks or finger marks.
- Let the holder dry completely, then sand lightly before painting in a matte or natural clay finish.
Shop the Look
Terrazzo-Style Clay Coasters
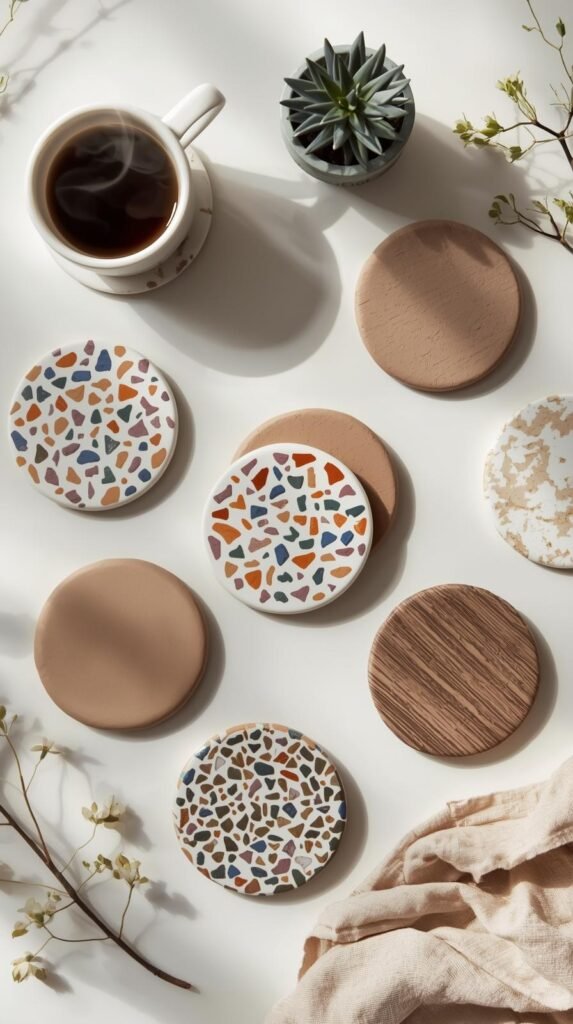
These terrazzo-inspired coasters look high-end but are surprisingly simple to make. The colorful clay chips mixed into a white base mimic real terrazzo and instantly elevate the look of any coffee table. This is one of the best air dry clay ideas to sell because the final product feels both modern and handcrafted. You can customize the palette to pastels, neutrals, or bold tones depending on your aesthetic.
How to Make It
- Take small pieces of clay and mix each one with acrylic paint to create different colors.
- Let the colored pieces firm up slightly, then chop them into tiny chips using a blade or cutter.
- Gently mix the chips into white clay and roll the combined piece until it is smooth and even.
- Use a coaster cutter or round object to cut circles or squares.
- Allow the coasters to dry completely, then seal them to protect against moisture.
Shop the Look
Little Clay Ring Cones
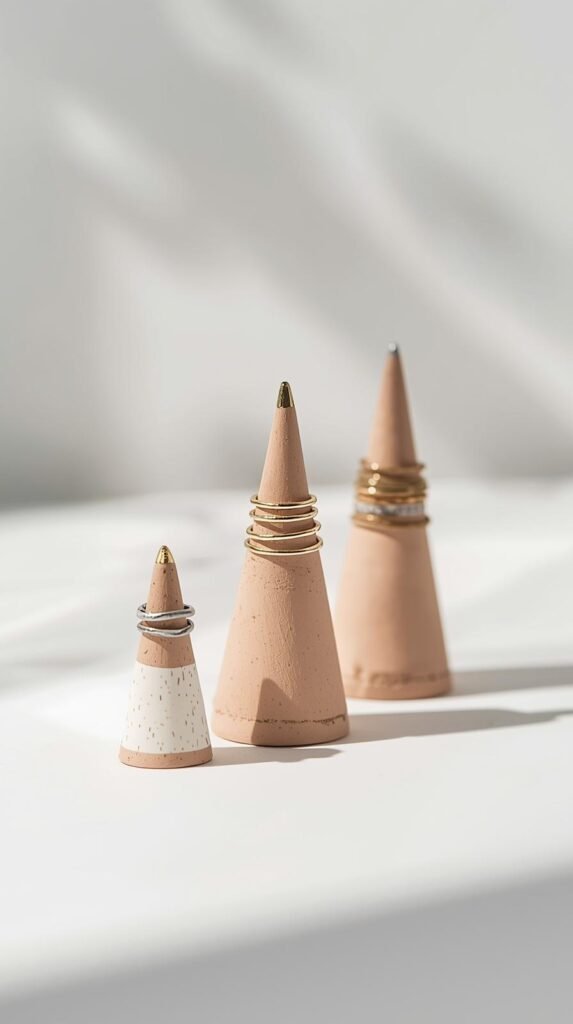
These tiny ring cones are one of the easiest small clay projects you can make, and they look adorable on a vanity or dresser. They help organize your rings while adding a soft sculptural touch to your decor. You can keep them simple and minimal or paint them with stripes, metallic accents, or speckles to match your style. Their quick drying time makes them perfect for air dry clay gifts or small items to sell.
How to Make It
- Roll a small ball of clay in your hands, then shape it upward into a cone.
- Tap the bottom on a flat surface to create a clean, even base so the cone stands upright.
- Smooth the surface with slightly damp fingers and refine the point at the top.
- Allow the cone to dry fully, then sand lightly to soften any seams.
- Paint the cone in your desired design and seal to protect the finish.
Shop the Look
Sculpted Clay Flower Magnets
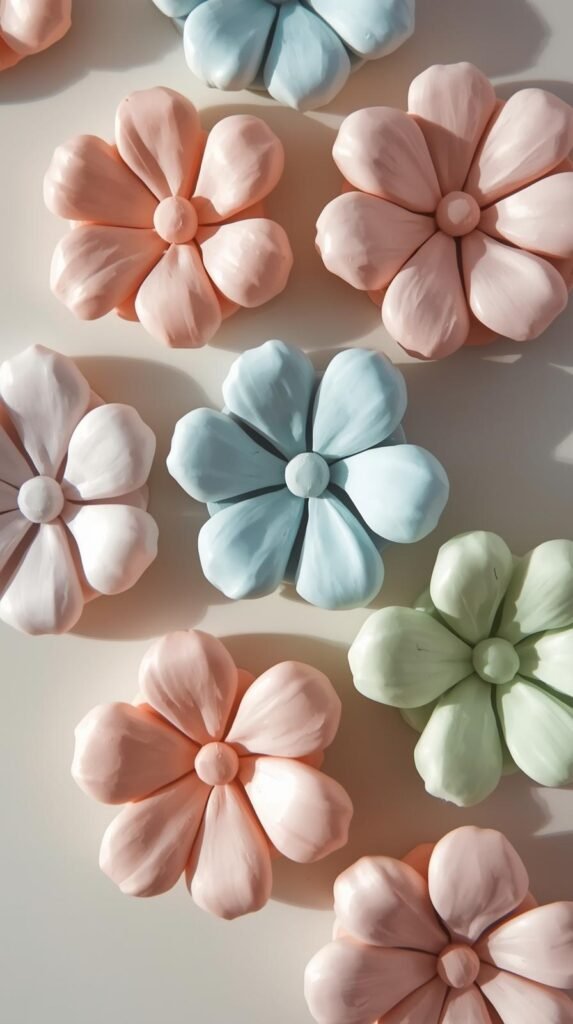
These sculpted flower magnets are cute, playful, and perfect for adding personality to your fridge or office board. They work beautifully as small handmade gifts and are a great way to practice simple sculpting techniques. You can keep the flowers minimal and modern or make them colorful and whimsical depending on your style.
How to Make It
- Roll out your clay and use flower-shaped cutters or freehand petal shapes with a sculpting tool.
- Form a small clay ball for the flower center and press it gently onto the petals.
- Smooth the edges with your fingers or a damp brush to blend the pieces together.
- Allow the flowers to dry completely before painting them in your chosen colors.
- Glue a small magnet to the back and let it set.
Shop the Look
Clay Keychains with Initials

These personalized clay keychains are simple, stylish, and make amazing gifts. They are easy enough for beginners but look polished and professional when finished. With endless shape options and stamped lettering, you can create pieces that match any aesthetic, from minimal neutral tones to bright and playful designs. This is one of the most popular air dry clay projects to sell because it is fast, customizable, and budget friendly.
How to Make It
- Roll out your clay to a quarter inch thickness and cut out shapes like circles, hearts, or squares.
- Press alphabet stamps into the surface to add initials or short words.
- Use a straw or sculpting tool to make a small hole at the top for the keychain ring.
- Let the pieces dry fully, then sand the edges for a clean finish.
- Paint or seal the keychains and attach hardware once dry.
Shop the Look
Organic Mini Clay Bud Vases
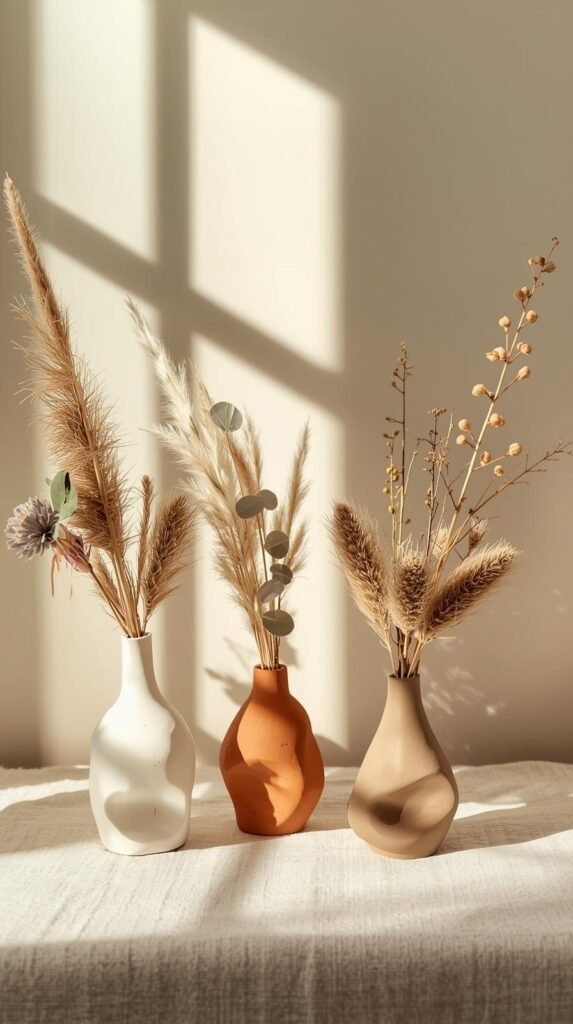
These mini bud vases are perfect for anyone who loves organic, sculptural decor. The beauty of this project is that the shape does not need to be perfect. In fact, the uneven curves and soft texture make the vase look more handcrafted and modern. These small vases pair beautifully with dried florals and work well as shelf decor, desk accents, or minimalist centerpieces.
How to Make It
- Roll a ball of clay and begin hollowing the center using your thumbs to create a small vessel shape.
- Pinch and smooth the clay until you reach your desired height and form.
- Use slightly damp fingers to refine the surface and soften any cracks or marks.
- Allow the vase to dry completely, which may take longer due to thickness.
- Paint or leave the vase raw, and finish with a sealant if desired.
Shop the Look
Mini Fruit-Themed Clay Bowls
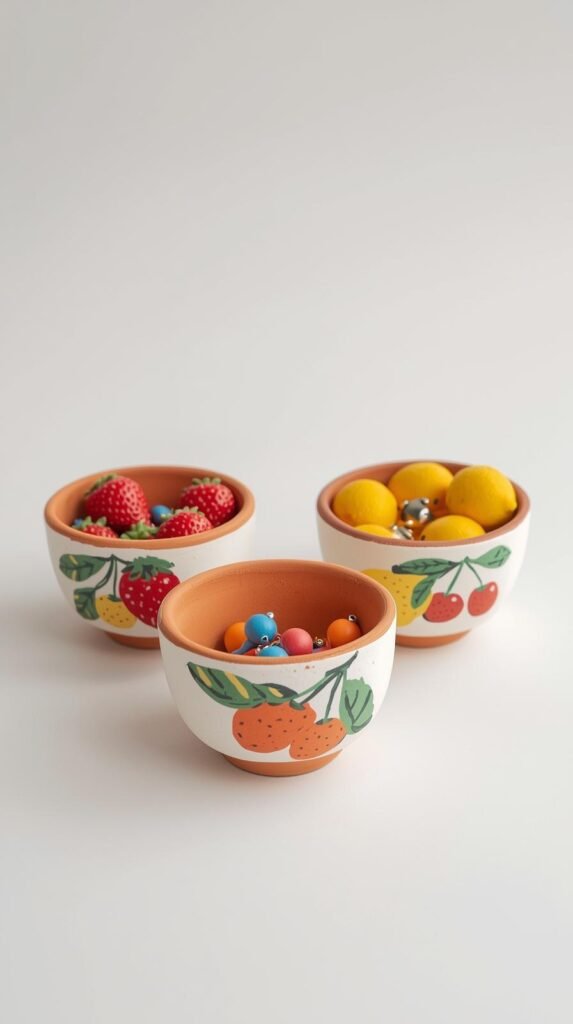
These mini bowls are playful, colorful, and perfect for storing jewelry, keys, hair accessories, or small desk items. They’re ideal for beginners because the shaping process is simple and the painted fruit designs instantly make them look fun and charming. Whether you paint strawberries, lemons, cherries, or abstract fruit patterns, these bowls add a bright pop of personality to any space.
How to Make It
- Roll a ball of clay and press the center outward with your thumbs to form a shallow bowl shape.
- Smooth the edges and adjust the walls of the bowl until you reach your desired shape.
- Let the bowl dry completely, making sure both the inside and outside are firm before painting.
- Paint fruit designs such as strawberries, lemons, or polka dot cherries using bright acrylic colors.
- Seal with a food-safe varnish if you plan to use the bowl for snacks or edible items.
Shop the Look
Air dry clay is one of the easiest ways to bring creativity into your home without needing complicated tools or advanced crafting skills. Each of these ten beginner friendly clay projects gives you room to play with texture, color, and shape while still keeping the process simple and relaxing. Whether you want to make gifts, create pieces to sell, or add handmade decor to your space, these ideas are the perfect place to start. Pick one project, start shaping, and enjoy watching your ideas come to life.


Pingback: 15 Easy Winter Crafts For Kids Using Paper And Cardboard