
Affiliate Disclosure – This post contains affiliate links. As an Amazon Associate, I earn from qualifying purchases at no extra cost to you.
After Christmas hits, the excitement slows down fast and the kids are suddenly looking at you like, “What now?” The toys are already old news, winter break feels long, and the leftover holiday clutter is piling up everywhere. If you are in the same boat, this is your sign to turn all that Christmas aftermath into fun, screen-free crafts that keep little hands busy and little imaginations going. These 20 after-Christmas crafts are easy, colorful, budget-friendly, and perfect for using supplies you already have at home.
1. Wrapping Paper Collage Art
Kids love tearing, cutting, and gluing, which makes leftover wrapping paper perfect for a creative collage activity. This craft turns holiday trash into bright, textured artwork that feels fun for toddlers and still engaging for older kids. It is simple, low-mess, and you can theme it however you want, from winter scenes to abstract color explosions.
Step-by-Step Instructions
- Set out construction paper or cardstock as the base.
- Tear or cut leftover wrapping paper into small pieces.
- Let kids arrange the pieces into any picture or random pattern.
- Glue everything down, pressing lightly so the pieces stick.
- Add optional glitter for sparkle and let the artwork dry completely.
Shop the Look
2. Ribbon Wand Streamers

If you still have a pile of leftover ribbon from gifts, this is the cutest way to use it. Kids love anything they can wave, twirl, or dance with, and these ribbon wands instantly become a winter-break favorite. They are bright, easy to make, and perfect for toddlers who need a fun indoor activity when it’s too cold to play outside.
Step-by-Step Instructions
- Gather ribbon scraps in different widths, colors, and lengths.
- Choose a base such as a wooden dowel, craft stick, or clean wooden spoon.
- Tie several ribbons to one end of the stick, pulling them tight.
- Secure the knots with clear tape so the ribbons do not slide off.
- Let kids decorate the handle with markers or stickers, then let them twirl and play.
Shop the Look
3. Cardboard Gingerbread Houses Remix
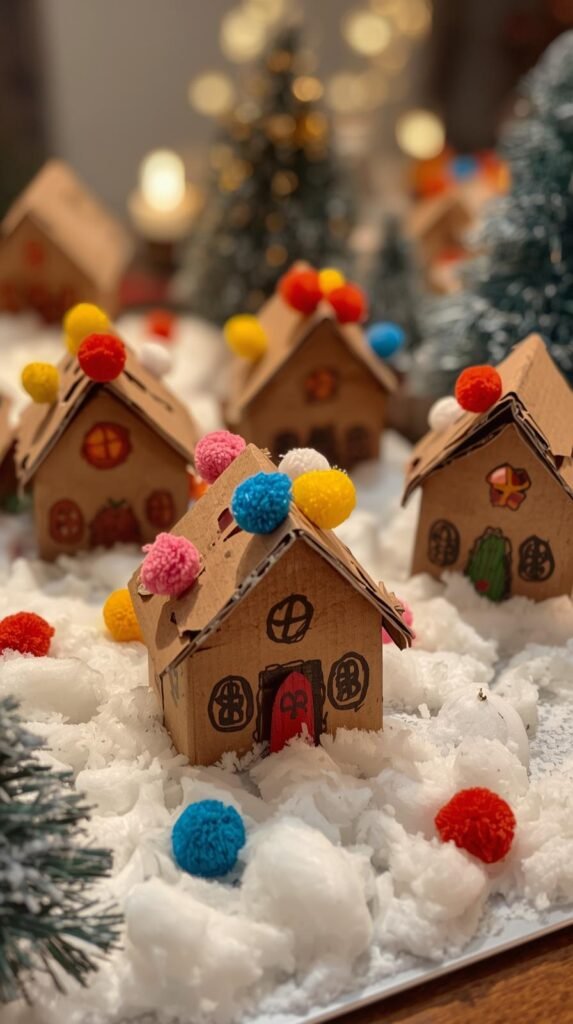
All those leftover Amazon boxes become the perfect base for a kid-friendly “gingerbread house” that does not require sugar, icing, or cleanup. Kids get to build, paint, and decorate their own little winter village using simple supplies you already have at home. This is a great craft for siblings because everyone can customize their own house style and create a whole tiny town together.
Step-by-Step Instructions
- Break down cardboard boxes and cut out simple house shapes, rectangles, or blocks.
- Add details like roofs, chimneys, or doors by cutting smaller scrap pieces.
- Let kids paint the cardboard using tempera or washable paints.
- After the paint dries, decorate with markers, pom poms, cotton balls, and stickers.
- Arrange all the finished houses on a table or shelf to create a mini winter village.
Shop the Look
4. Holiday Card Cutout Art

After Christmas, those greeting cards start piling up — but they’re full of cute characters, colors, and textures kids can turn into totally new art. This craft gives old cards a second life and keeps little hands busy with cutting, gluing, and creating. Kids can make posters, door signs, mini collages, or even brand-new cards to give to family or friends.
Step-by-Step Instructions
- Gather all the holiday cards you’re done displaying.
- Cut out fun shapes like trees, characters, snowflakes, and borders.
- Glue the cutouts onto fresh cardstock or construction paper to create a new design.
- For hanging pieces, punch a hole at the top and add yarn or ribbon.
- Display the finished artwork on a bedroom door, playroom wall, or bulletin board.
Shop the Look
5. New Year Firework Salt Painting

If your kids love magical, color-changing crafts, salt painting is a guaranteed win. This project turns simple glue and table salt into stunning “firework” art that feels perfect for the New Year season. The way the color spreads through the salt looks like real fireworks bursting across the page, and kids are obsessed every single time.
Step-by-Step Instructions
- Draw firework lines and shapes on dark construction paper using white school glue.
- Sprinkle salt generously over the glue until completely covered.
- Shake off the excess salt and keep the paper flat.
- Dip a dropper or paintbrush into liquid watercolor and gently touch it to the salt.
- Watch the color travel along the salt lines like mini fireworks, then let the artwork dry completely.
Shop the Look
6. Snowflake Garland from Scrap Paper
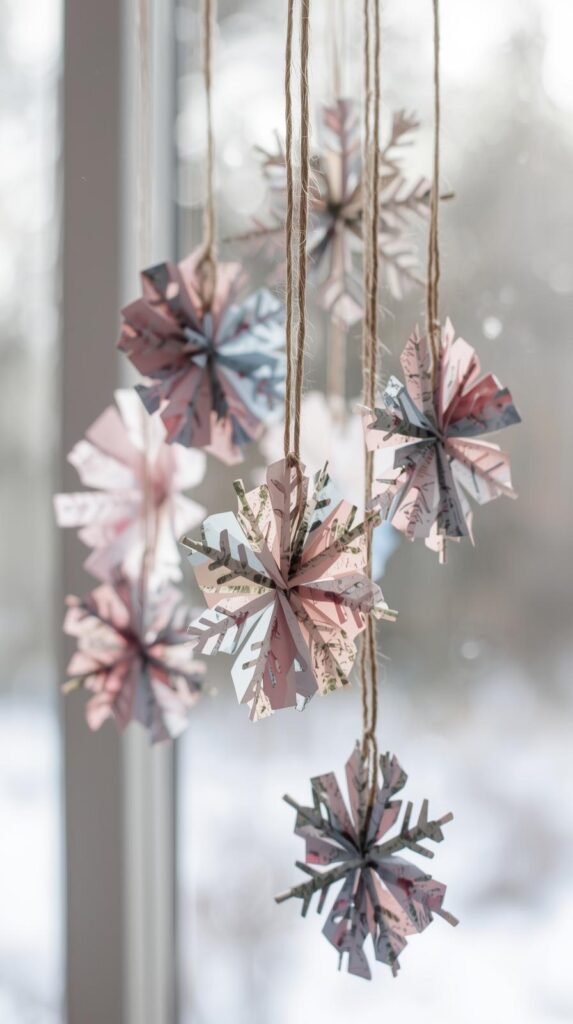
Leftover wrapping paper, tissue paper, and gift bag scraps become the prettiest winter snowflake garland. Kids love unfolding each snowflake to see the surprise shape they created, and the finished garland adds a cozy, crafty touch to any room. It’s budget-friendly, low-mess, and perfect for keeping little hands busy after Christmas.
Step-by-Step Instructions
- Gather leftover wrapping paper, tissue paper, or thin scraps that fold easily.
- Cut each piece into a square.
- Fold the square into a triangle, then fold it again to make a smaller triangle.
- Trim small shapes along the folded edges to create the snowflake pattern.
- Unfold the snowflakes and string them together on twine or yarn to make a garland.
Shop the Look
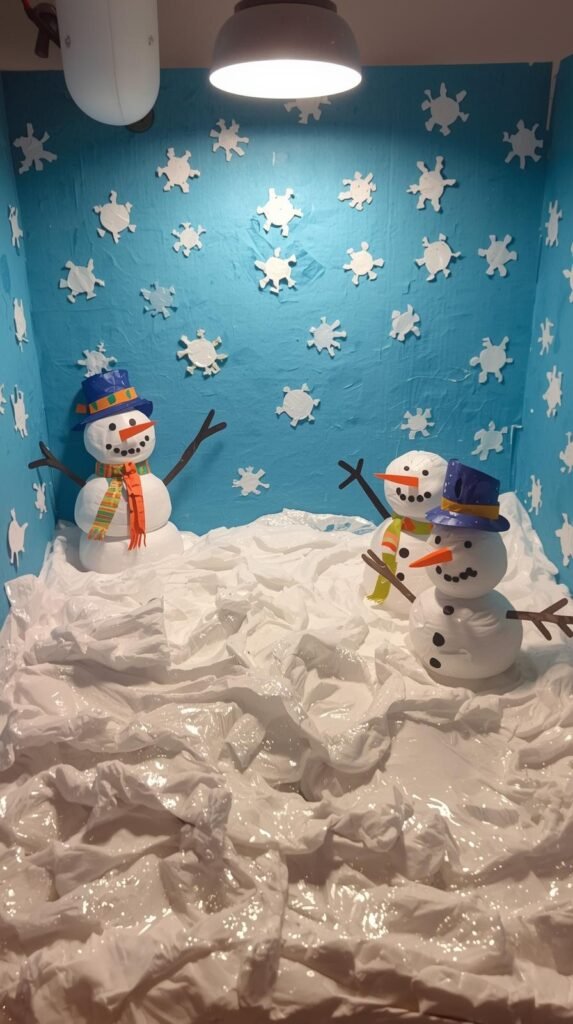
7. Sock Snowmen (Using Lonely Socks)

All those single socks that magically lose their partner finally have a purpose. Sock snowmen are soft, cute, and totally customizable, making them a kid favorite every winter. This no-sew craft gives little hands a fun sensory experience, and the finished snowmen look adorable on shelves or windowsills.
Step-by-Step Instructions
- Fill a clean sock with rice or polyfill until it forms a round, snowman-like shape.
- Tie a rubber band around the top to secure the filling.
- Use another rubber band to create the “head” by dividing the top portion from the body.
- Decorate with buttons, ribbon scraps for scarves, and markers or felt for the face.
- Add a mini hat by cutting the toe off an old sock and sliding it over the snowman’s head.
Shop the Look
8. Pom-Pom Hot Cocoa Mugs
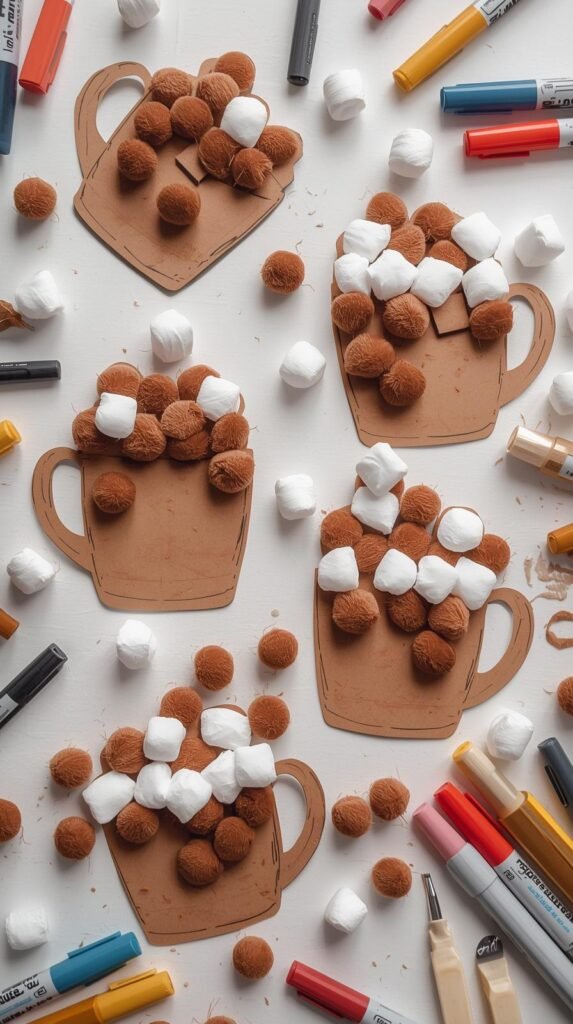
This craft is the definition of cute winter fun. Kids create their own “hot cocoa mug” using paper and pom-poms, with fluffy white pom-poms as the marshmallows. It’s simple, tactile, and great for toddlers who love gluing and sorting by color and size.
Step-by-Step Instructions
- Cut out a mug shape from construction paper or print a mug outline.
- Glue brown pom-poms inside the mug area to represent cocoa.
- Add white pom-poms on top as “marshmallows.”
- Decorate the mug with markers, stickers, or ribbon scraps.
- Let everything dry and hang it on the fridge or playroom wall.
Shop the Look
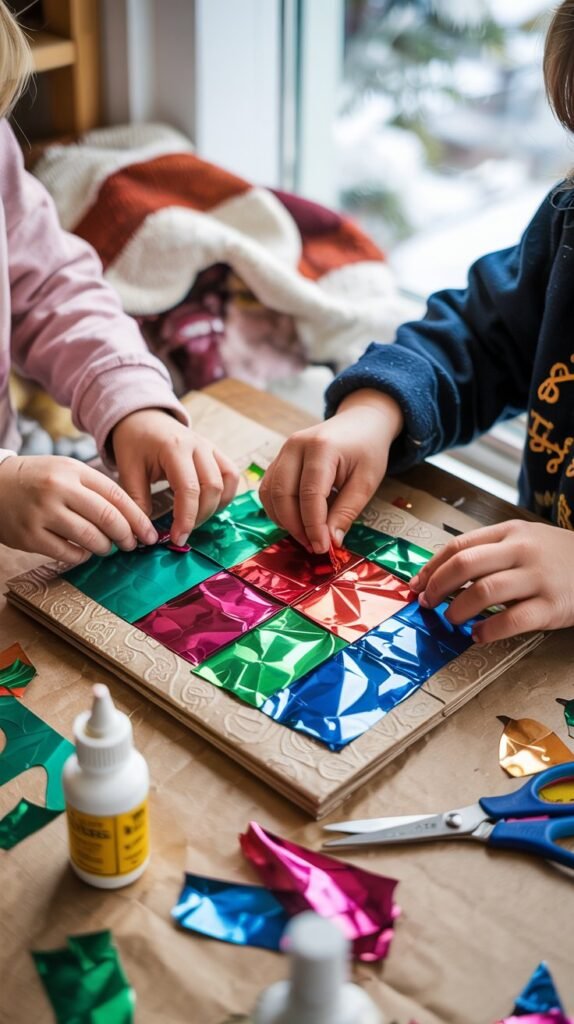
9. Tissue Paper “Stained Glass” Winter Art
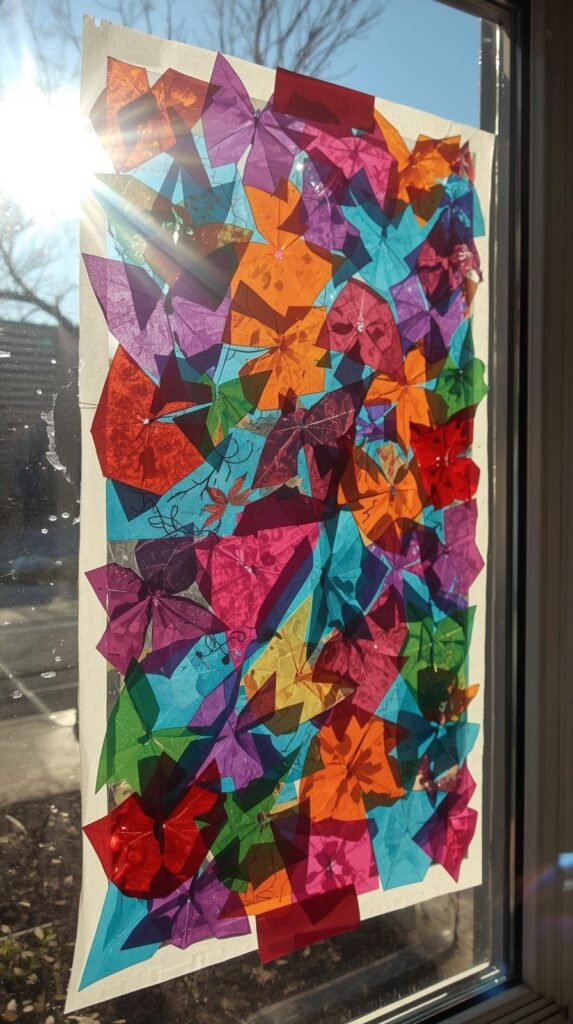
Leftover tissue paper from gift bags becomes a gorgeous stained-glass-style window decoration kids love making. With layered colors, soft light shining through, and simple shapes, this craft looks impressive but is incredibly easy. It’s perfect for toddlers and elementary-age kids who enjoy tearing, sticking, and seeing their artwork glow in the window.
Step-by-Step Instructions
- Cut a piece of clear contact paper into the size you want your artwork to be.
- Peel off the backing and place it sticky-side up on the table.
- Tear or cut tissue paper into small squares or shapes.
- Let kids place the tissue paper pieces onto the sticky surface, overlapping for a stained-glass look.
- Seal the artwork by placing another sheet of contact paper on top, then hang it on a window.
Shop the Look
10. Pinecone Snowy Decorations
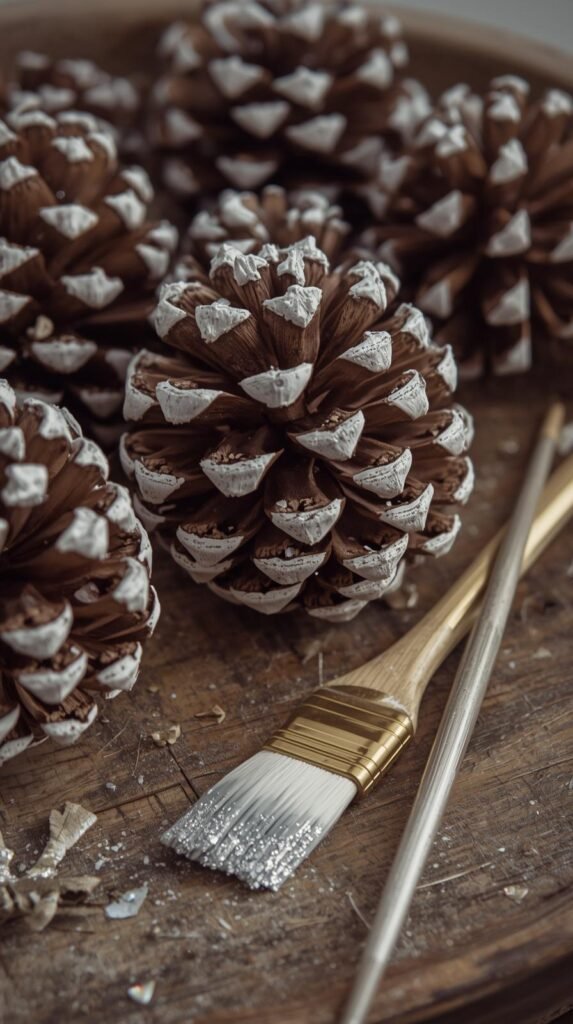
If you collected pinecones during the fall or have extras from holiday décor, kids can turn them into snowy winter decorations. A little white paint and glitter instantly transforms a regular pinecone into a frosty tabletop accent. They look adorable on shelves, windowsills, or as part of a mini winter village.
Step-by-Step Instructions
- Lay out pinecones on a protected surface or tray.
- Add a small amount of white paint to a paper plate.
- Let kids dip a brush into the paint and lightly brush the pinecone tips to create a “snowy” look.
- Sprinkle glitter while the paint is wet if you want extra sparkle.
- Tie a ribbon loop at the top if you want to hang them on doorknobs or branches.
Shop the Look
11. Paper Plate Snow Globes

Paper plates make the easiest little “snow globes,” and kids love shaking the glitter around and decorating their own winter scenes. It’s low-cost, mess-friendly, and turns simple supplies into something magical for winter break.
Step-by-Step Instructions
- Cut the center circle out of one paper plate to create a frame.
- On a second plate, have kids draw or glue a winter scene such as snowmen, trees, or houses.
- Sprinkle sequins or glitter over the scene to act as “snow.”
- Place clear plastic wrap or a transparent plate over the scene and tape or glue it securely.
- Attach the trimmed plate on top like a frame to complete the snow globe look.
Shop the Look
12. Craft Stick Snowflakes
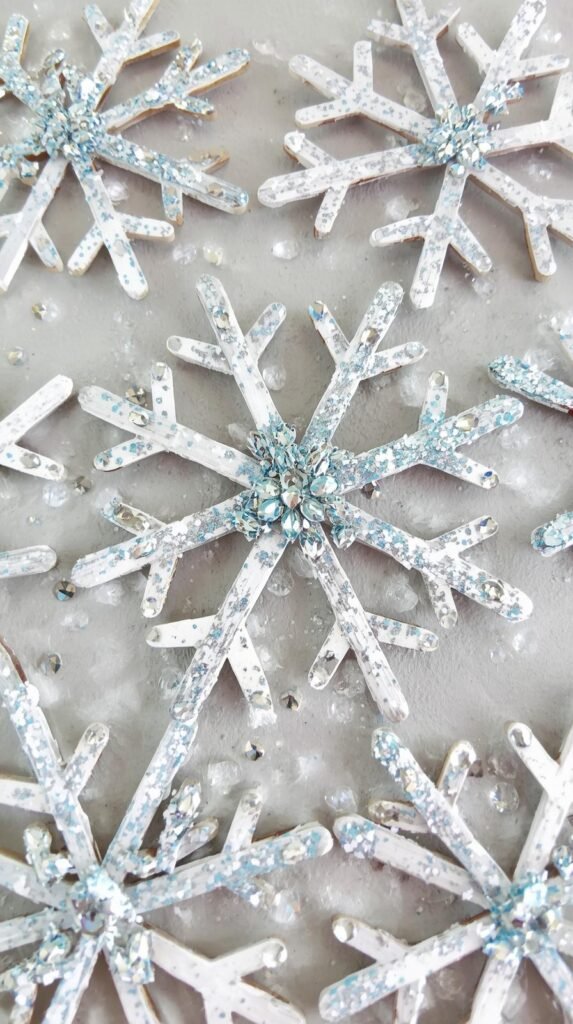
Craft sticks are the easiest building blocks for winter crafts, and kids love how quickly these snowflakes come together. They can paint them, glitter them, or leave them natural for a rustic look. Hang them in windows, on doorknobs, or across a playroom for a cozy after-Christmas vibe.
Step-by-Step Instructions
- Arrange three or four craft sticks into a snowflake shape, crossing them evenly.
- Glue the sticks together in the center and let them dry.
- Paint the snowflake white, blue, or any winter color.
- Add glitter, adhesive gems, or sequins while the paint is still wet.
- Tie a piece of string or yarn at the top if you want to hang them.
Shop the Look
13. Button Trees on Canvas
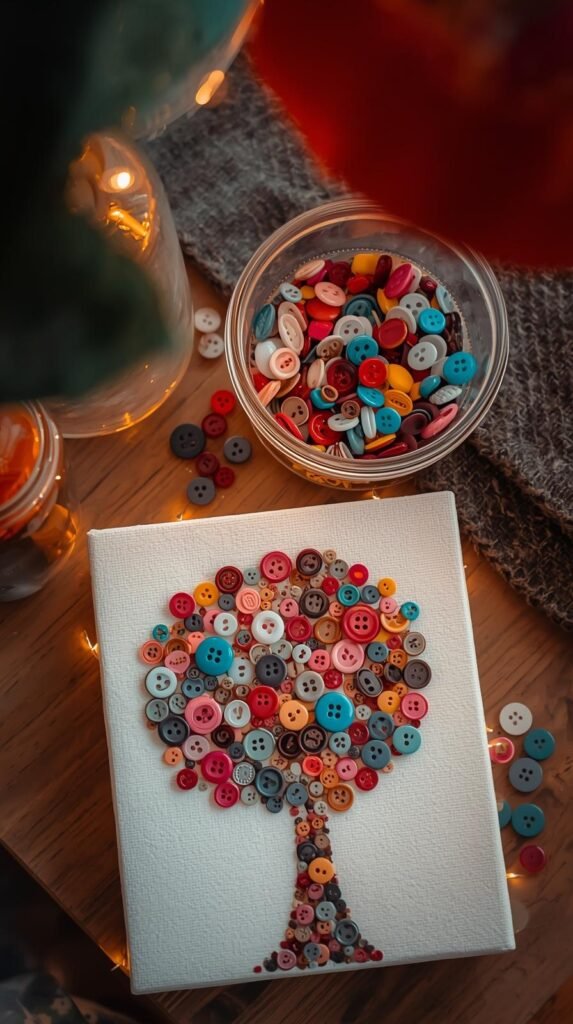
All those extra buttons floating around your craft drawer finally get a purpose. Kids love sorting the colors and arranging the buttons into cute tree shapes, and the finished canvas looks surprisingly stylish for a kid craft. It’s an easy winter project that doubles as adorable homemade décor.
Step-by-Step Instructions
- Set out a small canvas or thick cardstock as the base.
- Draw or lightly outline a tree shape to guide younger kids.
- Sort buttons by size and color, then place them within the tree outline.
- Glue each button down one at a time until the tree is filled in.
- Add a trunk using brown buttons, markers, or a strip of craft paper.
Shop the Look
14. DIY Winter Playdough

Homemade playdough is a classic for a reason, and winter scents make it even better. Kids love squishing, rolling, and shaping their dough into snowmen, trees, and winter treats. Adding peppermint, vanilla, or a touch of glitter turns this into a magical after-Christmas activity.
Step-by-Step Instructions
- Mix 1 cup flour, ½ cup salt, 1 tbsp cream of tartar in a bowl.
- Heat 1 cup water with a few drops of food coloring and optional peppermint or vanilla extract.
- Slowly pour the warm mixture into the dry ingredients and stir until a dough forms.
- Knead until smooth, adding a bit of flour if sticky.
- Add glitter or small sensory-safe mix-ins if you want a “frosty” look.
Shop the Look
15. Mitten Matching Craft

This craft is perfect for little hands and helps build matching, sorting, and coordination skills. Kids decorate their own paper mittens and connect the pairs with yarn, turning them into adorable room décor or a fun matching game. It is seasonal, easy, and uses supplies you likely already have sitting around.
Step-by-Step Instructions
- Print or draw mitten shapes onto cardstock or construction paper.
- Let kids color, paint, or decorate each mitten using markers, stickers, or tissue paper scraps.
- Cut out all the mittens once they are decorated.
- Punch a hole at the bottom of each mitten.
- String matching pairs together with yarn or ribbon and hang them up.
Shop the Look
16. Snowy Village Shoebox Diorama
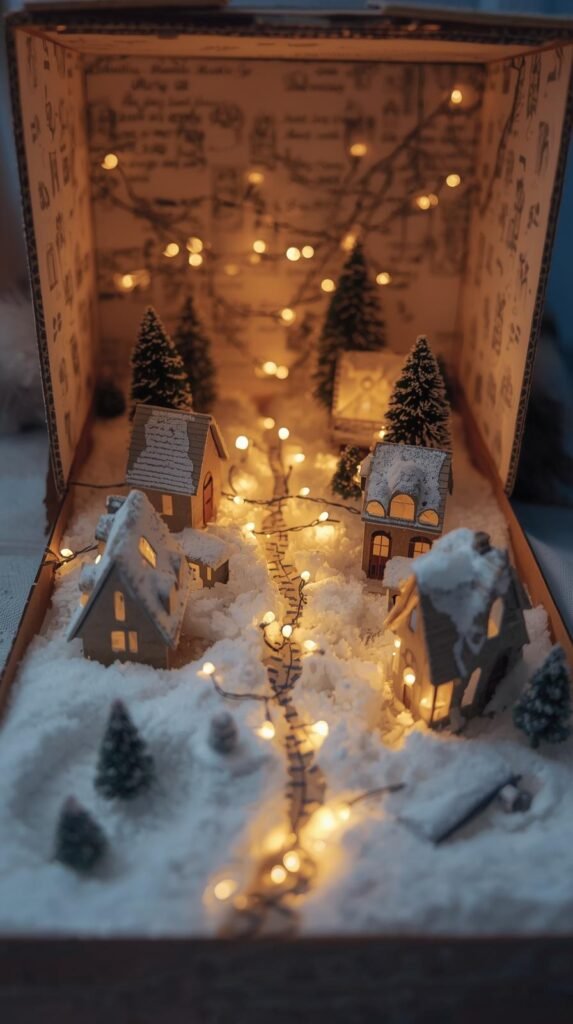
This craft lets kids build their own tiny winter village inside a shoebox using simple materials. They can create houses, trees, snowy hills, and little characters using scraps and cotton balls. It becomes a mini world they’ll want to play with long after the craft is finished.
Step-by-Step Instructions
- Turn a shoebox on its side to create the base of the diorama.
- Cover the inside with blue or white paper to create the sky and snowy ground.
- Cut out house shapes, trees, and characters using construction paper or leftover holiday cards.
- Glue cotton balls inside the box to add snow to the ground or rooftops.
- Arrange the cutouts inside the box to build your village, adding optional fairy lights for extra magic.
Shop the Look
17. Glitter Ice Ornaments (Outdoor Craft)

These glittery ice ornaments are a winter showstopper and a fun hands-on science moment for kids. They freeze small treasures, natural items, or sparkly glitter inside ice molds. Once frozen, the ornaments can be hung on trees outside where they shimmer in the winter sun.
Step-by-Step Instructions
- Fill silicone molds or shallow bowls with water.
- Add glitter, sequins, beads, or natural items like leaves and berries.
- Place a loop of twine or ribbon into the mold so it freezes inside the ornament.
- Set the molds outside in freezing temperatures or place them in the freezer.
- Pop them out once solid and hang them outside for a sparkling winter display.
Shop the Look
18. Winter Bird Feeders
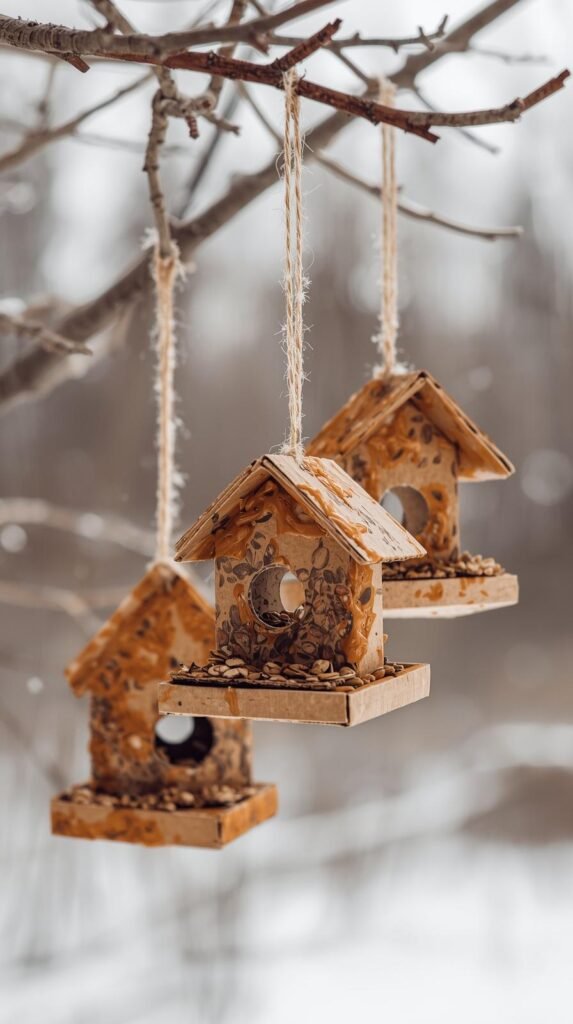
This simple craft lets kids create a sweet treat for winter birds while giving them a reason to look out the window and watch. It uses everyday ingredients and comes together in minutes, making it perfect for younger kids or quick winter-break activities.
Step-by-Step Instructions
- Cut shapes from cardboard or use pre-cut craft shapes.
- Spread peanut butter or sunbutter over the surface.
- Press the coated shape into birdseed until fully covered.
- Punch a hole at the top and thread twine for hanging.
- Hang the feeders outside on branches and watch the birds enjoy.
Shop the Look
19. Puffy Paint Snow Scenes
Puffy paint is always a hit, and winter is the perfect time to use it for snowy landscapes. The texture dries soft and raised, giving kids’ artwork a 3D look they love. They can create snowmen, snowy hills, snowflakes, or entire winter wonderlands on paper.
Step-by-Step Instructions
- Mix equal parts shaving cream and white school glue in a bowl.
- Add a bit of glitter or a drop of blue food coloring if you want a frosty effect.
- Spread the mixture on construction paper using a spoon or paintbrush.
- Let kids shape snowmen, snowdrifts, and snowflakes with the puffy paint.
- Allow the artwork to dry completely so the puffy texture sets and stays raised.
Shop the Look
20. New Year Countdown Chain

This classic paper chain gets a New Year twist and gives kids a fun way to track the days until school starts again. Each link can include a color, a drawing, or even a mini activity. It is simple, festive, and perfect for little hands who love cutting and gluing.
Step-by-Step Instructions
- Cut construction paper into strips, about one inch wide.
- Decorate each strip with drawings, stickers, or simple messages.
- Loop the first strip into a circle and glue or tape the ends together.
- Thread the next strip through the first loop, then glue the ends to form a chain.
- Continue until the chain is as long as you’d like and hang it in a bedroom or playroom.
Shop the Look
After Christmas is the perfect time to slow down, reset, and squeeze in a little extra creativity with the kids. These crafts turn leftover holiday clutter into hands-on fun that keeps little minds busy and gives you a cozy way to make winter break feel intentional instead of chaotic. Whether you’re building snowy villages, making puffy paint masterpieces, or hanging glittery ice ornaments outside, these simple ideas help you create sweet memories without extra stress or spending.
Want even more kid-friendly ideas? Check out 15 Easy Christmas Crafts Kids Will Love Making for more festive, family-friendly inspiration to keep the creativity going all season long.
Printable Recipe Card
Want just the essential recipe details without scrolling through the article? Get our printable recipe card with just the ingredients and instructions.

