
Affiliate Disclosure – This post may contain affiliate links. As an Amazon Associate, I earn from qualifying purchases. This means I may make a small commission at no extra cost to you if you shop through my links.
If you’ve been staring at polymer clay ideas on Pinterest thinking, “That looks cute… but I would mess that up,” this is your sign to start anyway.
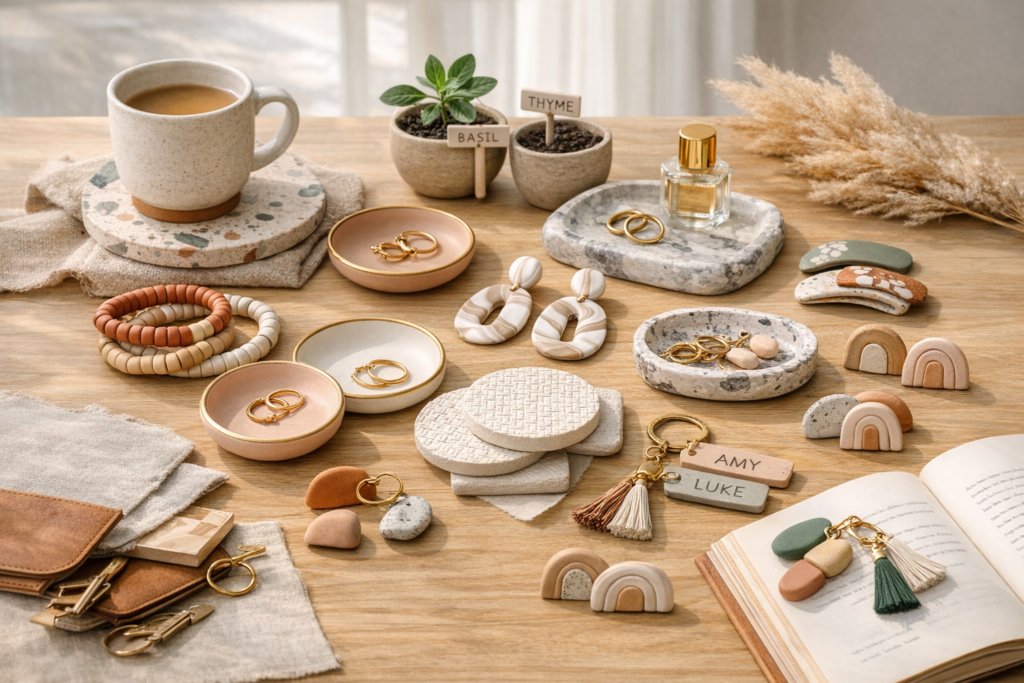
Polymer clay ideas for beginners do not need to be complicated to look elevated. The secret is choosing projects with simple shapes, forgiving finishes, and clean techniques. No hyper-detailed sculptures. No advanced tools. Just easy clay ideas that actually turn out good.
Whether you want minimalist decor, handmade jewelry, or small gifts that feel personal, these simple clay ideas are designed to be beginner-proof and aesthetic.
Let’s start with the easiest win.
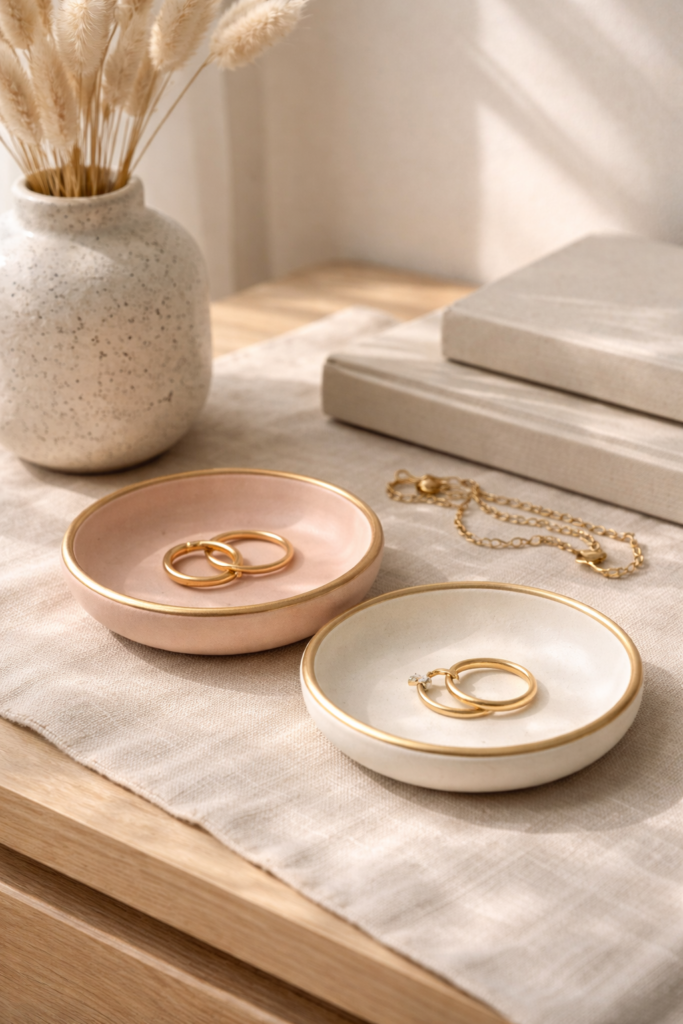
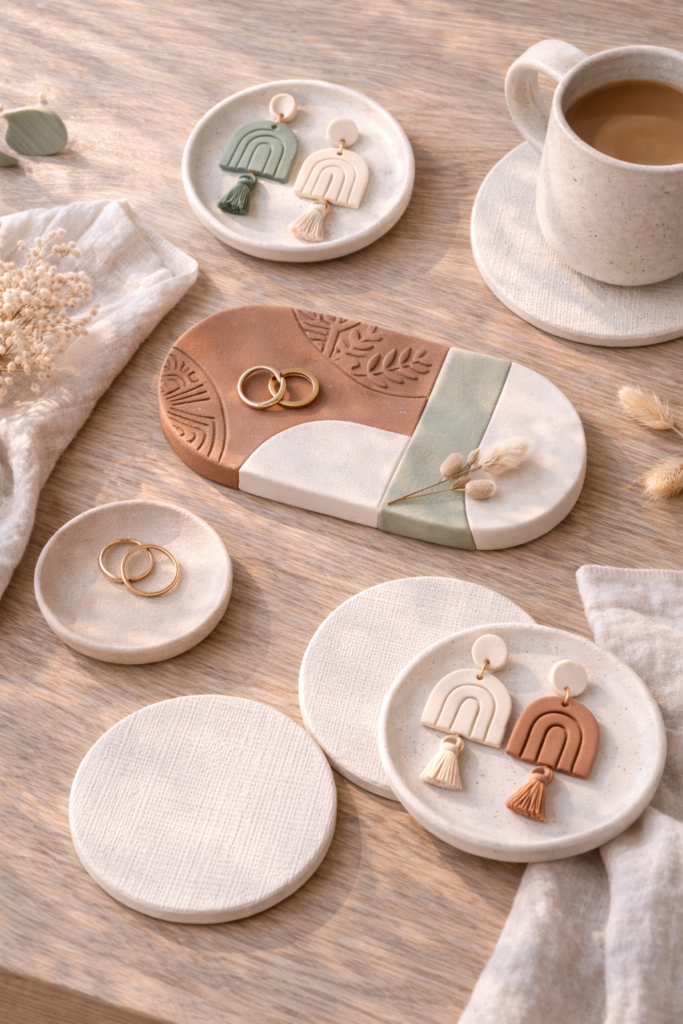
1. Minimalist Clay Ring Dishes
If you make nothing else from this list, make this.
A small, organic ring dish is one of the most beginner-friendly polymer clay ideas you can try. The shape is intentionally imperfect, which means you cannot really mess it up. Soft neutral tones like warm beige, dusty blush, or creamy white instantly make it feel modern and elevated. Add a thin metallic gold rim and it looks boutique-level.
This is one of those clay ideas that feels simple but looks expensive. It works on nightstands, bathroom counters, and dressers. And because the form is just a hand-pressed bowl shape, it is incredibly forgiving.
How to Make It
- Condition your polymer clay until soft and smooth.
- Roll into a ball, then flatten into a thick round disc.
- Gently press the disc into a small oven-safe bowl to form the curved shape.
- Smooth edges with your fingers.
- Bake according to package instructions.
- Once cooled, lightly brush the rim with gold acrylic paint if desired.
You can keep it matte for a modern look or seal it with a gloss finish for a slightly polished vibe.
Shop the Look
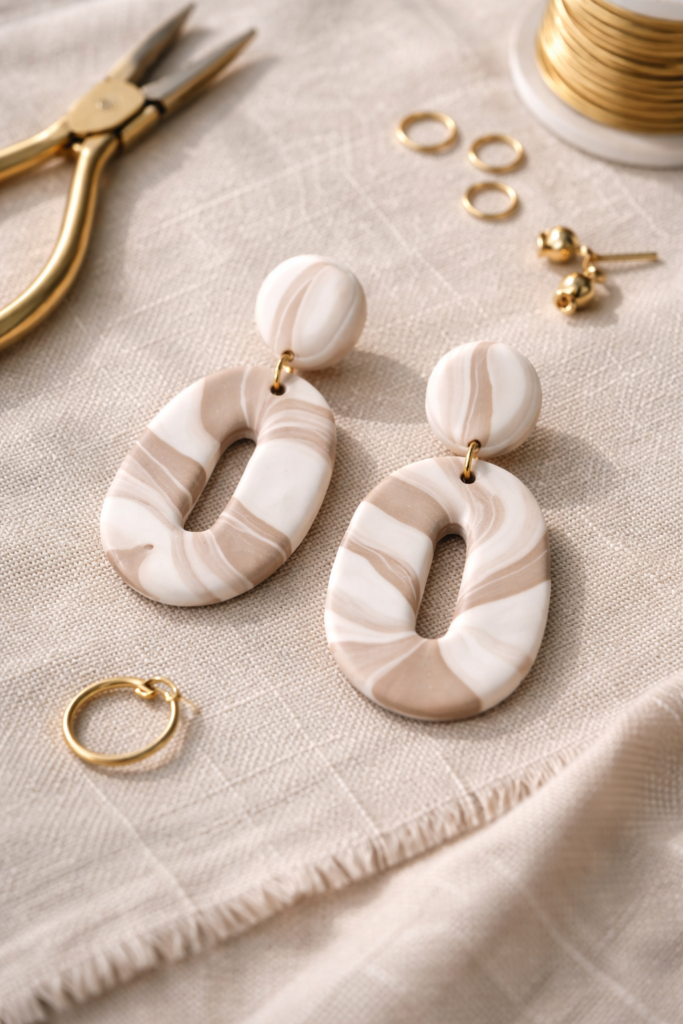
2. Marbled Clay Earrings
If you want something that looks high-end but is secretly one of the easiest polymer clay ideas for beginners, this is it.
Marbled clay earrings give that effortless, artsy vibe without requiring precision. The beauty is in the swirl. No two pieces look the same, which means imperfection actually works in your favor. Soft neutral blends like white and taupe feel modern and minimal, while bold combos like terracotta and blush or sage and cream give instant Pinterest energy.
This is one of those easy clay ideas that feels trendy but approachable. You’re basically twisting colors together and cutting shapes. That’s it. The result looks like something you would buy from a boutique.
How to Make It
- Condition two or three clay colors separately.
- Roll each into a rope shape.
- Twist them together loosely. Do not overmix or you’ll lose the swirl.
- Roll flat with a clay roller to create a marbled slab.
- Use small cutters to cut arches, circles, or ovals.
- Poke small holes at the top for jump rings.
- Bake according to package instructions.
- Once cooled, assemble with earring hooks and pliers.
Matte finishes feel modern and understated. A thin coat of gloss gives a slightly elevated, polished effect.
Shop the Look
- Polymer Clay Variety Pack
- Clay Earring Cutter Set
- Earring Hooks and Jump Rings Kit
- Jewelry Pliers Set
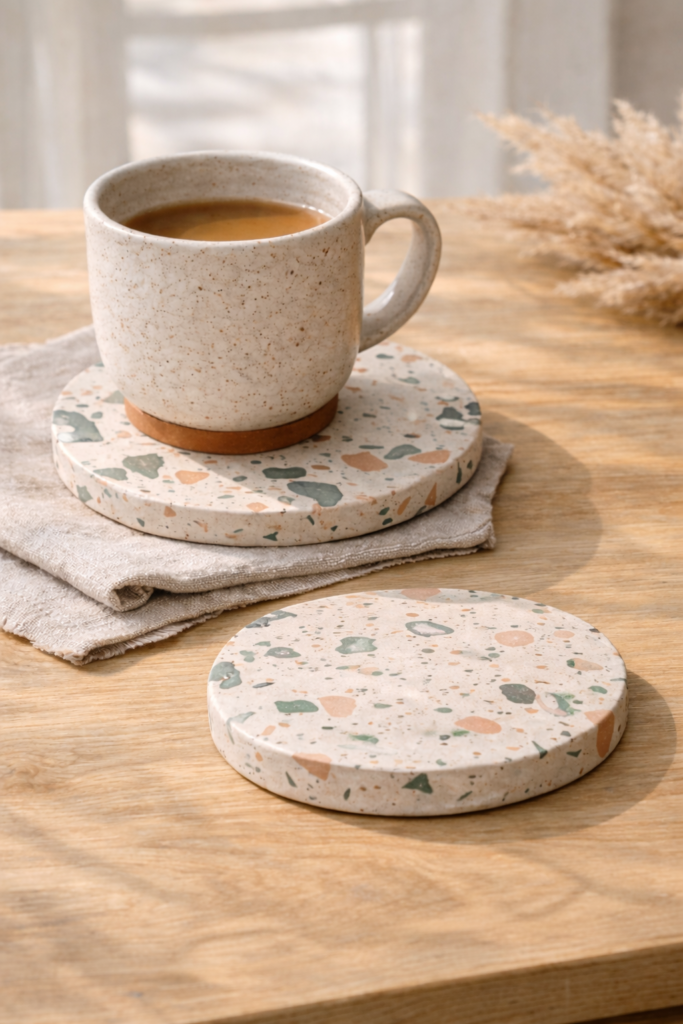
3. Terrazzo-Style Clay Coasters
If you love the look of modern terrazzo but do not want to spend real terrazzo money, this is your move.
Terrazzo-style coasters are one of the most aesthetic polymer clay ideas for beginners because the pattern is intentionally random. You are layering tiny clay fragments into a neutral base, rolling it flat, and cutting clean shapes. The mix of colors creates dimension without requiring advanced technique.
This is one of those simple clay ideas that instantly upgrades your coffee table. Think creamy ivory with muted rust, sage, and charcoal flecks for a modern vibe. Or go bold with blush, cobalt, and mustard chips for a more playful look. Either way, it feels custom.
How to Make It
- Condition a neutral base color and roll it into a thick slab.
- Take small scraps of contrasting clay colors and chop them into tiny pieces.
- Scatter the fragments over your base slab.
- Roll over the surface again to press the pieces into the clay.
- Use a round cutter or knife to cut coaster shapes.
- Smooth edges with your fingers.
- Bake according to package instructions.
- Lightly sand edges after cooling for a clean finish.
For extra durability, you can seal with a clear top coat once fully cured.
Shop the Look
4. Clay Bead Bracelets
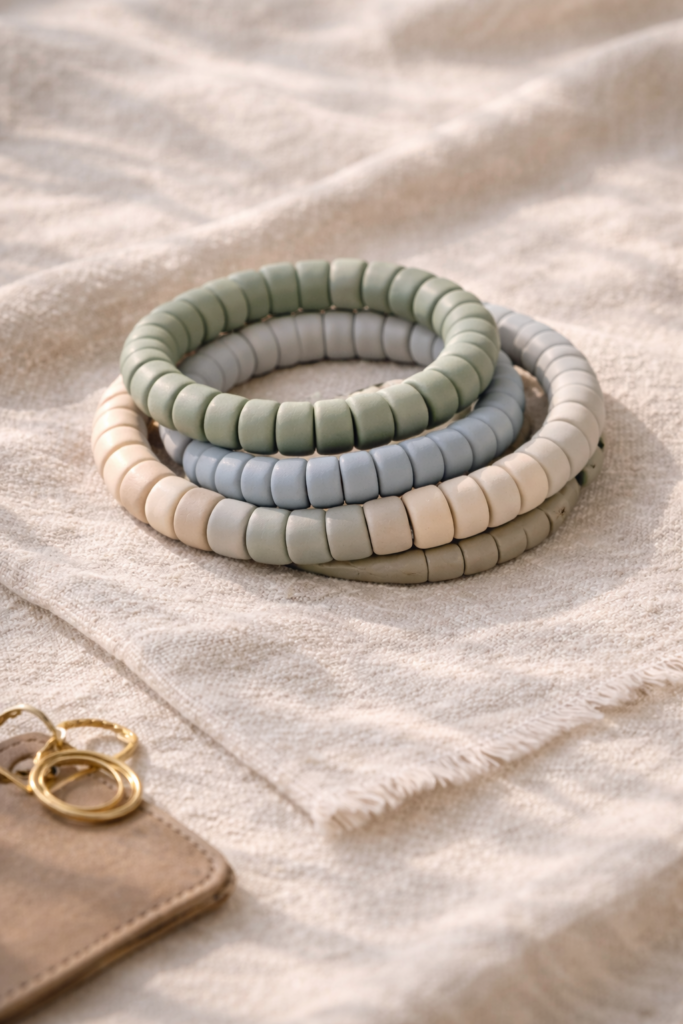
If you want a zero-pressure starter project, this is it.
Clay bead bracelets are one of the easiest polymer clay ideas for beginners because you are working with basic round shapes. No molds. No perfect symmetry required. Slight variation actually makes them look more handmade and intentional.
You can go earthy with warm browns and terracotta tones, keep it minimal with matte white and taupe, or lean playful with pastel beads. These easy clay ideas are perfect for layering and gifting. They also let you experiment with texture, like subtle marbling or soft matte finishes.
How to Make It
- Condition your clay until smooth.
- Roll small, evenly sized balls between your palms.
- Use a toothpick or skewer to gently pierce a hole through each bead.
- Place beads on parchment paper and bake according to package instructions.
- Let cool completely.
- String onto elastic cord and tie securely.
For a more polished look, lightly sand rough spots after baking and seal with a satin or gloss finish.
Shop the Look
5. Personalized Name Keychains
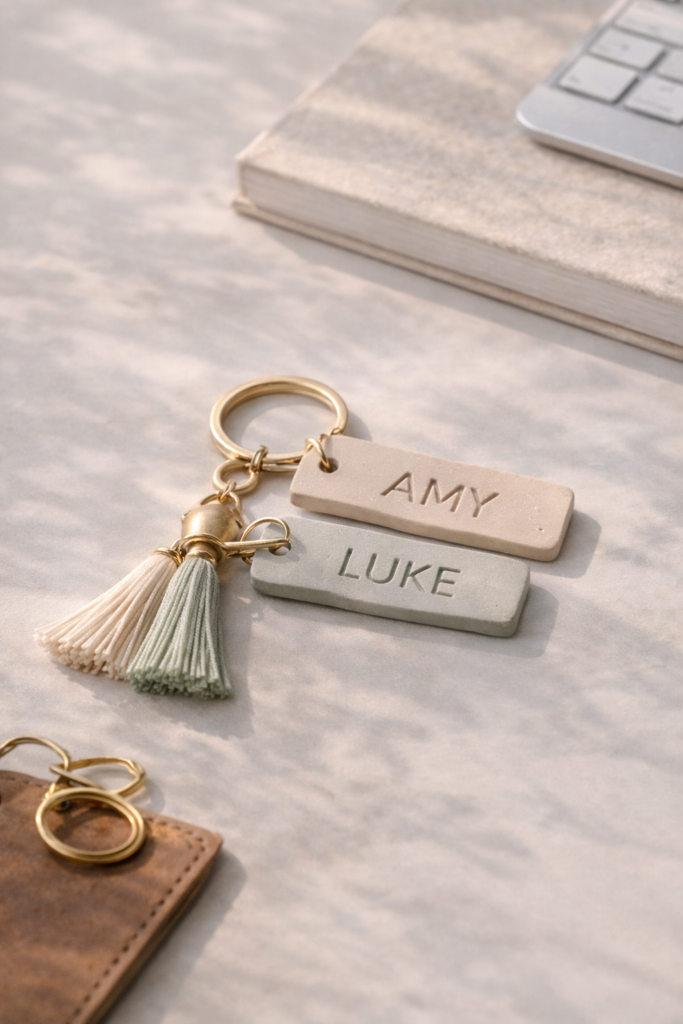
If you want a project that feels custom but is still beginner-friendly, this one wins every time.
Personalized keychains are one of the most practical polymer clay ideas for beginners because the base shape is simple. A circle, oval, or soft rectangle is all you need. The impact comes from stamped lettering and clean finishing. Neutral tones feel modern, while soft pastels or muted jewel tones make them pop.
This is one of those easy clay ideas that also makes a great small gift. Add a name, short word, or even a date. It feels thoughtful without being complicated.
How to Make It
- Condition clay and roll into a smooth slab about ¼ inch thick.
- Use a round or oval cutter to cut your base shape.
- Stamp letters into the clay using alphabet stamps.
- Poke a small hole at the top for the keyring.
- Smooth edges with your fingers.
- Bake according to package instructions.
- Once cooled, attach a keyring and chain.
You can leave the lettering indented for a minimal look or lightly brush paint over the stamped letters and wipe away excess for contrast.
Shop the Look
- Alphabet Letter Stamp Set
- Neutral Polymer Clay Pack
- Keychain Rings with Chain
- Clay Cutting Tools Set
6. Faux Stone Trinket Trays
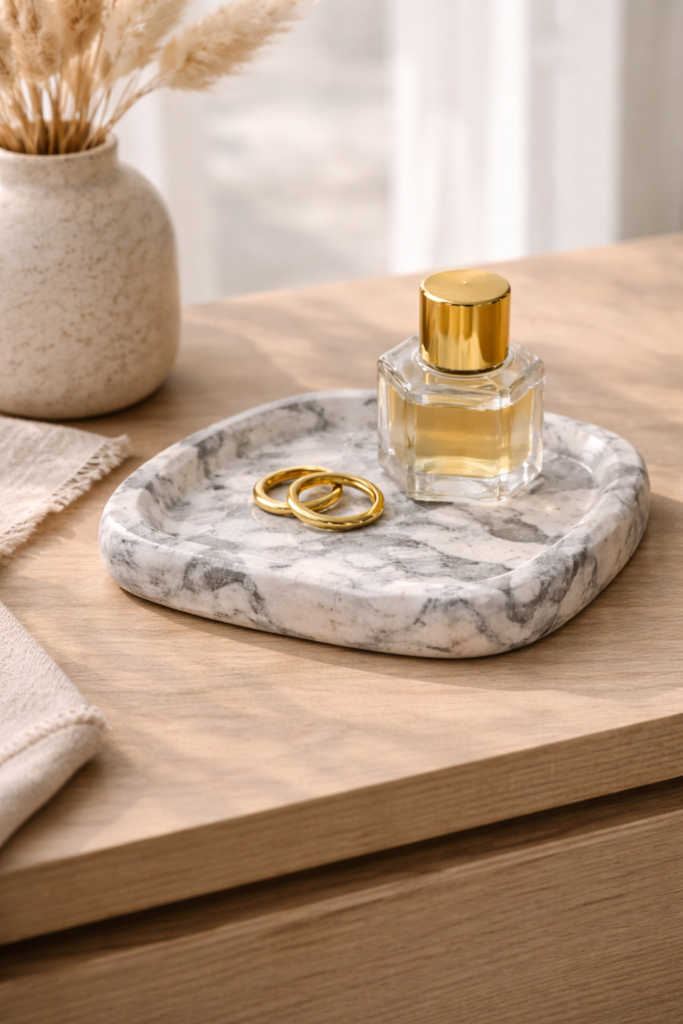
If you love the look of marble or granite but want something handmade and budget-friendly, this is your project.
Faux stone trinket trays are elevated polymer clay ideas for beginners because they rely on color blending rather than sculpting skill. Swirling white with gray, charcoal, or even muted blush creates that natural stone effect. The finish looks sophisticated, especially in matte or soft satin.
These simple clay ideas are perfect for dressers, entry tables, or coffee tables. The shape can stay organic and slightly irregular, which keeps it forgiving and beginner-proof.
How to Make It
- Condition two to three stone-inspired colors.
- Gently fold and twist them together without fully mixing.
- Roll into a slab to reveal the stone-like pattern.
- Cut into an oval or freeform shape.
- Slightly lift edges upward with your fingers to create a shallow tray.
- Bake according to package instructions.
- Lightly sand edges once cooled for a smooth finish.
Seal with a matte or satin top coat if you want extra durability.
Shop the Look
7. Clay Hair Clips
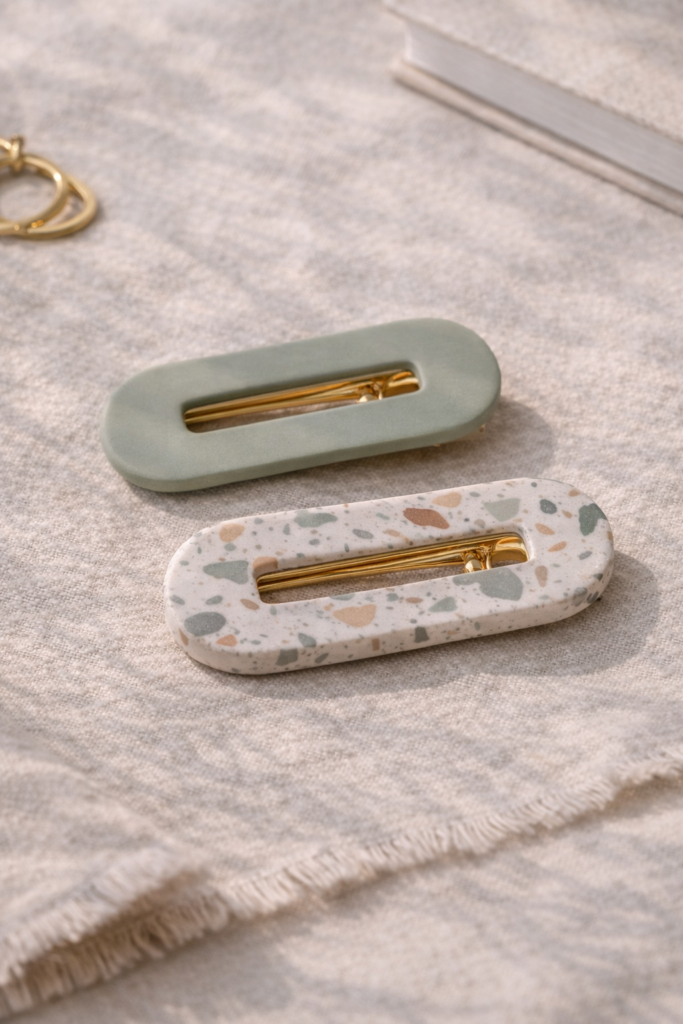
This one feels trendy but is surprisingly simple.
Clay hair clips are one of the most stylish polymer clay ideas for beginners because you are working with flat slabs. No sculpting. No complicated shaping. Just cut, bake, and attach. The design does the heavy lifting.
You can keep it minimalist with soft beige and subtle texture, go bold with terrazzo speckles, or create a clean marbled effect. The key is keeping the shape simple. Long rectangles, soft arches, or rounded bars always look modern and wearable.
How to Make It
- Condition your clay and roll it into a smooth slab.
- Use a knife or cutter to create your desired shape.
- Smooth the edges with your fingers or a soft tool.
- Bake according to package instructions.
- Let cool completely.
- Attach the baked clay piece to a metal hair clip base using strong craft glue.
- Allow glue to cure fully before wearing.
Matte finishes feel contemporary. A light gloss coat gives a slightly polished boutique look.
Shop the Look
8. Decorative Clay Magnets
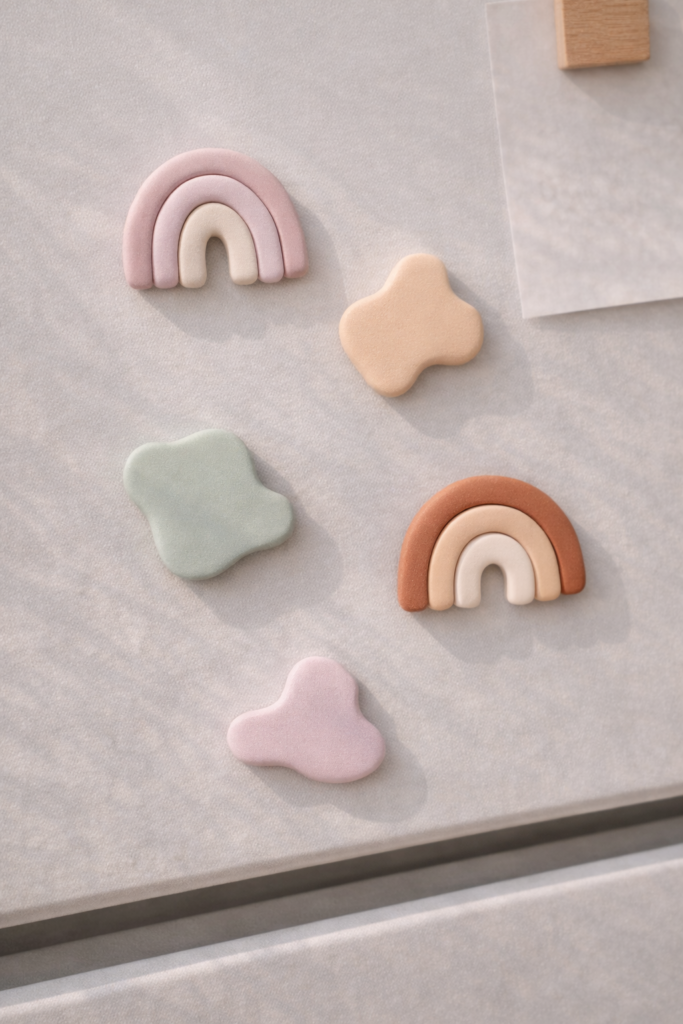
If you want instant gratification, make magnets.
Decorative magnets are some of the most fun polymer clay ideas for beginners because the shapes can be simple and playful. Think mini rainbows, lemons, mushrooms, hearts, or abstract blobs. You are working small, which makes this one of the easiest easy clay ideas to practice with.
This project is perfect if you want to experiment with color. Soft pastel palettes feel cute and modern. Bold primary tones give playful energy. You can even mix textures like smooth matte bases with tiny glossy accents.
How to Make It
- Condition your clay and choose simple shapes.
- Roll and shape by hand or use small cutters.
- Add light texture details if desired.
- Bake according to package instructions.
- Let cool completely.
- Attach small round magnets to the back using strong adhesive.
- Allow glue to fully cure before placing on your fridge.
Because these are small, they bake quickly and are great for testing color combinations.
Shop the Look
9. Clay Wall Hooks
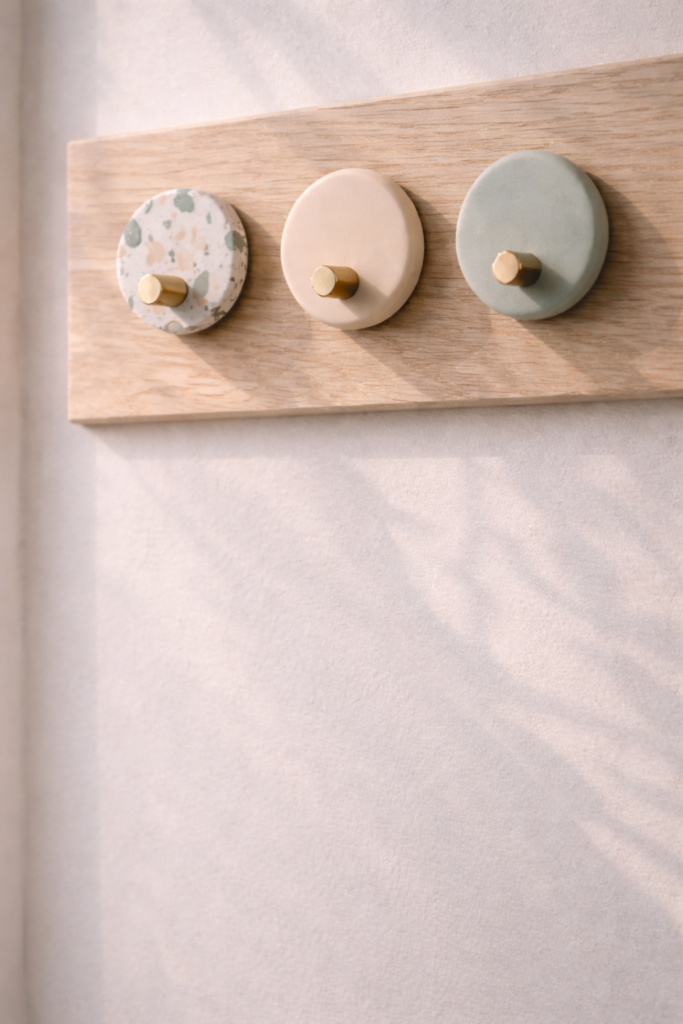
If you want something functional that still feels aesthetic, this is your move.
Clay wall hooks are one of the more elevated polymer clay ideas for beginners because they combine decor with purpose. You are not sculpting complex forms. You are creating a decorative front piece that mounts onto a basic hook base. Clean circles, soft arches, or simple terrazzo slabs look modern and intentional.
These simple clay ideas work beautifully in entryways, bathrooms, or craft rooms. Think matte white with gold hardware for a minimal look. Or go earthy with terracotta tones against natural wood.
How to Make It
- Condition and roll your clay into a thick slab.
- Cut into your chosen shape.
- Smooth edges carefully.
- Bake according to package instructions.
- Once cooled, attach the clay piece to a pre-drilled wooden hook base or hardware mount using strong adhesive.
- Allow glue to fully cure before installing on the wall.
Keep the shape simple and slightly thicker for durability.
Shop the Look
- Neutral Polymer Clay Pack
- Wood Wall Hook Base
- Heavy Duty Craft Adhesive
- Polymer Clay Rolling Pin Set
10. Mini Clay Plant Markers
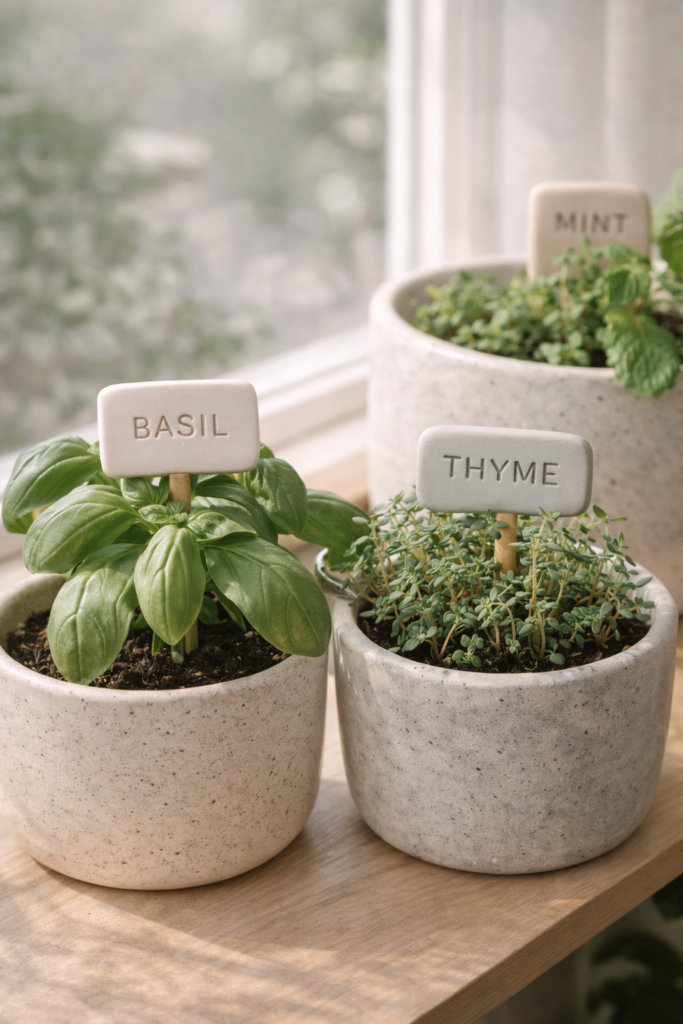
If you have a tiny herb garden or indoor plants, this project just makes sense.
Mini plant markers are one of the most practical polymer clay ideas for beginners because they are flat, simple, and customizable. You are essentially making small labeled stakes that slide into soil. No complex shaping. No fragile details. Just clean design.
These easy clay ideas look especially good in neutral palettes like creamy white with stamped black lettering. Or go earthy with sage green, muted terracotta, and soft sand tones. The finish feels intentional and boutique without being complicated.
How to Make It
- Condition clay and roll into a flat slab about ¼ inch thick.
- Cut small rectangle or oval shapes with one end slightly tapered.
- Stamp plant names into the clay.
- Smooth edges with your fingers.
- Bake according to package instructions.
- Let cool fully before inserting into soil.
Keep them slightly thicker than you think you need so they stay sturdy.
Shop the Look
- Alphabet Stamp Set for Clay
- Neutral Polymer Clay Colors
- Polymer Clay Cutter Set
- Acrylic Roller for Polymer Clay
11. Clay Napkin Rings
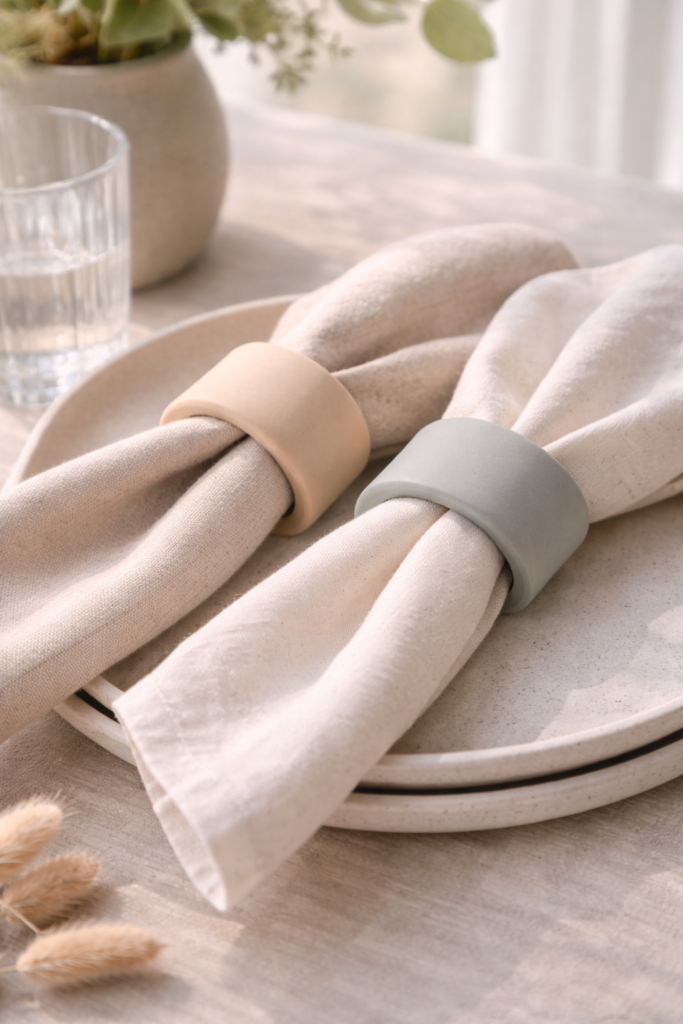
If you want your table to feel styled without buying anything new, this is such a smart project.
Clay napkin rings are understated polymer clay ideas for beginners that instantly elevate a dinner setup. The design can stay minimal, just a smooth cylindrical band in matte white, taupe, or soft gray. Or you can add subtle texture like light terrazzo flecks or faint marbling.
These simple clay ideas feel especially elevated in neutral palettes. Picture linen napkins threaded through handmade rings with soft organic curves. It feels curated, not crafty.
How to Make It
- Condition clay and roll into a thick rope shape.
- Wrap the rope around a napkin or small cylindrical object to measure size.
- Trim excess and gently press the ends together to seal.
- Smooth the seam with your fingers.
- Bake according to package instructions.
- Let cool completely before using.
Keep the ring slightly thick so it holds its shape after baking.
Shop the Look
12. Boho Clay Incense Holders
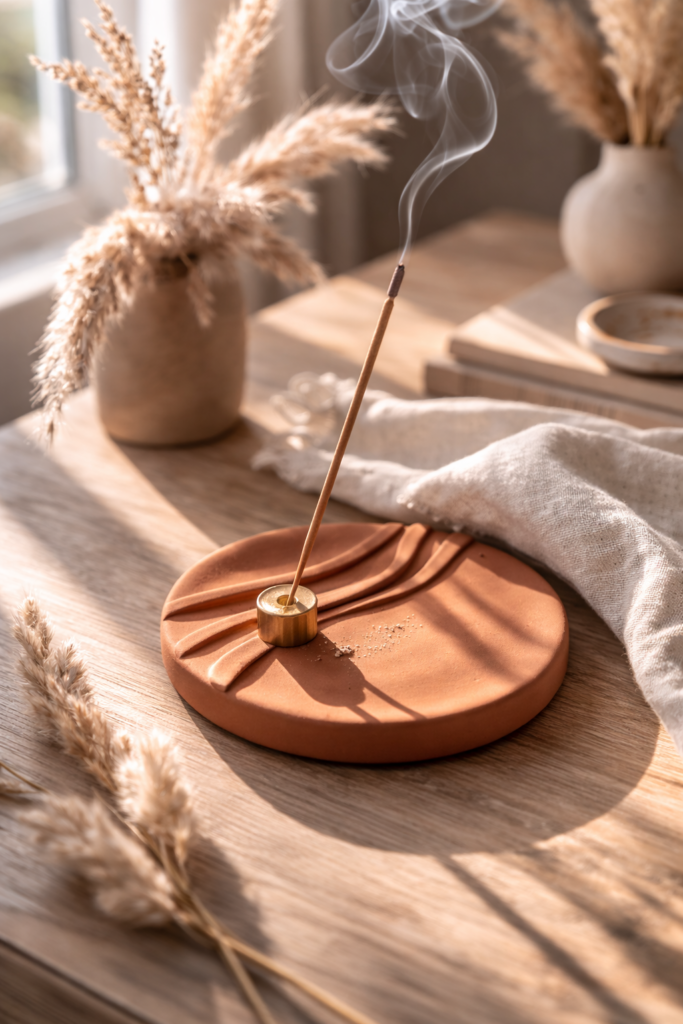
If you love calm, earthy corners in your home, this one is such a vibe.
Boho incense holders are beautiful polymer clay ideas for beginners because the structure is incredibly simple. You are creating a flat base with a small raised piece or hole to hold the incense stick. That is it. The design focus is texture and color.
Think warm terracotta, muted sand, dusty rose, or soft olive. Add light texture using fabric, lace, or subtle stamping for dimension. These easy clay ideas look especially good in matte finishes that feel natural and grounded.
How to Make It
- Condition clay and roll into a thick oval or organic slab.
- Create a small raised bump or gently insert a skewer at an angle to form the incense hole.
- Smooth all edges and surfaces carefully.
- Add light texture if desired.
- Bake according to package instructions.
- Let cool fully before using.
Keep the base slightly thicker so it stays sturdy and balanced.
Shop the Look
- Earth Tone Polymer Clay Set
- Polymer Clay Texture Tools
- Acrylic Rolling Pin for Clay
- Matte Finish Sealer
13. Clay Bookmark Charms
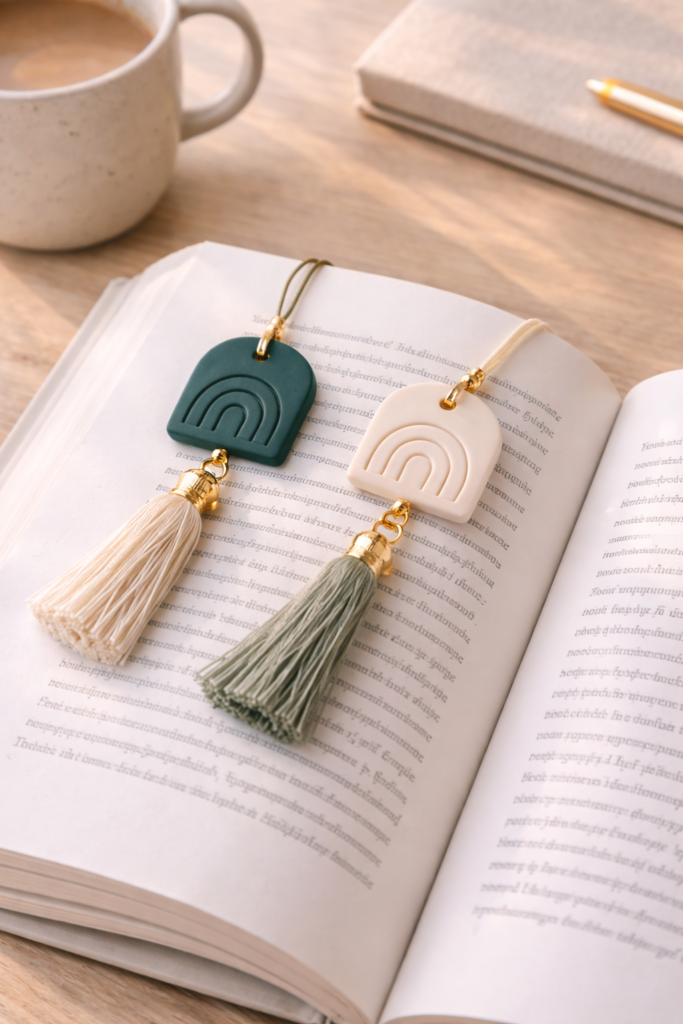
If you want something small, giftable, and almost impossible to mess up, make bookmark charms.
These polymer clay ideas for beginners are flat, lightweight, and super forgiving. You can cut simple shapes like circles, arches, leaves, or abstract blobs. Add a small hole at the top and attach a tassel or thin cord. That’s it.
Soft neutrals feel modern and minimal. Deep jewel tones like emerald or navy feel moody and elevated. You can even add subtle stamped textures for a handmade touch. These easy clay ideas are perfect for book lovers and feel thoughtful without being complicated.
How to Make It
- Condition clay and roll into a thin slab.
- Cut your desired shape using a cutter or knife.
- Smooth edges carefully.
- Poke a small hole at the top.
- Bake according to package instructions.
- Let cool fully, then thread a tassel or cord through the hole.
Keep the piece thin but not fragile. About ⅛ to ¼ inch thick works well.
Shop the Look
- Polymer Clay Color Pack
- Polymer Clay Shape Cutters
- Small Tassels for Crafts
- Polymer Clay Blade and Tools
14. Clay Picture Frame Accents
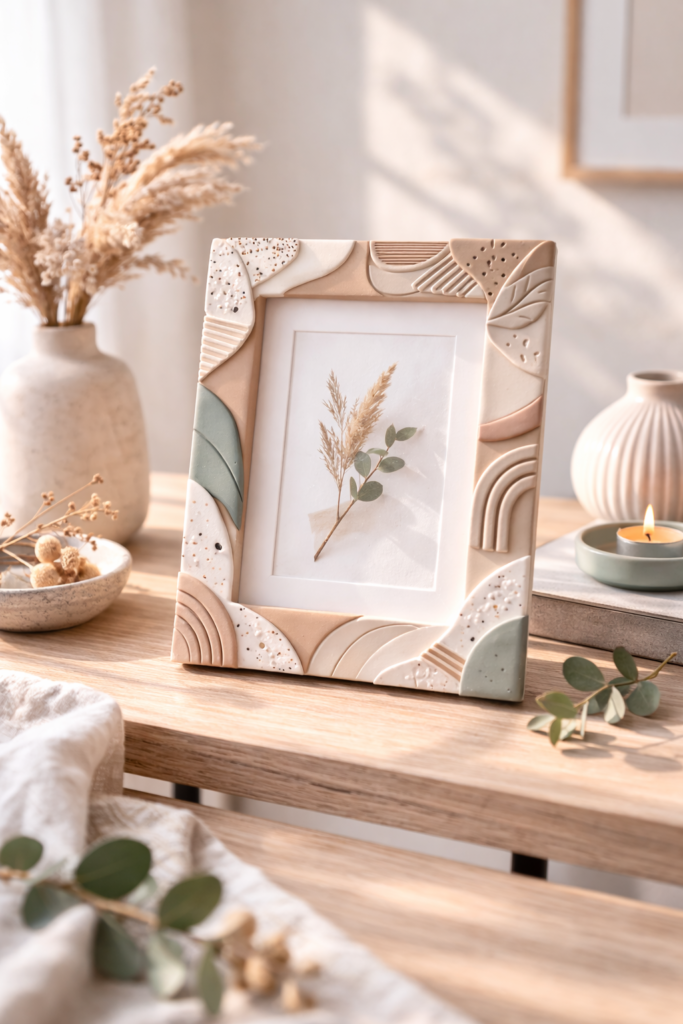
If you have a plain frame sitting around, this is the upgrade.
Clay picture frame accents are smart polymer clay ideas for beginners because you’re not building the entire frame. You’re adding decorative details to corners or borders. That keeps the project simple while still looking custom. Think soft arches layered on corners, tiny terrazzo strips along the edge, or subtle floral shapes pressed flat.
This is one of those simple clay ideas that instantly makes basic decor feel styled. Neutral clay on a black frame feels modern. Soft sage or blush on natural wood gives subtle personality.
How to Make It
- Condition clay and roll into a thin slab.
- Cut small decorative shapes for corners or trim pieces.
- Lightly press texture if desired.
- Bake according to package instructions.
- Let cool completely.
- Attach the pieces to the frame using strong craft glue.
- Allow glue to cure fully before displaying.
Keep the shapes thin and lightweight so they adhere securely.
Shop the Look
- Neutral Polymer Clay Pack
- Polymer Clay Texture Tools Set
- Strong Craft Glue
- Plain Wooden Picture Frames
15. Clay Candle Jar Lids
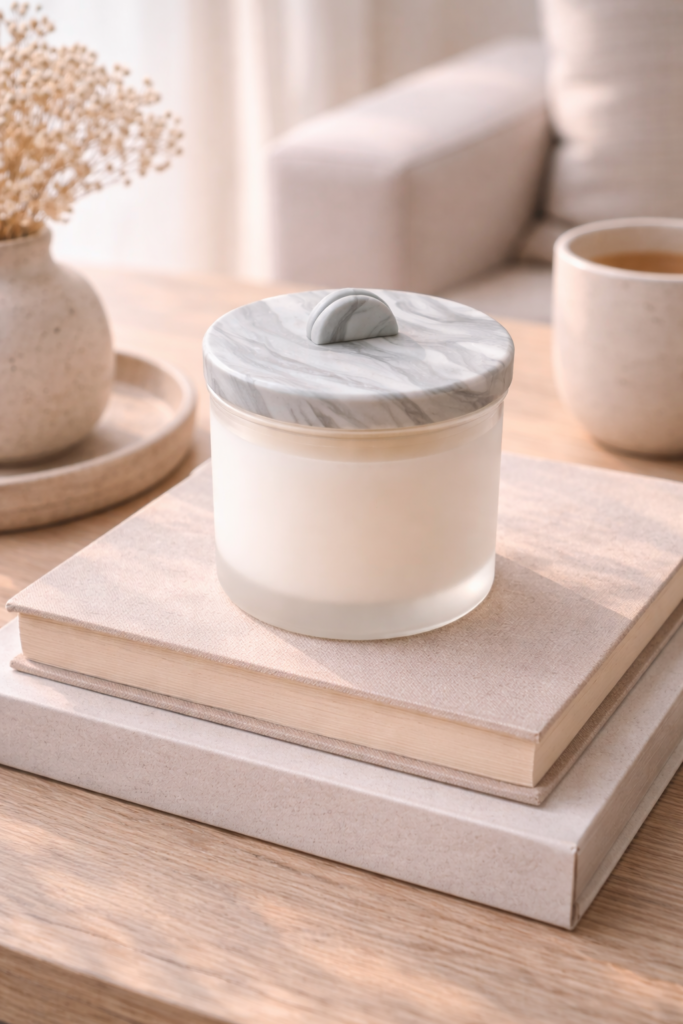
If you want something subtle but elevated, this is such a smart project.
Clay candle jar lids are understated polymer clay ideas for beginners that instantly make store-bought candles feel custom. You are creating a flat topper that sits over an existing jar lid. No sculpting skill required. Just clean shapes, smooth surfaces, and thoughtful color choices.
Matte cream feels modern. Soft gray with a faint marbled swirl feels luxe. Even a simple terrazzo slab can make a basic candle look boutique. These easy clay ideas are all about upgrading what you already own.
How to Make It
- Condition clay and roll into a smooth slab.
- Measure the top of your candle lid and cut a matching circle.
- Smooth the edges carefully.
- Bake according to package instructions.
- Let cool completely.
- Attach to the existing lid with strong adhesive if desired, or leave removable.
Keep the piece slightly thicker so it feels substantial and not flimsy.
Shop the Look
16. Textured Clay Coasters
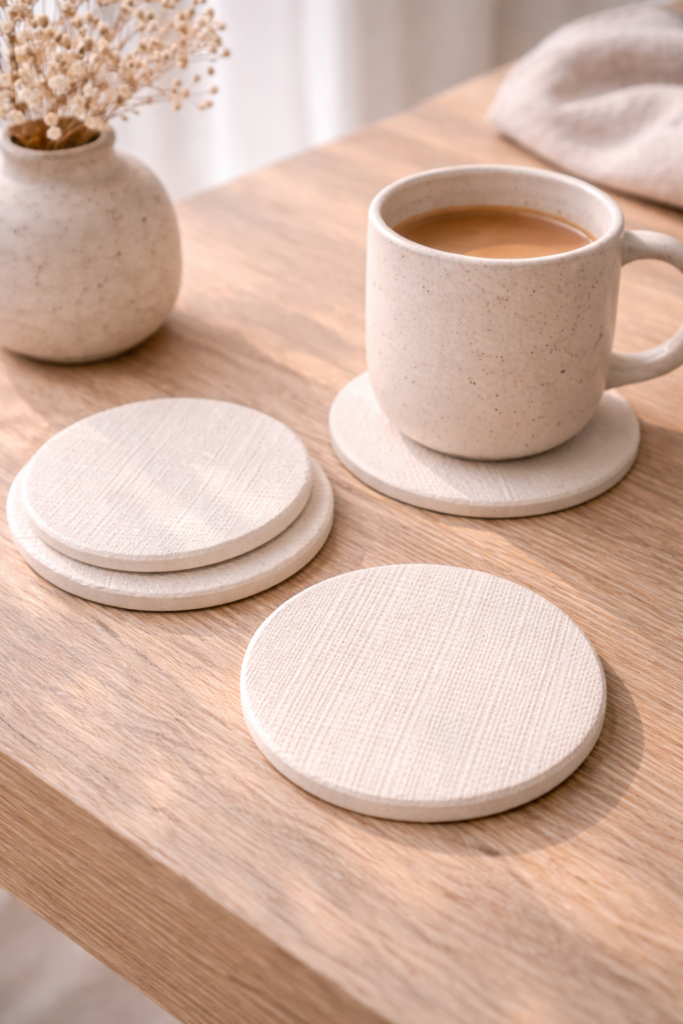
If you want something that looks handmade in the best way, texture is your secret weapon.
Textured coasters are beginner-friendly polymer clay ideas because the pattern does the heavy lifting. You are not sculpting details by hand. You are pressing fabric, lace, or textured tools into rolled clay. The result looks layered and intentional with almost no extra effort.
This is one of those simple clay ideas that feels elevated in neutral tones. Matte white with soft linen texture feels modern. Warm beige with lace imprint feels slightly boho. Even charcoal gray with subtle pattern looks bold and minimal.
How to Make It
- Condition clay and roll into a thick, even slab.
- Lay textured fabric or a stamping tool over the surface.
- Gently roll or press to transfer the pattern.
- Cut into round or square coaster shapes.
- Smooth edges carefully.
- Bake according to package instructions.
- Lightly sand edges after cooling if needed.
Keep the slab thick enough so the texture remains visible after baking.
Shop the Look
- Neutral Polymer Clay Set
- Polymer Clay Texture Stamps
- Polymer Clay Cutters Set
- Fine Sandpaper for Crafting
17. Abstract Clay Wall Art Tiles
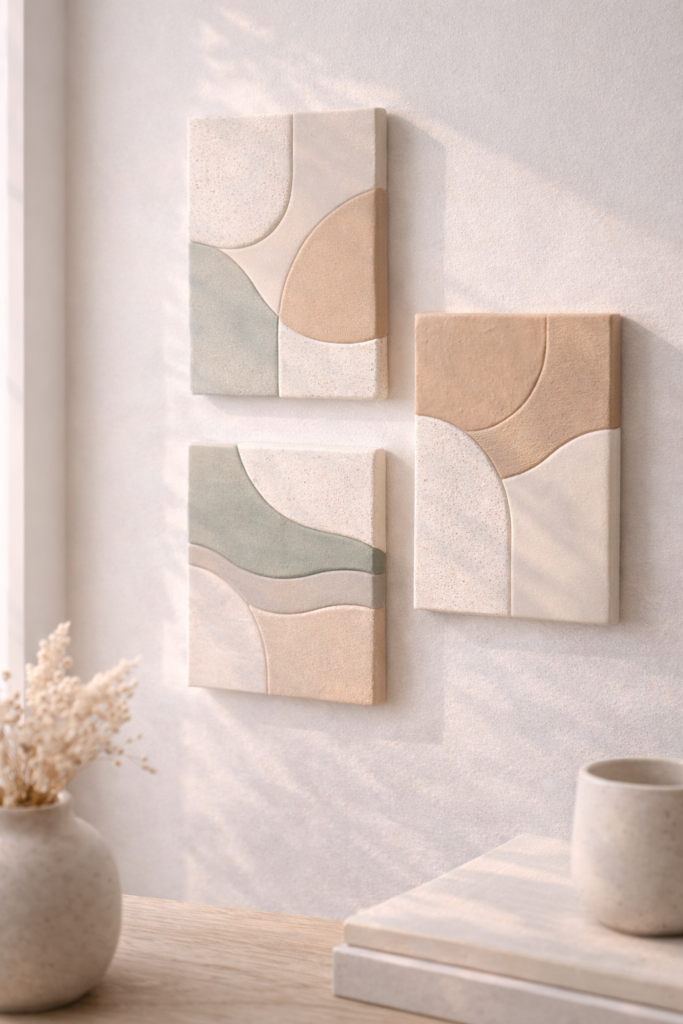
If you’re ready to try something that feels more “home decor” than “craft project,” this is it.
Abstract wall tiles are elevated polymer clay ideas for beginners because you are still working with flat slabs. No sculpting faces. No complicated techniques. Just clean geometric shapes, layered textures, and thoughtful color combinations.
Think soft neutral panels with subtle texture for a modern look. Or create a trio of muted earth-tone tiles with slight arches and curved cutouts for dimension. These easy clay ideas look high-end when mounted in small groupings. It feels curated, not crafty.
How to Make It
- Condition clay and roll into a thick slab.
- Cut geometric shapes like arches, rectangles, or organic curves.
- Add light texture or subtle layering if desired.
- Bake according to package instructions.
- Let cool completely.
- Mount onto a wood backing or attach hanging hardware using strong adhesive.
Keep shapes simple and cohesive if creating a multi-piece set.
Shop the Look
- Neutral Earth Tone Polymer Clay Pack
- Geometric Polymer Clay Cutters
- Strong Mounting Adhesive
- Small Wooden Craft Panels
Beginner Do’s and Don’ts for Polymer Clay
Before you start testing all these polymer clay ideas for beginners, this is the foundation that keeps your projects from cracking, burning, or looking messy. Most beginner mistakes are preventable.
| Do | Don’t |
|---|---|
| Condition your clay until soft and smooth | Skip conditioning. Stiff clay cracks and breaks |
| Bake at the exact temperature listed on the package | Guess the temperature or bake too hot |
| Use parchment paper on your baking tray | Place clay directly on metal without protection |
| Let pieces cool completely before handling | Move or bend warm pieces |
| Lightly sand rough edges after baking | Ignore finishing touches |
| Keep designs simple at first | Start with detailed sculpting |
Simple clay ideas succeed because you focus on clean basics. When you master these fundamentals, everything looks more polished.
Start Simple, Finish Strong
Here’s the truth. The best polymer clay ideas for beginners are not the most complicated ones. They are the clean, simple projects that let you focus on shape, color, and finish without overthinking it.
If you start with easy clay ideas like ring dishes, earrings, or coasters, you build confidence fast. And once you understand conditioning, baking, and smoothing, you can expand into more detailed designs without frustration.
Polymer clay ideas are forgiving, versatile, and perfect for modern handmade decor. Pick one project from this list and commit to finishing it this weekend. Not five. Just one. That’s how you build momentum.
And if you’re curious about exploring other clay types too, make sure you read Everything You Need to Know About Air-Dry Clay. It breaks down the differences so you can decide which material works best for your next project.
Save this list, pin it for later, and start creating.

