
Affiliate Disclosure – This post contains affiliate links. If you make a purchase through these links, Room Revival Studio may earn a small commission at no extra cost to you.
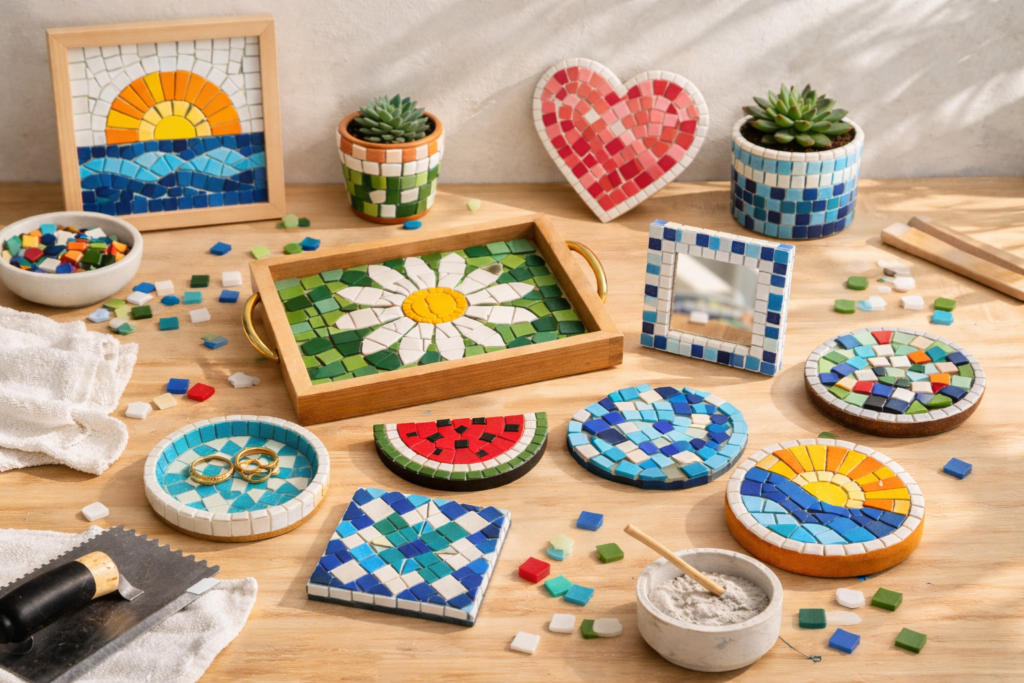
Glass mosaic tile crafts look expensive, artsy, and slightly intimidating but here’s the truth. They are one of the most forgiving DIY techniques for beginners once you understand the basic process. You don’t need artistic talent, fancy tools, or perfect precision. You just need the right project and clear steps.
This list is built specifically for beginners who want beautiful results without frustration. These are mosaic tile craft ideas you can actually finish and feel proud of, even if this is your very first tile project.
1. Glass Mosaic Tile Coasters
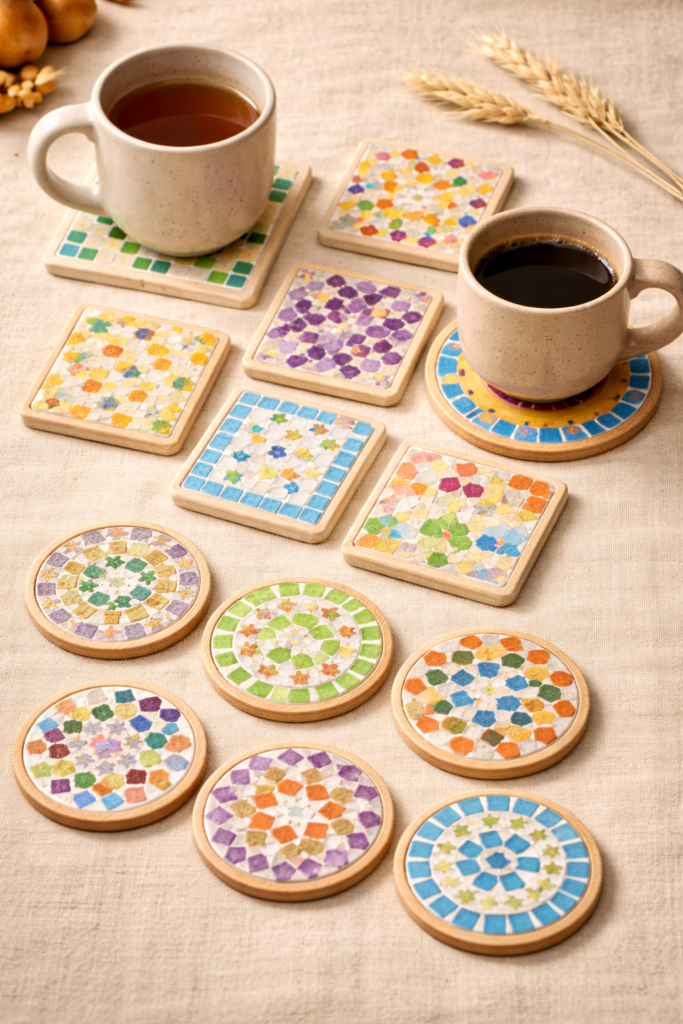
Glass mosaic tile coasters are the best beginner project for a reason. The surface is small, mistakes are easy to fix, and the finished result looks polished and gift-worthy. This project teaches the three core mosaic skills you will use in every future project: tile placement, adhesive control, and grouting.
How to Make It (Step-by-Step)
- Start with a clean cork, ceramic, or wooden coaster base. Wipe away dust so the adhesive bonds properly.
- Lay out your glass mosaic tile pieces on the coaster without glue first. This helps you plan spacing and color balance before committing.
- Apply a thin, even layer of tile adhesive to the coaster using a craft stick or spatula.
- Press each tile piece into the adhesive, leaving small gaps between tiles for grout.
- Allow the adhesive to dry completely according to the product instructions. Do not rush this step.
- Mix grout to a smooth, peanut-butter-like consistency.
- Spread grout over the tiles, pressing it into all the gaps with a rubber scraper or gloved fingers.
- Wipe away excess grout with a damp sponge, rinsing frequently.
- Let the grout cure fully, then apply a tile sealer to protect the surface.
Shop the Look
2. Mosaic Picture Frames
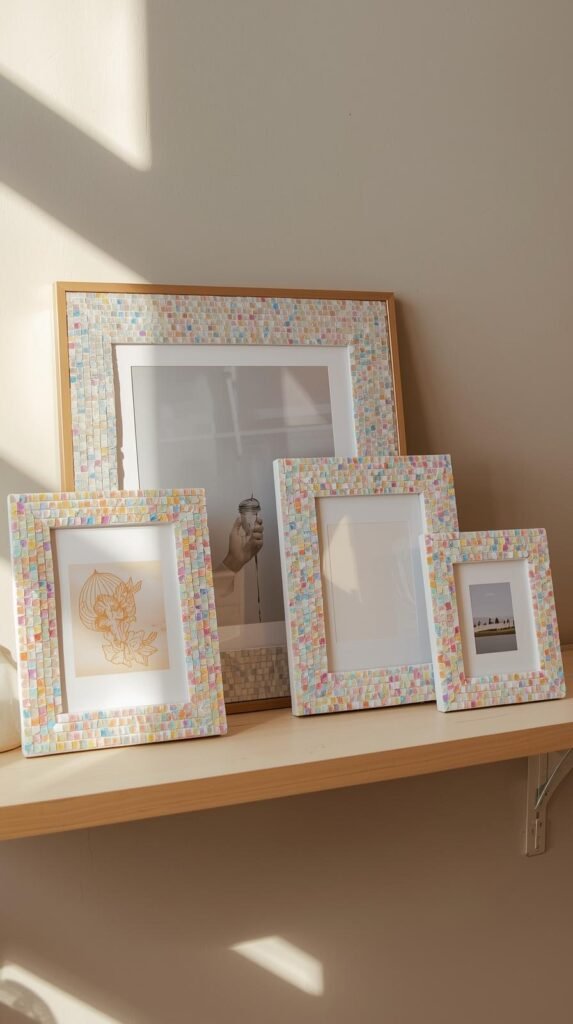
Mosaic picture frames are perfect for beginners who want structure without stress. The flat surface keeps things simple, while the frame shape naturally guides your design. This is one of those projects where even imperfect spacing still looks intentional once it’s grouted.
How to Make It (Step-by-Step)
- Remove the glass, backing, and any hardware from the picture frame so you’re working with just the frame itself.
- Clean the frame surface to remove dust or oils that could interfere with adhesion.
- Use painter’s tape to mask off the inner opening where the photo will sit. This keeps grout and adhesive out of the image area.
- Dry-lay your glass mosaic tile pieces around the frame to plan your layout before gluing.
- Apply tile adhesive in small sections so it doesn’t dry out while you work.
- Press each tile piece into the adhesive, leaving consistent gaps for grout.
- Allow the adhesive to fully cure according to the product instructions.
- Mix grout and spread it across the frame, pushing it firmly into all gaps.
- Wipe away excess grout with a damp sponge, rinsing often.
- Let the grout cure completely, then remove the painter’s tape and reassemble the frame.
Shop the Look
3. Mosaic Plant Pots
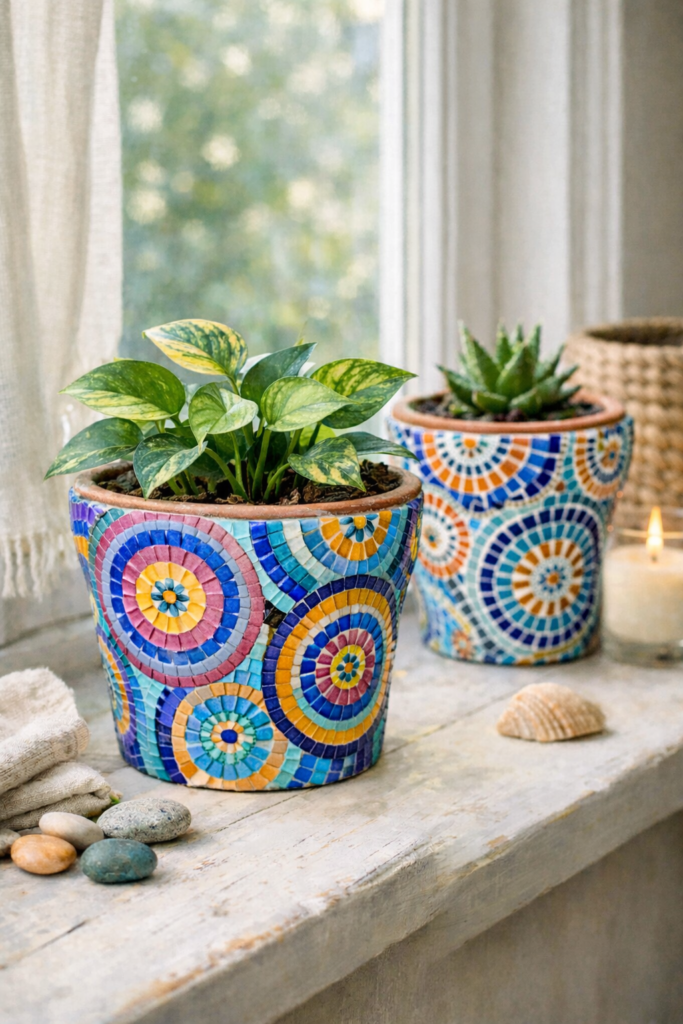
Mosaic plant pots are a great next step once you’re comfortable with flat surfaces. The curved shape teaches you how to work with smaller tile pieces and adjust spacing as you go. The end result instantly elevates basic terracotta pots and makes even simple plants feel styled.
How to Make It (Step-by-Step)
- Start with a clean terracotta or ceramic plant pot. Wipe away dust and let it dry completely.
- Apply a thin coat of sealer to the pot and allow it to dry. This prevents the pot from absorbing moisture from the adhesive.
- Break larger glass mosaic tiles into smaller pieces if needed using tile nippers. Smaller pieces work better on curves.
- Dry-lay the tiles around the pot to get a feel for spacing and pattern before gluing.
- Apply tile adhesive in small sections, working your way around the pot.
- Press each tile piece firmly into the adhesive, leaving small gaps for grout.
- Allow the adhesive to fully cure before moving on.
- Apply grout, pressing it into all the spaces between tiles, especially along curved areas.
- Wipe away excess grout with a damp sponge, rinsing frequently.
- Let the grout cure completely, then seal the entire surface for durability.
Shop the Look
4. Mosaic Serving Trays
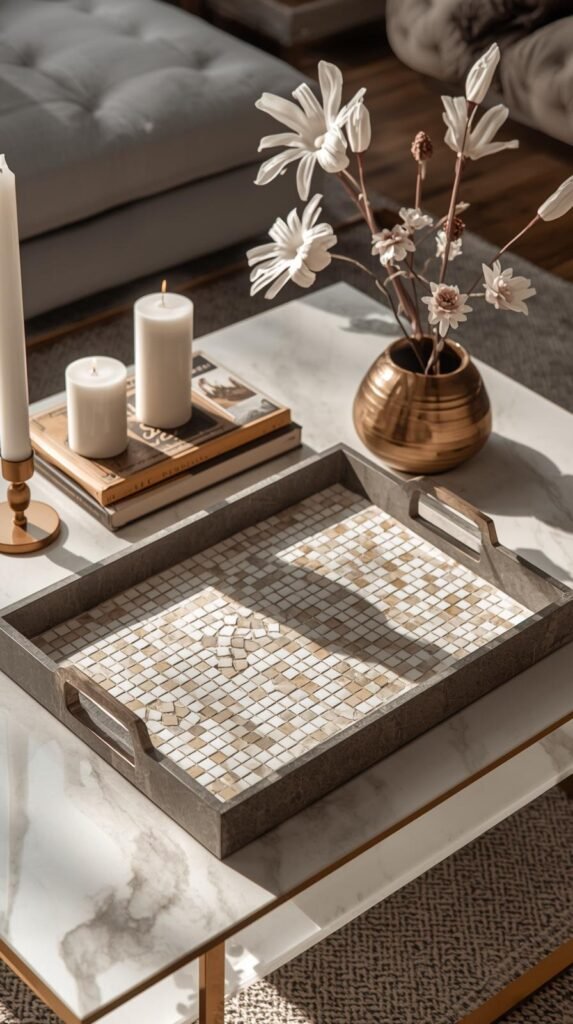
Mosaic serving trays are ideal for beginners who want a flat, forgiving surface with a high-end payoff. This project helps you practice clean lines and even spacing while creating something you can actually use or display. It’s also a great way to turn a plain tray into a statement piece.
How to Make It (Step-by-Step)
- Start with a wooden or metal serving tray and remove any liners or inserts.
- Lightly sand the tray surface so the adhesive grips properly, then wipe away dust.
- Dry-lay your glass mosaic tile pieces inside the tray to plan your design and spacing.
- Apply tile adhesive in an even layer, working in sections to prevent it from drying too quickly.
- Press each tile piece firmly into place, keeping grout gaps consistent.
- Allow the adhesive to fully cure before moving on.
- Mix grout and spread it over the tiled surface, pushing it into all gaps.
- Wipe away excess grout with a damp sponge, rinsing often for clean lines.
- Let the grout cure completely, then seal the surface to protect it from moisture and wear.
Shop the Look
5. Mosaic Stepping Stones
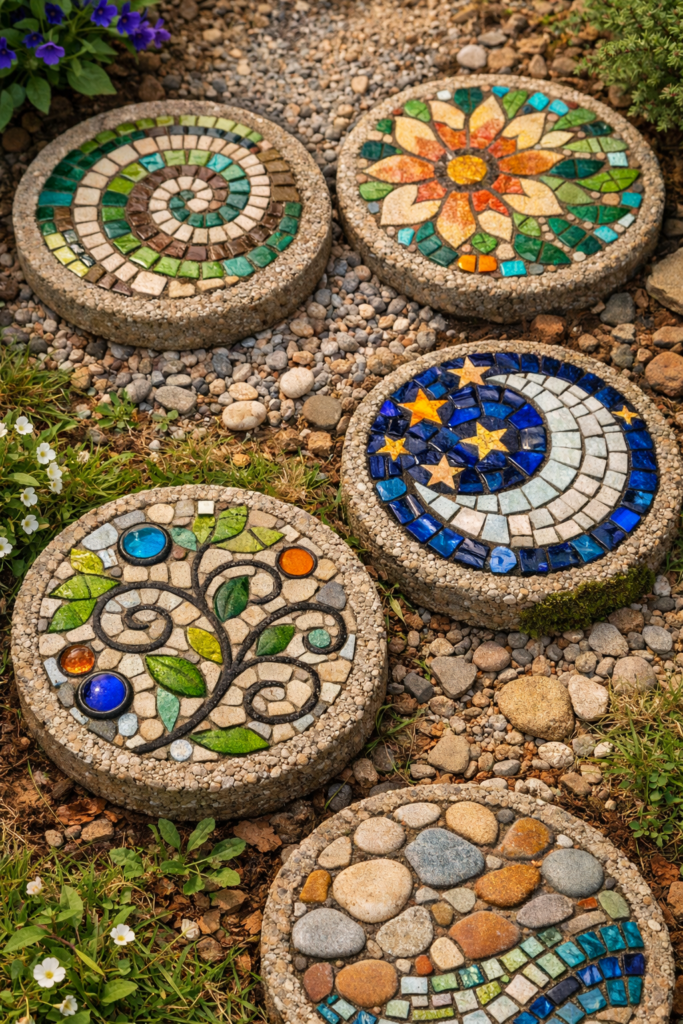
Mosaic stepping stones are a confidence-boosting project for beginners because they’re larger and more forgiving than small decor pieces. You don’t need perfect spacing or symmetry for this to look good. Once it’s finished, the texture and grout pull everything together.
How to Make It (Step-by-Step)
- Start with a concrete stepping stone or stepping stone mold and clean the surface thoroughly.
- If using a mold, mix concrete according to package directions and pour it into the mold. Smooth the surface.
- While the concrete is still wet but slightly set, gently press glass mosaic tile pieces into the surface.
- Arrange tiles evenly, making sure they are not fully submerged. The tops should remain visible.
- Allow the concrete to cure fully based on the manufacturer’s instructions.
- Once cured, apply grout over the surface, pressing it into the gaps between tiles.
- Wipe away excess grout with a damp sponge, rinsing frequently.
- Let the grout dry completely.
- Apply an outdoor-rated sealer to protect the stepping stone from moisture and weather.
Shop the Look
6. Mosaic Candle Holders

Mosaic candle holders are quick, satisfying projects that make a big visual impact. They’re perfect for beginners because the shape is small, the tile pieces don’t need to be perfectly aligned, and the finished piece looks far more expensive than it is. These also make great handmade gifts.
How to Make It (Step-by-Step)
- Start with a clean glass candle holder or votive. Wash it with warm soapy water and dry completely.
- Dry-lay your glass mosaic tile pieces around the outside of the holder to plan spacing and color placement.
- Apply tile adhesive to a small section of the glass at a time so it doesn’t dry before you place tiles.
- Press each tile piece firmly into the adhesive, leaving small gaps for grout.
- Continue working around the holder until the entire surface is covered.
- Allow the adhesive to fully cure according to the product instructions.
- Mix grout to a smooth consistency and spread it over the tiles, pushing it into all gaps.
- Wipe away excess grout with a damp sponge, being careful not to pull grout from the joints.
- Let the grout cure completely, then gently polish the tiles with a dry cloth to remove haze.
Shop the Look
7. Mosaic Wall Art Panels
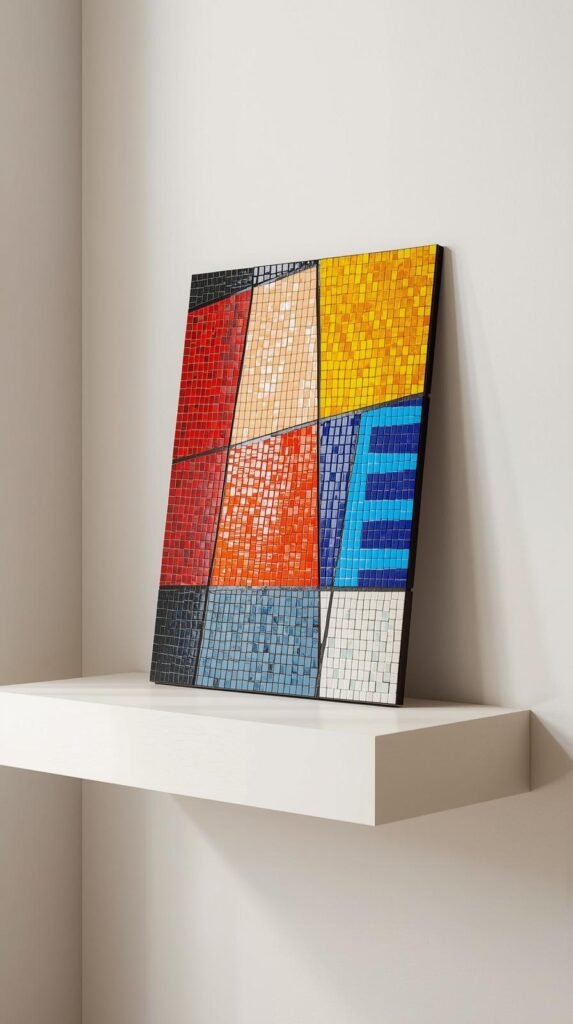
Mosaic wall art panels are ideal for beginners who want to focus on creativity without worrying about function or durability. This project lets you experiment with color, shape, and pattern while working on a flat, controlled surface. It’s also one of the easiest ways to create custom art for your home.
How to Make It (Step-by-Step)
- Choose a wood, MDF, or canvas-backed panel as your base and wipe it clean.
- Decide on a simple design or abstract layout and lightly sketch it on the surface if helpful.
- Dry-lay your glass mosaic tile pieces to test spacing and color balance.
- Apply tile adhesive evenly to the panel, working in sections.
- Press each tile piece into place, leaving consistent gaps for grout.
- Allow the adhesive to fully cure before continuing.
- Spread grout over the entire surface, pressing it firmly into all gaps.
- Wipe away excess grout with a damp sponge, rinsing frequently.
- Let the grout cure completely, then seal the surface if desired.
- Attach hanging hardware or display the panel on a shelf.
Shop the Look
8. Mosaic Tabletop Accent

A mosaic tabletop accent is a great way to turn a basic or thrifted piece into something eye-catching. This project is beginner-friendly because the surface is flat and forgiving, but it still teaches you how to work at a slightly larger scale. Once finished, it instantly adds texture and personality to a room.
How to Make It (Step-by-Step)
- Choose a small table, stool, or tabletop surface and make sure it’s structurally sound.
- Lightly sand the surface to help the adhesive bond, then wipe away all dust.
- Dry-lay your glass mosaic tile pieces to plan the design and spacing.
- Apply tile adhesive evenly across the surface, working in manageable sections.
- Press each tile piece into the adhesive, leaving consistent grout gaps.
- Allow the adhesive to cure completely before moving on.
- Mix grout and spread it across the entire surface, pushing it into all gaps.
- Wipe away excess grout with a damp sponge, rinsing often.
- Let the grout cure fully, then apply a tile sealer for durability.
Shop the Look
9. Mosaic Mirror Frames
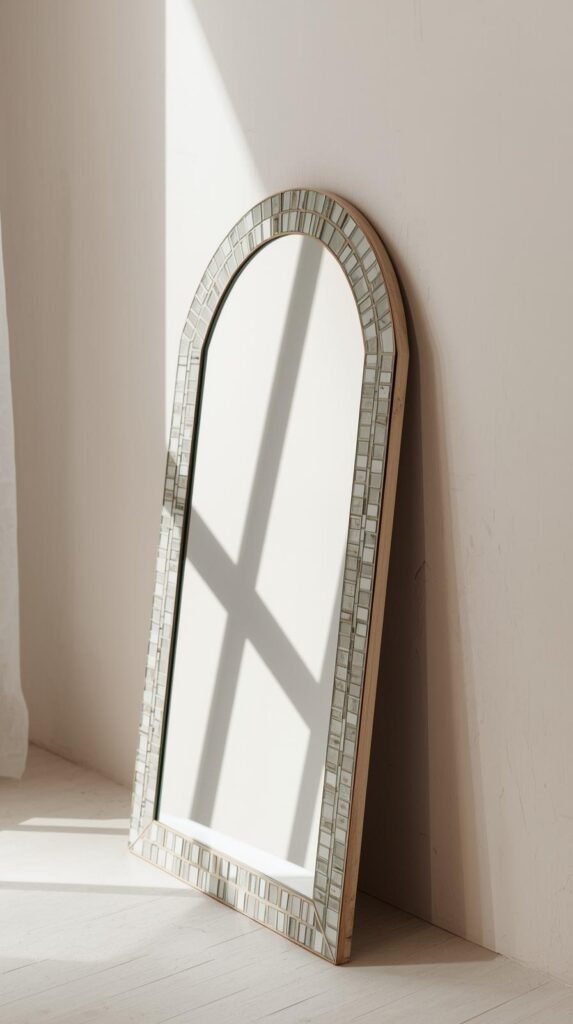
Mosaic mirror frames are a classic beginner project because the impact is big, but the technique stays simple. The mirror itself does most of the visual work, while the tiles add texture and color around the edges. Even uneven tile spacing disappears once everything is grouted.
How to Make It (Step-by-Step)
- Remove the mirror from its frame if possible, or tape off the glass completely to protect it.
- Clean the frame surface so the adhesive sticks properly.
- Dry-lay your glass mosaic tile pieces around the frame to plan spacing and pattern.
- Apply tile adhesive in small sections to prevent it from drying too quickly.
- Press each tile piece firmly into place, leaving small gaps for grout.
- Allow the adhesive to cure fully before continuing.
- Spread grout over the tiled areas, pressing it into all the gaps.
- Wipe away excess grout with a damp sponge, rinsing often.
- Let the grout cure completely, then carefully remove tape from the mirror glass.
- Polish the tiles with a dry cloth to remove any remaining grout haze.
Shop the Look
10. Mosaic Address Signs
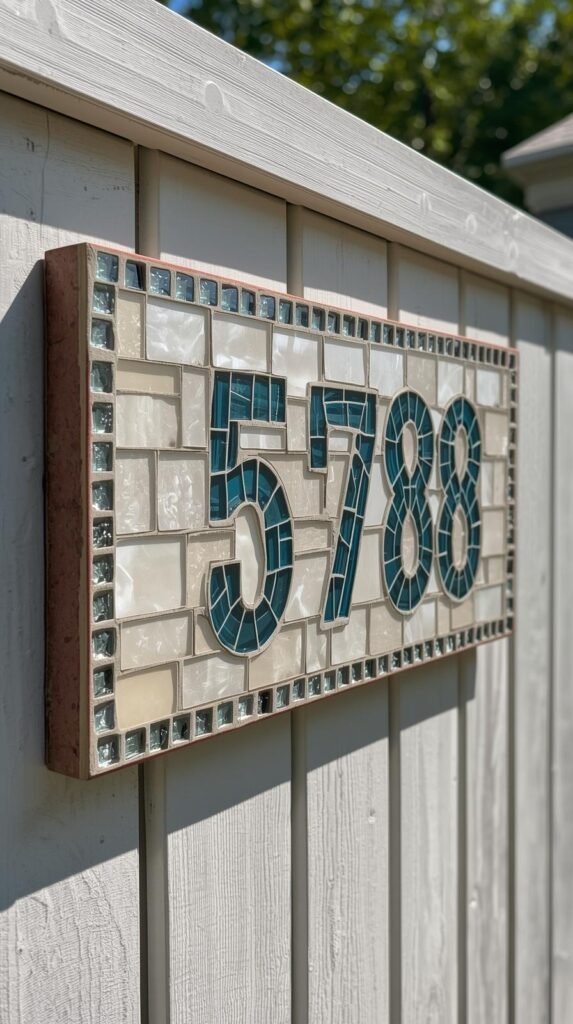
Mosaic address signs are a functional way to practice clean spacing and simple layouts. Because the design is straightforward, beginners can focus on tile placement and grout work without overthinking the pattern. This project works well for both indoor and outdoor use when sealed properly.
How to Make It (Step-by-Step)
- Choose a wooden, cement, or slate sign base and clean it thoroughly.
- Lightly sketch or mark where each number or letter will go.
- Dry-lay your glass mosaic tile pieces to plan spacing and alignment.
- Apply tile adhesive in small sections to keep it workable.
- Press each tile piece into place, forming the numbers or design.
- Allow the adhesive to cure completely before grouting.
- Spread grout over the tiles, pressing it firmly into all gaps.
- Wipe away excess grout with a damp sponge.
- Let the grout cure fully.
- Apply an outdoor-rated sealer if the sign will be exposed to weather.
Shop the Look
11. Mosaic Jewelry Dishes
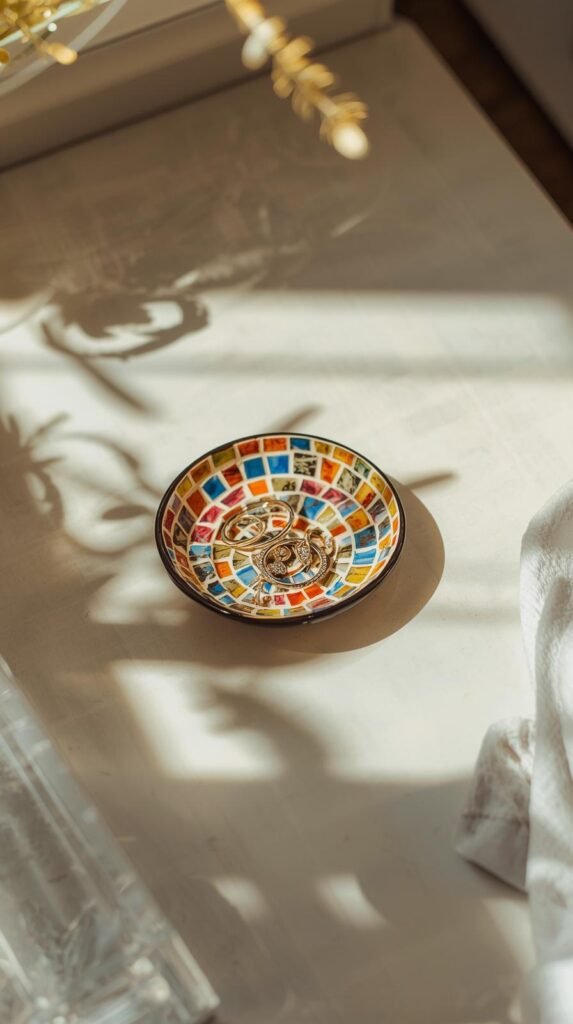
Mosaic jewelry dishes are one of the easiest ways to practice mosaic tile work on a small scale. The shallow surface keeps everything contained, and the finished piece feels polished and gift-worthy even if your spacing is not perfect. This is an ideal project for using leftover glass mosaic tile pieces from earlier crafts.
How to Make It (Step-by-Step)
- Choose a shallow ceramic, clay, or resin jewelry dish with a flat interior base. Avoid deep bowls for your first attempt.
- Wash the dish with warm soapy water to remove dust or residue, then dry completely.
- Place your glass mosaic tile pieces inside the dish without glue to plan spacing and color placement. Keep tiles away from the curved edges if possible.
- Apply a thin, even layer of mosaic tile adhesive to the bottom of the dish using a craft stick or spatula.
- Press each tile piece gently into the adhesive, leaving small, even gaps between tiles for grout.
- Adjust tile placement while the adhesive is still wet, then stop touching once positioned.
- Allow the adhesive to cure fully according to the manufacturer’s instructions. This step is critical for clean grouting.
- Mix grout to a smooth, thick consistency similar to peanut butter.
- Spread grout over the tiled area, pressing it into all gaps between tiles with gloved fingers or a rubber scraper.
- Use a damp sponge to wipe away excess grout, rinsing the sponge frequently. Do not scrub.
- Let the grout set for the recommended time, then gently polish the tiles with a dry cloth to remove haze.
- Apply a tile sealer once fully cured to protect the surface from moisture and wear.
Shop the Look
12. Mosaic Clock Faces
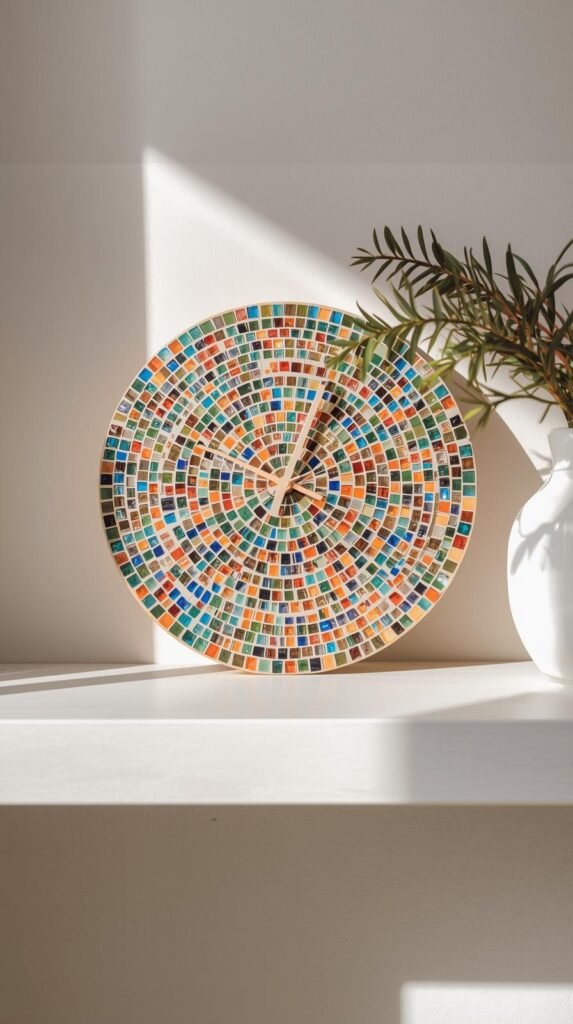
Mosaic clock faces are a great beginner project because the design is simple, but the finished piece feels custom and intentional. The key is working around the clock mechanism carefully so the tiles enhance the face without interfering with movement. Once finished, this becomes a functional piece of art.
How to Make It (Step-by-Step)
- Start with a blank clock base or an old clock with a removable face. Remove the clock hands and mechanism and set them aside safely.
- Clean the clock face thoroughly to remove dust, oils, or residue so the adhesive bonds properly.
- Identify and protect the center hole where the clock mechanism sits. You can place a small piece of painter’s tape over it as a reminder not to tile over it.
- Lay out your glass mosaic tile pieces on the clock face without glue to plan spacing and color placement. Keep tiles at least ½ inch away from the center hole.
- Apply mosaic tile adhesive to the clock face in small sections using a craft stick or spatula.
- Press each tile piece gently into the adhesive, leaving even gaps between tiles for grout.
- Double-check that no tiles interfere with where the clock hands will rotate. Adjust while the adhesive is still wet.
- Allow the adhesive to cure fully according to the manufacturer’s instructions before moving on.
- Mix grout to a smooth, thick consistency and spread it over the tiled surface, pressing it into all gaps.
- Wipe away excess grout with a damp sponge, rinsing often and avoiding the center hole.
- Let the grout set, then polish the tiles gently with a dry cloth to remove haze.
- Once completely cured, remove any tape and reinstall the clock mechanism and hands. Test to ensure the clock runs smoothly.
Shop the Look
13. Mosaic Garden Markers
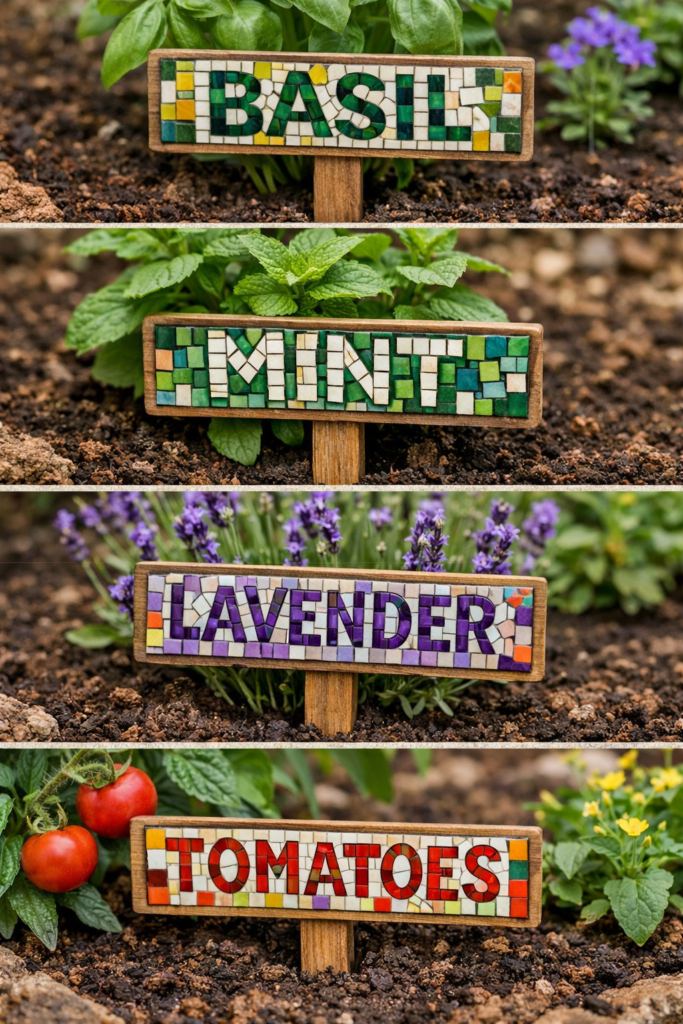
Mosaic garden markers are an easy outdoor-friendly project that doesn’t require precision to look good. Letters, shapes, and color contrast do the heavy lifting, which makes this ideal for beginners. These are great for herbs, flower beds, or even potted plants on a patio.
How to Make It (Step-by-Step)
- Choose a flat garden marker base such as wood, cement, stone, or a thick craft stake. Make sure it is sturdy and outdoor-safe.
- Clean the surface thoroughly and allow it to dry completely. Any moisture or dust can weaken adhesion.
- Lightly sketch the word, plant name, or shape onto the marker with pencil or chalk. Keep letters simple and bold.
- Lay out glass mosaic tile pieces without glue to plan spacing and letter shapes. Adjust until the design is easy to read.
- Apply mosaic tile adhesive in small sections so it stays workable.
- Press tile pieces into the adhesive, forming letters or shapes and leaving even gaps between tiles for grout.
- Check alignment while the adhesive is still wet, then stop adjusting once tiles are placed.
- Allow the adhesive to cure fully according to the product instructions.
- Mix grout to a thick, smooth consistency and spread it over the tiled surface, pressing it firmly into all gaps.
- Wipe away excess grout with a damp sponge, rinsing frequently to keep tile edges clean.
- Let the grout cure completely.
- Apply an outdoor-rated sealer to protect the marker from moisture, sun exposure, and temperature changes.
Shop the Look
14. Mosaic Vanity Trays
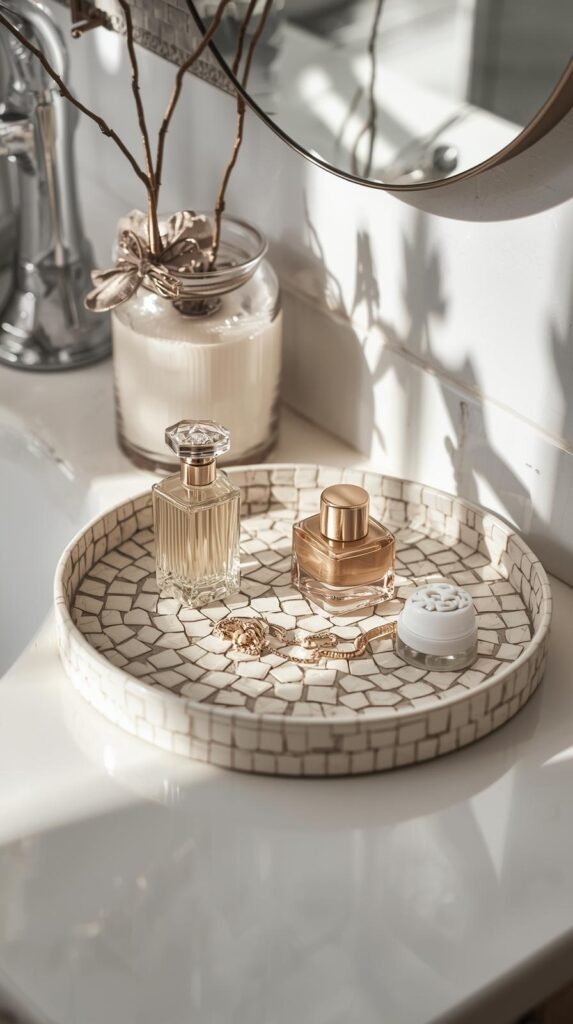
Mosaic vanity trays add texture and personality to bathrooms, dressers, or nightstands while staying very beginner-friendly. The tray edges help contain the design, which makes spacing and grout control much easier. This project delivers a high-end look without complex technique.
How to Make It (Step-by-Step)
- Choose a wooden, metal, or resin vanity tray with a flat base and raised edges.
- Clean the tray thoroughly and allow it to dry completely before starting.
- Dry-lay glass mosaic tile pieces inside the tray to plan color placement and spacing. Keep tiles slightly away from the edges for clean lines.
- Apply a thin, even layer of mosaic tile adhesive to the tray base using a craft stick or spatula.
- Press each tile piece gently into the adhesive, leaving small, consistent gaps for grout.
- Adjust placement while the adhesive is still wet, then stop touching once tiles are positioned.
- Allow the adhesive to cure fully according to the manufacturer’s instructions.
- Mix grout to a smooth, thick consistency and spread it over the tiles, pressing it firmly into all gaps.
- Wipe away excess grout with a damp sponge, rinsing frequently to keep edges clean.
- Let the grout cure completely.
- Apply a tile sealer to protect the surface from moisture and daily use.
Shop the Look
15. Mosaic Bookends
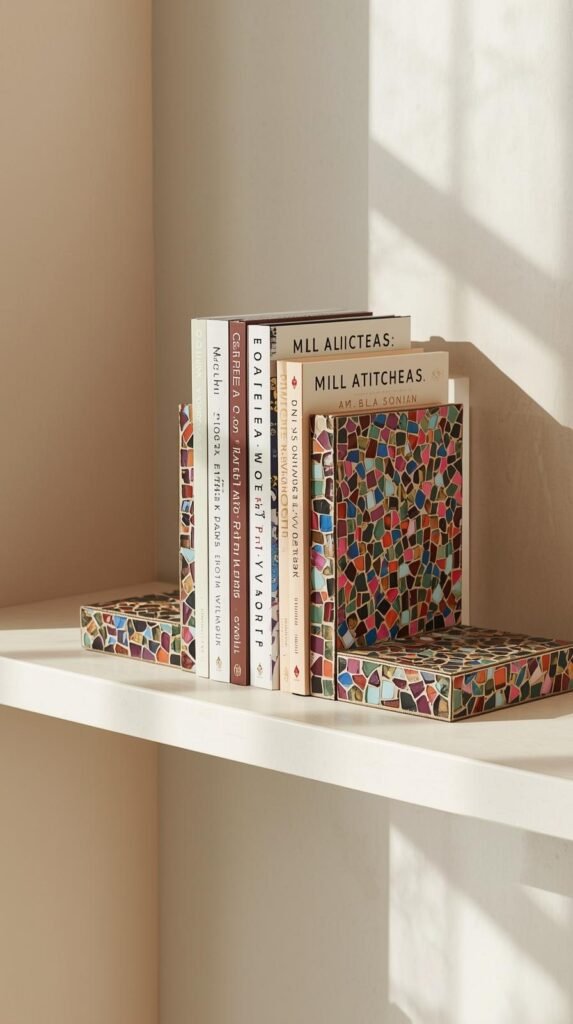
Mosaic bookends are a practical project that hides small imperfections beautifully. Their weight and flat surfaces make tile placement easier for beginners, and the finished result feels custom and substantial. This is a great option if you want a functional decor piece without tackling a large surface.
How to Make It (Step-by-Step)
- Choose heavy, sturdy bookend bases made of metal, resin, or solid wood. Lighter bookends may tip once tiled.
- Clean the bookend surfaces thoroughly to remove dust, oils, or residue.
- Dry-lay your glass mosaic tile pieces to plan spacing and coverage before gluing.
- Apply a thin, even layer of mosaic tile adhesive to the bookend surface using a craft stick or spatula.
- Press tile pieces firmly into the adhesive, leaving small, even gaps between tiles for grout.
- Check alignment while the adhesive is still wet, then stop adjusting once tiles are placed.
- Allow the adhesive to cure fully according to the manufacturer’s instructions.
- Mix grout to a thick, smooth consistency and spread it over the tiles, pressing it into all gaps.
- Wipe away excess grout with a damp sponge, rinsing often to keep tile edges clean.
- Let the grout cure completely.
- Apply a tile sealer to protect the surface from wear and handling.
Shop the Look
16. Mosaic Accent Tiles for Decor
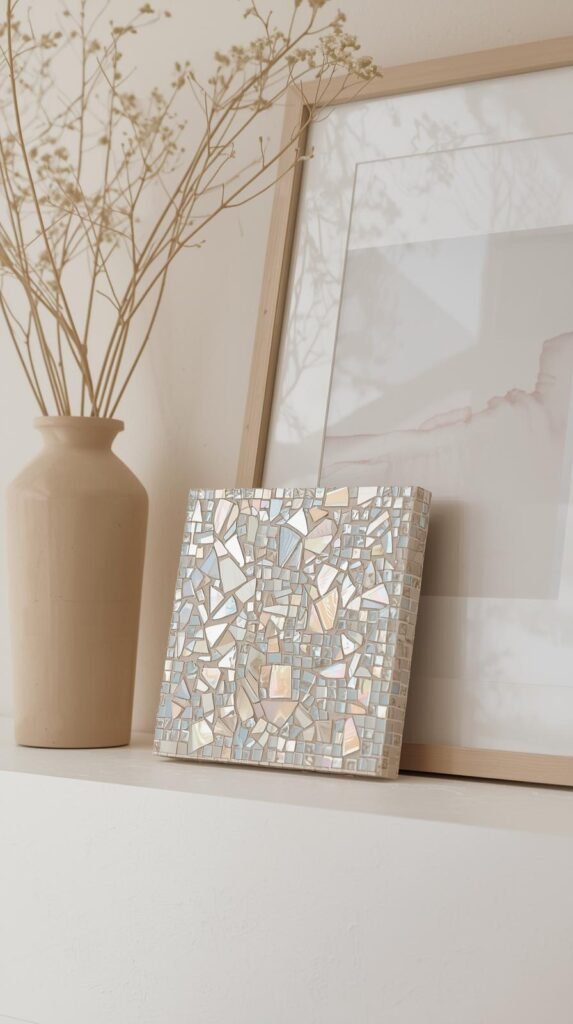
Mosaic accent tiles are single-tile projects that work as standalone decor. This is perfect for beginners who want to practice technique without committing to a large surface. Finished tiles can be styled on shelves, leaned against walls, or framed for an elevated, handmade look.
How to Make It (Step-by-Step)
- Choose a single tile base, ceramic tile, or small backing board with a flat surface.
- Clean the surface thoroughly and let it dry completely before starting.
- Dry-lay glass mosaic tile pieces to plan spacing, pattern, and color balance.
- Apply a thin, even layer of mosaic tile adhesive using a craft stick or spatula.
- Press each tile piece gently into the adhesive, leaving small, consistent gaps for grout.
- Adjust placement while the adhesive is still wet, then stop touching once tiles are positioned.
- Allow the adhesive to cure fully according to the manufacturer’s instructions.
- Mix grout to a thick, smooth consistency and spread it over the tiled surface, pressing it into all gaps.
- Wipe away excess grout with a damp sponge, rinsing frequently to keep edges clean.
- Let the grout cure completely, then gently polish tiles with a dry cloth to remove haze.
- Apply a tile sealer to protect the finished surface.
- Style the finished tile on a shelf, lean it against decor, or frame it for display.
Shop the Look
Mosaic Magic Starts with One Tile

Glass mosaic tile crafts might look intimidating at first glance, but once you understand the rhythm of planning, gluing, grouting, and sealing, everything clicks. These beginner-friendly projects prove that you don’t need advanced skills or expensive tools to create pieces that feel intentional and elevated. Starting small is the secret. Each finished project builds confidence and makes the next one easier.
If you’re loving the idea of turning everyday items into statement decor, don’t stop here. Head over to 15 DIY Vase Makeovers That Look Designer on a Budget for more high-impact, low-cost projects that transform basics into something beautiful. Save this post, pick one project to start, and let your creativity take over.

