
If you’ve been staring at gorgeous embroidery designs on Pinterest thinking, I wish I could do that, this is your sign to start. Hand embroidery designs do not have to be complicated to look beautiful. In fact, simple embroidery designs often look more modern and intentional.
I’ve found that the key to easy embroidery is choosing clean shapes, beginner-friendly stitches, and letting negative space do the work. In this guide, you’ll discover 15 simple hand embroidery patterns that are approachable, stylish, and perfect for anyone brand new to stitching.
Let’s start with one of the most timeless embroidery ideas you can try.
1. Minimalist Line Floral Embroidery
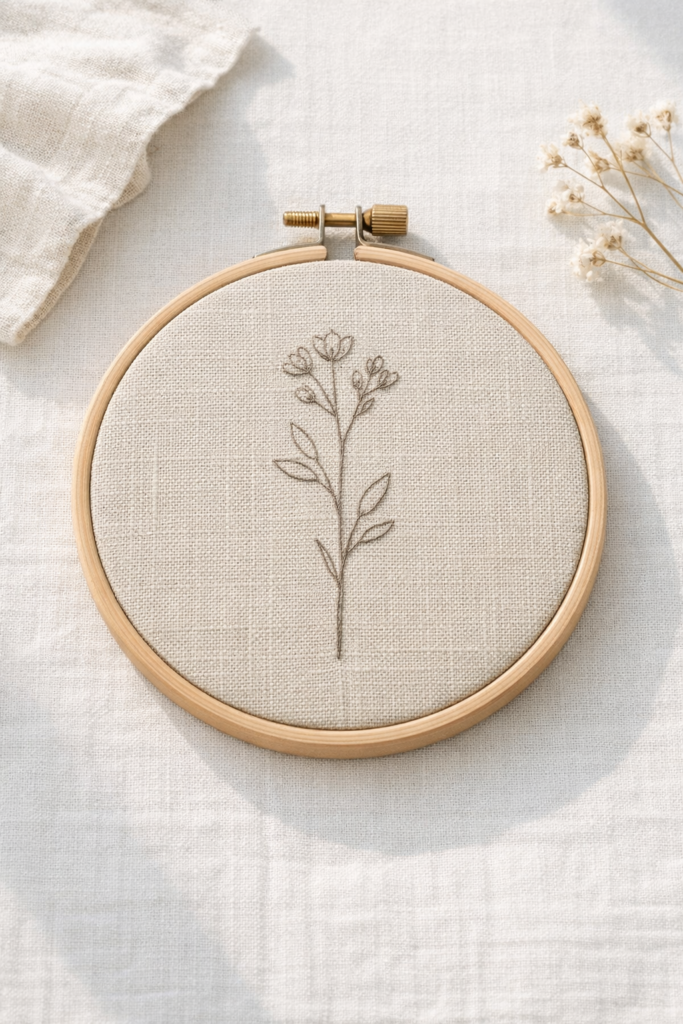
If you want something that looks effortlessly modern but is incredibly easy to stitch, minimalist line florals are it. This style of hand embroidery design focuses on delicate outlines instead of heavy fills, which makes it perfect for beginners. Think soft linen fabric, a light wood hoop, and a single neutral thread tracing a simple wildflower stem. It feels clean, contemporary, and very on-trend with modern embroidery aesthetics.
This is one of those simple embroidery designs that looks high-end framed on a wall or layered on a gallery shelf.
How to Create This Design
- Lightly sketch a single curved stem with 3–5 small oval leaves using a water-soluble fabric pen.
- Thread your needle with one or two strands of embroidery floss for a delicate look.
- Use a stem stitch to outline the main stem.
- Stitch each leaf with a simple satin stitch or outline them with backstitch for a minimal effect.
- Add tiny French knots for small buds if you want a subtle detail.
Keep the design centered but allow for breathing room around it. The empty space is part of the aesthetic.
Shop the Look
- 6 Inch Embroidery Hoop
- DMC Neutral Embroidery Floss Set
- Linen Embroidery Fabric
- Water-Soluble Fabric Marking Pen
2. Simple Monogram Letter Embroidery
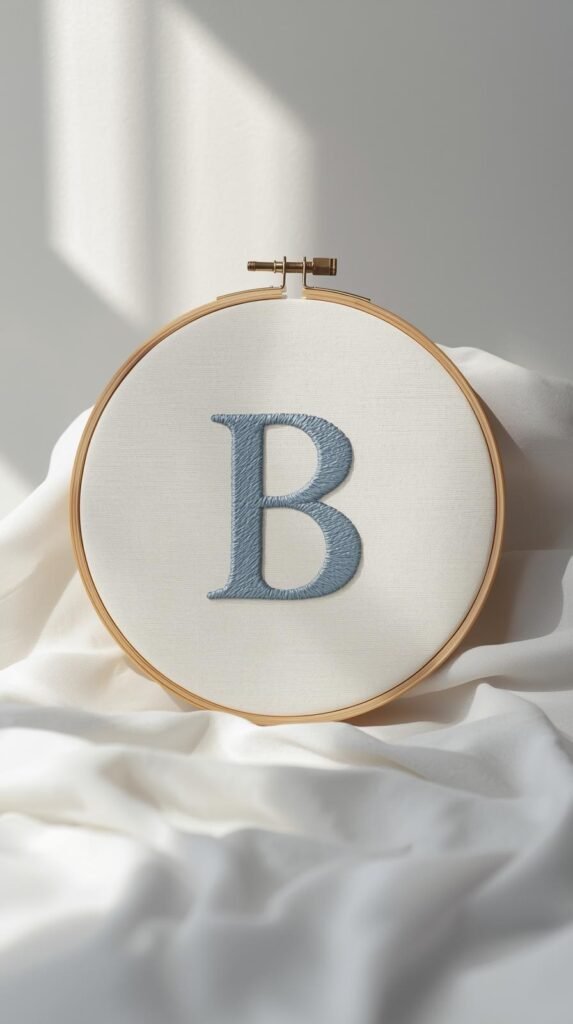
There’s something timeless about a stitched monogram. It feels classic but can still look modern depending on the font and thread color you choose. If you’re just starting with embroidery patterns, this is one of the easiest ways to practice clean lines and controlled stitches without feeling overwhelmed. A single bold letter stitched onto cotton or linen instantly looks personalized and gift-worthy.
This is one of those simple hand embroidery patterns that works beautifully on tote bags, pillow covers, or even framed in a hoop for wall decor.
How to Create This Design
- Print or trace a bold serif or script letter onto your fabric using transfer paper or a water-soluble pen.
- Secure the fabric tightly in your embroidery hoop so it stays smooth.
- Outline the letter using a backstitch for crisp, controlled lines.
- If you want a filled look, use satin stitch to carefully fill in the letter, keeping your stitches parallel and close together.
- Gently rinse away any visible transfer marks once finished and let dry flat.
For a minimalist look, stick to a single thread color. For something more playful, choose a soft pastel or muted earthy tone.
Shop the Look
- Cotton Embroidery Fabric
- Embroidery Transfer Paper
- Embroidery Needle Set
- Beginner Embroidery Thread Set
3. Cute Daisy Embroidery Pattern
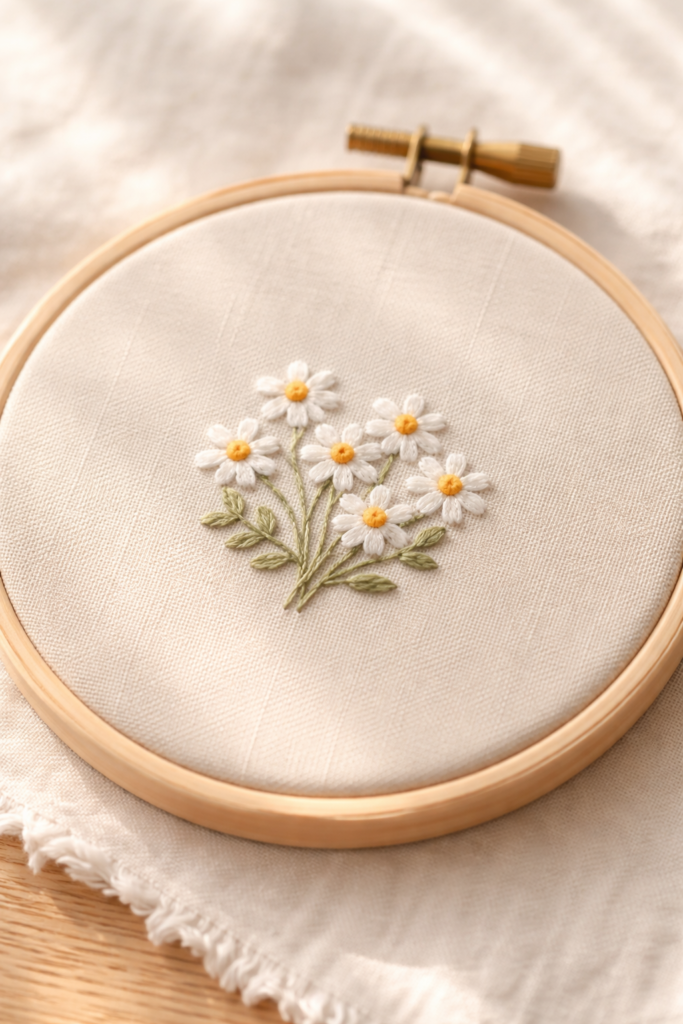
If you’re looking for cute embroidery designs that feel cheerful and beginner-friendly, daisies are the perfect place to start. They use a few basic stitches, they’re forgiving, and they instantly brighten up your fabric. This is one of the most popular simple embroidery designs because it looks charming whether you stitch one single bloom or a scattered cluster across the hoop.
Soft white petals with a golden yellow center feel classic, but you can also experiment with blush, lavender, or muted terracotta for a more modern embroidery vibe.
How to Create This Design
- Lightly draw a small circle for the flower center.
- Stitch the center using French knots clustered tightly together.
- Around the center, create petals using the lazy daisy stitch, spacing them evenly.
- Add a simple straight stitch or stem stitch beneath the flower for a stem.
- Repeat the design in different sizes if you want a fuller composition.
Keep your petals consistent in length for a balanced look, and don’t overcrowd the center.
Shop the Look
- Beginner Embroidery Kit
- White + Yellow Embroidery Floss
- Cotton Embroidery Fabric
- Small Embroidery Scissors
4. Abstract Modern Shape Embroidery
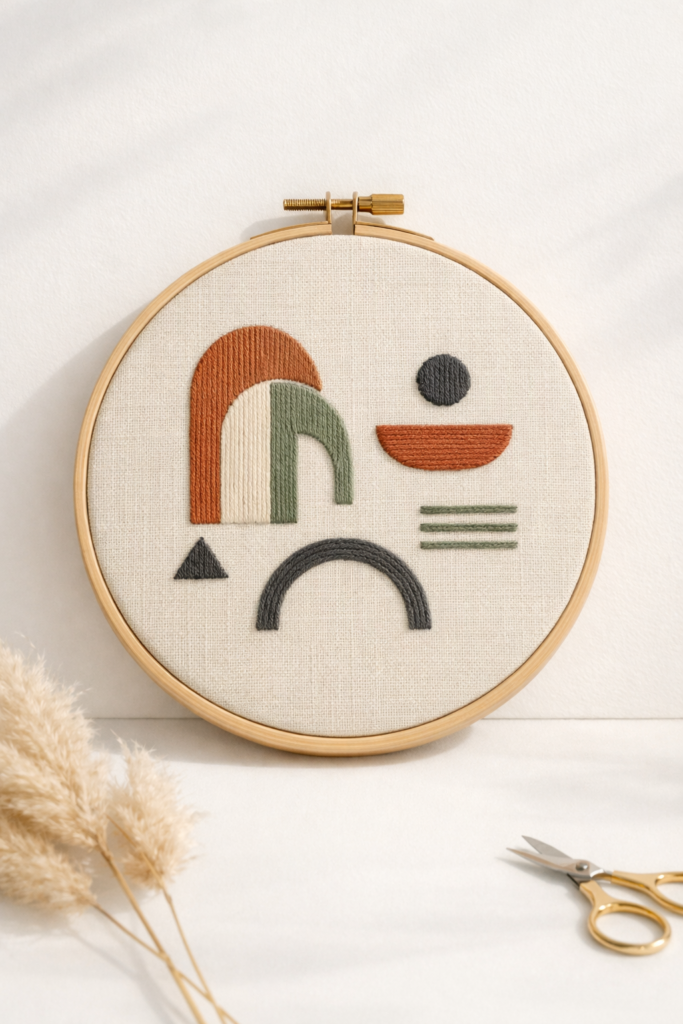
If florals aren’t your thing, abstract embroidery ideas are such a good alternative. Clean arches, half-moons, soft geometric lines, and minimal color blocking feel modern and elevated without requiring advanced skills. This is one of those simple embroidery designs that looks straight out of a boutique home decor shop, especially when stitched on neutral linen with muted thread tones like rust, sage, clay, or charcoal.
The beauty of this design is restraint. You’re focusing on shape, spacing, and contrast instead of complicated embroidery patterns.
How to Create This Design
- Lightly sketch simple shapes like arches, circles, or overlapping lines using a fabric pen.
- Outline each shape with a split stitch or backstitch for clean definition.
- Choose one or two sections to fill using satin stitch for subtle dimension.
- Leave some shapes as outlines only to keep the design airy and balanced.
- Step back and evaluate spacing before adding extra elements.
Keep the design slightly off-center for a more editorial, modern feel.
Shop the Look
5. Tiny Heart Motif Embroidery
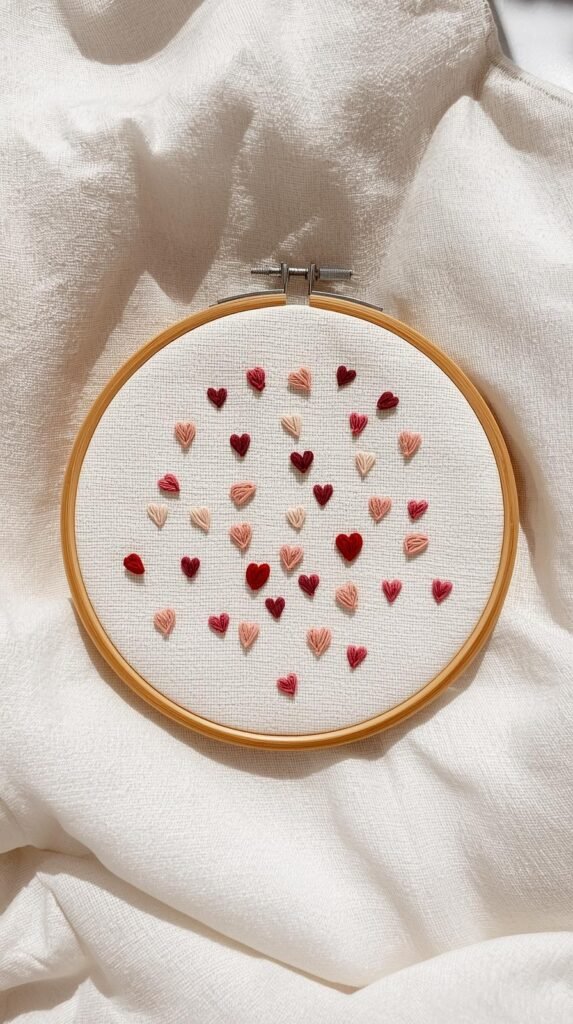
If you want something quick, satisfying, and almost impossible to mess up, tiny hearts are it. This is one of the easiest simple embroidery designs you can stitch in under 20 minutes. It’s perfect for practicing clean outlines and small satin fills without committing to a large embroidery pattern. Plus, clustered mini hearts look adorable on tote bags, sleeves, or layered inside a larger hoop design.
You can keep it classic with red thread on white cotton or go modern with muted mauve, dusty blue, or soft terracotta on linen.
How to Create This Design
- Lightly draw a small heart about 1 to 1.5 inches wide.
- Secure your fabric tightly in the hoop so it stays smooth.
- Outline the heart using a backstitch for crisp edges.
- Fill the shape using satin stitch, keeping your stitches parallel and evenly spaced.
- For a minimalist look, leave the heart as an outline only.
You can repeat the design in a scattered pattern or stack several hearts vertically for a playful composition.
Shop the Look
6. Simple Lavender Sprig Embroidery
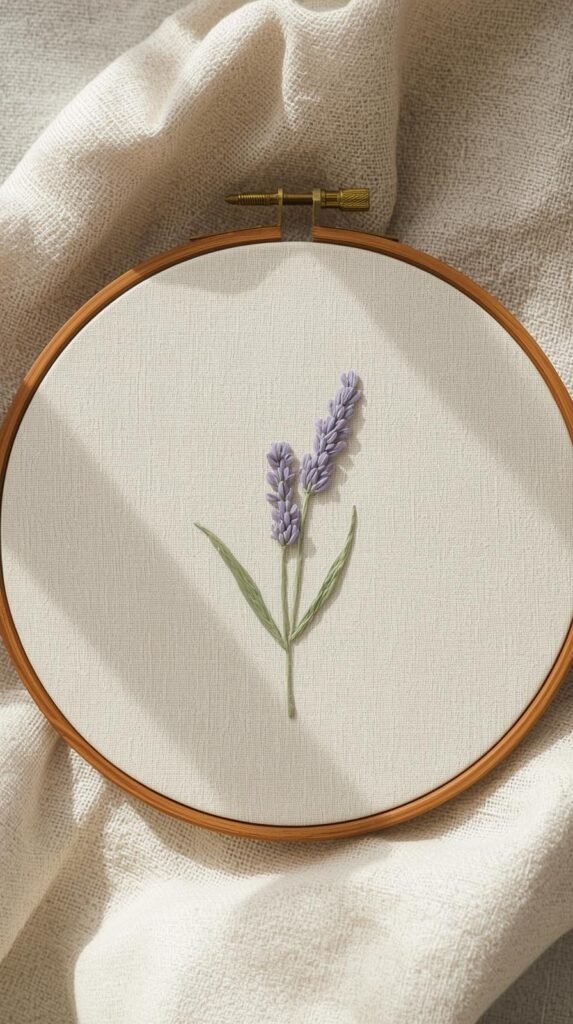
Lavender sprigs are one of those hand embroidery designs that instantly feel delicate and calming. They look intricate, but they’re actually built from very simple stitches, which makes them perfect for beginners. A slim vertical stem with tiny clustered buds gives you that soft botanical look without complicated embroidery patterns. On natural linen with muted purple and sage thread, this design feels effortlessly elevated.
It’s a beautiful option if you love subtle, nature-inspired embroidery ideas.
How to Create This Design
- Lightly draw a thin vertical stem with short angled lines branching off both sides.
- Stitch the main stem using a stem stitch for a smooth, slightly twisted line.
- Use small straight stitches or lazy daisy stitches to create the lavender buds along each branch.
- Alternate bud placement slightly so it looks organic instead of perfectly symmetrical.
- Add a few extra buds at the top to create that tapered lavender shape.
Keep the buds close together near the top and slightly spaced toward the bottom for a realistic look.
Shop the Look
- Purple Embroidery Floss Set
- Natural Linen Embroidery Fabric
- 6 Inch Wooden Embroidery Hoop
- Water-Soluble Fabric Pen
7. Beginner Rainbow Arch Embroidery
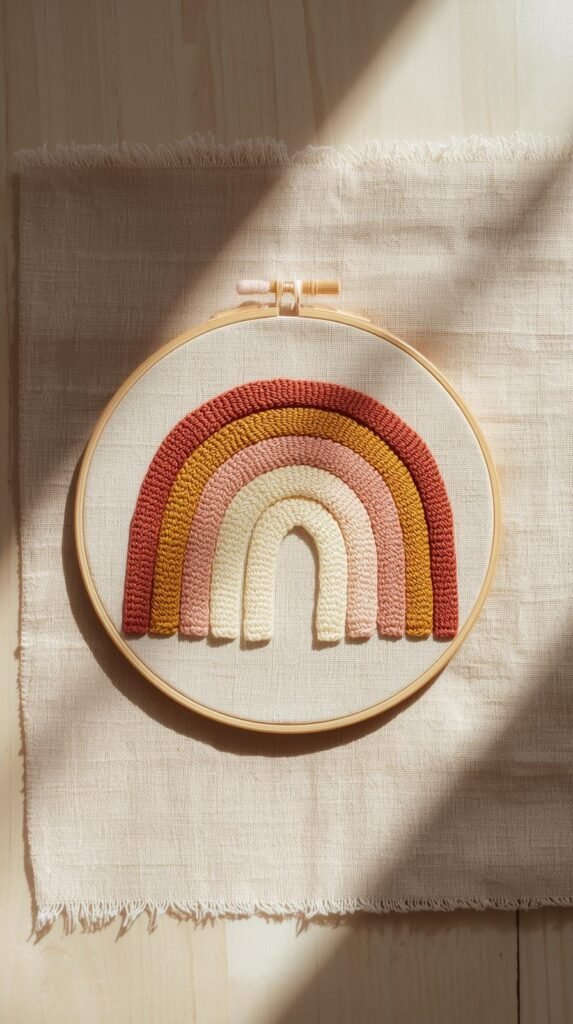
If you love modern embroidery ideas with a playful twist, a simple rainbow arch is such a satisfying project. It’s clean, graphic, and perfect for practicing smooth parallel stitches. This design works beautifully in soft neutral tones for a minimalist look or muted retro shades like rust, mustard, dusty rose, and clay. It’s one of those simple embroidery designs that feels trendy but still timeless.
Stitched on linen in a 6-inch hoop, it instantly looks Pinterest-worthy.
How to Create This Design
- Lightly draw three to five evenly spaced arches stacked inside one another.
- Start with the outer arch and stitch along the line using backstitch or split stitch.
- Continue inward, keeping the spacing between arches consistent.
- If you prefer a filled look, use satin stitch to thicken each band instead of outlining only.
- Leave space beneath the rainbow or add small straight stitches for a subtle base line.
Choose thread colors before you begin so the palette feels intentional and cohesive.
Shop the Look
- Muted Embroidery Floss Set
- Linen Embroidery Fabric
- 6 Inch Embroidery Hoop
- Embroidery Needle Assortment
8. Small Botanical Wreath Embroidery
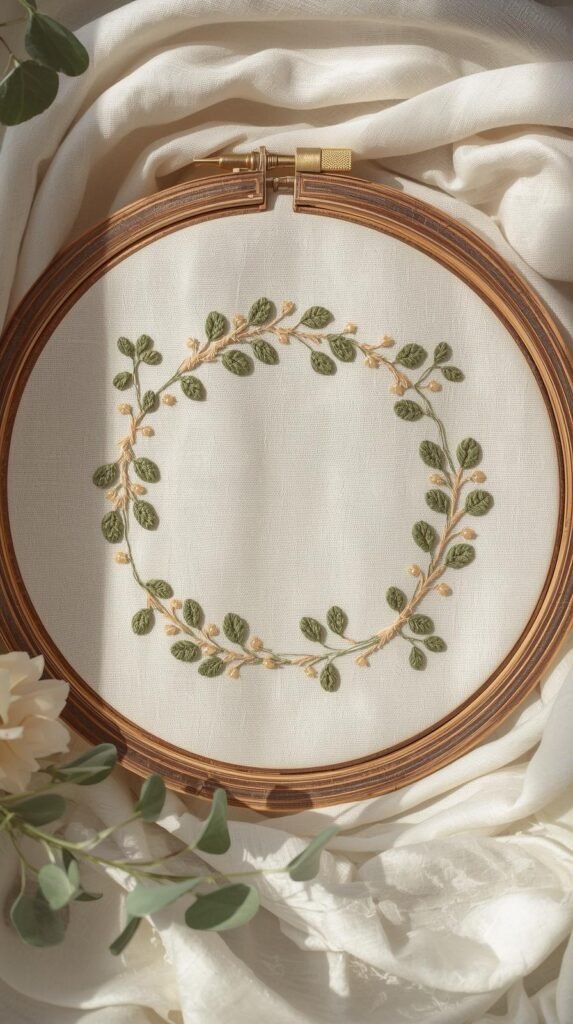
A tiny botanical wreath is one of those embroidery patterns that looks detailed but is surprisingly beginner-friendly. It’s built from simple repeated stitches, which makes it relaxing and easy to follow. This design feels especially beautiful on soft cotton or linen fabric with muted green tones and subtle floral accents. It’s classic, decorative, and perfect if you want your embroidery designs to feel a little more styled and complete.
A small wreath also works beautifully if you want to add a word or initial in the center later.
How to Create This Design
- Lightly draw a circle as your guide using a small bowl or tracing template.
- Stitch along the circle using a stem stitch to form the base outline.
- Add small leaves along the circle using lazy daisy stitches or simple satin stitch.
- Vary leaf direction slightly so the wreath feels natural and not rigid.
- Optional: add tiny French knots between leaves for subtle floral detail.
Keep the wreath airy by spacing elements evenly instead of filling every inch of the circle.
Shop the Look
- Green Embroidery Floss Set
- Cotton Embroidery Fabric
- 6 Inch Wooden Embroidery Hoop
- Water-Soluble Fabric Marker
9. Inspirational Word Script Embroidery
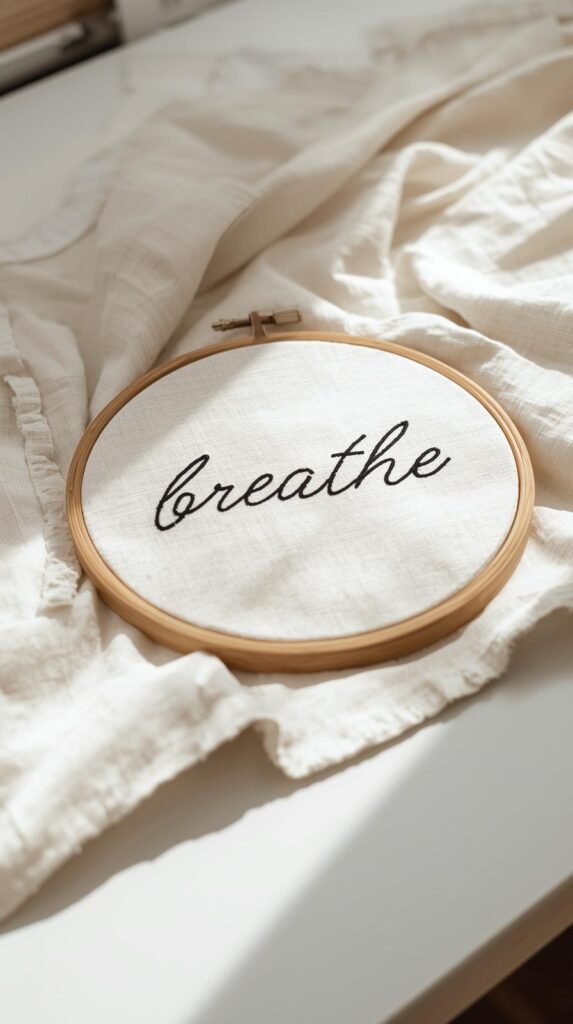
If you love embroidery ideas that feel personal and meaningful, stitching a single word is such a powerful option. Think “breathe,” “create,” “home,” or “calm.” This style of hand embroidery design is clean, modern, and incredibly beginner-friendly because it focuses on simple line work rather than complex embroidery patterns. On neutral linen with black, taupe, or dusty rose thread, it feels intentional and elevated.
It’s also one of the easiest ways to turn simple embroidery designs into decor that feels custom.
How to Create This Design
- Choose a short word and print it in a script or clean handwritten font.
- Transfer the word onto your fabric using transfer paper or a water-soluble pen.
- Secure the fabric tightly in your hoop so the surface stays smooth.
- Outline each letter using a backstitch or stem stitch for fluid lines.
- Go slowly around curves to keep your lettering crisp and consistent.
Keep the word centered with plenty of negative space around it for a modern finish.
Shop the Look
10. Crescent Moon Embroidery Design

If you want something a little dreamy but still beginner-friendly, a crescent moon is a beautiful choice. It’s simple, graphic, and looks stunning stitched in soft metallic gold, creamy ivory, or muted gray thread. This type of hand embroidery design works especially well on darker fabric like charcoal cotton or deep linen for contrast. It feels subtle and celestial without requiring complicated embroidery patterns.
It’s one of those simple embroidery designs that looks far more intricate than it actually is.
How to Create This Design
- Lightly draw a crescent moon shape by sketching a curved “C” and thickening one side.
- Outline the moon using a backstitch or split stitch to define the shape.
- Fill the crescent using satin stitch, keeping your stitches parallel and close together.
- For added texture, you can use long and short stitches instead of satin stitch.
- Optional: add tiny French knots around the moon for subtle stars.
Keep the curve smooth and avoid sharp angles to maintain a clean, polished look.
Shop the Look
11. Tiny Mushroom Embroidery Pattern

Tiny mushrooms are having a moment in the world of cute embroidery designs, and honestly, they’re perfect for beginners. The shapes are simple, slightly whimsical, and easy to break down into basic stitches. A rounded cap, a slim stem, and a few tiny dots are all you need. On soft cotton or natural linen, stitched in earthy tones like rust, cream, and muted brown, this hand embroidery design feels cozy and modern at the same time.
It’s one of those embroidery ideas that looks adorable alone or repeated in a small scattered pattern.
How to Create This Design
- Lightly draw a small rounded mushroom cap with a narrow stem underneath.
- Outline the entire shape using backstitch for clean edges.
- Fill the cap using satin stitch or long and short stitches for a soft texture.
- Fill the stem with simple vertical satin stitches.
- Add small French knots or tiny satin stitches on the cap for classic mushroom spots.
Keep the mushroom under 2 inches tall for a delicate, balanced look.
Shop the Look
- Earth Tone Embroidery Floss Set
- Natural Linen Fabric
- 6 Inch Wooden Embroidery Hoop
- Small Embroidery Scissors
12. Star Constellation Outline Embroidery
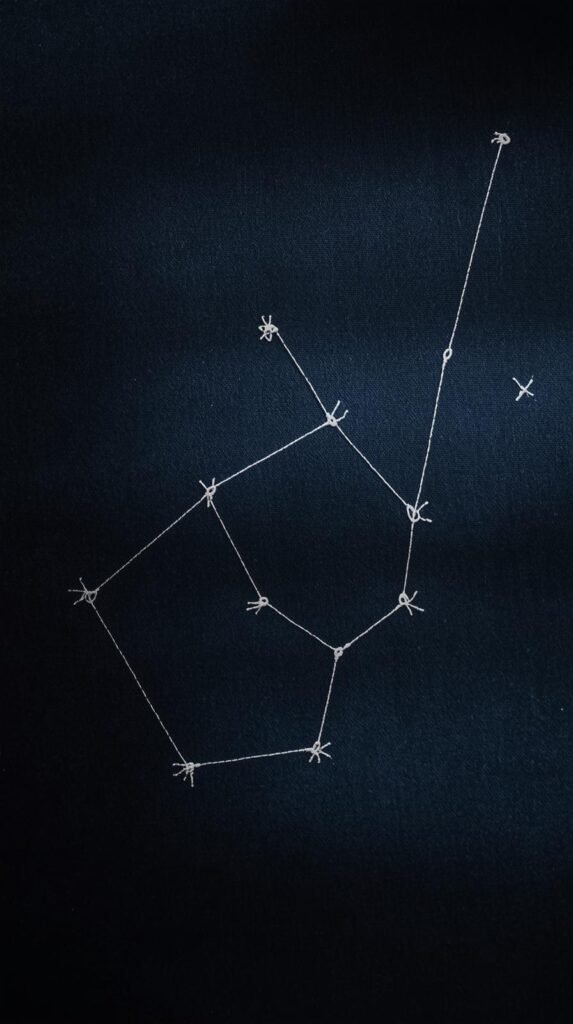
If you love minimalist embroidery designs with a little celestial energy, a star constellation outline is such a simple but striking choice. It’s clean, graphic, and perfect for practicing straight stitches and tiny detail work. On dark navy or charcoal fabric with white or metallic thread, this hand embroidery design feels modern and slightly moody. It’s subtle, elegant, and surprisingly easy to stitch.
This is one of those simple hand embroidery patterns that looks beautiful framed or layered into a gallery wall.
How to Create This Design
- Choose a simple constellation layout or create your own scattered star pattern.
- Lightly mark small dots where each star will be placed.
- Stitch each star using a small French knot or tiny cross stitch.
- Connect selected stars with straight stitches to form the constellation lines.
- Keep your connecting lines thin by using one or two strands of thread.
The key is spacing. Leave enough room between stars so the design feels airy and intentional.
Shop the Look
13. Polka Dot Fill Pattern Embroidery
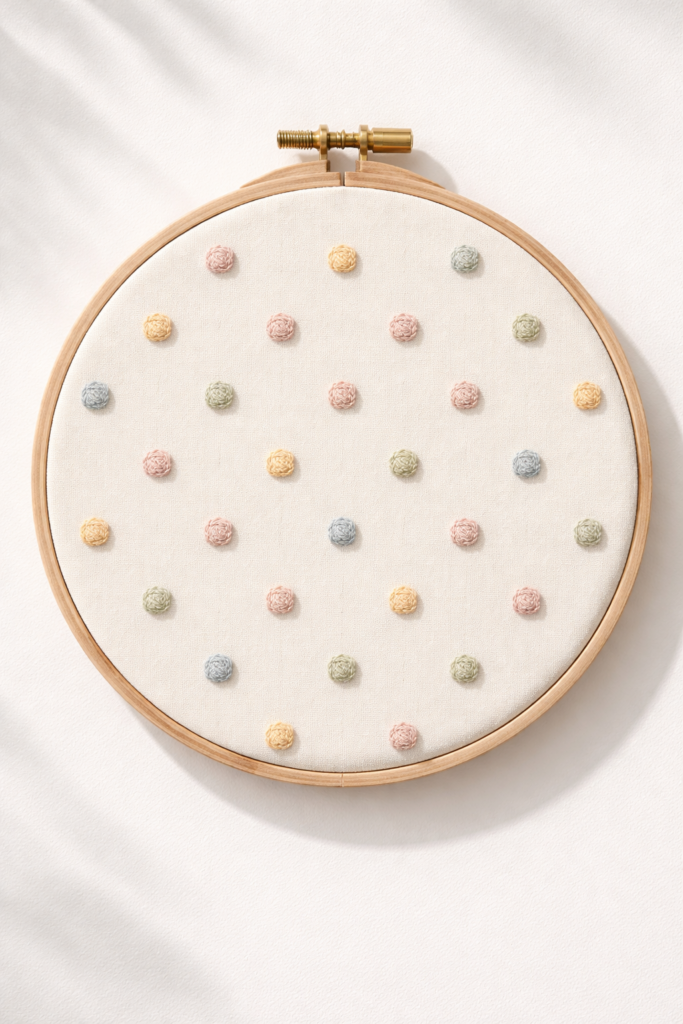
If you want to practice consistency without worrying about complicated shapes, a polka dot fill pattern is perfect. This is one of the most forgiving simple embroidery designs because it relies on repetition instead of precision outlining. Tiny stitched dots scattered evenly across fabric create a playful but clean look. On neutral cotton with soft blush, sage, or muted blue thread, it feels modern and understated.
It’s also a great background design if you want to layer another hand embroidery design on top later.
How to Create This Design
- Lightly mark evenly spaced dots across your fabric using a ruler for guidance.
- Stitch each dot using a French knot for a slightly raised texture.
- Keep your knots consistent in size by wrapping the thread the same number of times each time.
- Continue filling the area evenly, working row by row to maintain spacing.
- Step back occasionally to check balance and alignment.
You can fill the entire hoop or create a defined shape filled with dots for a more structured look.
Shop the Look
- Pastel Embroidery Floss Set
- Cotton Embroidery Fabric
- Embroidery Needle Set
- Fabric Ruler + Marking Pen
14. Minimal Mountain Outline Embroidery
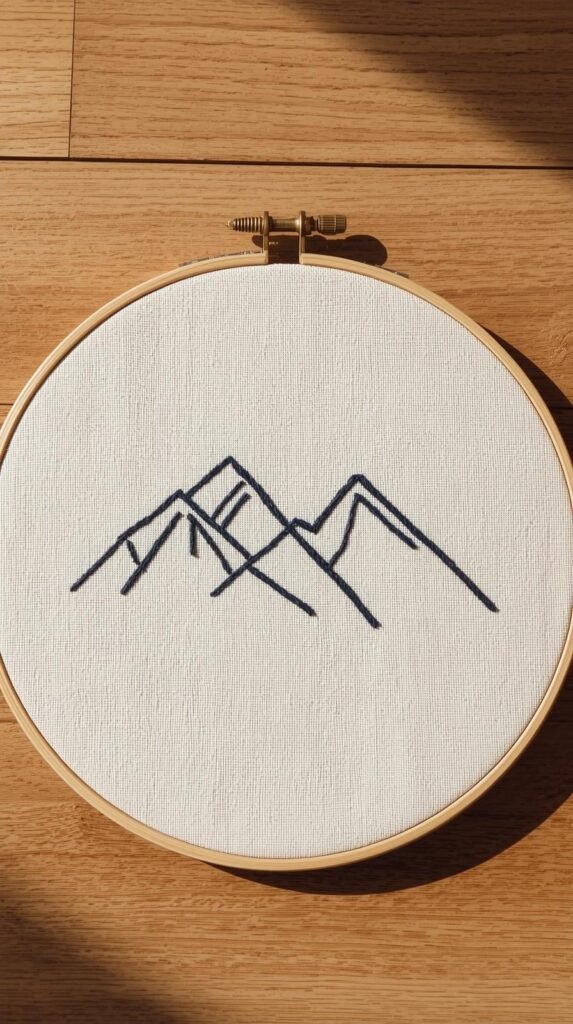
If you love clean, nature-inspired embroidery ideas, a minimal mountain outline is such a calming design to stitch. It’s built from simple angled lines and soft peaks, which makes it one of the most approachable simple embroidery designs for beginners. On neutral linen with charcoal, slate blue, or muted green thread, this hand embroidery design feels serene and modern. It’s subtle but still visually interesting.
This style works especially well if you like embroidery patterns that lean graphic and uncluttered.
How to Create This Design
- Lightly sketch two or three overlapping mountain peaks with simple triangular shapes.
- Outline each peak using backstitch or split stitch for crisp edges.
- Add a second stitched line inside one peak to suggest depth or layering.
- Keep the lines thin by using one or two strands of embroidery floss.
- Leave plenty of open space around the mountains to maintain a minimalist feel.
Focus on smooth, steady stitching so the peaks look clean and intentional.
Shop the Look
- Charcoal Embroidery Floss
- Neutral Linen Embroidery Fabric
- 6 Inch Wooden Embroidery Hoop
- Embroidery Needle Assortment
15. Small Bouquet Cluster Embroidery
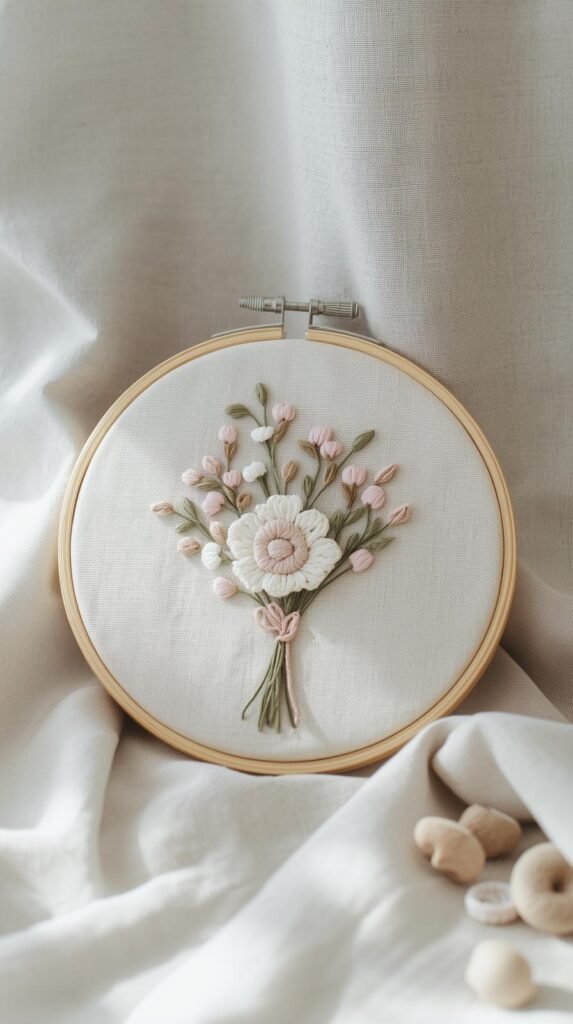
If you’re ready to combine everything you’ve practiced, a small bouquet cluster is the perfect final project. This design brings together simple florals, tiny leaves, and delicate stems into one balanced composition. It still counts as one of the best simple embroidery designs because each element is basic, you’re just layering them thoughtfully. On soft linen with muted blush, sage, cream, and dusty blue thread, this hand embroidery design feels polished and display-worthy.
It looks especially beautiful centered in a wooden hoop and styled on a shelf or gallery wall.
How to Create This Design
- Lightly sketch three small flowers clustered close together with short stems.
- Stitch the stems using stem stitch to create a soft, flowing base.
- Add petals using lazy daisy stitches or simple satin stitch.
- Fill flower centers with French knots for texture.
- Add small leaves around the cluster to complete the bouquet shape.
Keep the cluster compact and allow open space around it so the design feels intentional rather than crowded.
Shop the Look
- Muted Floral Embroidery Floss Set
- Natural Linen Embroidery Fabric
- 6 Inch Embroidery Hoop
- Embroidery Starter Tool Kit
The best part about starting with simple embroidery designs is realizing how quickly you can create something beautiful with just a few stitches. You do not need complicated embroidery patterns or expensive tools to get started. A basic hoop, quality thread, and a little patience are more than enough to bring these hand embroidery designs to life.
If you’re brand new and want a full walkthrough of supplies, stitches, and setup, make sure to read How to Start Embroidery from Scratch: A Complete Beginner Tutorial next. It breaks everything down step by step so you can move from beginner to confident stitcher without feeling overwhelmed.
Save this list, pick one design, and start stitching today.

