This post contains affiliate links. If you purchase through my links, I may earn a small commission at no extra cost to you. Thank you for supporting Room Revival Studio!
A plain concrete slab is one thing. A paver patio is something else entirely. Pavers give you texture, color variation, pattern options, and a finished look that reads instantly as designed. The problem is most people don’t realize how many ways there are to use them, or how different one paver patio can look from another.
These 12 ideas run the range from DIY weekend installs to full backyard transformations. Some are about the paver material itself. Some are about the pattern, the border, or the way you style around it. All of them work harder than a plain slab ever could.
Whether you’re starting from scratch or layering over something existing, there’s an idea here worth stealing.
1. Go Herringbone for Maximum Visual Impact
Herringbone is the paver pattern that makes a patio look like it was professionally designed regardless of budget. The interlocking V-shape draws the eye across the surface and adds movement to what would otherwise be a flat, static plane. It works best with rectangular pavers, standard brick-sized concrete or clay pavers are the classic choice. The key detail is the angle: a true 45-degree diagonal herringbone feels more dynamic than a straight-axis layout. Going diagonal also helps disguise edges that aren’t perfectly square, which is real life on most patios. One thing to know: herringbone requires more cuts than running bond or stack patterns, especially at the borders. Budget extra time and a few more pavers to account for edge pieces.
Shop the Look
2. Mix Two Paver Sizes for a European Courtyard Look
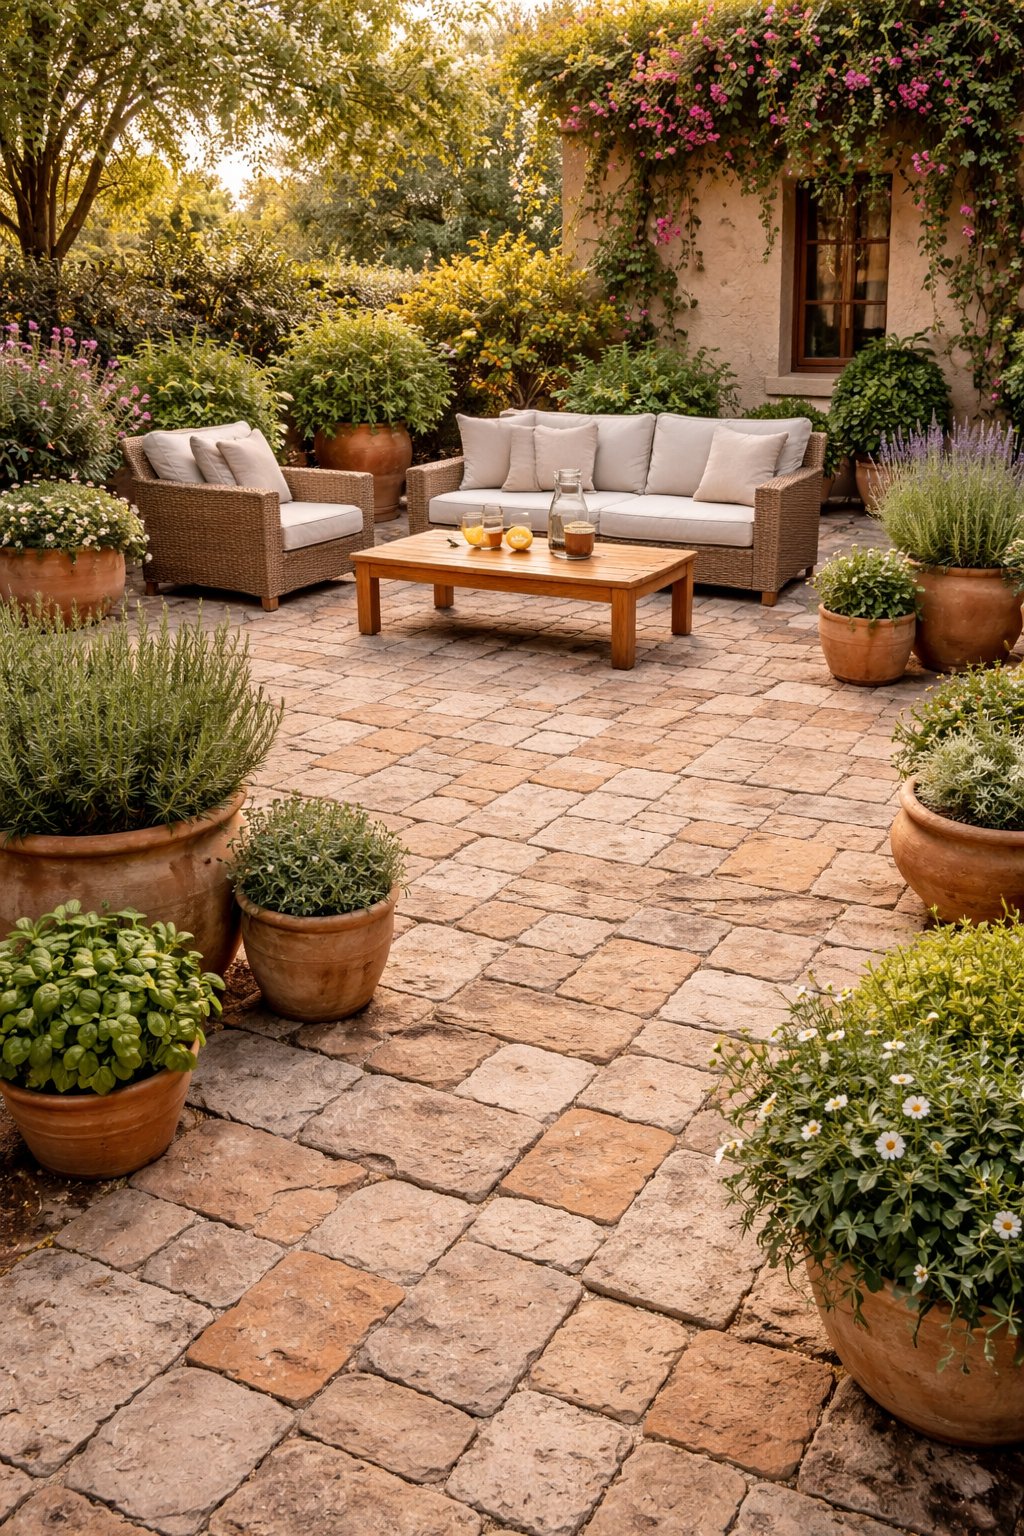
Mixing two paver sizes in the same surface creates the kind of irregular, time-worn look you see in European city squares and Italian villa courtyards. It reads expensive because it is more labor-intensive, but the visual payoff is enormous. The classic combo is a large square paver with smaller square infill pieces grouped in the joints, or a large rectangular slab surrounded by smaller square cuts. Stick to two tones maximum: a warm cream or buff paired with a darker charcoal or slate grey works in almost every outdoor context. The variation in size and tone means no two sections of the patio look identical, which is exactly what gives it that high-design feel. One thing to know: mixing sizes requires more planning upfront. Sketch the layout on paper before you start cutting anything.
Shop the Look
3. Use Flagstone Pavers for an Organic, Natural Feel
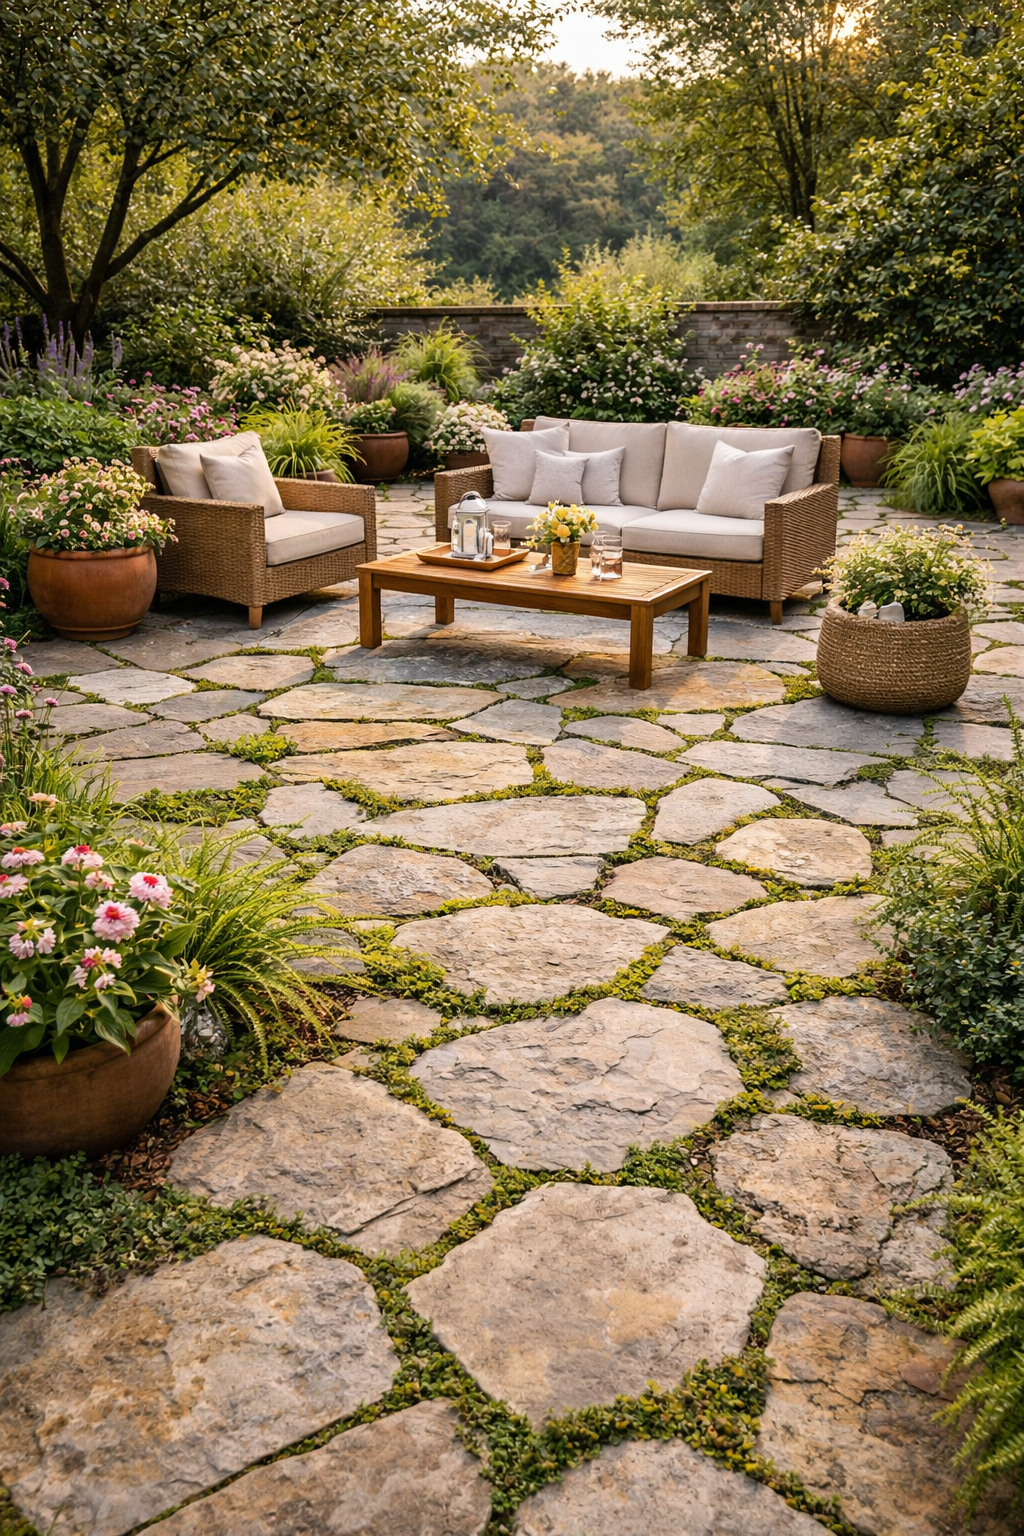
Flagstone pavers have irregular shapes and natural surface variation that no manufactured product can replicate. Laid in a random pattern with planting gaps between, they create a garden-integrated patio that looks like it grew from the ground rather than being placed on it. Creeping thyme, moss, or dymondia are the best gap fillers: they stay low, spread slowly, and add fragrance and softness to the surface. Natural flagstone options include bluestone, limestone, slate, and sandstone, each with a different color range and texture. Cast concrete flagstone lookalikes are significantly cheaper and easier to transport, and from a distance the effect is nearly identical. One thing to know: flagstone on sand allows for some movement with freeze-thaw cycles, which is actually a feature. Rigid mortar joints on flagstone can crack over time as the ground shifts.
Shop the Look
- Concrete Flagstone Pavers Natural Look
- Creeping Thyme Ground Cover Seeds
- Paver Base Panel for Leveling
4. Add a Contrasting Border for a Finished Edge
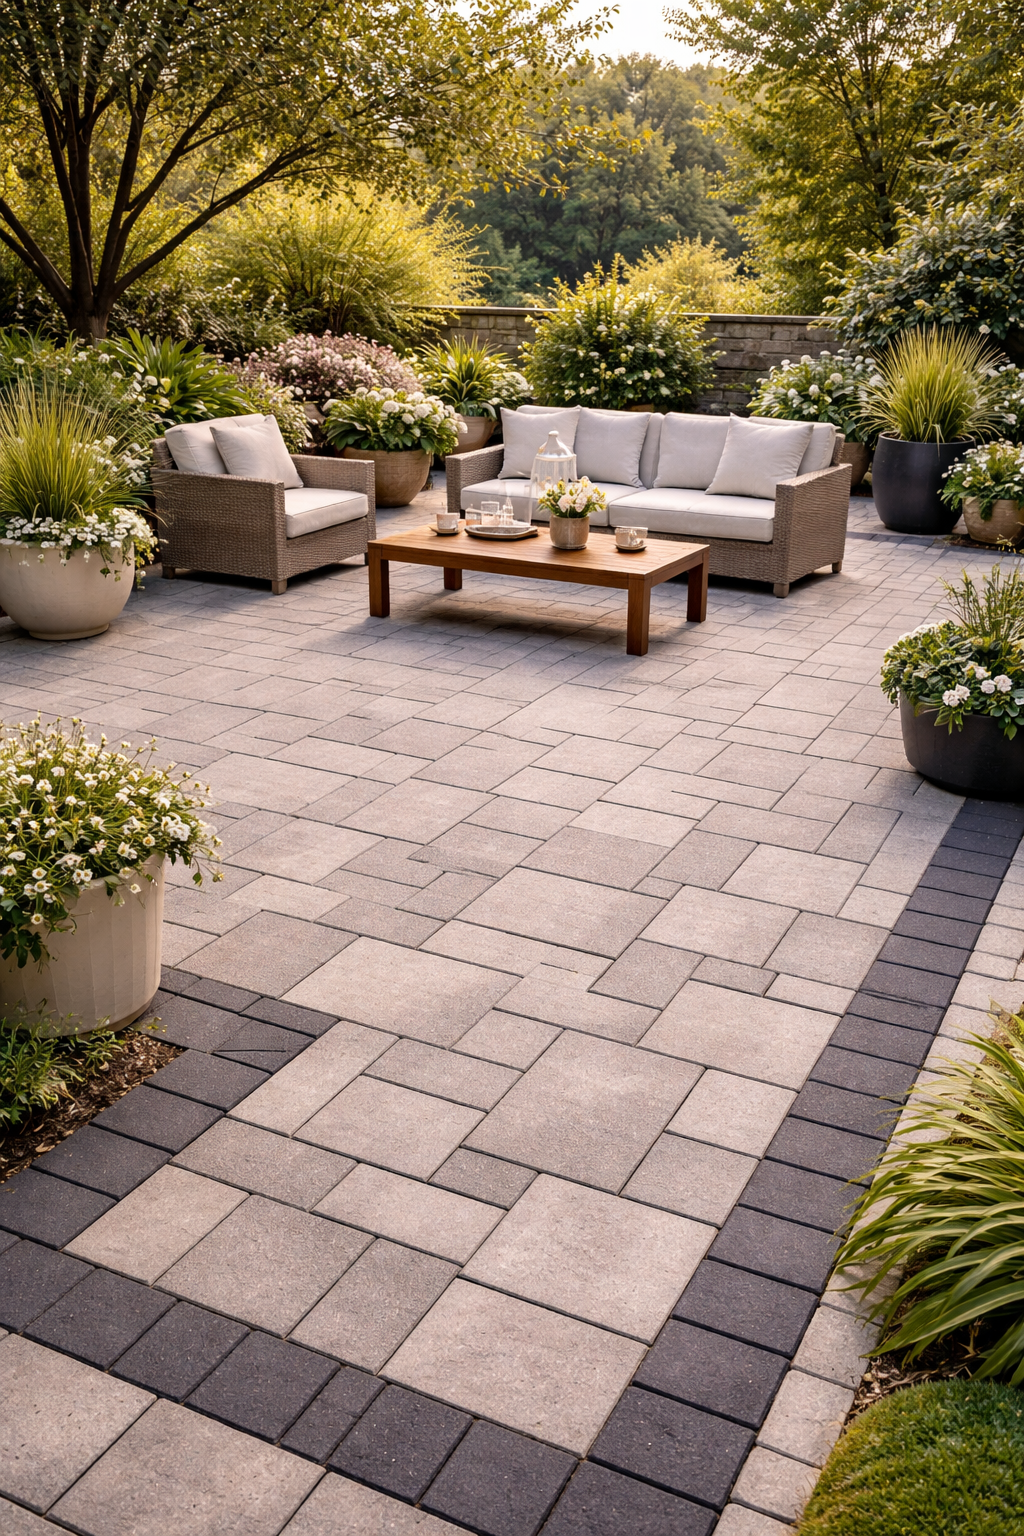
A border transforms a paver patio from a surface into a room. Running a single row of contrasting pavers around the perimeter, darker pavers framing a lighter field, or a different size laid in a soldier course, gives the patio a deliberate edge that reads like trim on a well-dressed room. It also solves the practical problem of what to do with partial pavers at the edges: a defined border means your field pattern can stop cleanly rather than trailing off into awkward cut pieces. The most classic combination is a charcoal or dark grey border around a buff or light grey field. For a more modern look, try a concrete edge restraint with a thin line of narrow pavers creating a sleek perimeter band. One thing to know: install the border first, then lay the field inward from it. This keeps your pattern centered and your cuts at the border where they’re least visible.
Shop the Look
5. Try Grass Pavers for a Green-Infused Surface
Open-grid grass pavers with green grass growing through the cells creating a lush textured surface, garden setting, sunlight, photorealistic, editorial home decor photography, highly detailed, magazine-quality styling, beautiful natural light, intentional composition –style raw –v 6 –ar 9:16
Alt Text: Open-grid grass pavers with green grass growing through the cells creating a lush green textured patio surface
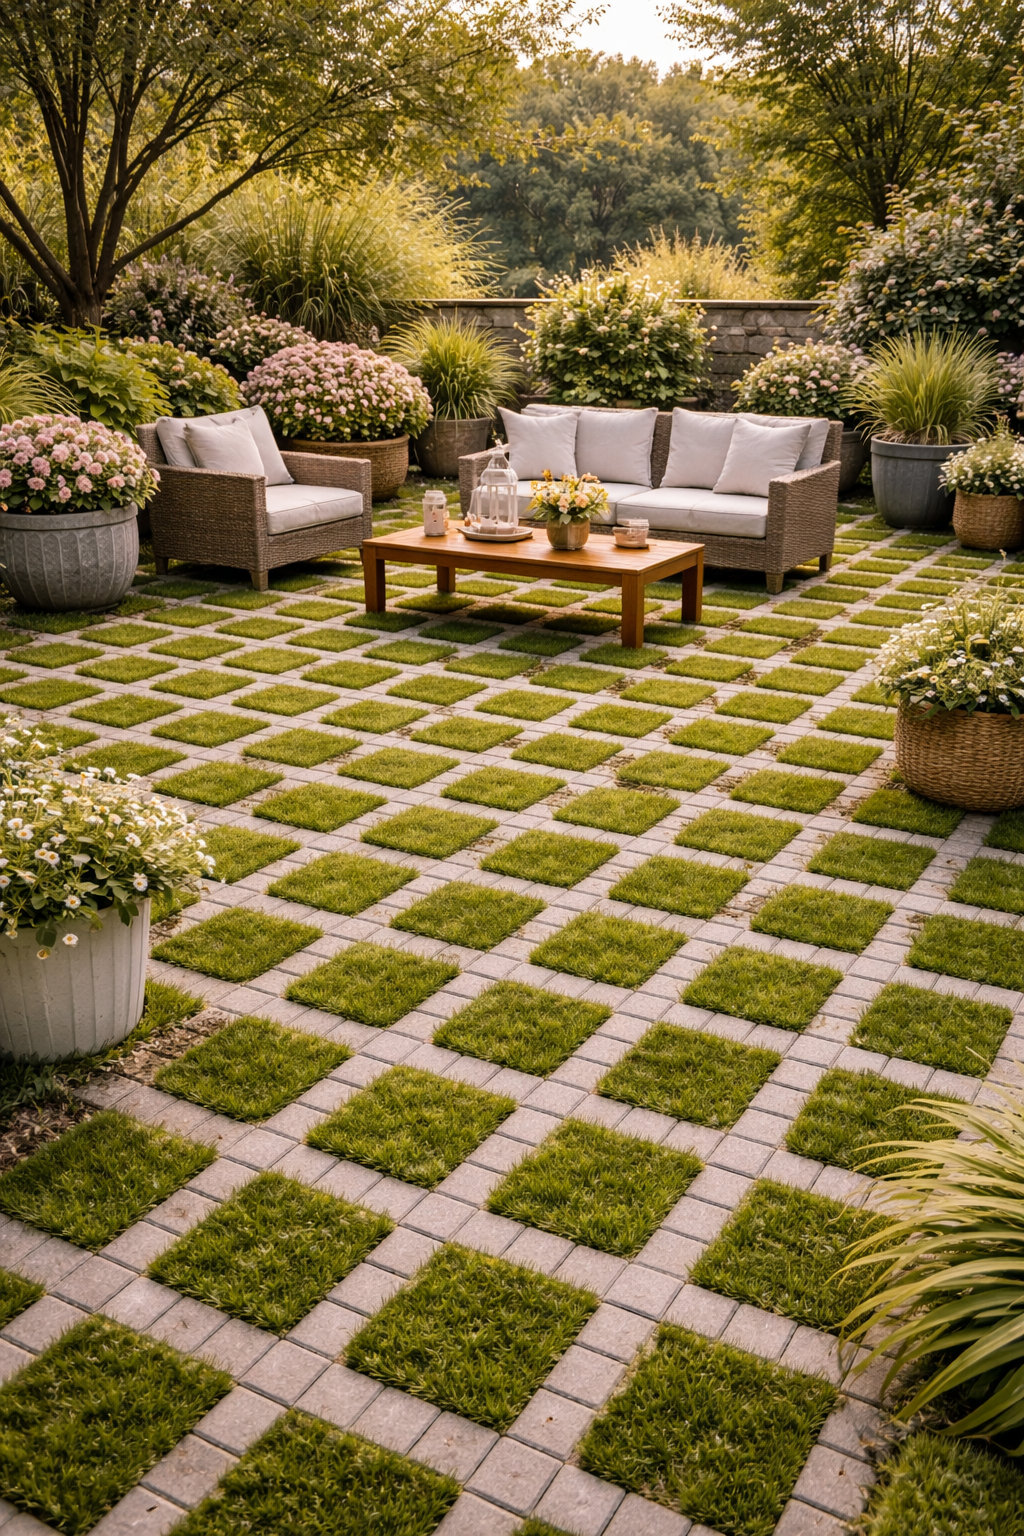
Grass pavers are the option that looks impossibly lush while still functioning as a stable hardscape. The open-grid design, either plastic lattice or concrete with large open cells, lets grass grow up through the structure. The result is a surface that’s firm enough to walk and sit on but looks like a patchwork of green and stone rather than a traditional paved patio. It works best in areas with moderate foot traffic and decent sunlight, because the grass in the cells still needs to grow. Plastic grass pavers are the most DIY-friendly: they interlock, sit on compacted base material, and tolerate a lot of abuse. Concrete open-cell pavers are heavier and more permanent but have a cleaner, more finished look. One thing to know: grass pavers need the same watering and fertilizing attention as a lawn. The cells dry out faster than open ground, so factor that into your maintenance routine.
Shop the Look
6. Create a Circular Paver Feature in the Center
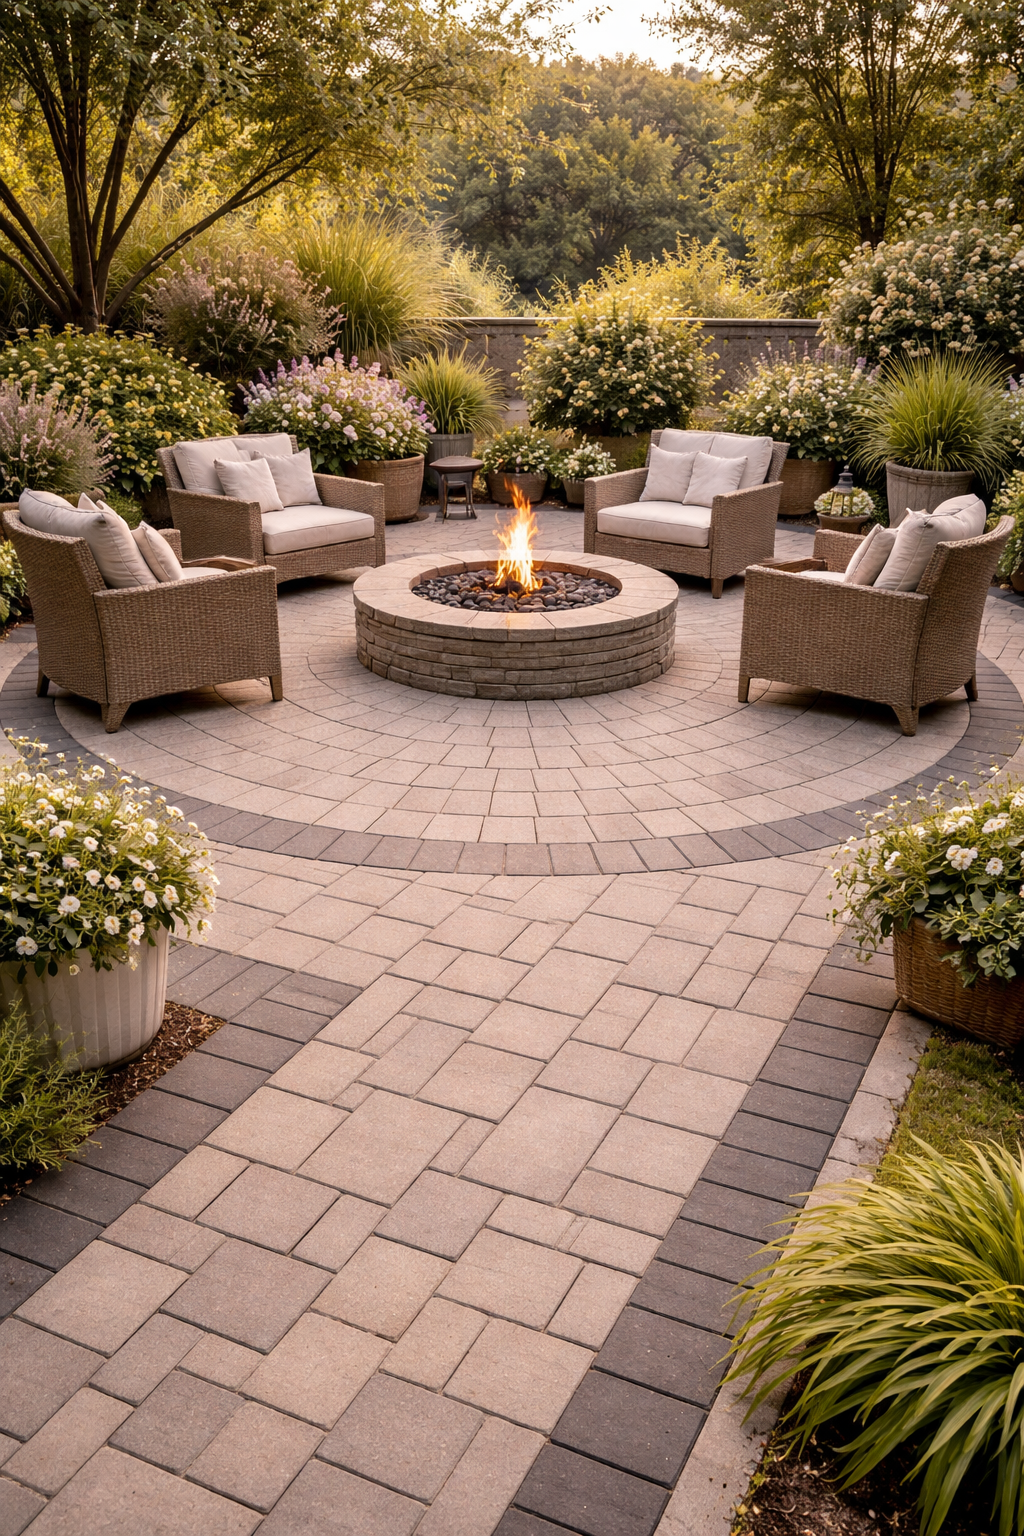
A circular paver insert at the center of a rectangular patio breaks up the geometry and creates a natural focal point. Radial kits, where tapered wedge-shaped pavers fan out from a center keystone, are available at most home improvement stores and designed specifically to be installed by a motivated DIYer over a weekend. Place a fire pit, a water feature, or a large planter at the center of the circle to anchor the design and give the radial pattern a reason to exist. The contrast between the curved radial section and the straight field pavers surrounding it is what makes the patio feel architectural rather than just assembled. One thing to know: the spacing between wedge-shaped pavers gets wider as you move outward from the center. Fill the joints with polymeric sand and set it with water so the gaps stay packed and don’t creep over time.
Shop the Look
7. Use Tumbled Pavers for a Rustic, Old-World Look
Tumbled pavers look like they’ve been underfoot for a hundred years, and that’s the entire point. The tumbling process rounds the edges, roughens the face, and creates a worn, irregular texture that reads as old-world and artisanal rather than freshly manufactured. Tumbled travertine, tumbled marble, and tumbled concrete pavers all work beautifully in cottage, Mediterranean, and French country settings. They pair well with terracotta planters, weathered iron furniture, and trailing plants spilling over the edges. Because the edges aren’t crisp, slight variations in level between pavers are barely noticeable, which makes DIY installation more forgiving. One thing to know: tumbled natural stone pavers need sealing annually to prevent staining. A good penetrating stone sealer takes about 30 minutes to apply and protects the surface without changing the look or feel underfoot.
Shop the Look
8. Combine Pavers and Gravel for a Low-Maintenance Design
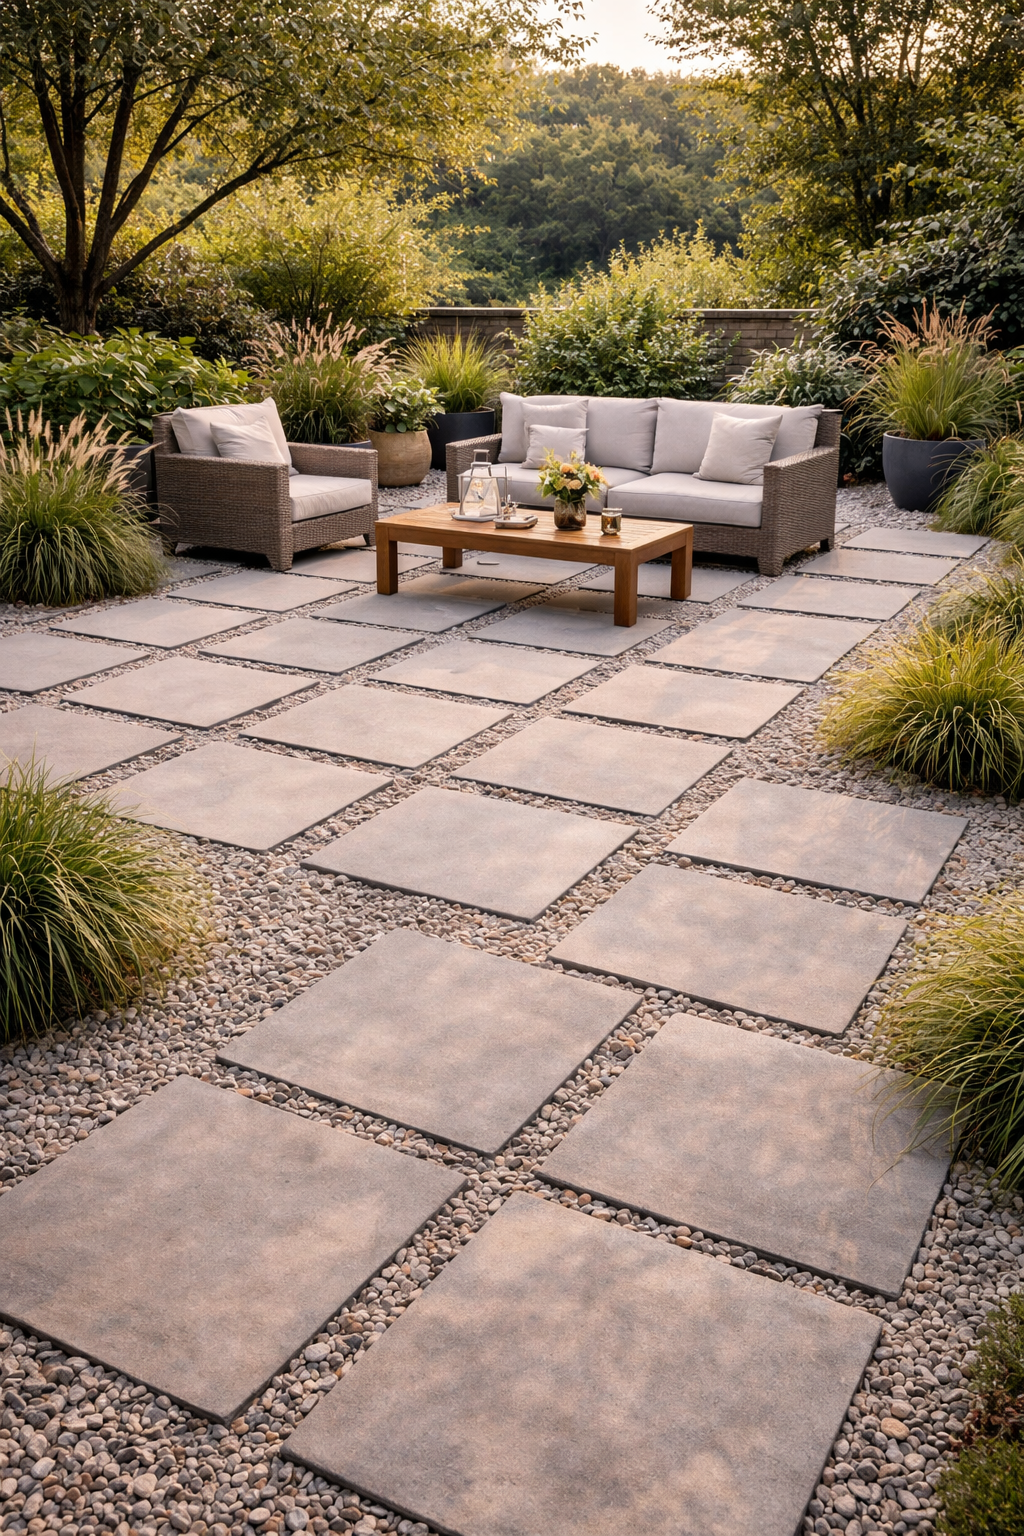
A paver-and-gravel combination is one of the most low-maintenance patio surfaces you can create, and it’s also one of the most design-forward. Large square or rectangular pavers set into a field of decorative gravel look intentional and modern with minimal materials. The gravel fills the gaps, handles drainage naturally, and keeps weeds in check when laid over a quality landscape fabric. Decomposed granite gives a warm, sandy tone that pairs beautifully with concrete pavers. White or grey river rock reads more contemporary and works well in modern or Japandi-inspired spaces. Leave the gravel loose between and around the pavers so it can shift and settle, but define the patio boundary with steel or aluminum edging to keep everything contained. One thing to know: gravel requires topping up every few years as it compacts and displaces over time. Keep a small surplus bag for touch-ups.
Shop the Look
- Decorative White Gravel for Patio
- Heavy-Duty Landscape Fabric Weed Barrier
- Steel Metal Lawn Edging Border
9. Go Bold with a Basket-Weave Pattern
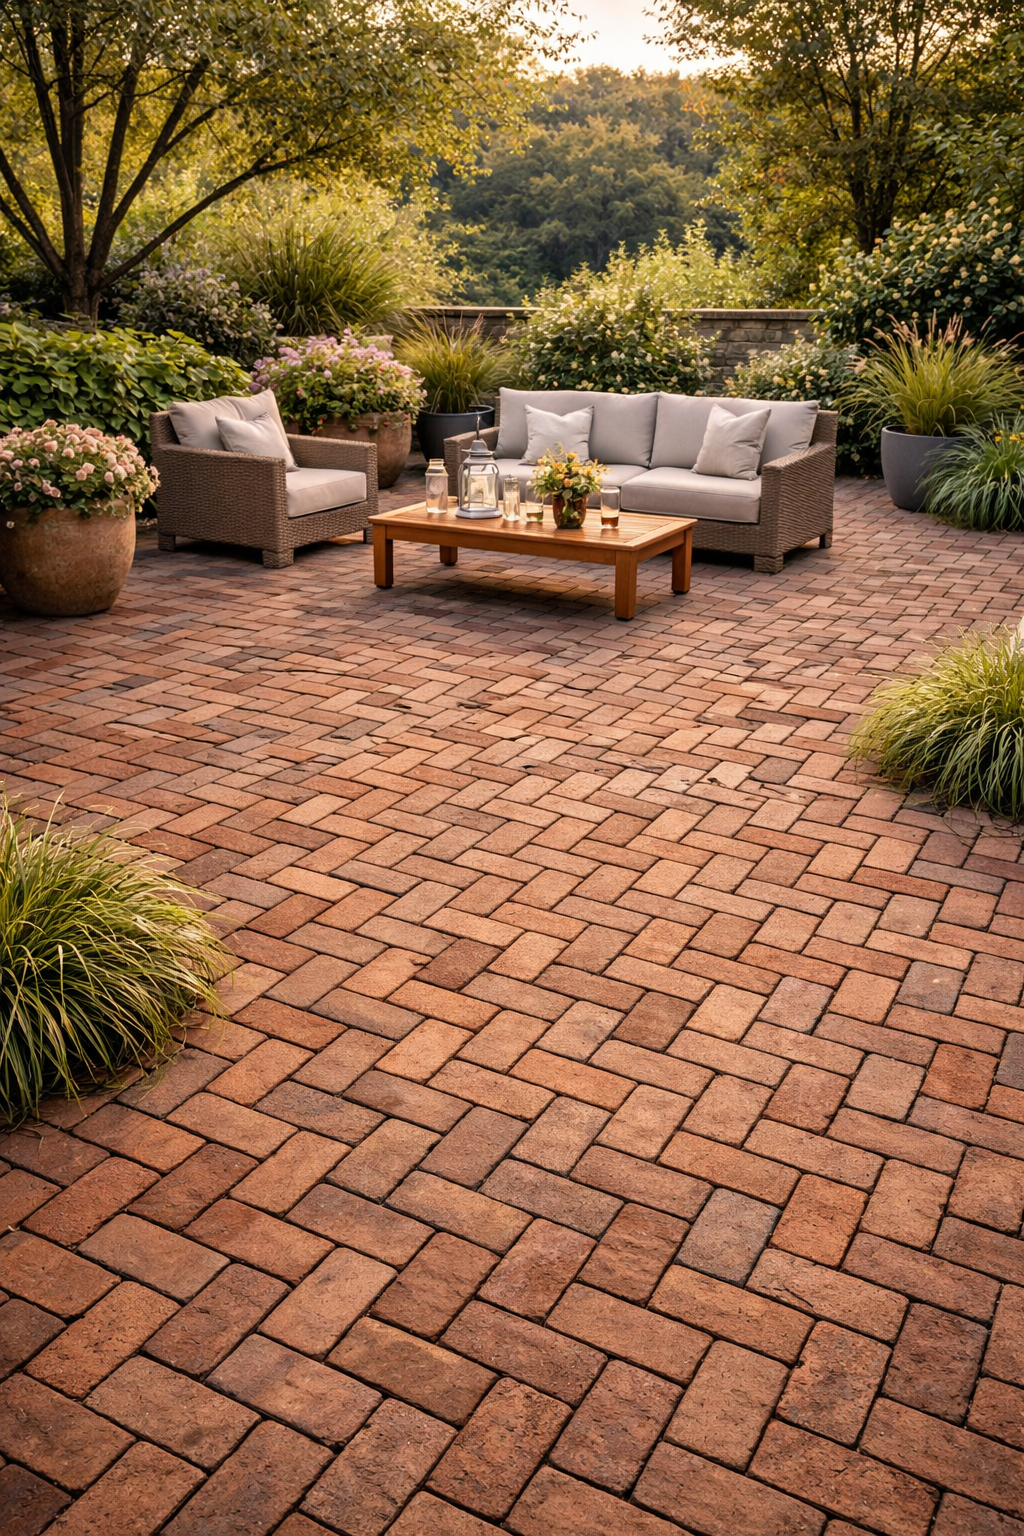
The basket-weave pattern is made by alternating pairs of rectangular pavers, two vertical, two horizontal, in a repeating square grid. The result looks exactly like woven fabric rendered in stone, and it gives a patio surface a richness and rhythm that running bond or stack patterns can’t match. It’s one of the oldest brick-laying patterns and one of the most satisfying because the repeat unit is so clear and satisfying. Traditional red or buff-toned brick pavers read classic and warm. Using the same basket-weave pattern in cool grey concrete pavers makes the design feel more contemporary. One thing to know: basket-weave works best with square or near-square pavers. If your pavers aren’t exactly twice as long as they are wide, the pattern won’t tile correctly. Check your dimensions before you buy.
Shop the Look
10. Use Travertine Pavers for a Pool or Luxury Patio Look

Travertine pavers are the gold standard for outdoor luxury surfaces, and they’re more accessible than most people think. The ivory, walnut, noce, and classic travertine color options suit everything from Tuscan warm to modern Mediterranean. The surface stays cooler than concrete or porcelain in direct sunlight, which is a genuine practical advantage in hot climates. Travertine is also slip-resistant when tumbled or brushed, making it ideal for areas near water. The natural variation in each tile means no two pieces are identical, which gives the finished surface an organic richness that manufactured materials can’t replicate. One thing to know: travertine is porous and needs sealing before use and annually after. Don’t skip the sealer. Oil, food, and moisture will penetrate and stain unsealed travertine quickly, and some stains are very hard to remove.
Shop the Look
- Tumbled Ivory Travertine Paver
- Natural Stone Sealer for Travertine
- Luxury Outdoor Patio Furniture Set
11. Lay Stepping Paver Strips Through a Lawn
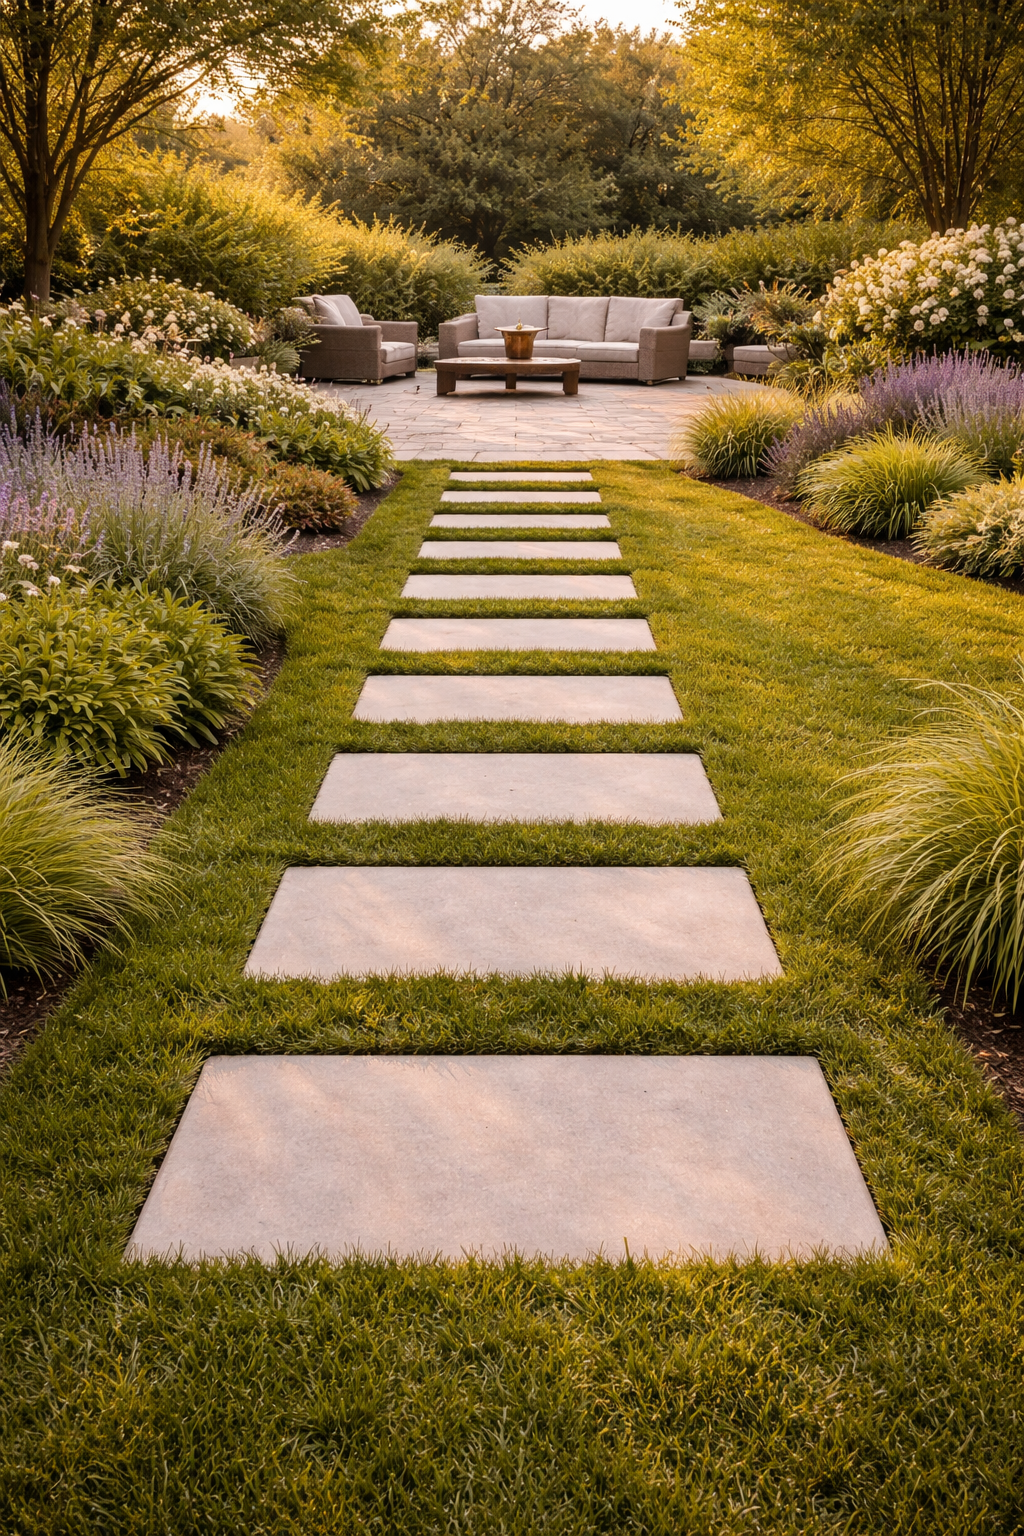
You don’t have to pave the entire outdoor area to get the look. A series of rectangular pavers set flush into the lawn creates a clean pathway that connects zones of the yard and frames the patio as a destination rather than just a slab at the back door. Set the pavers flush with the soil surface so a lawn mower can pass over them without damage. Spacing matters: gap them at a natural walking stride so movement feels effortless rather than like a hopscotch course. Large format pavers (18×24 or 24×24) look the most design-forward and disappear into the grass at a distance in the best possible way. This approach works particularly well for connecting a back door to a patio, a patio to a garden shed, or two outdoor zones that currently feel disconnected. One thing to know: pavers set in lawn need to be checked annually and releveled as the ground shifts seasonally.
Shop the Look
- Large Concrete Stepping Stone 24×24
- Rectangular Stepping Stone Paver Set
- Paver Base Sand for Leveling
12. Add Lighting Between Pavers for Nighttime Drama
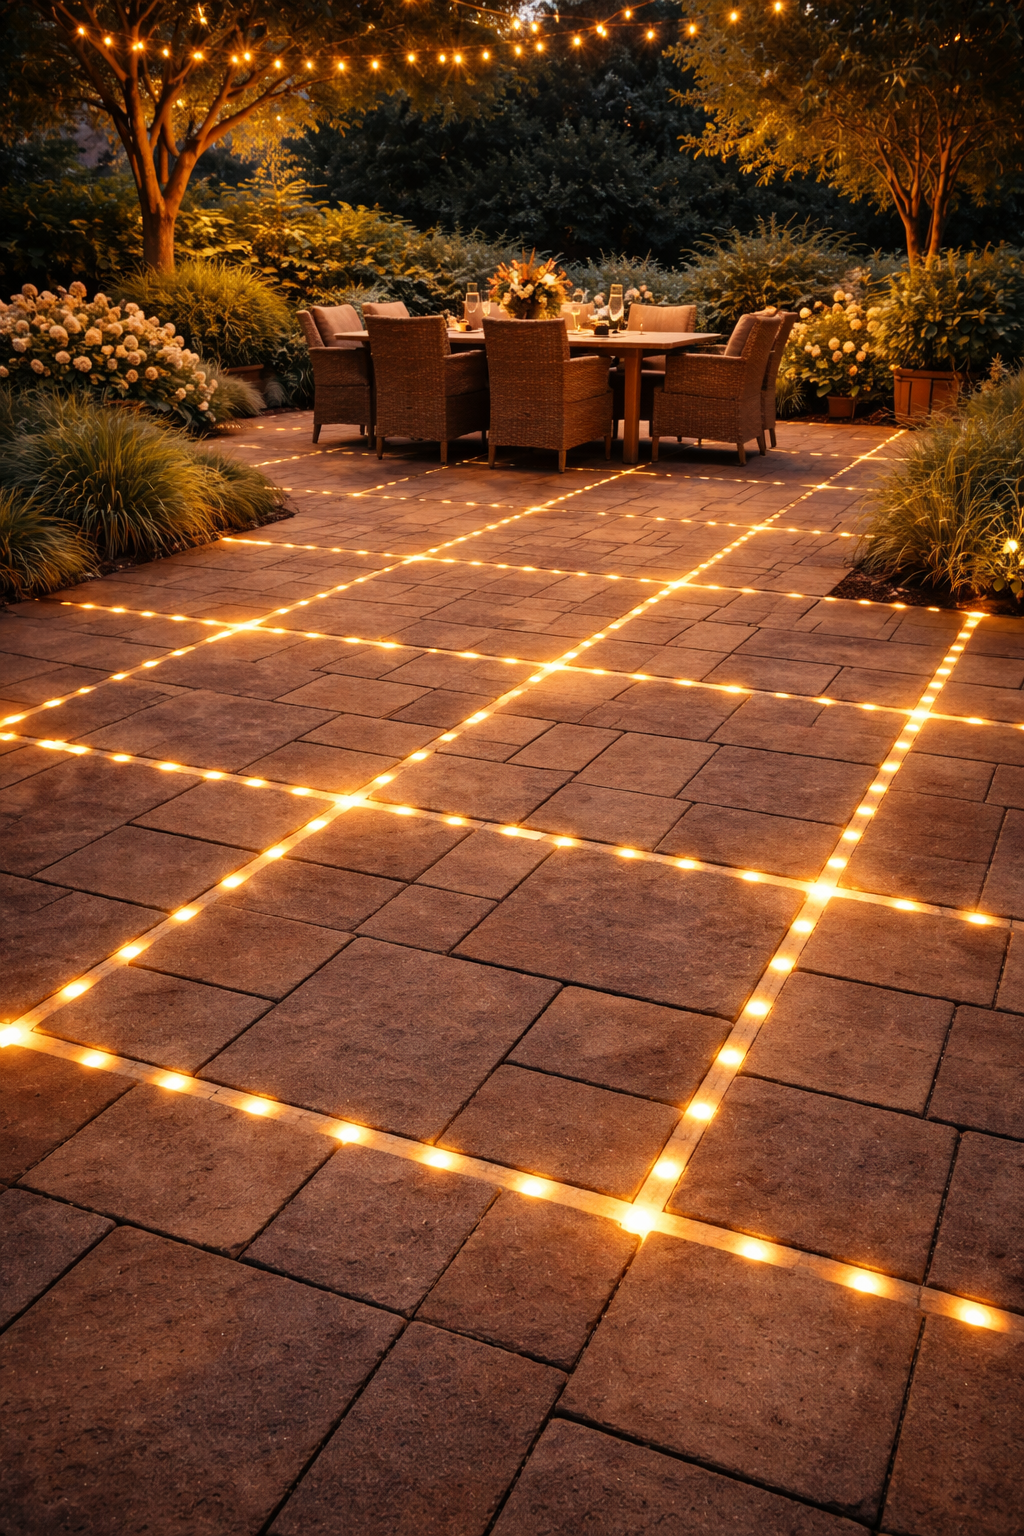
In-ground LED lights recessed between pavers turn an ordinary patio into something that looks completely different after dark. The glowing grid pattern created by low-profile paver lights is one of the most dramatic outdoor lighting effects available, and it’s achievable without a licensed electrician if you use solar or low-voltage options. Recessed paver lights sit flush with the surface and are designed to support foot traffic. Solar versions charge during the day and activate automatically at dusk. Low-voltage systems require a transformer but give you more control over brightness and scheduling. Place them along pathways, at the perimeter of the patio, or in a grid pattern across the entire surface for maximum effect. One thing to know: install paver lights before you set the polymeric sand. Getting them level and flush is much easier before the joints are locked in.
Shop the Look
- Recessed Solar Paver Lights
- Low-Voltage In-Ground LED Paver Light
- Outdoor Low-Voltage Lighting Transformer
Your Patio. Your Pattern.
Twelve ideas, one goal: a patio that looks like you actually meant it. The paver you choose and the pattern you lay it in are the foundation, everything else is just styling around something that already works.
Pick the one that fits your space, your climate, and your aesthetic. Then start there. The pattern is what makes it a patio worth spending time on.
Want to keep going? Check out our guide to outdoor patio decor ideas that work on any paved surface.