Affiliate Disclosure – This post contains affiliate links. If you purchase through my links, I may earn a small commission at no extra cost to you.
If your frames feel flat, generic, or straight from the clearance aisle, it’s not the art. It’s the mat.
A decorative mat board is the fastest way to upgrade picture matting without spending custom-framing money. And once you start experimenting with fabric, texture, and layered detail, your walls instantly feel curated instead of store-bought.
Today I’m showing you exactly how to transform basic picture matting into something that looks custom, elevated, and completely intentional.
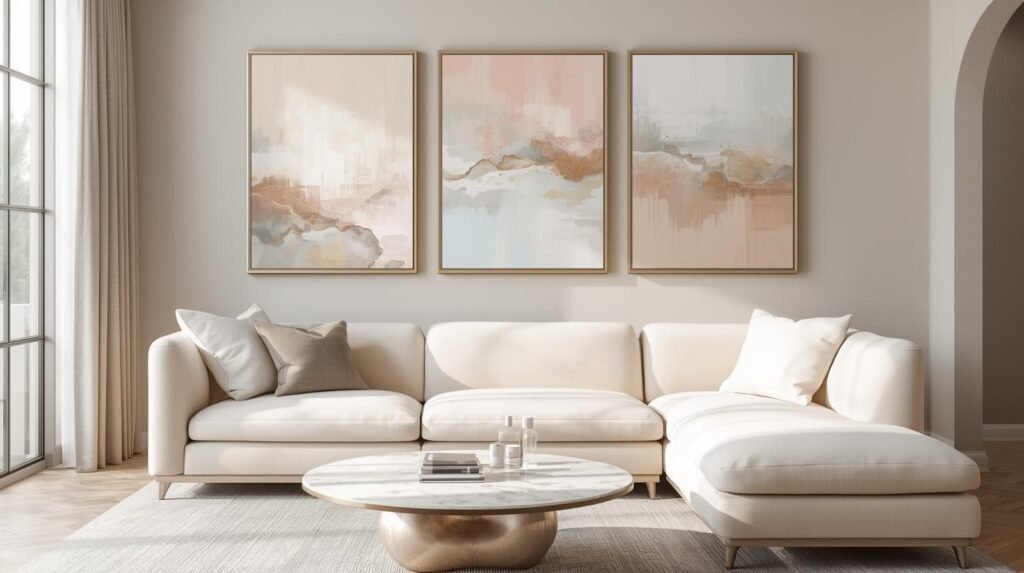
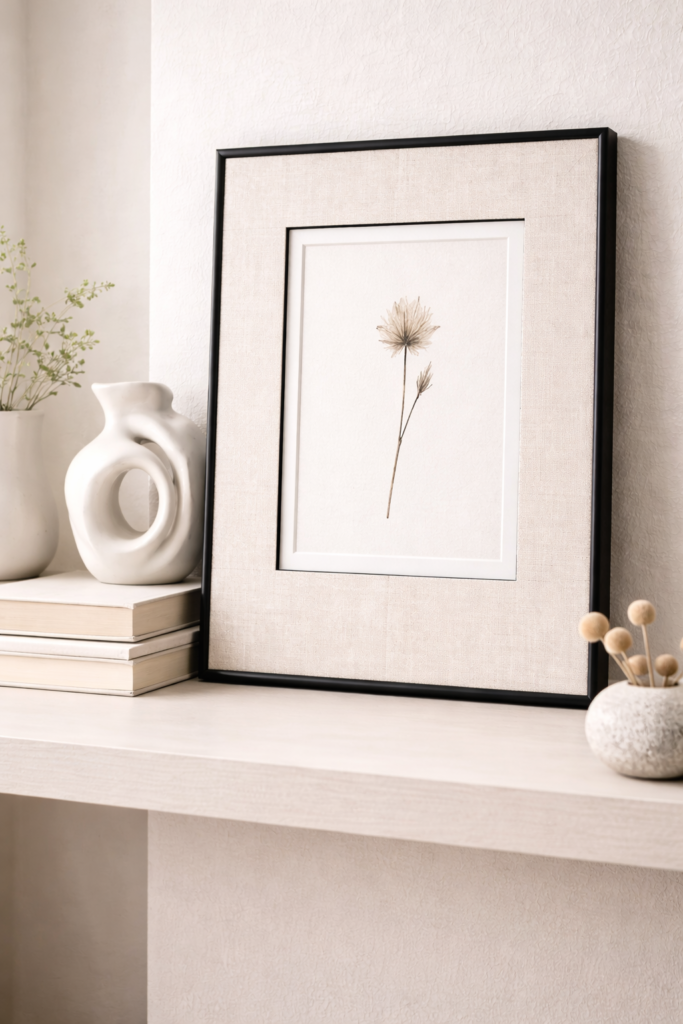
1. Linen-Wrapped Neutral Mat Board
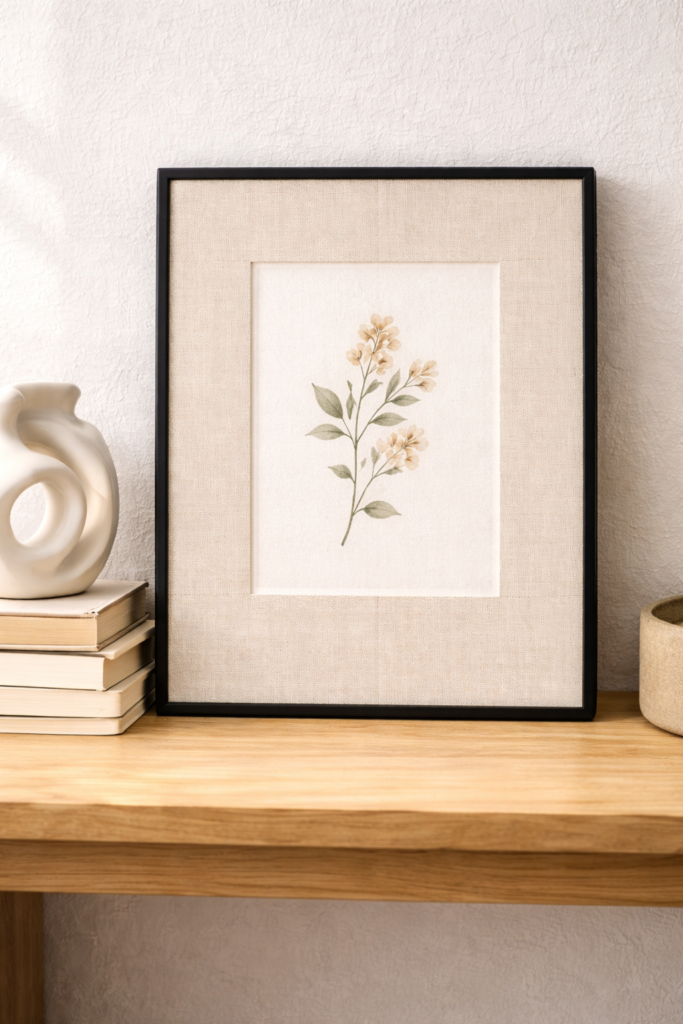
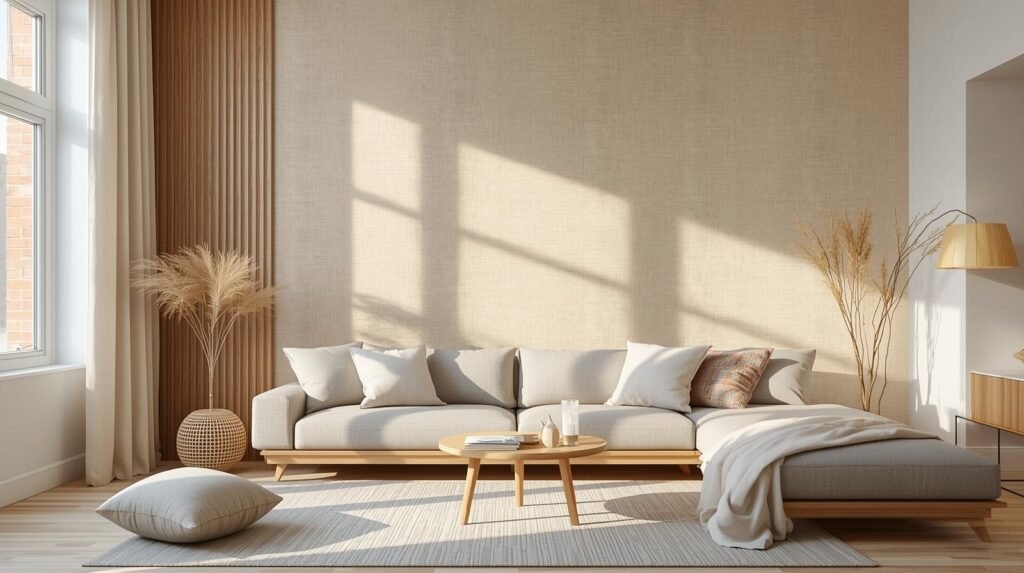
If you want your art to look expensive without screaming for attention, start here. A linen-wrapped DIY fabric mat board in soft oat, ivory, or warm beige adds depth that plain white picture matting just cannot compete with. The subtle weave catches light beautifully and gives even simple artwork a tailored finish.
The texture does the talking while the color stays calm and versatile. It’s quiet luxury in mat form.
How to Make It (Step-by-Step)
- Cut lightweight linen slightly larger than your mat board opening.
- Apply an even layer of archival spray adhesive to the front of the mat.
- Smooth fabric from center outward using a brayer or flat card.
- Flip the mat and carefully trim the inner window with a sharp precision knife.
- Wrap excess fabric around the back and secure cleanly.
When you’re matting pictures DIY, precision is everything. Clean edges are what make this look professional.
Shop the Look
2. Striped Fabric Mat Board (Tailored & Bold)
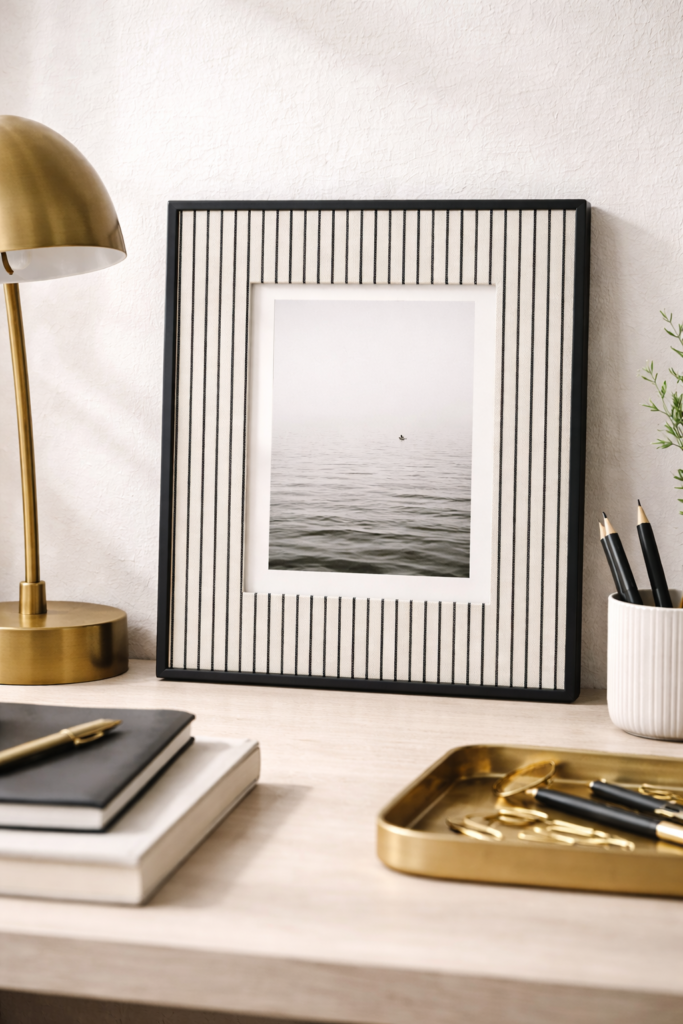
If you want your picture matting to feel instantly custom, a striped fabric mat board is the move. It feels structured, graphic, and intentional without overpowering the artwork. Thin pinstripes give a subtle tailored look, while wider stripes create more visual drama.
Stripes create direction. Vertical stripes elongate the art visually, while horizontal stripes feel balanced and editorial. When you’re exploring Picture Matting Ideas DIY, this is one of the easiest upgrades with the biggest payoff.
How to Make It (Step-by-Step)
- Choose a cotton or linen striped fabric with a tight weave.
- Measure carefully to ensure stripes will align evenly around the window opening.
- Apply archival spray adhesive to the mat board surface.
- Lay fabric down slowly, making sure stripes stay straight.
- Smooth outward from the center to avoid shifting.
- Flip and trim the inner window with a sharp blade, following stripe lines for precision.
- Wrap excess fabric neatly around the back.
Clean alignment is everything here. Crooked stripes instantly look homemade. Straight stripes look professionally framed.
This version of a Fabric Frame Mat feels polished and confident. It works in modern, preppy, coastal, and even transitional interiors.
Shop the Look
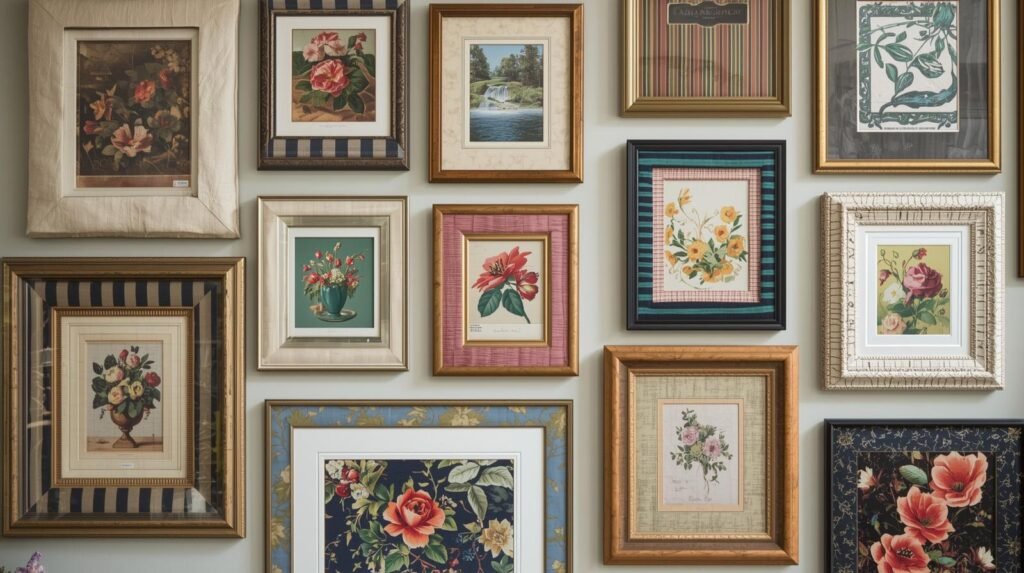
3. Floral Mat Board (Soft but Statement-Making)
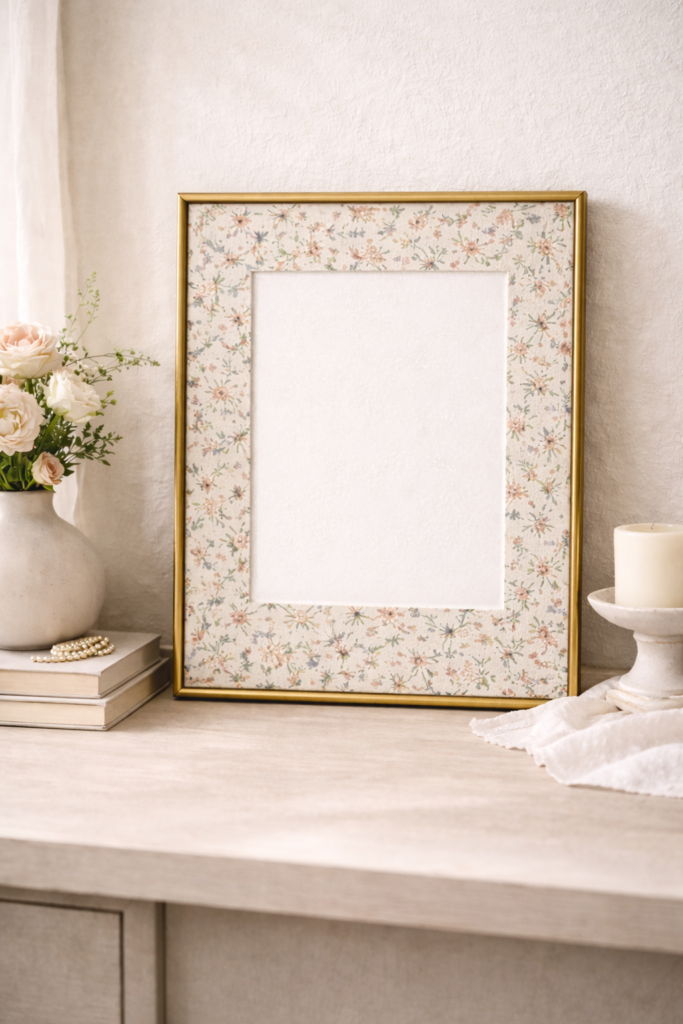
A floral mat board instantly changes the mood of a frame. Instead of a flat border, you get movement, softness, and personality. Small-scale florals feel refined and layered, while larger blooms lean bold and expressive. When you’re experimenting with Matting Pictures DIY, fabric is what makes the difference between craft project and custom detail.
Keep the artwork simple so the mat can breathe. A delicate sketch, vintage portrait, or minimal typography looks elevated against a patterned surround. The contrast between structured frame lines and organic floral fabric creates visual tension that feels intentional.
How to Make It (Step-by-Step)
- Choose a lightweight cotton floral fabric with a tight print scale.
- Cut fabric at least 1 inch larger than the mat board on all sides.
- Apply an even layer of archival adhesive across the mat surface.
- Smooth fabric down carefully, working from center outward.
- Flip the mat and trim the inner window opening using a sharp precision blade.
- Wrap excess fabric around the back and secure cleanly for a crisp finish.
Shop the Look
4. Velvet Fabric Frame Mat (Moody and Luxe)
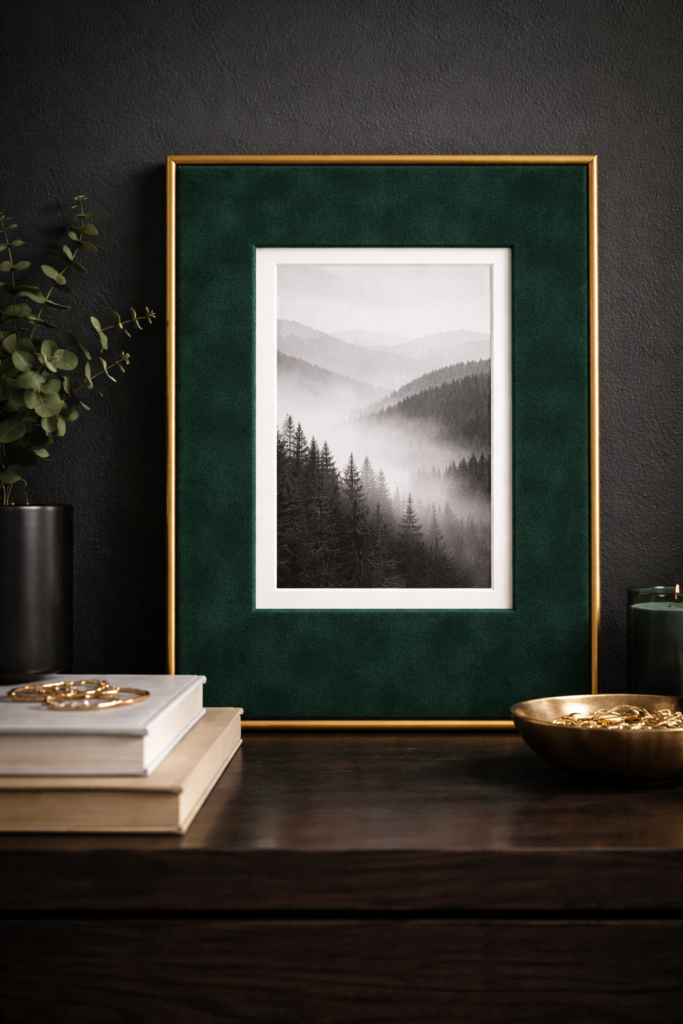
If you want drama, velvet is it. A velvet decorative mat board absorbs light in a way cotton and linen never will. Deep emerald, navy, plum, or even charcoal instantly make artwork feel gallery-level. The softness against a structured frame creates contrast that feels rich and intentional.
Velvet works best when the artwork has strong contrast or metallic detail. Gold accents pop harder. Black-and-white photography feels more elevated. Even simple line art looks expensive when surrounded by depth and texture.
How to Make It (Step-by-Step)
- Choose a thin velvet fabric with minimal stretch.
- Cut fabric larger than the mat board by at least 1 inch on each side.
- Apply a strong archival spray adhesive evenly across the mat surface.
- Lay velvet down slowly and smooth gently to avoid crushing the pile.
- Flip and carefully trim the inner window using a new sharp blade.
- Wrap excess velvet around the back and secure tightly for clean edges.
Shop the Look
- Velvet Fabric by the Yard
- Heavy-Duty Archival Spray Adhesive
- Professional Craft Knife Set
- Acid-Free Mat Board Sheets
5. Double-Layer Fabric and Paper Matting
If you want your picture matting to look professionally framed, layering is the move. A fabric top layer paired with a contrasting paper underneath creates depth that feels intentional and architectural. This technique gives your DIY frame mat a shadow-line effect without buying a custom double mat.
Think linen over black cardstock. Floral cotton over muted blush paper. Striped fabric over crisp white. That thin reveal around the inner edge is what makes it look high-end instead of homemade.
How to Make It (Step-by-Step)
- Cut and wrap your top fabric mat board as shown in previous sections.
- Cut a second mat board from cardstock or specialty paper slightly smaller than the top layer window opening.
- Align carefully so a thin border of the bottom layer shows evenly on all sides.
- Secure the two layers together using archival tape or adhesive.
- Place artwork behind both layers and assemble inside the frame.
Shop the Look
- Decorative Cardstock Pack
- Acid-Free Mat Board Sheets
- Archival Double-Sided Tape
- Precision Metal Ruler
6. Raw Edge Frayed Linen Mat
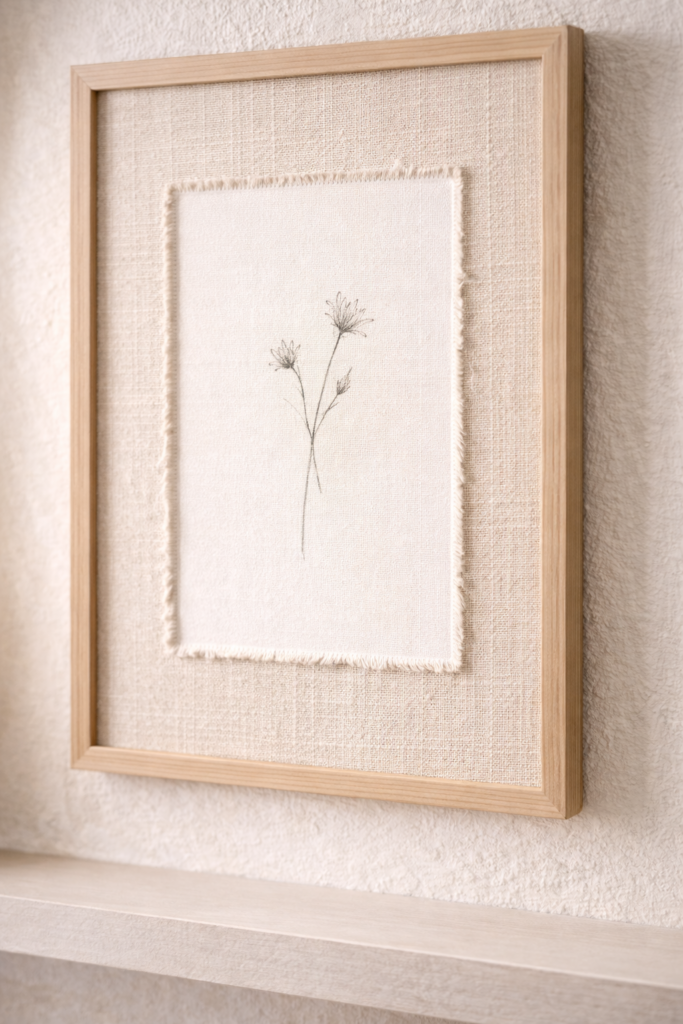
A raw-edge DIY fabric mat board brings softness and movement into structured frames. Instead of perfectly wrapped edges, this technique leaves a controlled fray around the inner window opening. It feels relaxed, organic, and intentionally imperfect.
This approach works beautifully when you want texture to stand out. The subtle threads add dimension, especially in neutral palettes like oat, flax, sand, or soft gray. It gives your decorative mat board a handcrafted finish that still feels elevated.
How to Make It (Step-by-Step)
- Cut lightweight linen larger than your mat board by at least 1 inch on each side.
- Adhere the linen smoothly to the mat surface using archival spray adhesive.
- Trim the inner window opening carefully with a sharp blade.
- Gently pull a few threads along the inner edge to create a subtle, even fray.
- Wrap and secure the outer fabric edges neatly around the back of the mat.
Shop the Look
7. Patterned Fabric Frame Mat with Minimal Art
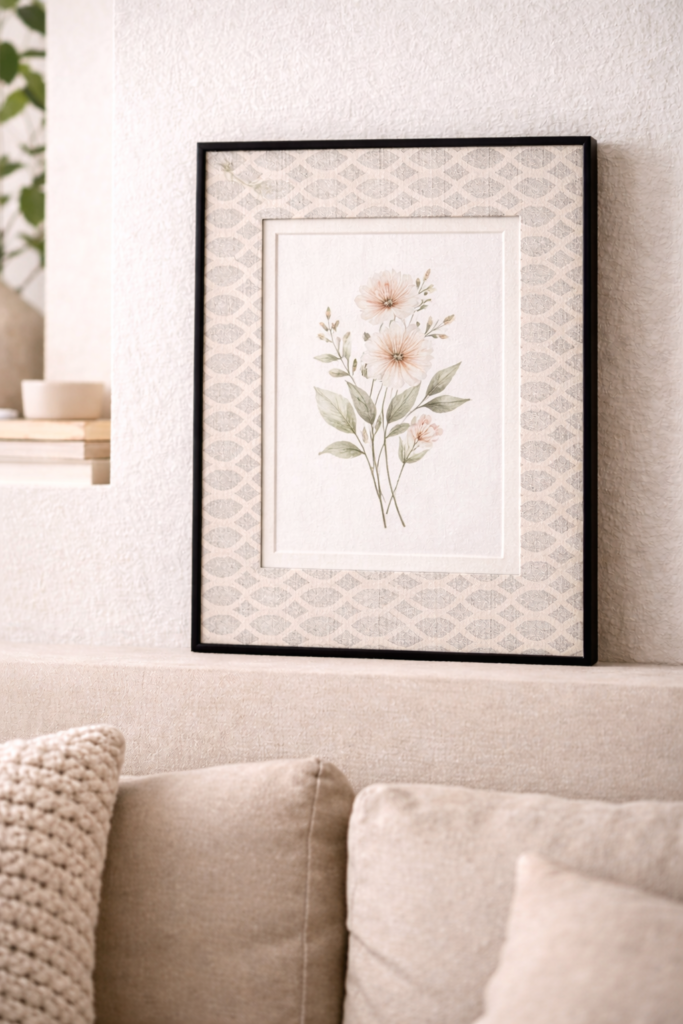
When the artwork is simple, the mat can carry more personality. A patterned fabric frame mat instantly turns understated art into a statement piece. Think micro florals, soft geometrics, subtle block prints, or tone-on-tone patterns that add interest without overwhelming the image.
The key is balance. Let the decorative mat board do the visual work while the artwork stays clean and restrained. This approach makes even inexpensive prints look curated and custom.
How to Make It (Step-by-Step)
- Select a patterned cotton or linen fabric with a tight, consistent repeat.
- Cut fabric larger than your mat board, ensuring the pattern is centered.
- Apply archival spray adhesive evenly across the mat surface.
- Lay fabric down carefully, smoothing from the center outward.
- Trim the inner window opening precisely with a sharp blade.
- Wrap and secure excess fabric around the back of the mat for a clean finish.
Shop the Look
- Patterned Cotton Fabric
- Archival Spray Adhesive
- Craft Knife with Replacement Blades
- Acid-Free Mat Board Sheets
8. Two-Tone Fabric Mat Board
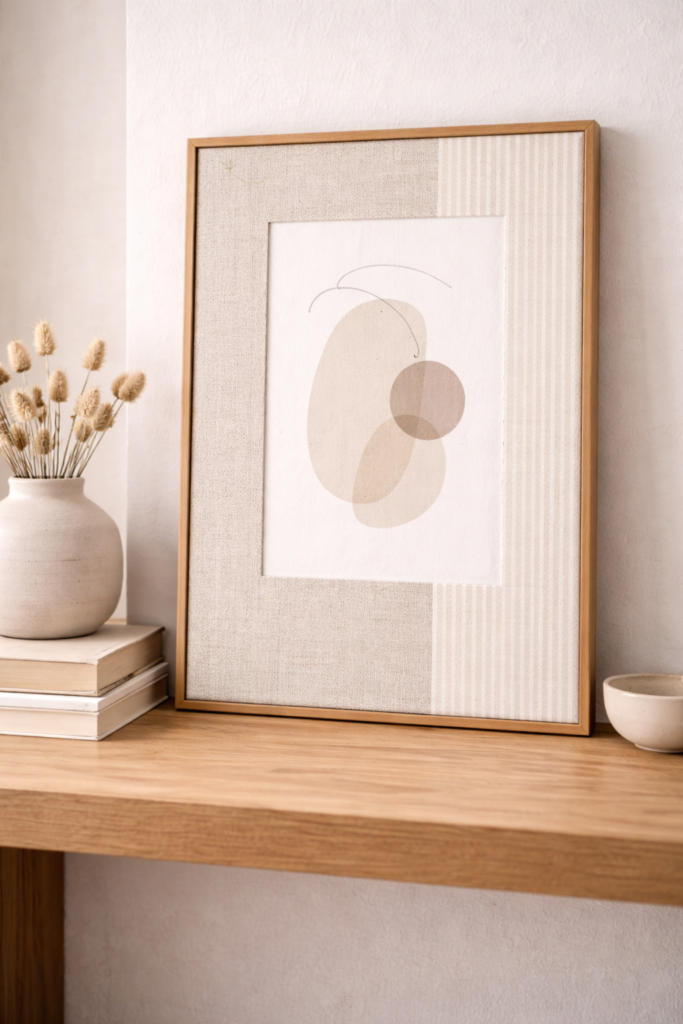
A two-tone decorative mat board feels custom the second you install it. Splitting the mat into two complementary fabrics creates contrast and architectural interest without changing the frame itself. Neutral paired with stripe, floral paired with solid, or linen paired with velvet all create depth.
This technique works especially well when you want your Picture Matting Ideas DIY to look intentional and layered. The clean division line makes the mat feel designed, not improvised.
How to Make It (Step-by-Step)
- Choose two fabrics that complement each other in scale and tone.
- Cut both fabrics to fit half of the mat board surface, allowing slight overlap at the seam.
- Apply archival adhesive to one half of the mat and smooth the first fabric into place.
- Repeat on the other half, aligning edges precisely where the fabrics meet.
- Press the seam firmly so it lies flat and clean.
- Trim the inner window opening carefully with a sharp precision blade.
- Wrap and secure excess fabric around the back of the mat.
Shop the Look
9. Painted Fabric Wash Mat
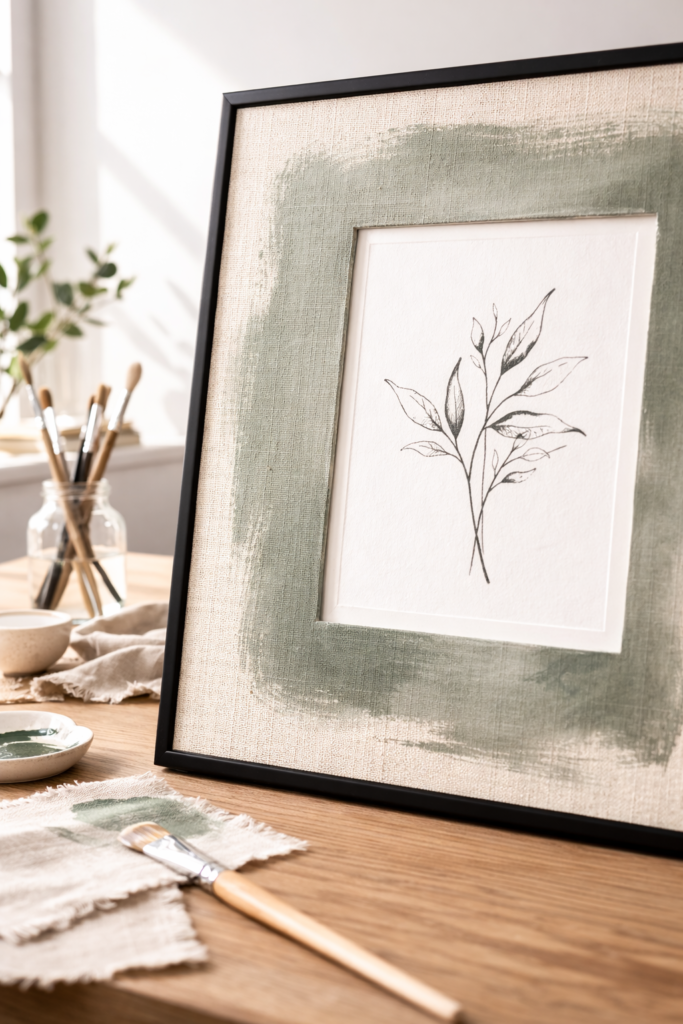
If you love texture but want more color control, this is where things get interesting. A painted fabric wash over linen gives your decorative mat board a custom tint while keeping the weave visible. It feels layered, artistic, and slightly imperfect in the best way.
This technique is perfect when you cannot find the exact shade you want. You control the depth, warmth, and saturation. The result looks like boutique picture matting instead of off-the-shelf white.
How to Make It (Step-by-Step)
- Wrap lightweight linen over your mat board using archival spray adhesive.
- Mix acrylic paint with water to create a diluted wash.
- Use a wide soft brush to apply thin, even strokes across the fabric surface.
- Blot lightly with a clean cloth to soften harsh lines.
- Allow the fabric to dry completely before trimming the inner window opening.
- Trim carefully with a sharp blade and secure edges cleanly.
Shop the Look
10. Embroidered Fabric Mat Detail
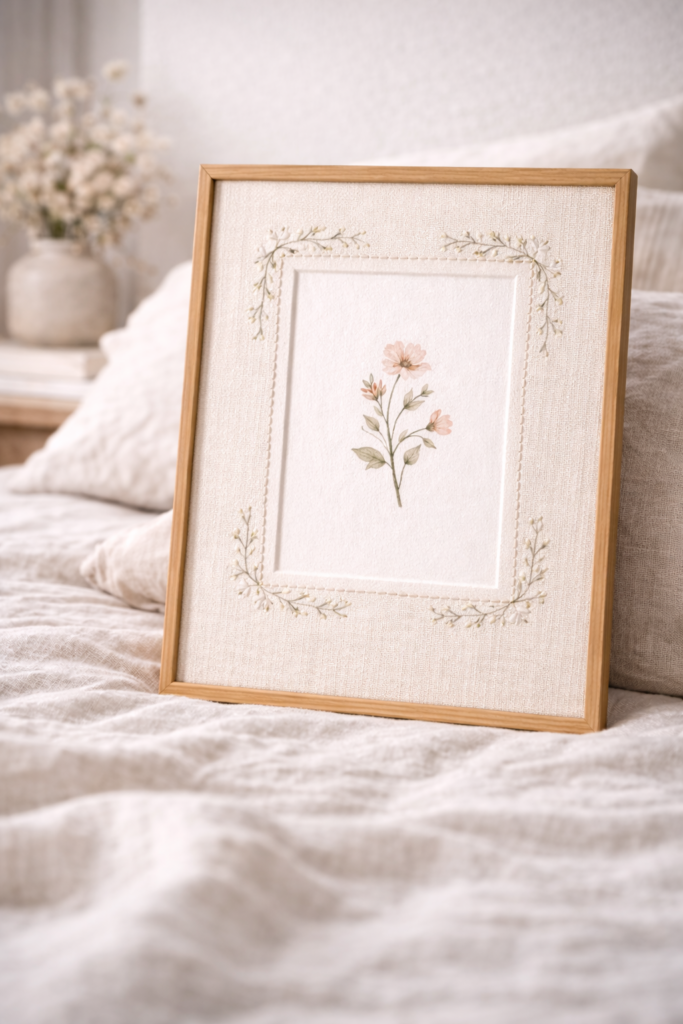
If you want your DIY fabric mat board to feel completely custom, embroidery is the detail that takes it there. A subtle stitched border, corner accent, or minimal line motif adds texture without overwhelming the artwork. It feels handcrafted but polished.
This approach works beautifully with solid linen or cotton. A simple stitched outline around the inner window adds depth and frames the art in a way standard picture matting never could. It’s quiet detail with serious impact.
How to Make It (Step-by-Step)
- Wrap a solid fabric over your mat board using archival spray adhesive.
- Lightly sketch a stitching guide line around the inner window opening.
- Use embroidery thread and a sharp needle to stitch directly through the fabric layer.
- Keep spacing consistent for a clean, professional look.
- Once stitching is complete, trim the inner window opening carefully with a precision blade.
- Secure fabric edges around the back of the mat.
Shop the Look
11. Burlap or Textured Jute Mat
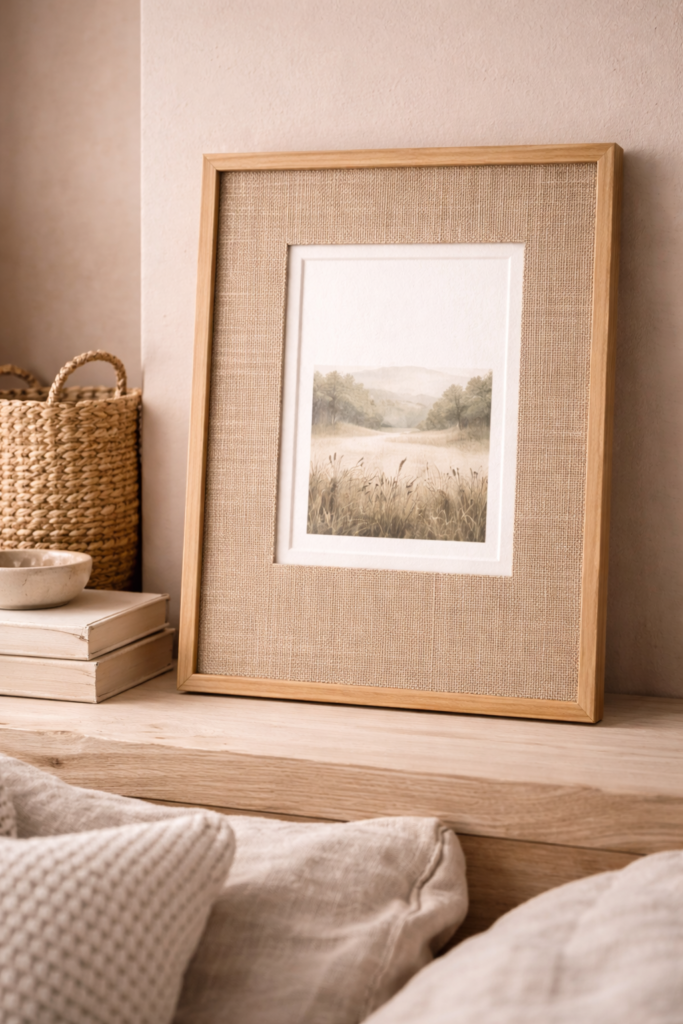
If you want instant texture, burlap or jute delivers. This version of a fabric frame mat adds warmth and depth that flat cardstock never could. The coarse weave creates natural contrast against smooth glass and structured frames, making the artwork feel grounded and dimensional.
This works beautifully when you want a strong organic presence. The texture becomes part of the visual story, especially in layered gallery walls or larger statement frames. It transforms simple matting pictures DIY projects into something that feels intentional and tactile.
How to Make It (Step-by-Step)
- Choose a fine-weave burlap or jute to avoid excessive bulk.
- Cut fabric larger than your mat board by at least 1 inch on each side.
- Apply archival spray adhesive evenly to the mat surface.
- Press fabric down firmly, smoothing slowly to prevent shifting.
- Trim the inner window opening carefully using a sharp precision blade.
- Wrap and secure excess fabric tightly around the back for clean edges.
Shop the Look
12. Monogrammed Fabric Mat Board
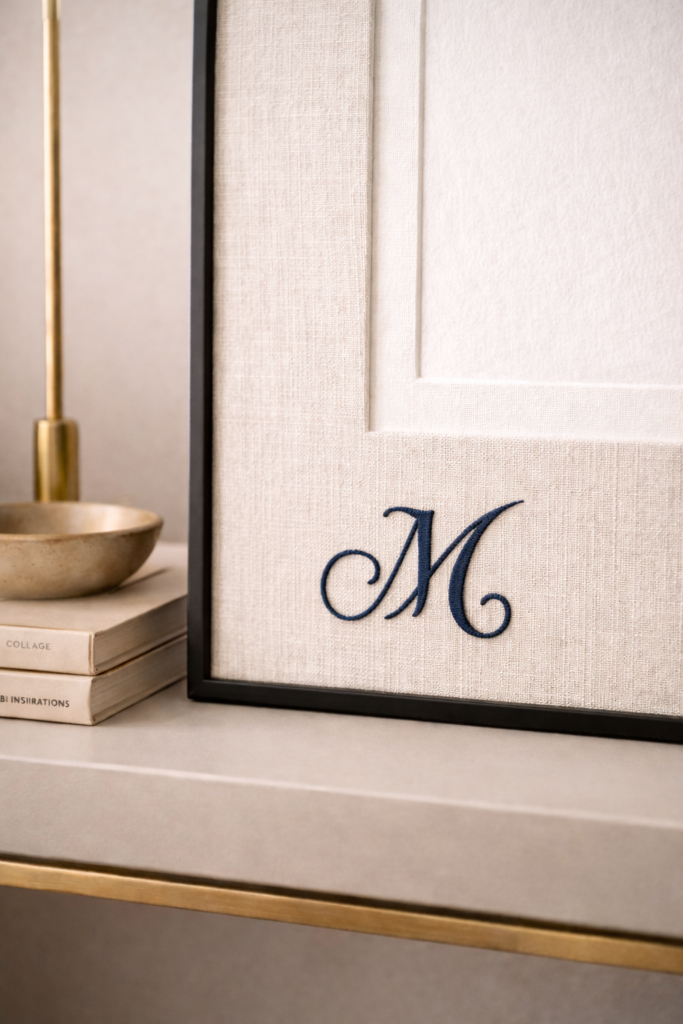
If you want your decorative mat board to feel completely one-of-a-kind, a subtle monogram takes it there. Adding stitched initials or a small iron-on detail in the lower corner makes the frame feel personal and intentional. It turns standard picture matting into something that looks commissioned.
Keep the base fabric simple so the monogram stands out without competing. Linen, cotton, or even a soft striped fabric works beautifully. The result feels custom, elevated, and thoughtfully finished.
How to Make It (Step-by-Step)
- Wrap your chosen fabric smoothly over the mat board using archival spray adhesive.
- Lightly mark placement for the monogram in one corner of the mat.
- Stitch initials by hand using embroidery thread, or apply a small iron-on letter.
- Keep lettering minimal and proportionate to the mat size.
- Trim the inner window opening carefully with a sharp blade.
- Wrap and secure excess fabric neatly around the back of the mat.
Shop the Look
The Final Touch That Changes Everything
A decorative mat board is one of those small upgrades that completely shifts how your art feels on the wall. Instead of basic white borders, you now have texture, dimension, and personality built right into the frame. Whether you tried a striped fabric mat board, a floral mat board, layered picture matting, or a fully custom DIY fabric mat board, the difference is immediate and noticeable.
The beauty of matting pictures DIY style is that you control the mood. Neutral linen feels refined. Velvet feels dramatic. Patterned cotton feels expressive. Every frame becomes an opportunity to design, not just display.
If this sparked your creativity and you’re ready to keep experimenting, don’t stop here. Explore even more hands-on ideas in 20 Art and Craft Ideas That Spark Creativity and keep building pieces that feel personal, elevated, and completely yours.