Blank walls are bossy. They stare you down until you either hang something or start questioning your life choices. The good news? You don’t need a gallery budget—or an art degree—to make your space look curated and chic. These Wall Art Ideas DIY projects prove that personality and polish can absolutely coexist, even on a thrift-store budget. From easy DIY wall art made with paint and texture to DIY photo wall layouts that showcase your best memories, these ideas are as fun to make as they are to display.
Think homemade wall art that looks high-end, DIY wall art décor living room pieces that pull your space together, and DIY wall décor crafts that actually match your vibe. Whether you love wall art crafts with natural textures or prefer to wall art DIY paint your way to something bold and modern, this list is packed with creative wall décor ideas that look straight out of a designer’s portfolio—without the designer price tag.
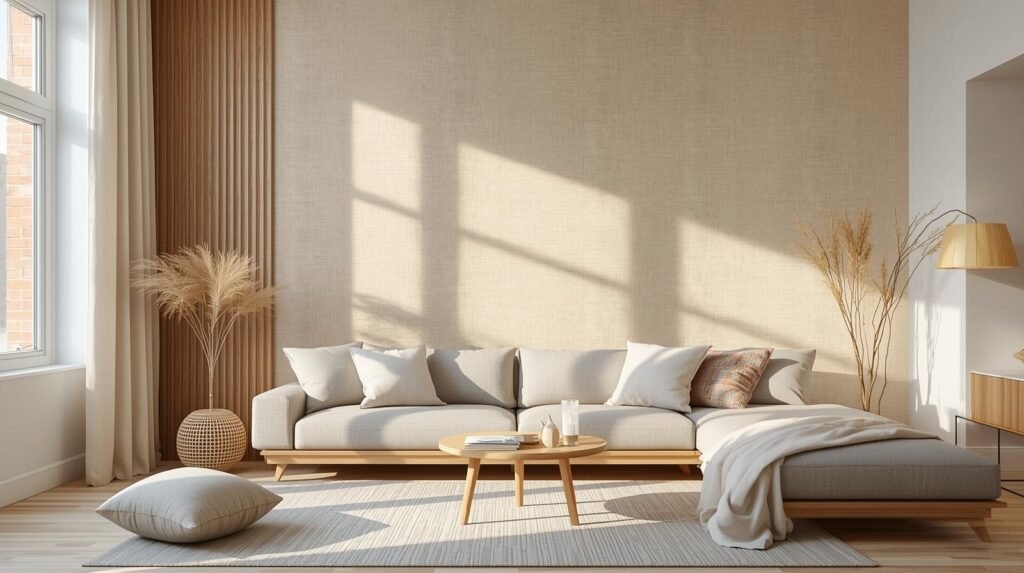
1. Paint A Soft Color-Block Mural
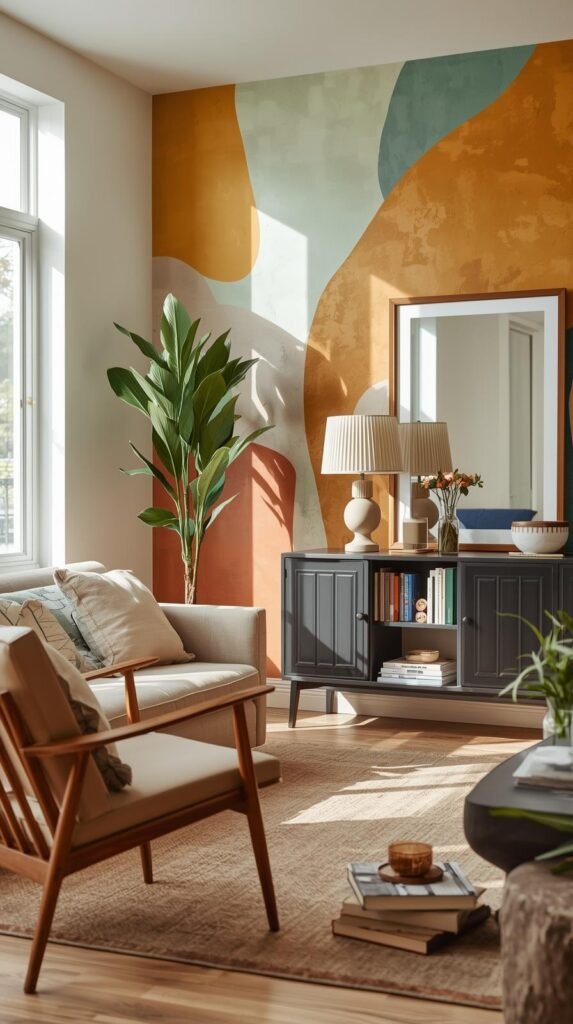
Wallpaper is pricey. A color-block mural? Practically free and super forgiving. Pick two or three tones from your existing palette and paint big, soft shapes—arches, waves, blobs—across one wall. It’s like instant architecture.
Why It Works
- Soft curves make small rooms feel cozy and intentional.
- Color continuity ties together mismatched furniture and rugs.
- Zero precision needed—organic shapes are meant to be imperfect.
Quick Tips
- Use a pencil and string to sketch an arch; fill with a foam roller for smooth edges.
- Choose muted neutrals for sophistication or one bold accent for drama.
- Tape lightly and remove while paint is damp for cleaner lines.
2. Frame Your Wallpaper Scraps Like Art
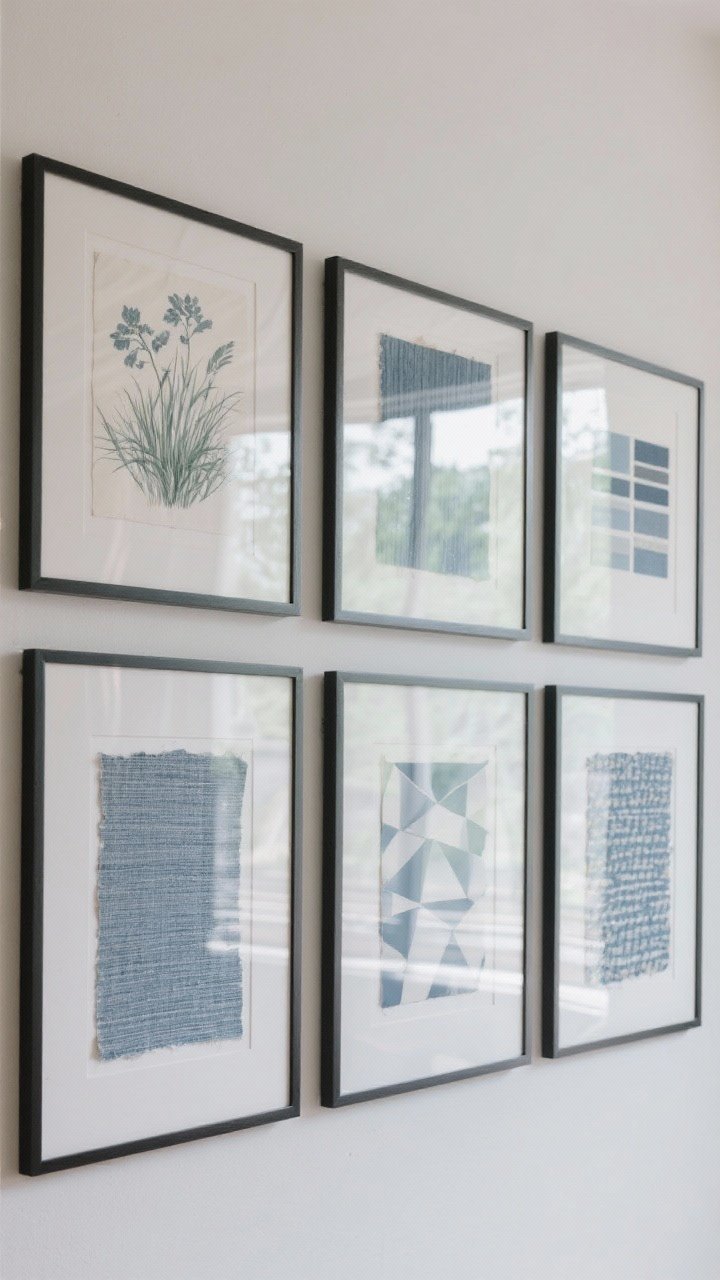
Have leftover wallpaper or sample swatches? Frame them. Large-scale prints and grasscloth textures look like museum pieces when you add mats and hang them as a grid.
How To Nail The Look
- Pick three to six panels from the same color family for cohesion.
- Use deep mats to make humble paper look luxe.
- Hang in a tidy grid with 2” spacing for that gallery feel.
FYI: This is a lifesaver in rentals—no paint needed, all the impact.
3. Create A Fabric Tapestry With Dowels
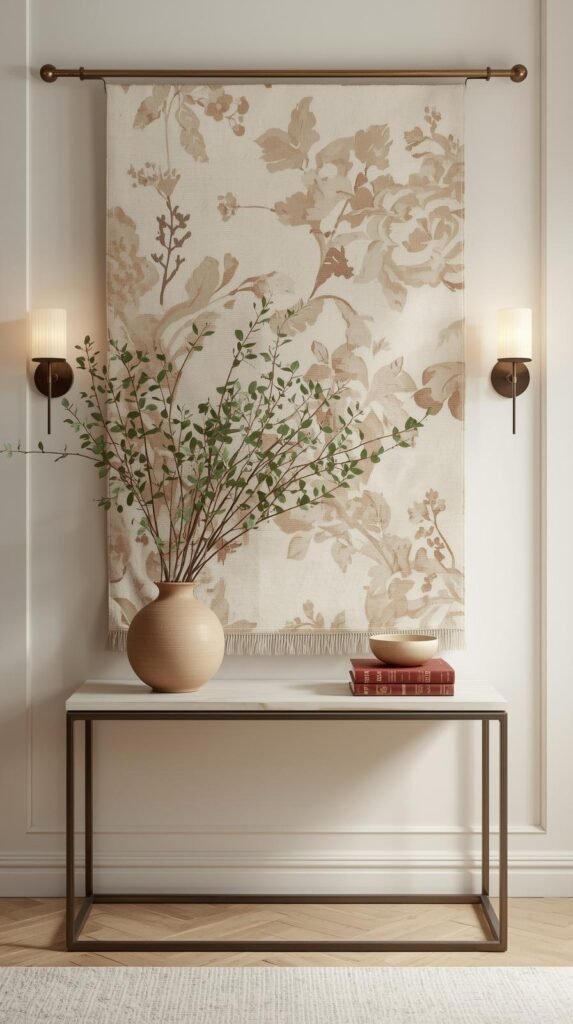
Textile art adds warmth, absorbs sound, and says “I travel” even if your passport is dustier than your top shelf. Grab a pretty fabric remnant, hem the edges, and suspend it from a wooden dowel.
Pick Your Fabric Personality
- Linen or canvas for airy minimalism.
- Block prints or ikat for boho energy.
- Velvet for mood and drama.
Pro Moves
- Stain the dowel and add leather cord for a designer detail.
- Use iron-on hem tape if you don’t sew—no one will know.
- Layer two tapestries (one smaller on top) for dimension.
4. Pressed Botanicals In Floating Frames

Want organic, minimalist art? Press leaves, grasses, or blooms and mount them in floating glass frames. It reads like a scientific specimen display but make it chic.
How To Press
- Place leaves between parchment paper inside a heavy book for 5–7 days.
- Optional: use desiccant for quicker drying and more vibrant color.
- Arrange with breathing room—negative space = elegance.
Try a trio of oversized ferns for a spa-like vibe, or a grid of delicate grasses for coastal cool.
5. Oversized Monochrome Canvas (No Art Degree Required)
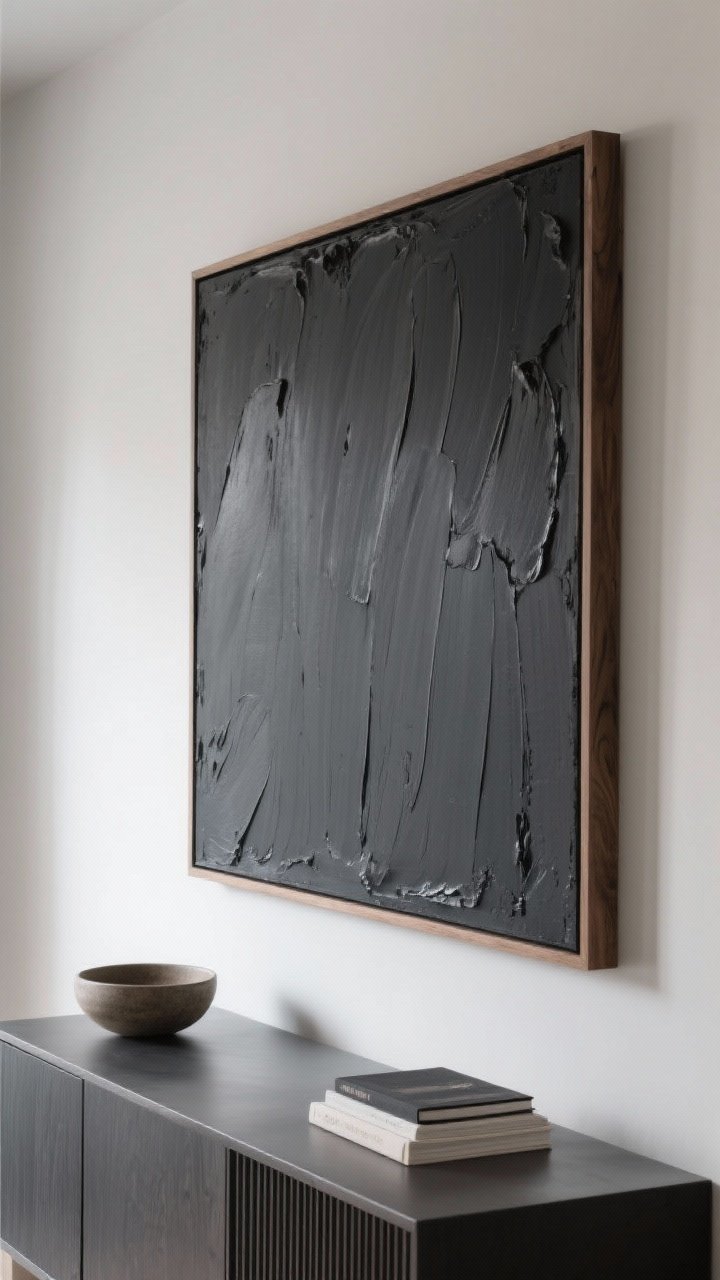
Big art, small effort. Stretch a large canvas (or buy one) and paint it a single, moody color. Then add subtle texture with joint compound, gesso, or thick brush strokes in the same tone.
Why It Feels Expensive
- Scale makes even simple work feel intentional.
- Tonal texture catches light and shadows—quiet drama.
- Clean edges keep it modern and not “DIY oops.”
Execution Tips
- Stick to 36”–60” wide for impact over a sofa or console.
- Use plaster knife for sweeping texture; sand lightly when dry.
- Frame with a simple floater frame to finish the look.
6. Shadow Box Memories (But Make It Elevated)
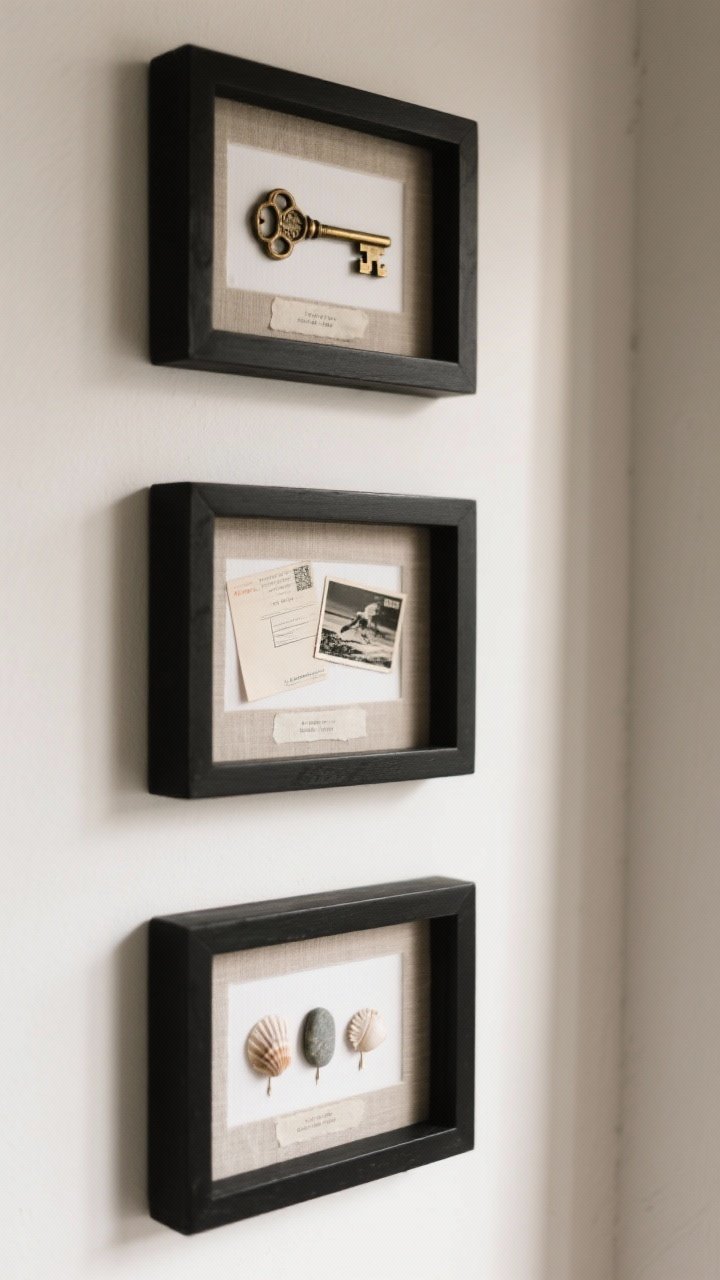
Shadow boxes don’t have to scream “high school memorabilia.” Think curated collections: vintage matchbooks, brass keys, black-and-white postcards, or beach finds. Arrange them with breathing room and consistent spacing.
Curate Like A Gallery
- Pick a single theme or material for cohesion—metal, paper, organic.
- Use museum putty or pins for secure, reversible mounting.
- Label with tiny captions printed on vellum for a scholarly touch.
Group three shadow boxes vertically for narrow walls or flank a doorway for architectural balance.
7. Painted Picture Ledge Gallery
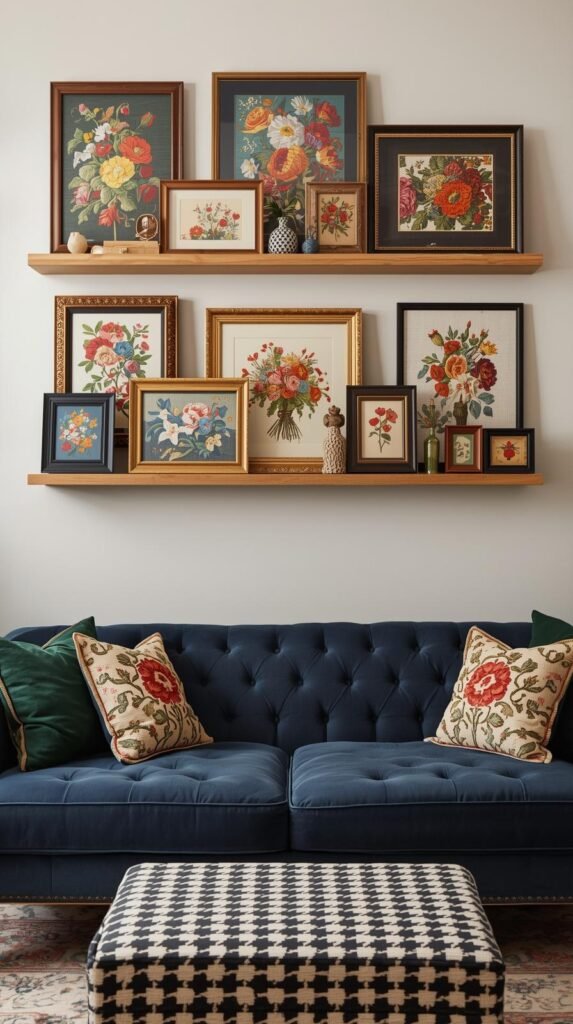
Commitment issues? A picture ledge lets you shuffle art without new holes every time inspiration strikes. Paint the ledge the same color as the wall for a built-in vibe.
Styling Formula
- Mix heights and frame finishes, but keep colors within a tight palette.
- Layer art slightly—overlapping corners looks collected, not chaotic.
- Add a sculptural object (tiny vase, wooden knot) for dimension.
Install Tips
- Mount at 57”–60” from floor to center the arrangement at eye level.
- Use studs or heavy-duty anchors—those frames add up.
- Two ledges stacked 10–12” apart = instant feature wall.
8. Tape Art With Electric Personality
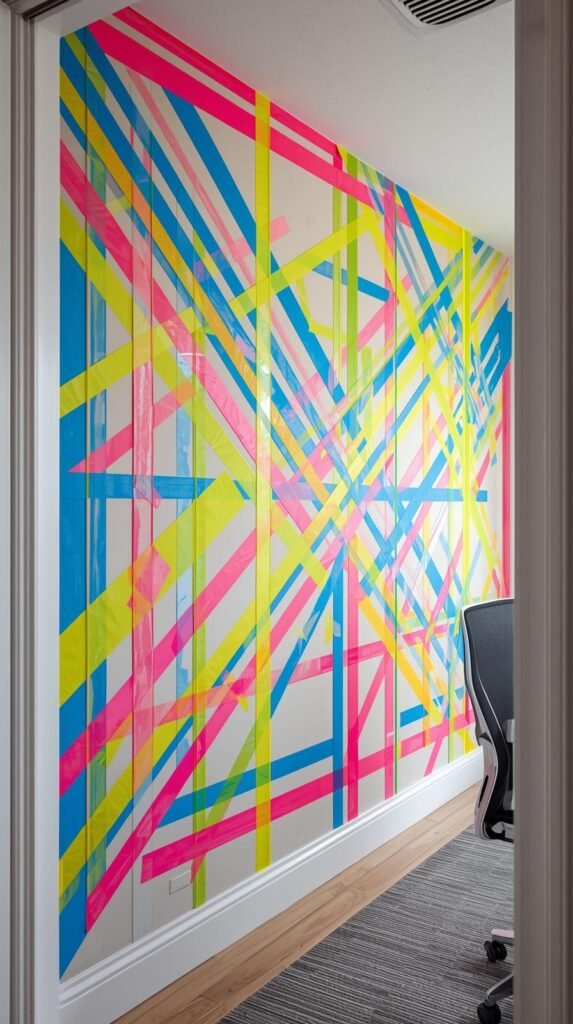
Painter’s tape isn’t just for straight lines—it’s a medium. Create geometric or abstract designs directly on the wall with colored washi or vinyl tape. It’s bold, graphic, and totally removable.
Make It Work
- Choose two to three tape colors, max, to keep it sleek.
- Sketch the layout lightly; use a level for crisp geometry.
- Finish ends at consistent angles for a tidy look.
IMO, this rocks in rentals, kids’ rooms, and home offices where a little energy goes a long way.
9. Salvaged Wood Mosaic Panel
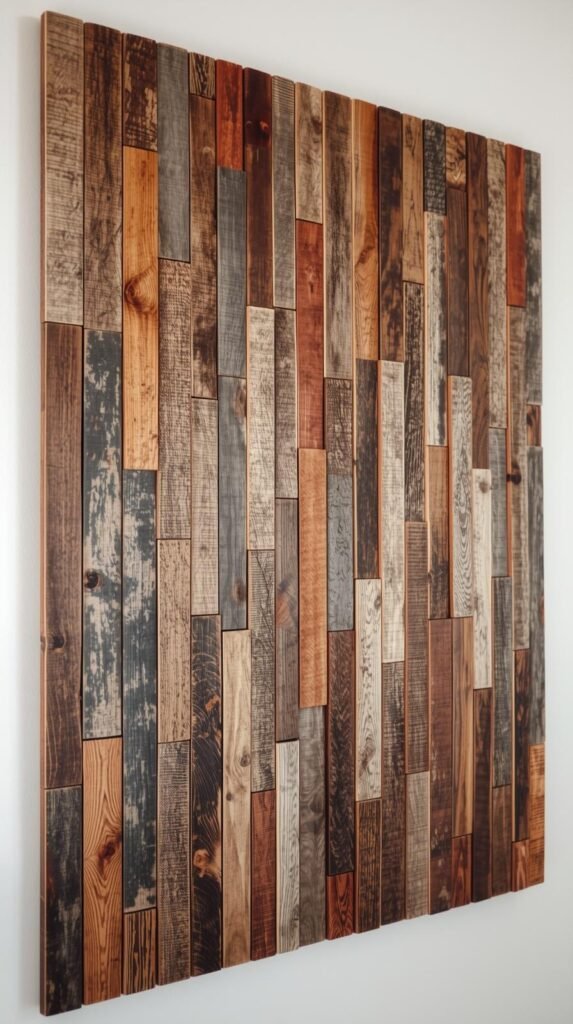
Turn scrap wood into a jaw-dropping mosaic. Cut pieces into strips or triangles, stain them in a few tones, and glue them onto plywood in a chevron, herringbone, or sunburst pattern.
Design Choices
- Three stain colors (light, medium, dark) create depth.
- Matte polyurethane keeps it modern; glossy can feel heavy.
- Negative space edge (leave a 1” border of plywood) adds polish.
Build Smarter
- Pre-sand and stain pieces before assembly—your future self thanks you.
- Lay out the pattern on the floor first; snap a pic to follow.
- Mount with a French cleat for safety—this piece has weight.
10. Bold Typography On Fabric Or Canvas
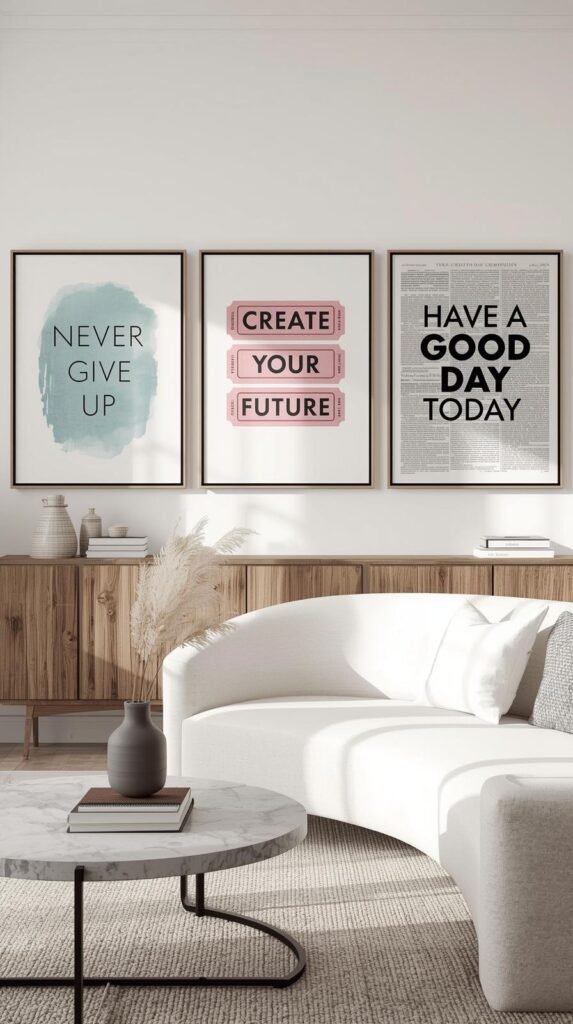
Say it with art—literally. Choose a phrase, lyric, or single oversized word and paint it onto canvas or fabric. Keep the palette simple and the font bold.
Design Like A Pro
- Use stencils or a projector for clean lettering.
- Go black on ecru or navy on linen for timeless vibes.
- One huge word (BREATHE, GATHER, HOME) feels chic when spaced generously.
Want a softer look? Try tone-on-tone paint so the message whispers instead of shouts (your wall, your rules).
Bonus Tips For All DIY Wall Art
- Scale matters: For sofas, art should be 2/3 the width of the furniture.
- Hanging height: Center art at ~57” from floor—museum standard.
- Lighting: Add a picture light or sconce to elevate any piece instantly.
- Consistency: Limit your palette to 3–4 colors room-wide for cohesion.
- Texture: Mix flat art with textiles or wood for depth and warmth.
There you go—ten DIY wall art ideas that turn blank walls into genuine “oh wow” moments. None of these projects require a trust fund or a fine arts degree—just a little creativity, some weekend energy, and the courage to try something new. Grab your tape, brushes, and a playlist, and make your walls as interesting as you are. Because let’s be real—your home deserves more than beige space and blank stares.
The beauty of homemade wall art is that it grows with you—it can evolve, move, and change as your style does. Whether you’re refreshing your DIY wall art décor living room or giving your bedroom a mini glow-up, there’s always room to experiment.
Ready to keep the creative streak going? Check out How to Paint Old Furniture for a Fresh Look (Thrift Flip Tutorial) next—it’s the perfect follow-up for adding more custom, one-of-a-kind charm to your home without spending designer dollars.